The Float Top

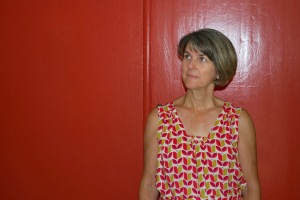
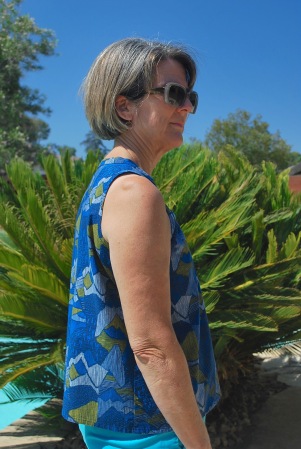
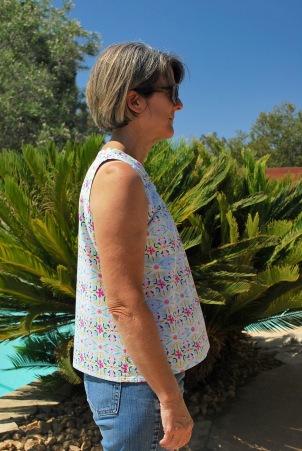
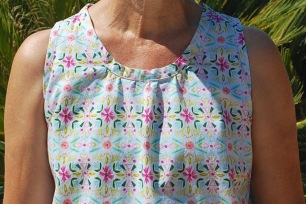
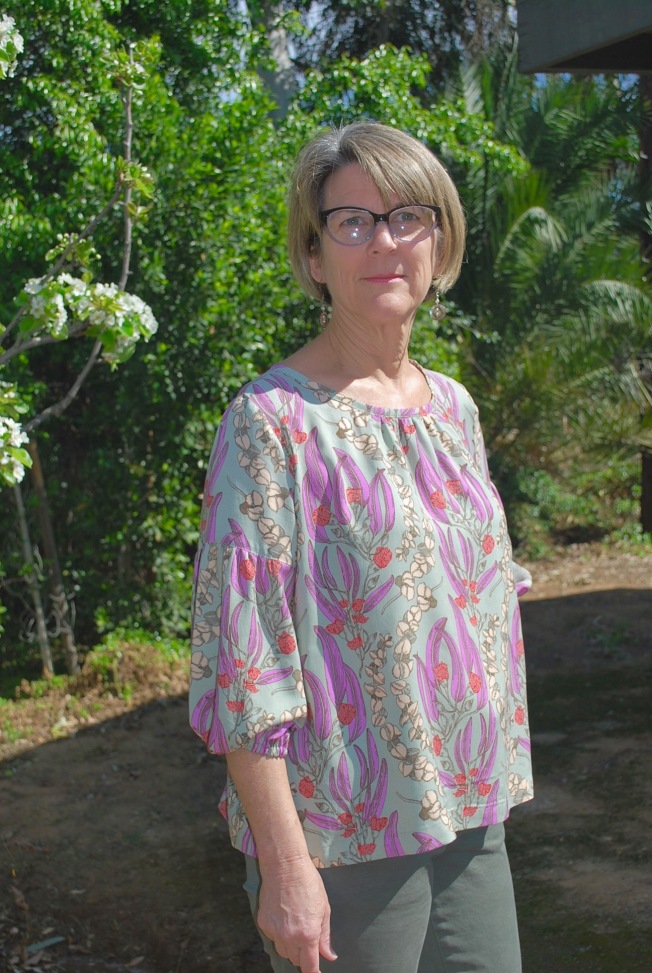
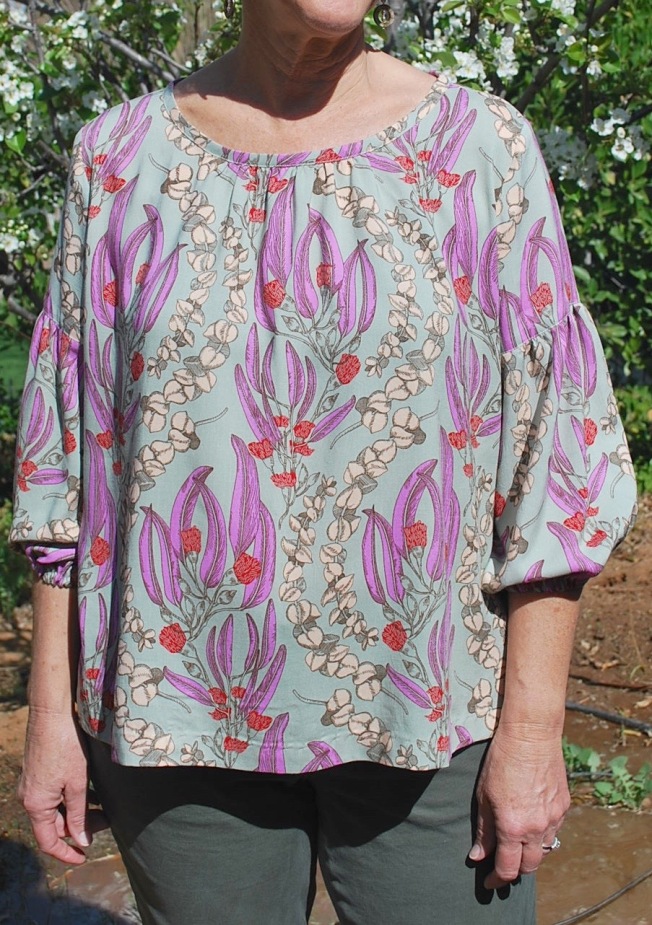
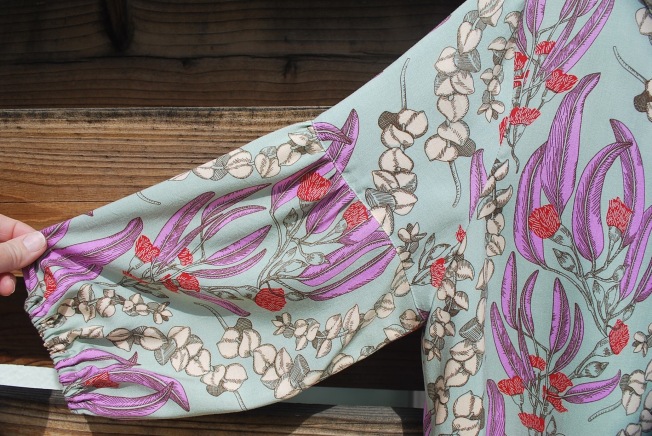
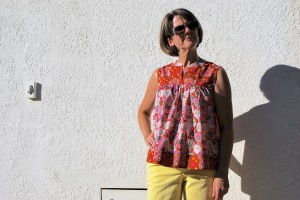
As much as I tell myself dresses for summer are the way to go, I still find myself grabbing shorts for stay-at-home, errand-running kind of days. But I can probably wear less than half of the hot weather tops in my closet. No slinky knit tank tops…yet. Click here for explanation. This has forced me to think outside my normal tank top box and take the time to sew some fun, forgiving, gathered blouses. And I couldn’t be more happy with reconstruction make #5 that I’m sharing here.
DSC_0714

DSC_0711

DSC_0704

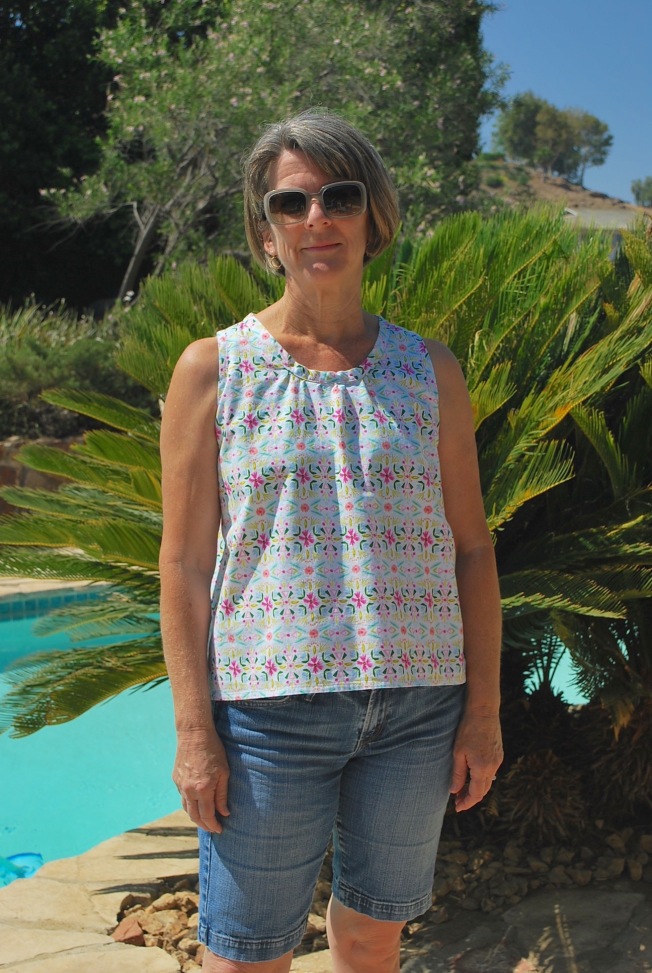
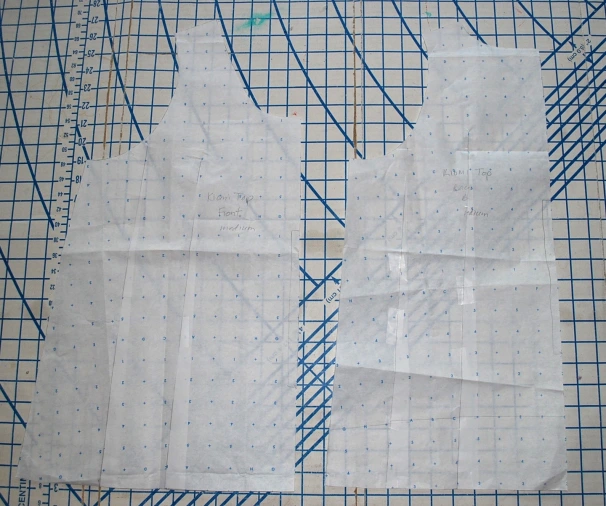
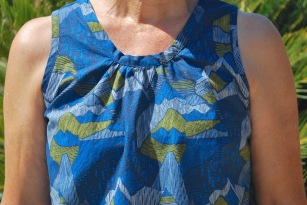
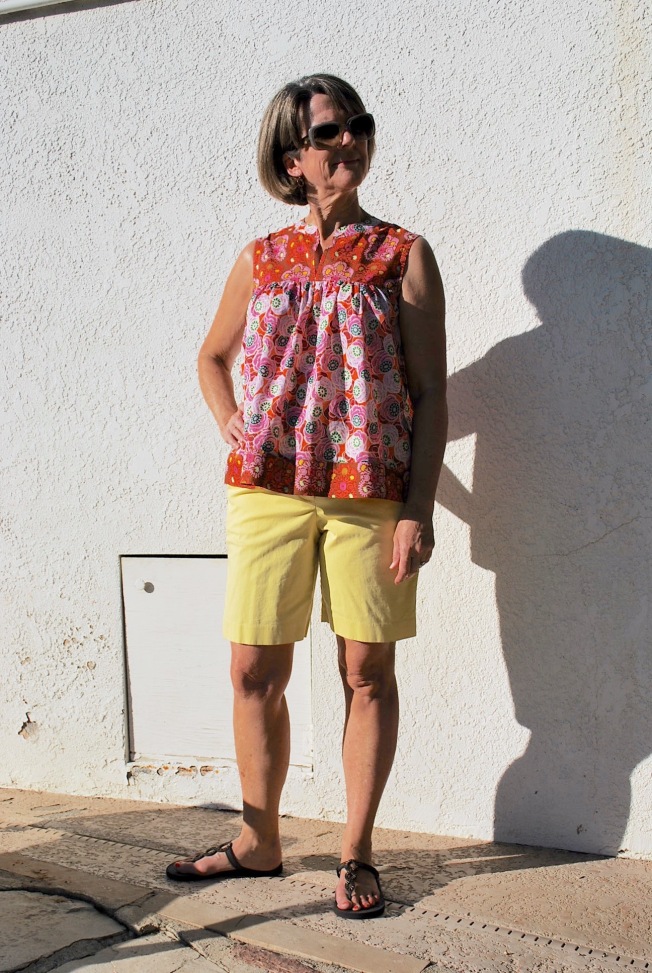
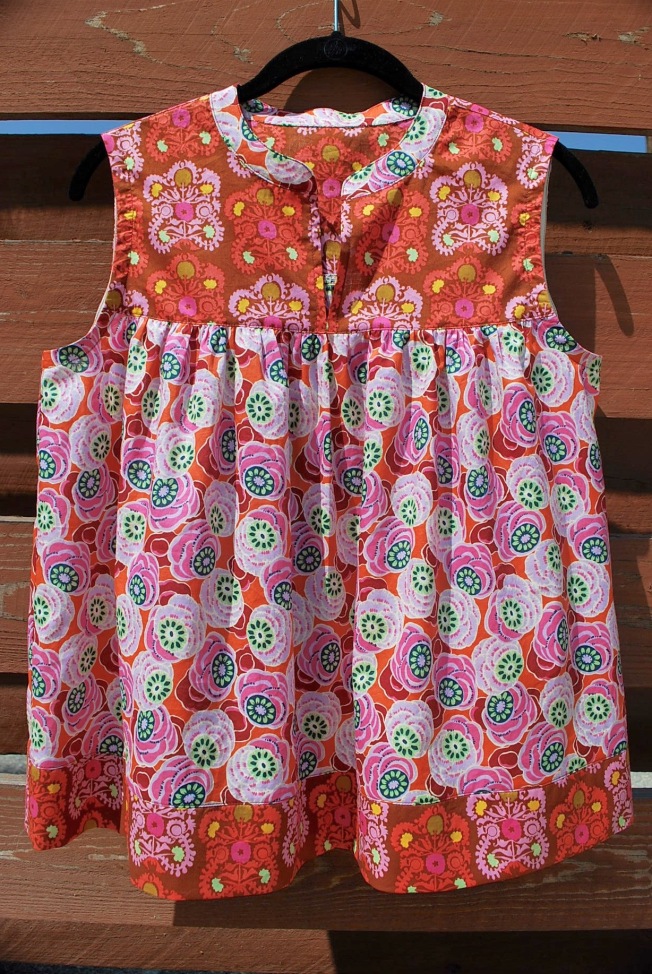
The pattern I used is McCall’s 7095. I grabbed this on sale at JoAnn’s when I was collecting loose-through-the-chest patterns. I knew immediately that this design fit the bill perfectly – above the chest gathers and a high non-revealing neckline, and as a bonus, it is super cute! I made view A.

DSC_0732

My fabrics are from the Dream Weaver Voile Collection by Amy Butler, purchased online at Hawthorne Threads. The fabric is $13.95 per yard and is 54″ wide. I cannot say enough wonderful stuff about this cotton voile. It’s silky smooth, buttery soft, and light as a feather. You cannot go wrong with an Amy Butler voile. This is my fourth project with this fabric. Amy, please make more voile! I’m running out of designs to choose from.
DSC_0561

DSC_0563

DSC_0565

The instructions called for finishing the armhole by turning under the raw edge of the fabric 5/8″ and doing a narrow hem. I thought this would be almost impossible at the curve of the underarm. I finished the armholes with purchased bias tape instead.

DSC_0570

Oops! I didn’t notice the bias tape was turned under at the shoulder when I took the picture.

For the bottom band, I doubled the width of the pattern piece, folded it in half and sewed the edges together when it was sewn onto the body. I did this instead of a single layer band with a narrow 5/8″ hem as called for in the instructions.

DSC_0567

LET’S BE HONEST:

1.  I made a size Small (8 – 10) even though that is not reflective of my measurements on the chart. I am bigger. I assumed there would be plenty of design/wearing ease. Fortunately I was correct and it fit perfect.

2. I shorten the body pattern piece by about 2 inches. I often shorten tops as I do not want them to end at my thighs, the widest part of me. I prefer tops to hit a few inches above my thighs.

3. The only deviations I made from the instructions were mentioned above, the armhole finish and double layer for the bottom band.

4. In case you’re wondering, my shorts are RTW from Talbots. I also have these shorts in two other colors.

5. This top is way more billowy and wide than I would usually wear, but it’s just so fun and comfortable, I don’t care!

I love everything about this top. Maybe one with sleeves for fall?
DSC_0715

Thanks for stopping by and taking the time to read this post!


The Carefree Dress

Who doesn’t love a flowing, cool, maxi dress for summer? One that makes you feel like your on vacation even when your just walking around the house. This is what I choose for reconstruction make #4. Click here for an explanation. I don’t think any other type of garment combines casualness and luxury the way a long, loose-fitting, sleeveless dress does. I’m really excited to share this one with you.

DSC_0670

DSC_0675

DSC_0683

The pattern I used is McCalls 7404 which I purchased on sale at JoAnn’s for $1.99. I think it is a “new release” as the date on the envelope is 2016. When I first saw this pattern, I knew I would buy it. It fit my reconstruction criteria of loose and gathered above the chest. Additionally, I was attracted to the casual maxi dress idea as I didn’t have any in my closet. I made view D.

7404

The fabric I used is Joel Dewberry, Bungalow Rayon collection, specifically Dahlia Rayon in Maze. I purchased it from Hawthorne Threads and knew I wouldn’t go wrong this selection as I was super pleased my Joel Dewberry rayon I had purchased for The Triple Digit Dress. I bought 3 3/8 yards at $9.95 per yard. I machine wash and hang dry this fabric. It’s soft and drapey, yet substantial and easy to iron.

DSC_0692

The armholes and neckline are finished with bias tape. Long strips are included as patterns pieces. There is also a bias trim inset between the bodice and the body of the dress. The pattern instructions were to iron it up and top-stitch. I ironed it down instead.

DSC_0699

DSC_0694

The back has a slit opening and hook closure. I can pull the dress on without undoing the hook. So while the opening is not actually necessary, it’s a nice design feature.

DSC_0696

There is a slit at the bottom of the center front seam.

DSC_0701

LET’ BE HONEST:

1. I cut a size Medium (12-14). It fits fine, except the armholes are very large. Before attaching the bodice to the body of the dress, I took in the bodice side seams 5/8″ to lessen the armholes, but that was not enough. I wear a “cami bra” with this dress to prevent from exposing too much.

2. Because I am not a tall person, I cut off 5″ off the bottom of the pattern pieces.

3. Because of how rayon stretches with gravity, the bottom was very uneven. I let it hang for a couple of days, then trimmed the bottom to even it out. And hemmed it from there.

4. In addition to cutting several inches off the bottom, I lowered the front slit about 2″. I really didn’t want the slit to go above my knee. Who wants to worry about a gust of wind or be careful when you sit down?

5. The most difficult thing about this dress was getting the rayon bias tape even and nice. I hand basted it in all three applications before machine stitching.

I have to say this is now one of my favorite dresses hanging in my closet. Wearing this dress is just so comfortable, free, and easy. What about you? Have you discovered a free and easy dress pattern lately?

DSC_0681


The Triple Digit Dress

I’m still sewing my summer reconstruction makes like crazy. Click here for explanation. We’ve got two, if not three, more months of HOT weather. With this being the case, I haven’t come close to maxing out on sewing for this season. However, I’m happy to take time away from my machine to share with you reconstruction make #3, a comfortable, cool summer dress.

DSC_0604

DSC_0613

DSC_0620

To belt or not to belt, that is the question.

The pattern I used is Simplicity 1668 which I got on sale at JoAnn’s for $1.99. I snatched this pattern up as soon as I stumbled upon it as it fit my reconstruction criteria perfectly – loose and gathered at the chest.

simplicity-sportswear-pattern-1668-envelope-front

The fabric is Tulip Rayon in Poppy by Joel Dewberry which I purchased once again from my favorite online store Hawthorne Threads. (I know I sound like a broken record always mentioning Hawthrone Threads, but I haven’t managed to get to Los Angeles for fabric shopping in several months. I am thankful for their great selection and great customer service.) I got 1.75 yards at a cost of $9.70 per yard. I love this fabric. I prewashed it in a cold machine cycle, and hung to dry. It’s soft, lightweight and drapey, yet not too delicate for everyday wear.

DSC_0573

DSC_0575

An elastic casing forms the gathers at the middle front.

The gathers near the shoulder are sewn to a facing. The armholes are finished with purchased bias tape.

DSC_0588

DSC_0584

There is a box pleat with top stitching at the back neckline.

DSC_0581

Curved hem is finished with a facing. Not the easiest thing in the world to do perfectly on a rayon. Mine is passable.

DSC_0591

LET’S BE HONEST:

1. I cut a size Small (10-12) at the top and graded a Medium (14-16) at the bottom. I also added 1″ in length by slashing the pattern pieces where indicated. The photo on the envelope showed the dress several inches above the knee on the model. I’m not tall, so I figured adding 1″ would fall at the knee on me. I’m happy with the overall fit and did not have to make any adjustments while sewing.

2. The pattern is labeled as “easy-to-sew.” I think that this can apply to the other views-elastic pants and shorts, and jacket. For the dress, I have to say the neckline with the elastic casing, shoulder gathers, and facings is a little fiddle-some, especially in a rayon. I wouldn’t recommend this dress for a beginner.

3. I interfaced the belt even though the directions did not call for it.

4. Now I’m going to talk the nitty gritty of practicality. I LOVE this dress. I think the pattern and fabric are a perfect match. And it couldn’t be more comforable to wear. However, I still find myself grabbing the same old shorts and sleeveless tops over this cute dress on a daily basis. Is it too “nice” to just wear around the house or a trip to the grocery store? I think the real reason I don’t throw it on more often is the fact that it’s care is “high maintainence.” First I have to accumulate a load of delicate wash cycle items to wash with it, then I will need hang it dry, and then I will need to iron it. This means it will be a long time before I wear it again once I throw it in the laundry pile.

What about you, do you avoid wearing some garments you love just because of their care requirements?

DSC_0617


Happy Coverall Dress

Except for some last minutes sewing details for my sister-in-law‘s wedding next weekend, I am madly focused on my summer “reconstruction” makes. Click here for explanation. I’m sewing much faster than I’m blogging. I’ve got lots to share. Stay tuned. Reconstruction make #2 is a simple grab-n-go dress that’s nonrevealing and has pleats in all the right places. It’s a great alternative to shorts and a T-shirt.

DSC_0593

This dress has been through the washer and dryer twice already.

The pattern I used is Simplicity 2147.  I bought it on sale at JoAnn’s for about $1. I was attracted to this pattern because of the loose fit and bodice yoke with pleats and ample chest coverage. I was not attracted to it because it says “Learn to Sew”, although that signals quick and easy – a good thing when your whipping out summer clothes. I made view B.

2147

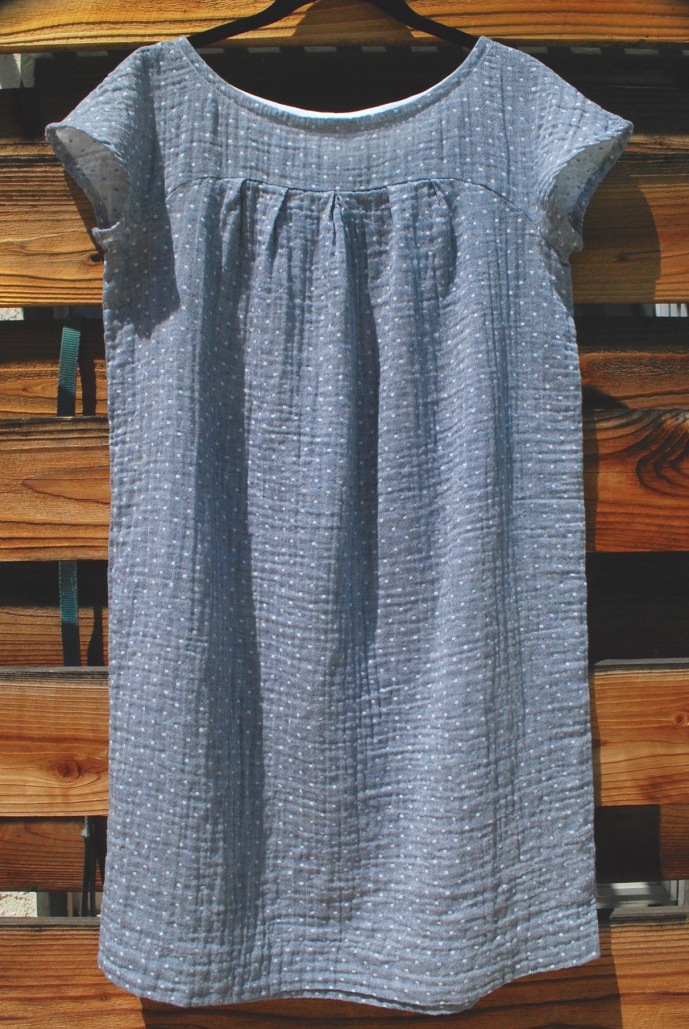
The fabric I used is Robert Kaufman, Double Gauze Chambray in Indigo. I purchased it from my favorite online fabric store Hawthorne Threads. I ordered 2 yards at a cost of $11.70 per yard. This is my first double gauze experience. I have seen many makes with double gauze floating around the online sewing community and had been curious about it for some time. I love the characteristics of this fabric, it’s soft and lightweight while having a similar fashion aesthetic of a regular chambray. However, I don’t think it was the perfect choice for this pattern. I’ll explain below.

DSC_0594

Because of the loose weave of the gauze, the fabric sort of stretches over the shoulder and creates a wing effect on the edge of the sleeves. Not a big deal, but something I wasn’t jazzed about the first time I tried it on. Can I live with it? Yes!

DSC_0599

The side view is a bit unflatteringly “full.” I don’t know if it’s because there are also pleats in the back or it’s the nature of the fabric. What I do know, however, is that as the day wears on, you get a rear end sag from the double gauze stretching out while sitting. The dress appears freshly washed in the photo.

DSC_0600

DSC_0505

The neckline is finished with purchased bias tape. The sleeves have a narrow machine hem.

DSC_0512

I like how the wrong side of the fabric is the “negative” of the right side.

DSC_0507.jpg

I did a machine blind hem for the bottom hem. The stitches are hiddened well in the crinkly, double gauze!

LETS BE HONEST:

1. I made a size 12 and graded out to a size 14 on the bottom half. I did not do this out of concern for my hips. I did this because I added 5″ to the hem. (View B is described as a mini-dress, which I don’t do.) I noticed that the body of the dress narrows slightly towards the bottom and I thought if I continued the inward angle following the size 12 line, it might feel a little narrow at the hem.

2. Hmm…what else can I say. Despite the winged sleeves and saggy rear end, I really love this dress and will continue to reach for it often this summer.

What about you…can you overlook disppointing details when the garment perfectly fills a need in your wardrobe?


The Kiomi Top

Eight weeks ago I had a double mastectomy because I was diagnosed with breast cancer. I’m not telling you this to shock you or for your sympathy, after all this is a sewing blog. I’m sharing this so you will know the true reason behind my choice of projects these past few months, and the months upcoming. But before I jump into sewing, I want to say that my prognosis is excellent, and I have the good fortune of not requiring any post treatments such as chemo therapy or radiation.

However, I am currently “under reconstruction.” My breasts are temporarily oddly shaped and uneven. That is why I am choosing tops and dress patterns that are loose and gathered above the chest. One week after surgery, I started to think about all the hot weather that is to come, looked through all my patterns, and choose The Kiomi Top from Lotta Jansdotter’s book, Everyday Style, as my first recovery make.

DSC_0526

DSC_0534

DSC_0529

DSC_0539


DSC_0519

The Kiomi Top from Everyday Style by Lotta Jansdotter

I thought this pattern would make up nicely in a quilting weight cotton fabric as I desired an opaque, more substantial weight fabric rather than a voile or lawn cotton which is my usual preference for a top or blouse. I ordered two fabrics from my favorite online store, Hawthorne Threads. (As much I prefer buying fabric in person, I think it’s awesome to purchase fabric online when you have drains attached to you, can’t drive yet, and really don’t want to leave the house.) I chose two fabrics – Iza Pearl Designs, Blush & Bloom collection, Floral Stripe in Aqua, $9.95 per yard, and Leah Duncan, Lore collection, Olympus in Navy, $12.95 per yard. I bought 1 3/4 yards of each.

After studying the photos of the Kiomi in the book, I decided I would prefer less flair for this semi-cropped top. Lotta Jansdotter looks taller and thinner than me, so she can pull off a more extreme A-line. I took out eight inches of width at the bottom of the top. I did this by cutting two slashes on both the front and back patterns pieces and overlapping the openings by an inch at the bottom. I found the width to be perfect and was very happy I made this adjustment.

DSC_0528 DSC_0536

DSC_0548

I made four slashes to take out a total of 8 inches of width on the bottom.

DSC_0522.jpg

I would not look as cute as Lotta in a top this swingy.

LET’S BE HONEST:

1. The size range in this book is XS to XL. I made a Medium (bust 36 – 37 1/2) and it fit fine even though my bust size falls closer to the Small measurements.

2. I had an issue with the neckline on this pattern. With my first top, I followed the instructions to pull the neckline gathers to 3 1/2″ for the size Medium before sewing on the bias tape. This was too much gathering. It caused the neckline to be pulled into a kind of soft “V” shape and also pulled armholes towards the chest area. I studied all the photo examples in the book, and none of the necklines looked like mine which leads me to believe the measurements in the book were not adequately “tested.” For my second top, I pulled the gathers to 5″. I found this to be a much more acceptable result and looked more like the rounded necklines in the book.

DSC_0530   DSC_0540

Left: Gathers are 3 1/2″. Right: The gathers are 5″.

3. I had an issue with the instructions for the neckline bias tape. You are given a pattern for 2″ bias tape and instructions to iron it down the middle and then in on both sides 1/2″. This of course creates a 1/2″ bias tape which is to be used on both the neckline and arm holes. Looking at all the photos in the book and the illustrations on instruction page, the neckline bias binding is clearly wider than the armhole binding. In a couple of the photos the neckline binding looks like it could be as wide as 1″. There are no instructions that differentiate the binding widths of neckline and armholes. I like the way the wider neckline binding looks, so of course I made adjustments on my own to achieve that. However, small details are what make a simple design such as the Kiomi unique, and I think the creators of the book owe their followers instructions and patterns pieces which will enable them to create exactly what they see in the photos.

4. Despite my complaints above, I love actually these two tops and have already worn them both several times. They serve the purpose that was intended for them – in the hot weather, they hide my not so perfect chest AND I still feel cute.

5. This is my third project from Everyday Style by Lotta Jansdotter. I have a post on the Esme Tunic here. I also made the Owyn Pants. I haven’t done a post about them, but you can see photos of them in this post.

I am especially grateful right now that I can sew. I am able to create clothes that I feel great in post-surgery. What about you, when have you felt grateful that you can sew?

DSC_0542


Japanese Smock Blouse B

Japanese patterns…I’ve become mildy obsessed. With each project I make, I become a bigger fan. My continuing quest for more interesting tops was a great reason to sew up my fourth Japanese pattern.

DSC_0393

DSC_0390

DSC_0397

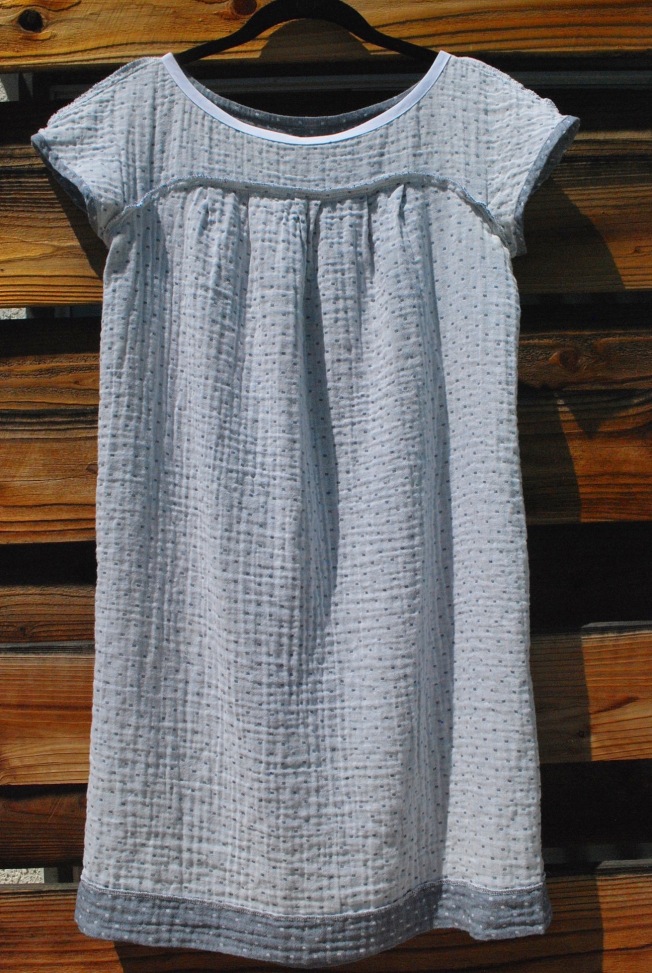
The pattern I used is B: Smock Blouse with Garibaldi Sleeves from Stylish Dress Book, Wear With Freedom by Yoshiko Tsukiori. This is my second project from this book. My first was Japanese Dress Y. I chose pattern B because of it’s simplcity and design features that would lend well to a drapey fabric.

DSC_0098

This book has 26 adorable patterns to choose from.

DSC_0379

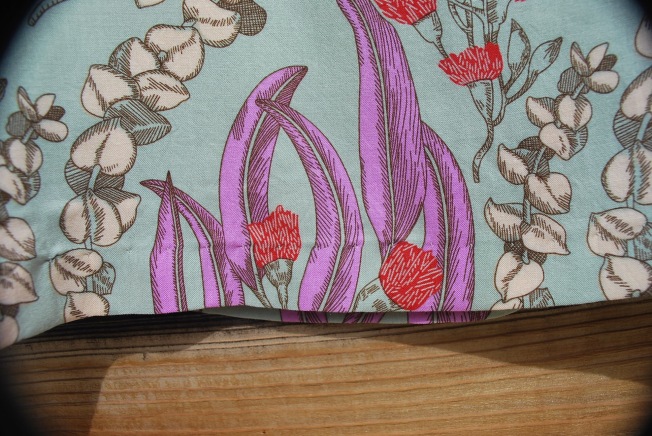
Contrary to my usual habits (I am actually not a fabric horder, and have very little stash), I already had the fabric before I choose this pattern. It was part of my online Black Friday sale purchase from Hawthorne Threads. The fabric is Anna Maria Horner, Pretty Potent Rayon, Eucalyptus in Ruby. I purchased about 2 yards for $9.95 per yard. This is a nice quality rayon which came through a machine prewash and line dry beautifully.

DSC_0352

DSC_0354

The neckline is finished with bias tape which I first machine stitched to the front, then folded over, hand stitched on the inside and then top stitched on the front side. The pattern does not provide explict instructions on how to do this!

DSC_0356

Here’s a Garibaldi sleeve. It has a partially gathered bottom piece with an elastic casing hem.

DSC_0358

The back neckline does not have gathers.

DSC_0360

I did a machine blind hem. One of my favorite finishing techniques for hem that have little or no curve.

DSC_0362

Inside peek at the stitch.

LET’S BE HONEST:

1. The pattern sizes in this book range from 6 to 16. I cut a straight size 12, and was happy with the fit. I probably could have made a 10 and been just as satisfied since it’s very loose fitting.

2. This pattern is well drafted and true to the picture. I have developed a trust in the Japanese patterns.

3. However, as with the other Japanese patterns I’ve made, the instructions are minimal. If you are a beginner, do not attempt one of these patterns unless you have some in-person support. Here’s Blouse B in it’s one page entirety:

DSC_0383

4. The instructions showed the bias tape cut at 1 3/8″ wide. I cut it at 1 5/8″ because I was afraid any stretching or fraying might leave it too narrow in places.

5. I think one reason I like these patterns is they are friendly/flattering to the pear shaped, small busted woman.

I only sewed with Big 4 patterns (plus Burda) for 40 years. I trust them and know how to work with them. Since starting this blog, 2 years ago, I have ventured to other resources for patterns. (Yes, you can teach an old dog new tricks.) I have discovered that well drafted patterns can come from just about anywhere. Still, I choose patterns from alternate sources because I find an appealing and unique design, and not because I want to jump on the social media bandwagon with the latest indie pattern.

What about you? How do you choose patterns?

Thanks for visiting and reading this post! Cheers, Lori
DSC_0403

It’s been such a warm February, our trees think it’s spring!


The Allay Shirt

So I need to ask myself again at the two year anniversary of my blog – have I sewn myself stylish yet? I have to say no, not completely. At times, I still feel frumpy or a lack of clothes. When the weather finally cooled down this fall, sometime in the middle of November, I really felt like I had no cool weather clothes. I say cool weather, not cold weather because I live in Southern California. I’m talking about everyday, nice, casual – something more interesting than a long sleeved, plain t-shirt. I thought this loose-fitting shirt was a great way to start filling this void in my wardrobe.

DSC_0318

DSC_0321

DSC_0329

The pattern I used is McCall’s 7018. I had this pattern for quite some time, bought on sale at JoAnn’s, probably 5 for $7. I made view E. I was attracted to it’s loose fit and versatility. We do have chilly mornings and evenings in the winter, so one feature I look for is a simple, narrow sleeve that will easily slide into a jacket or sweater.

DSC_0347

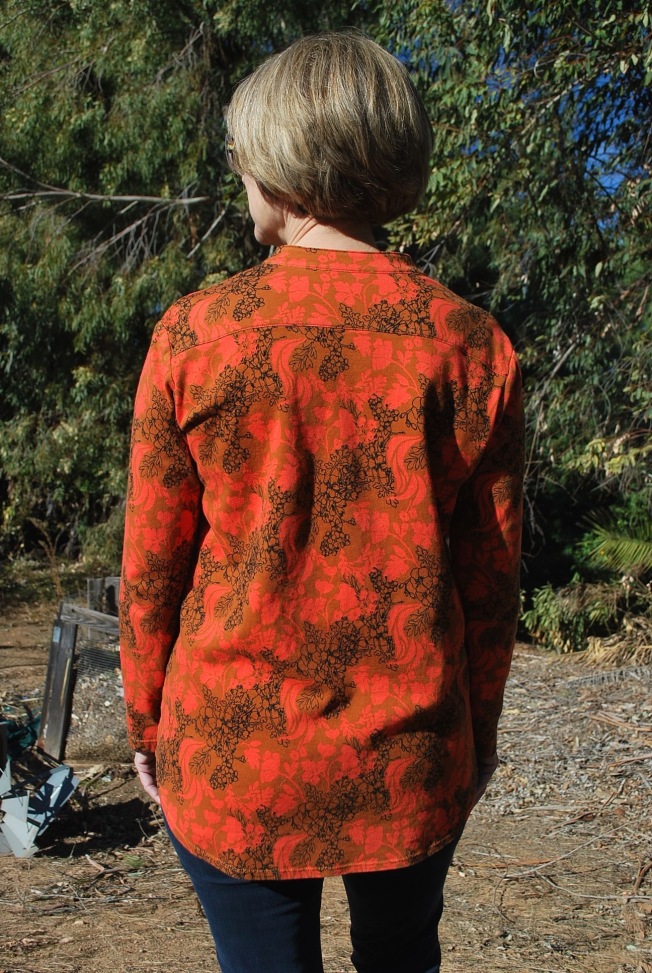
The fabric I used is Anna Maria Horner, Tangle Knit in Rust. I bought this knit online at Hawthorne Threads during their Black Friday Sale. I bought 1.75 yards for $9.70 per yard. I am always leery about buying knits online because the quality of the fabric and the printing can vary greatly. But, I have purchased Anna Maria Horner knits before and knew it was a sure bet. I was not disappointed, this is a perfect top weight cotton interlock with a nice print quality.

DSC_0289

I like the not-too-drastic high-low feature of the hem.

DSC_0295

This shirt washes beautifully. When I took these photographs, it had been worn and put through the washer and dryer.

DSC_0299

I slipped stitched the bottom of the collar down by hand before top stitching on the front side.

DSC_0300

DSC_0293

Simple narrow double needle hem. No serging on the edges, just trimming close to the stitching.


LET’S BE HONEST:

1. I cut a straight size 12. The only adjustment I made was taking off 1″ in the length before cutting. This is standard practice for me as my widest part is my thighs and I never want to top to end at that spot. Since this top is “loose-fitting,” I did not have to grade wider at the hips were I am about a size 16. I am very pleased with the fit and like the look of the shaped hemline.

2. The pattern is labeled as “EASY.” Doing a collar with a button front is never easy for a beginner especially with a knit. I guess we should assume that EASY does not equal Beginner?

3. Before top stitching on the collar, I hand-based all around close to where I was going to top stitch to prevent the fabric from stretching/pulling under the machine foot when stitching.

I love this shirt. I’ve worn it 3 or 4 times already, and very time it makes me feel happy that I’m wearing it.

DSC_0319

What about you? Do you find the start of a new season upon you and suddenly feel like you have nothing to wear?


The Truly Perfect Blouse

Ok, I broke my New Year’s resolution and got behind on my blogging. Taxes and a wonderful spring break vacation got in the way. I am always envious of other seamstresses who, no matter what, are so prolific all the time. What is their secret? Boundless energy? Hyper disciplined? No day job? Anyway, I have been anxious to share Fresh Make #26 with you because I am so pleased with it turned out. I have made a wrap blouse perfect for work or a fun spring event.

DSC_0037

I was inspired to make another wrap top after my success with the second try of The Every Woman Top. Unlike RTW, I discovered a custom made wrap top can actually look decent on me because I can adjust for my bust to hip ratio.

DSC_0044DSC_0073DSC_0054 The pattern I used was Vogue 8833, which I purchased on sale at JoAnn’s for $4.99. (I always mark the sale dates for Vogue patterns on my calendar.) I choose this pattern because of my new enthusiasm for the wrap design and my constant need for verstile, causal professional wear. Additionally, I am a big fan of the patterns that have the A,B,C,D cup size options.

vogue blouse

The fabric, which I ordered online, more than met my expectations. It is a smooth, lovely lawn cotton from Hawthorne Threads. Here are the specifics: Melody Miller, Playful Lawn, Vintage Flora lawn in Aqua. I love the fresh, modern color palate. It also comes in a couple of other colorways. I purchased 2 1/2 yards at $13.95 per yard.

DSC_0074

It has princess seams both in both front and back which add to a flattering fit. There’s an opening in one of the princess seams for the tie to go through. I added a thread loop on the opposite side seam at the waistline to hold the tie in place.

DSC_0084 DSC_0078

Because the lawn cotton sews up and irons so beautifully, I decided not to top-stitch the edge of the collar or facings.

DSC_0085 Here’s an inside peek so you can get a better idea of how it all goes together.

LET’S BE HONEST:
1. I think I say this everytime I make a Vogue pattern, but I feel I need to keep making this comment – this pattern is labeled “Easy.” I believe this rating is relative to other Vogue patterns, not sewing in general. This pattern has a collar with a band, set-in sleeves, and some other features that wouldn’t be appropriate for a beginning seamstress to attempt independently.

2. I cut a Size 12 on top and graded to a Size 16 on the bottom. I choose the B cup option. Overall I was very pleased with the fit and did not make any adjustments after trying it on while sewing.

3. The only thing I added that wasn’t suggested in the instructions, was a thread loop at one side seam to hold the tie in place.

4. Honestly, I have nothing more to say about this pattern, except it sews up exactly like it looks. I am very happy with it. I truly think it would be great on all figure types.

REFLECTIONS, REVELATIONS, AND CONFESSIONS:
I’m just anxious to publish this post. Even when I’m on a fabulous vacation, I miss sewing and blogging. I still look on Instagram and scan through other blogs to keep up on what others are doing. How about you? How do you feel when you don’t have time to sew….even when you’re having a fabulous time doing something else?

DSC_0025

Fresh Makes, Take Twos

I have made 25 garments since starting this blog, and I have probably mentioned in most of my posts, “When I make this again, I’m going to…….” So how many have I actually made again? I will admit that 90%+ of my makes are one-time adventures. Mainly because with the limited time I have to sew, I find the most enjoyment out of trying a new pattern from my large pattern stash each time I make a garment. But there are two that I have been compelled to revisit, and I’m excited to share these Take Two makes with you.

The first Take Two is The Jean Skirt, Fresh Make #1.DSC_0001Sometimes the garments that “wow” the least are the ones we grab the most because they are a great basic. And that is the case with The Jean Skirt, Simplicity 1616. I really like how it fits, lays flat across the stomach, yet has plenty of width through the hips and thighs. AND it is quick and easy to make. I wanted to make another as soon as I finished the first and what finally spurred me into action was, sadly, I tore my first Jean Skirt.DSC_0005DSC_0016 The fabric, which I ordered online, was disappointingly thin. While wearing it, it got caught on something, I don’t even remember what, and now it’s wadded up on the top shelf of my closet.

I learned my lesson that you usually “get what you pay for.” So for Jean Skirt, Take Two I shelled out the big bucks for 2 3/4 yards at $14.50 per yard for Anna Marie Horner’s beautiful, thick, soft, interlock knit, Mary Thistle, in navy, from my favorite online fabric store, Hawthorne Threads.DSC_0004This fabric goes through the washer and dryer beautifully. The dark blue with a black print acts like a neutral. You can really pair it with almost any color. A true grab and go skirt.

My second Take Two is The Every Woman Top, Fresh Make #21.DSC_0011
I was initially drawn to this pattern for it’s potentially figure flattering variation of a basic knit top.

My first version of The Everywoman Top, Vogue 8151, was a fit fail from the waist down. The biggest fit fail of my 25 Fresh Makes. I describe this all in my original post, but basically the fabric was too thick and the fit was too loose, resulting in one big belly sag instead of flattering, fabric folds created by the side ruching. BUT I loved the fit from the waist up. The small bust adjustment I did worked well and neck band laid perfectly in front and back.

Through the waist and belly, it's a bit of a blob silhouette. Go ahead and click to enlarge to see what I mean.

Through the waist and belly, it’s a bit of a blob silhouette. Go ahead and click to enlarge to see what I mean.

Version two, much better!

Version two, much better!

I vowed to redeem myself by making another with a thinner, single jersey knit. I did just that with a 95% cotton, 5% Lycra, Threaded Shreds Knit in Mamey, again, from Hawthorne Threads. I splurged in purchasing 1 7/8 yards at $15.95 per yard. I love this fabric. It washes beautifully, and is super soft and stretchy. It is also thin enough that bulk is not created by the double thickness of the wrap front. This time when contructing the garment, I followed the instructions of making a one inch seam allowance down the sleeves and sides. And after trying on, I even took in the side seams another 1/2 inch to get enough negative ease to form the fabric folds across the belly instead of a sag. I am truly 100% happy with the results of this Take Two. It you would like more construction details of these patterns, just go to the original posts, Jean Skirt and Every Woman Top

There seems to be a lot of prolific sewists in the online sewing community who post new versions of the same pattern frequently. I know it makes sense to perfect a pattern that really fits your lifestyle and can potentially become an integral part of your wardrobe. I just don’t like repetitive sewing. It becomes labor to me rather than a creative experience. What about you? What are your thoughts and practices when it comes to sewing up the same pattern several times?

The Every Woman Top

I waited for months for the weather to change, and then when it finally did I realized I had quite a shortage of professional, casual clothes for cooler temperatures. You know the category – not jeans and hoodies, and also not dress slacks and blazers. These are the clothes I need to wear to my teaching job every weekday morning. So I choose to make this long sleeve, knit, wrap top for Fresh Make #21, not to wow you with my sewing skills (which I confess is sometimes how choose my makes), but because it is a garment that I truly need.DSC_0496DSC_0497

The neckband lays beautifully in the back. The gathers formed by the side shirring are more successful in the back because of the single layer of fabric.

The neckband lays beautifully in the back. The gathers formed by the side shirring are more successful in the back because of the single layer of fabric.

The pattern I choose is Vogue 8151. I bought it on sale at JoAnn’s for $4.99. I’ve been trying to make a commitment to making my own basics. I was attracted to this pattern because the wrap front offers a nice variation on a basic knit top. I was also curious about “Today’s Fit” by Sandra Betzina. The sizing on “Today’s Fit” patterns have a bust/waist/hip ratio more in line with the measurements of real women. I noticed that it was copywrited in 2005, so this pattern has some staying power in the Vogue book. I named it The Every Woman Top because it was designed for all of us. DSC_0510I originally purchased this fabric with the intention of making an easy wearing, short sleeved dress. But the weather turned cooler, and another warm weather dress was not what I needed at the moment. I bought this fabric because I was anxious to try an Amy Butler knit as I know hers is a name I could trust for quality fabrics. There are a lot of bad knits out there. This cotton interlock is Cross Roads in Citrus from Amy Butler’s Glow collection. The weight is substantial and it feels as soft as a favorite pair of PJs. I purchased it from my favorite online fabric store, Hawthorne Threads. I purchase 2 yards at $14.50 per yard, plus tax and shipping. Not cheap but well worth it, I think.
I love the neckline on this top. I usually do not look good in a wrap neckline because of my small bust, but this it cut just right for me.

I love the neckline on this top. I usually do not look good in a wrap neckline because of my small bust, but this it cut just right for me.

Inside peek!

Inside peek!

DSC_0518I used clear elastic for the shirring on the sides. I first used this elastic on my Moneta Dress.

LET’S BE HONEST:
1. I cut a size C. The sizes range from A to J. The measurements on size C are: bust – 36″, waist – 28 1/2″, hips – 38 1/2.” I still have a pear shape even with these adjusted ratios. The pattern offered simple adjustment instructions for different body types. I followed the small bust adjustment and folded out 1/2″ through the middle of the dart to reduce dart width.

2. I followed the instructions by looking at the illustrations (which is what I usually do, unless the picture is confusing, then I read.) When I did my first try on, it felt a little too roomy, and I honestly felt I cut the right size for me. So I did a gradual take in on the sides from the armhole through the bust and waist and gradually came back out near the hip. Just today, when I glanced over the pattern, before writing this post, I noticed the instructions says to sew a 1″ seam down the sleeve and sides, then adjust if necessary depending on the stretch of your knit. Ah, that’s why it was big, I had stitched a standard 5/8″ seam! Oh well, next time.

3. You can’t really tell exactly how it’s going to look and fit until the elastic is sewed into the side seams to create the shirring. After I had done that, I wasn’t compelled to remove it to adjust the side seams. (Maybe I shouldn’t have been so lazy.)

3. While I love this fabric, I don’t think it’s a perfect choice for this pattern. Aside from the fact that the top should just fit me more snugly, I think the shirring at the bottom would form nicer folds with a thinner fabric such as a single jersey knit.

4. I shortened the sleeve by 1″ before cutting.

Despite not achieving the fit I envisioned based on the photo on the front of the envelope, I still like this top and I have something new to grab in my closet. I am actually very anxious to make this pattern again with a single knit and a more snug fit. I think it has the potential to be very flattering. Thanks for reading this post. I welcome your comments! Cheers, Lori