Linnet Dress no.77

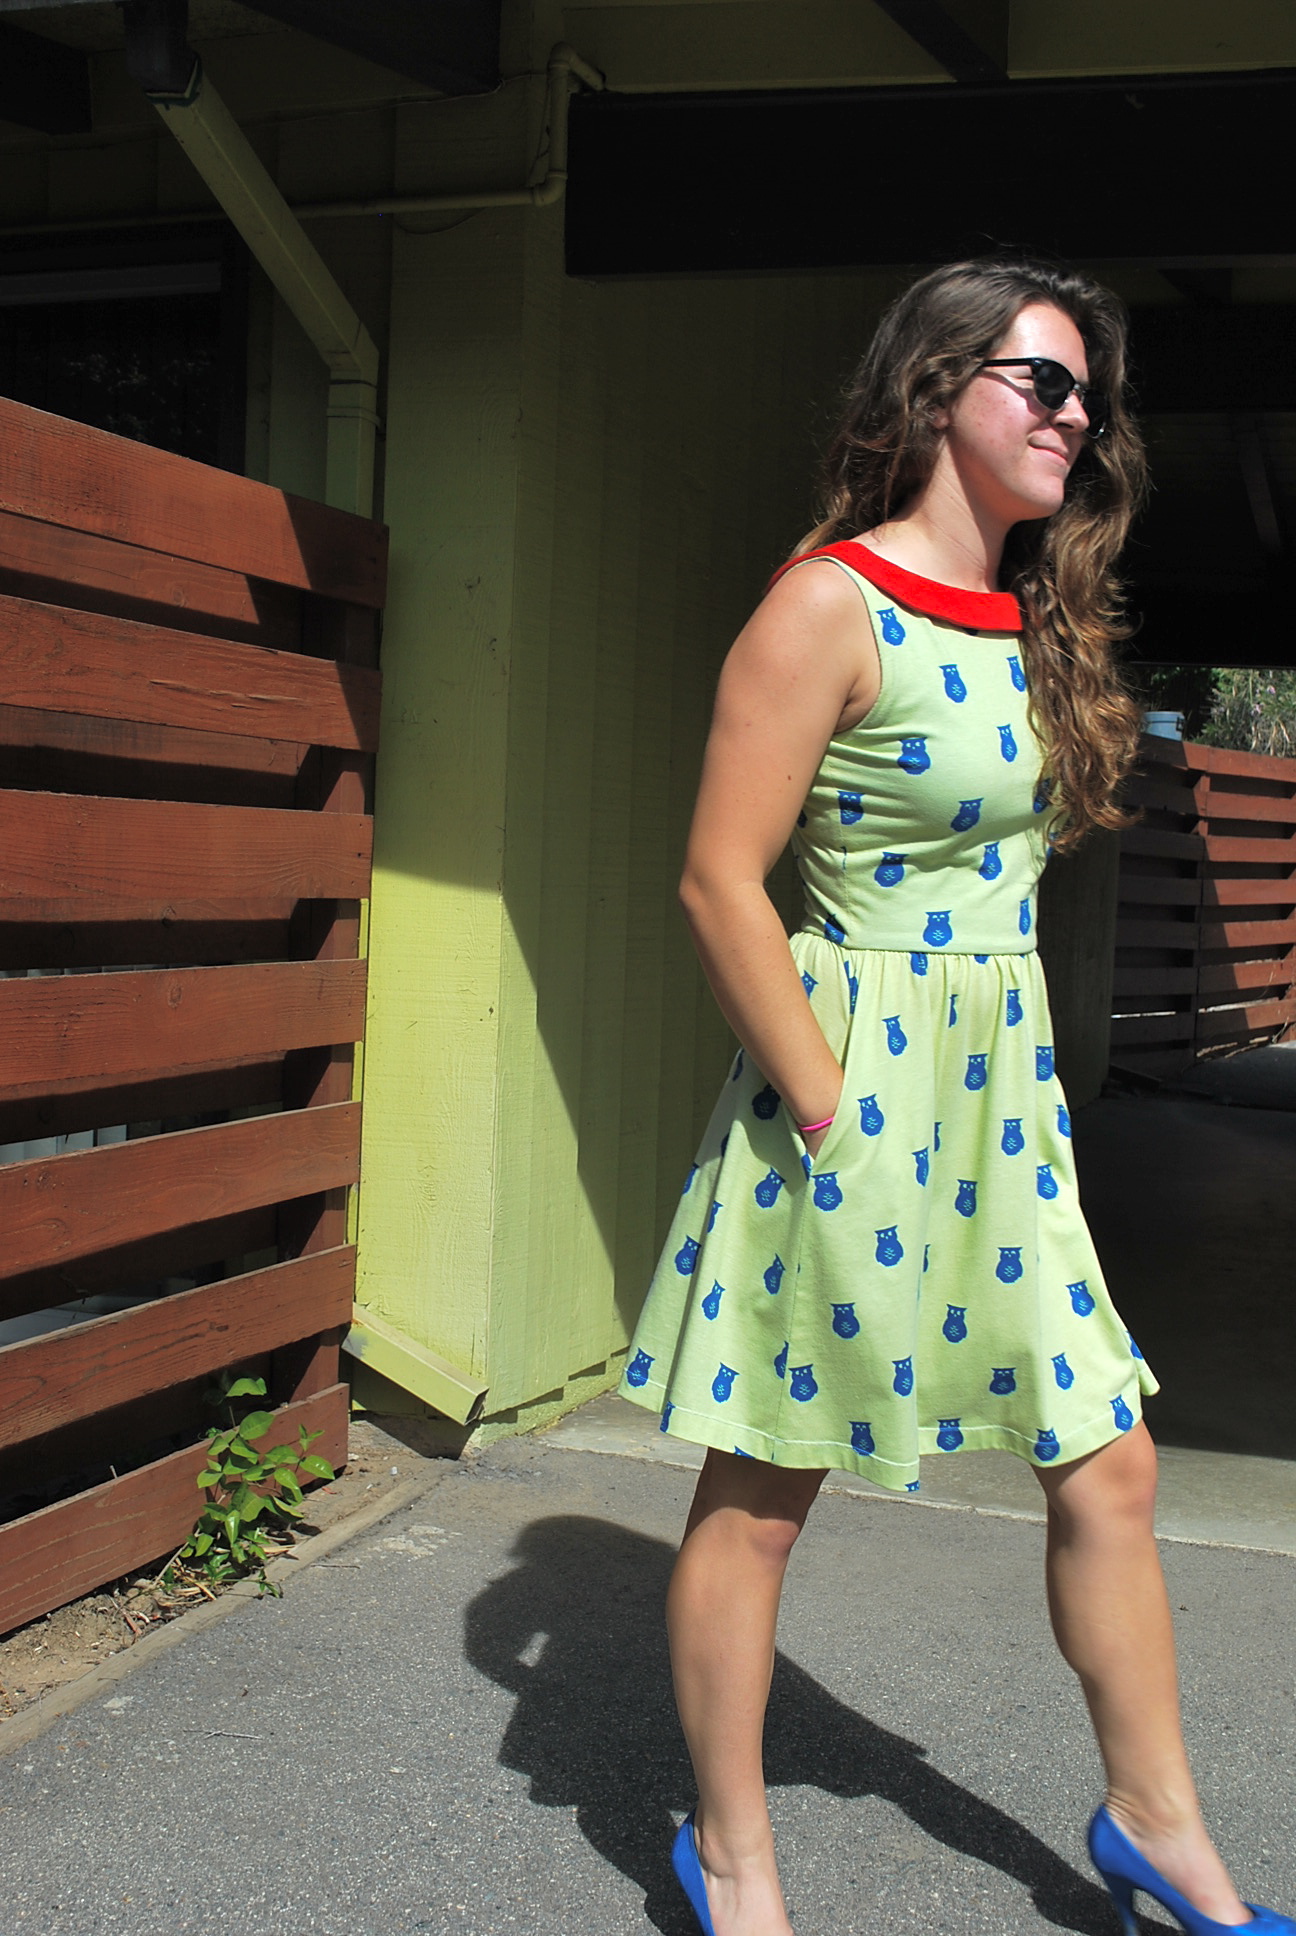
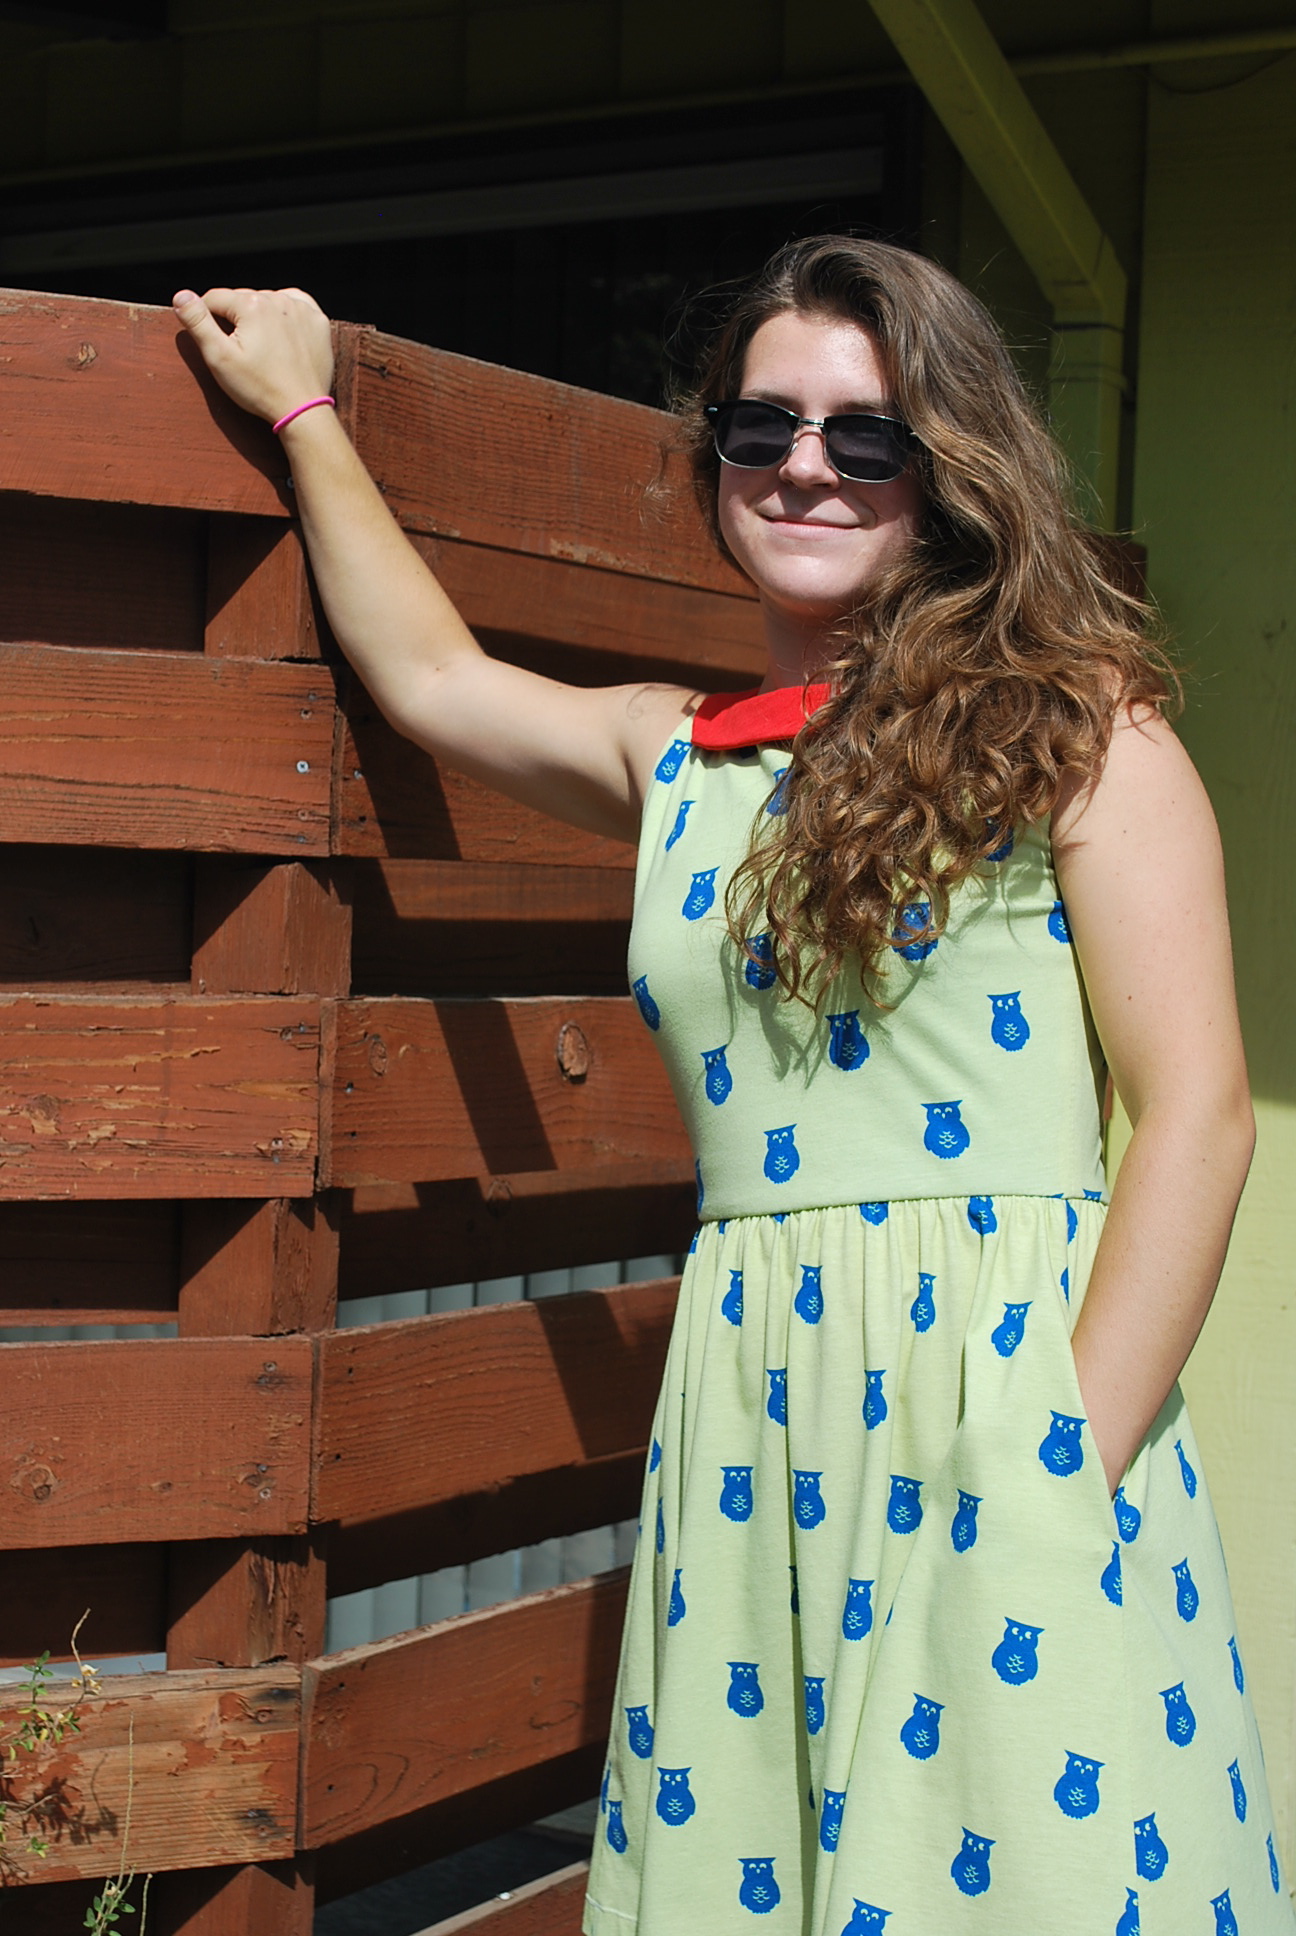
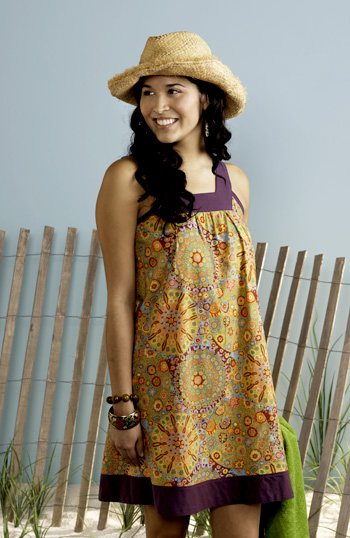
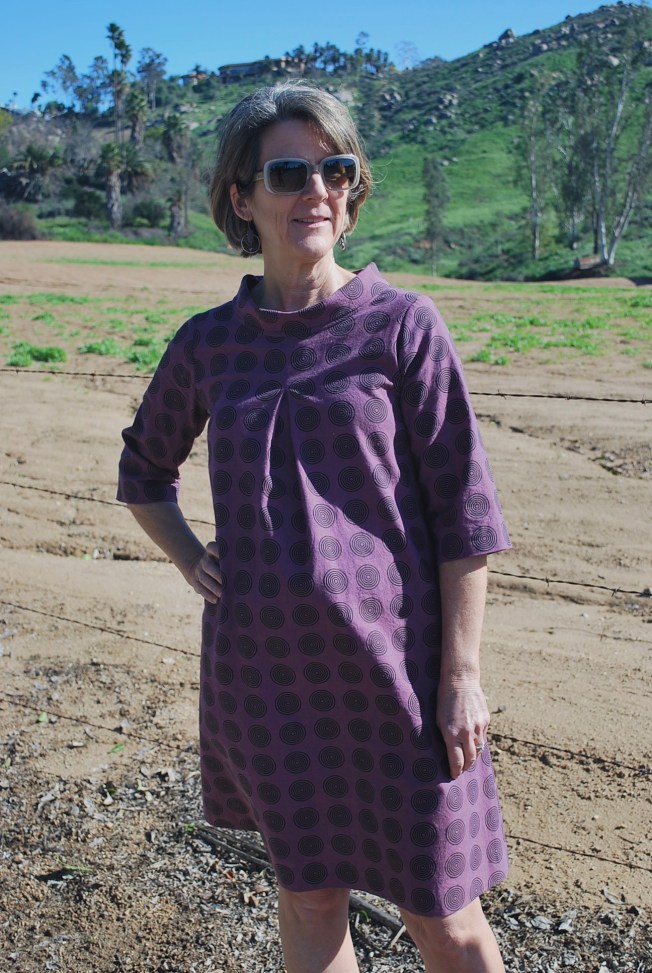
I feel like Linnet Dress no. 77 is an awesome secret I’m sharing with you! I stumbled upon this dress on Pinterest and have never seen any posts about it from the online sewing community anywhere on social media. And it’s stylishly adorable!

Before I share the dress, let me digress for a moment. This is my first blog post in over five months. I have been suffering from bloggers block. For those of you that know I had a bout with breast cancer last year, let me assure you I’m doing great. My last several posts featured “reconstruction” clothes. Since my last post in September, I have sewn at least fifteen projects, mostly tops and tunics for the seasons of fall and winter. I’ve had many successes and a few failures. Lots of stuff worth sharing. But I kept finding myself so anxious to start the next project, I didn’t want to take the time to do a blog post on something I just completed. Creating lots of new clothes was part of my renewal and recovery. Additionally, I’ve been asking myself for quite some time why I blog, other than to show off my sewing skills. My “reconstruction” theme gave me a temporary purpose, but I would like to move on now. So I’ve been feeling a little lost and am looking for a way to get back my blogging mojo. I figure if I can get this post out on this fantastic dress that deserves attention, maybe I’ll be revived.

fullsizeoutput_454

dsc_0752

When I found Linnet Dress no. 77 on Pinterest, I was immediately taken by it as well as several other patterns by this Japanese company. The pattern came quickly from Japan via an Etsy site. I can’t remember how much I paid for it but I remember thinking it was pretty reasonable. No more than an indie pattern in the U.S..

fullsizeoutput_459

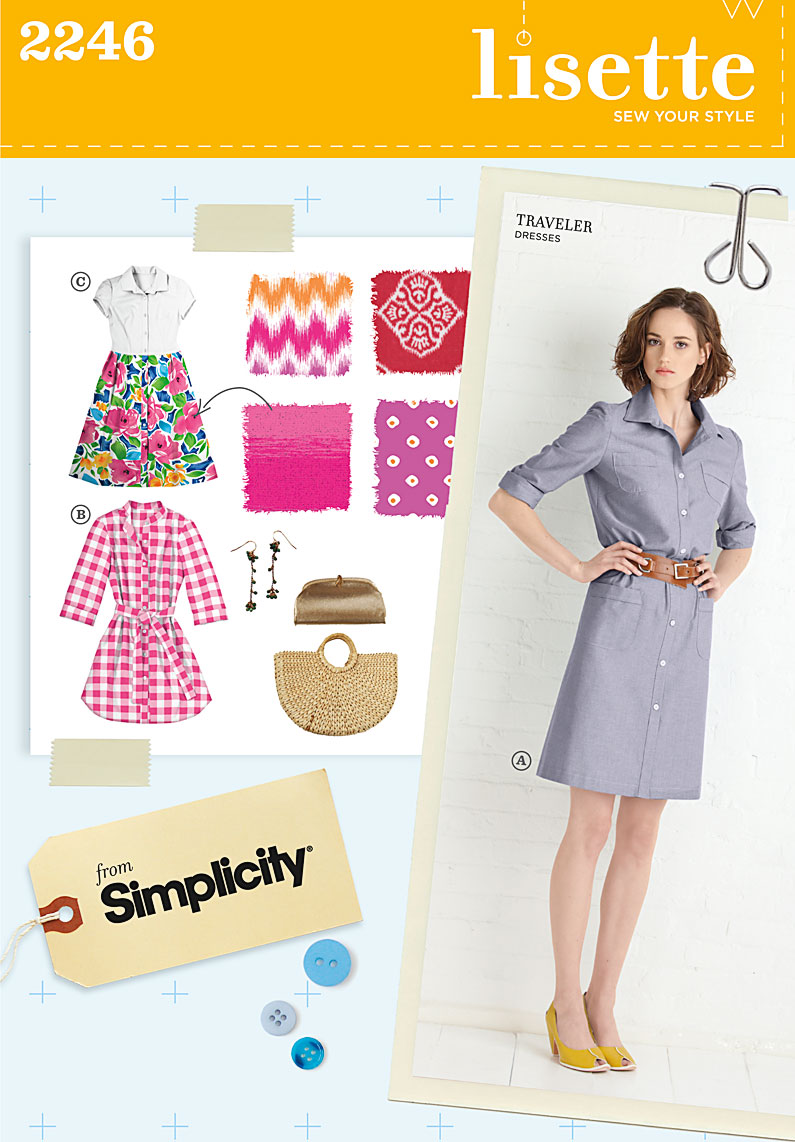
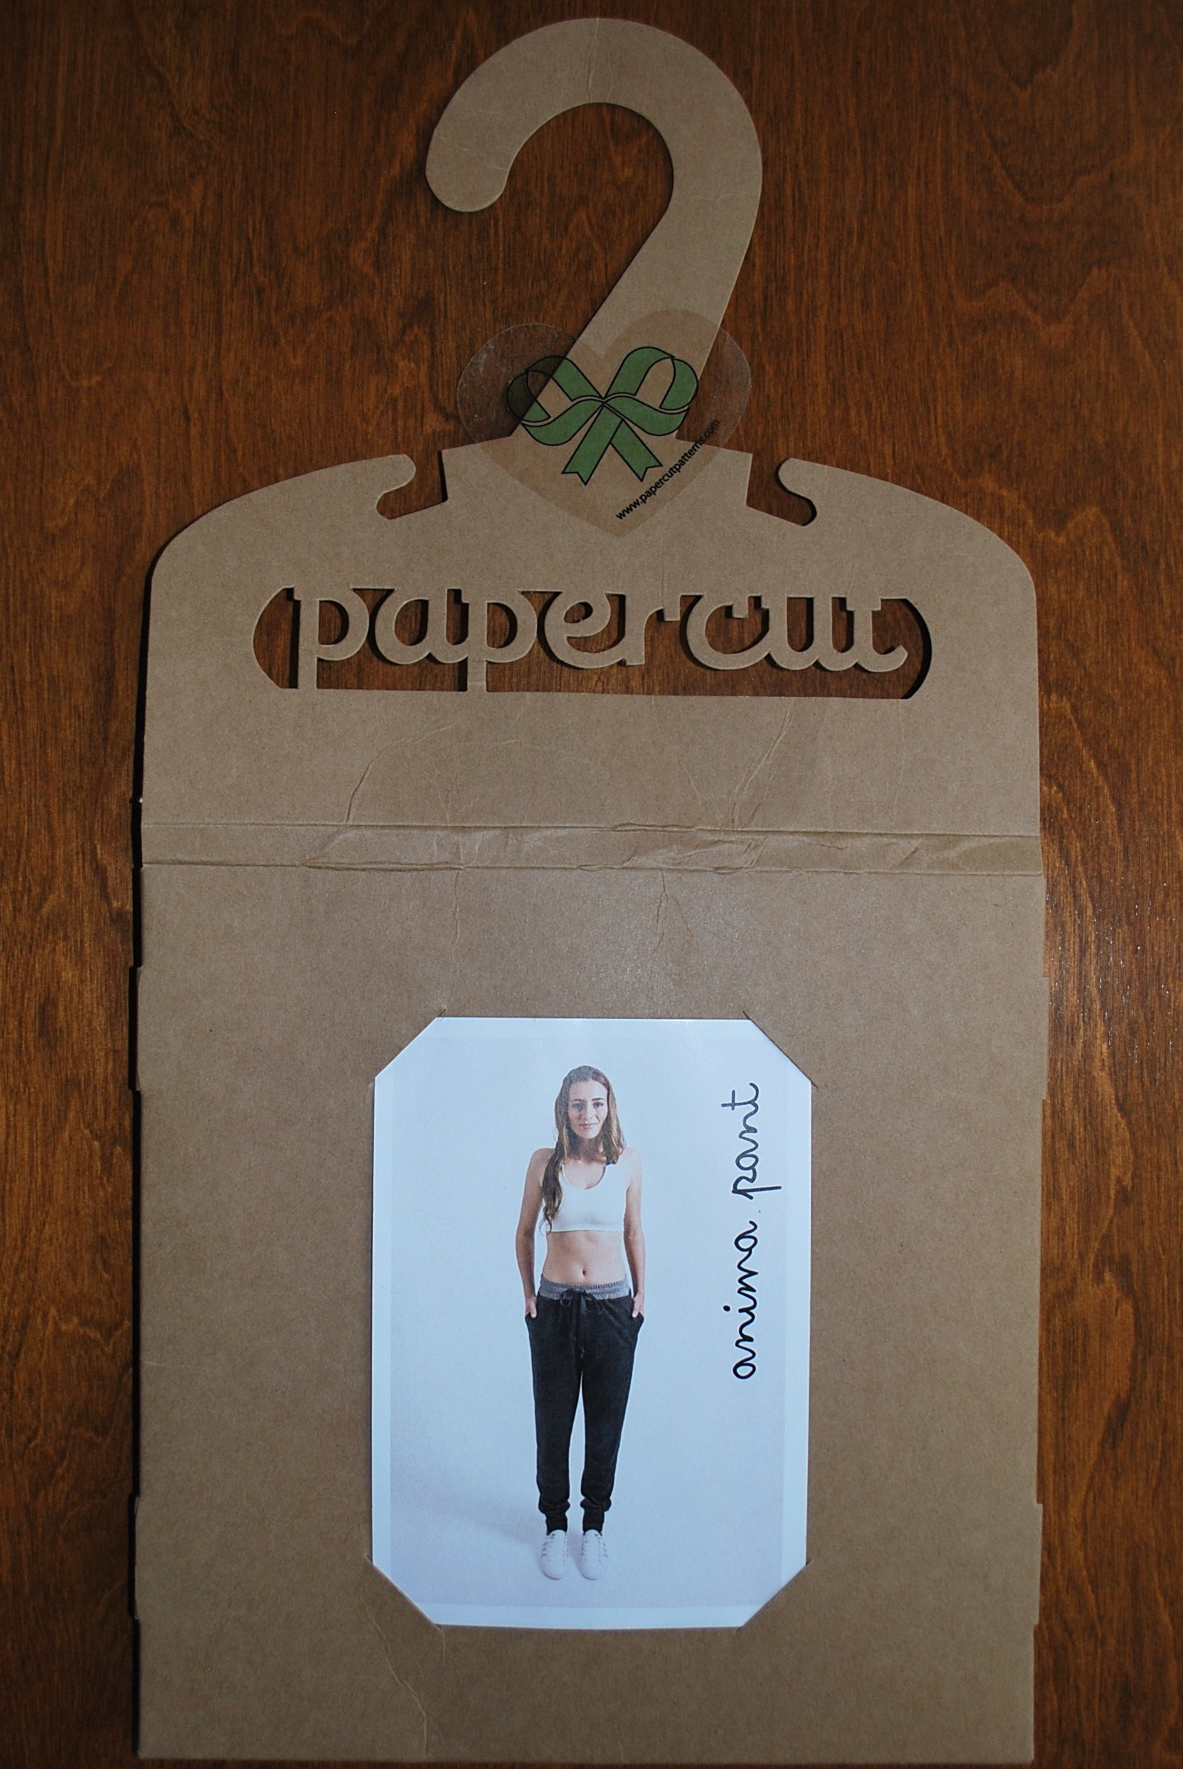
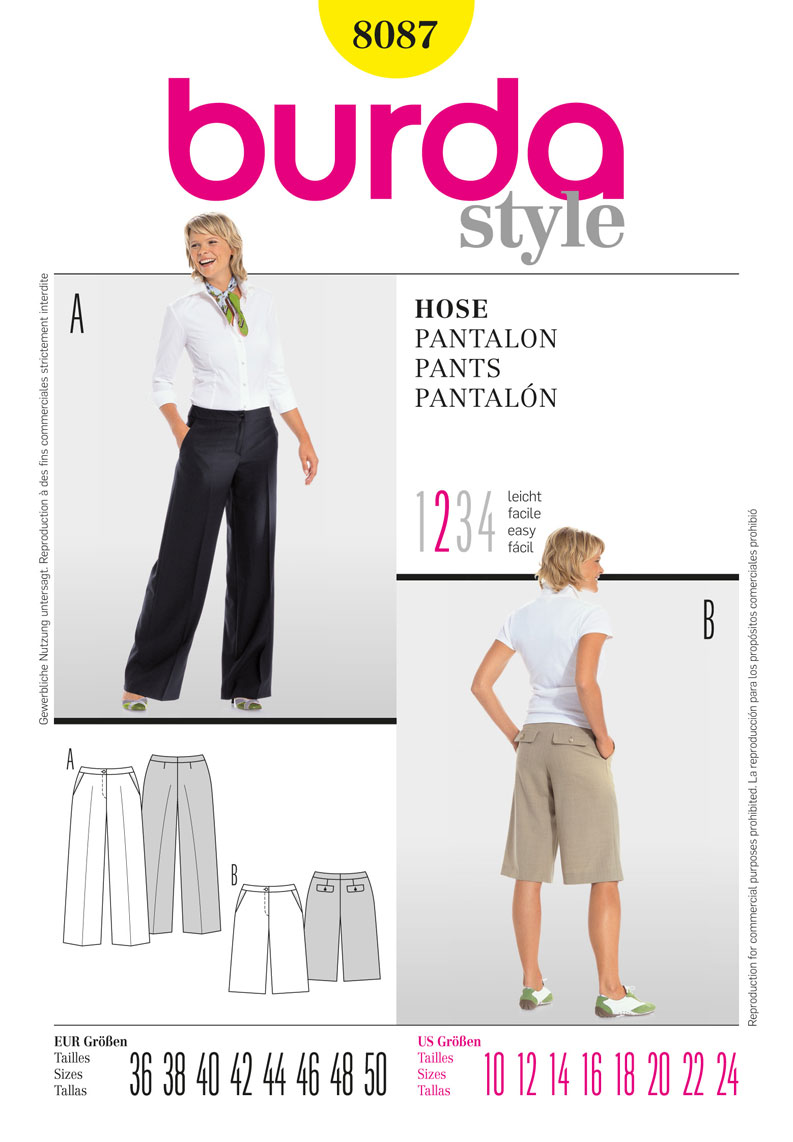
This is the cover sheet of the pattern that comes in a clear plastic envelope.

The pattern is printed on a substantial weight paper, and people who are more patient than me would probably trace off their size instead of cutting it up like I did. You need to add your own seam allowances.

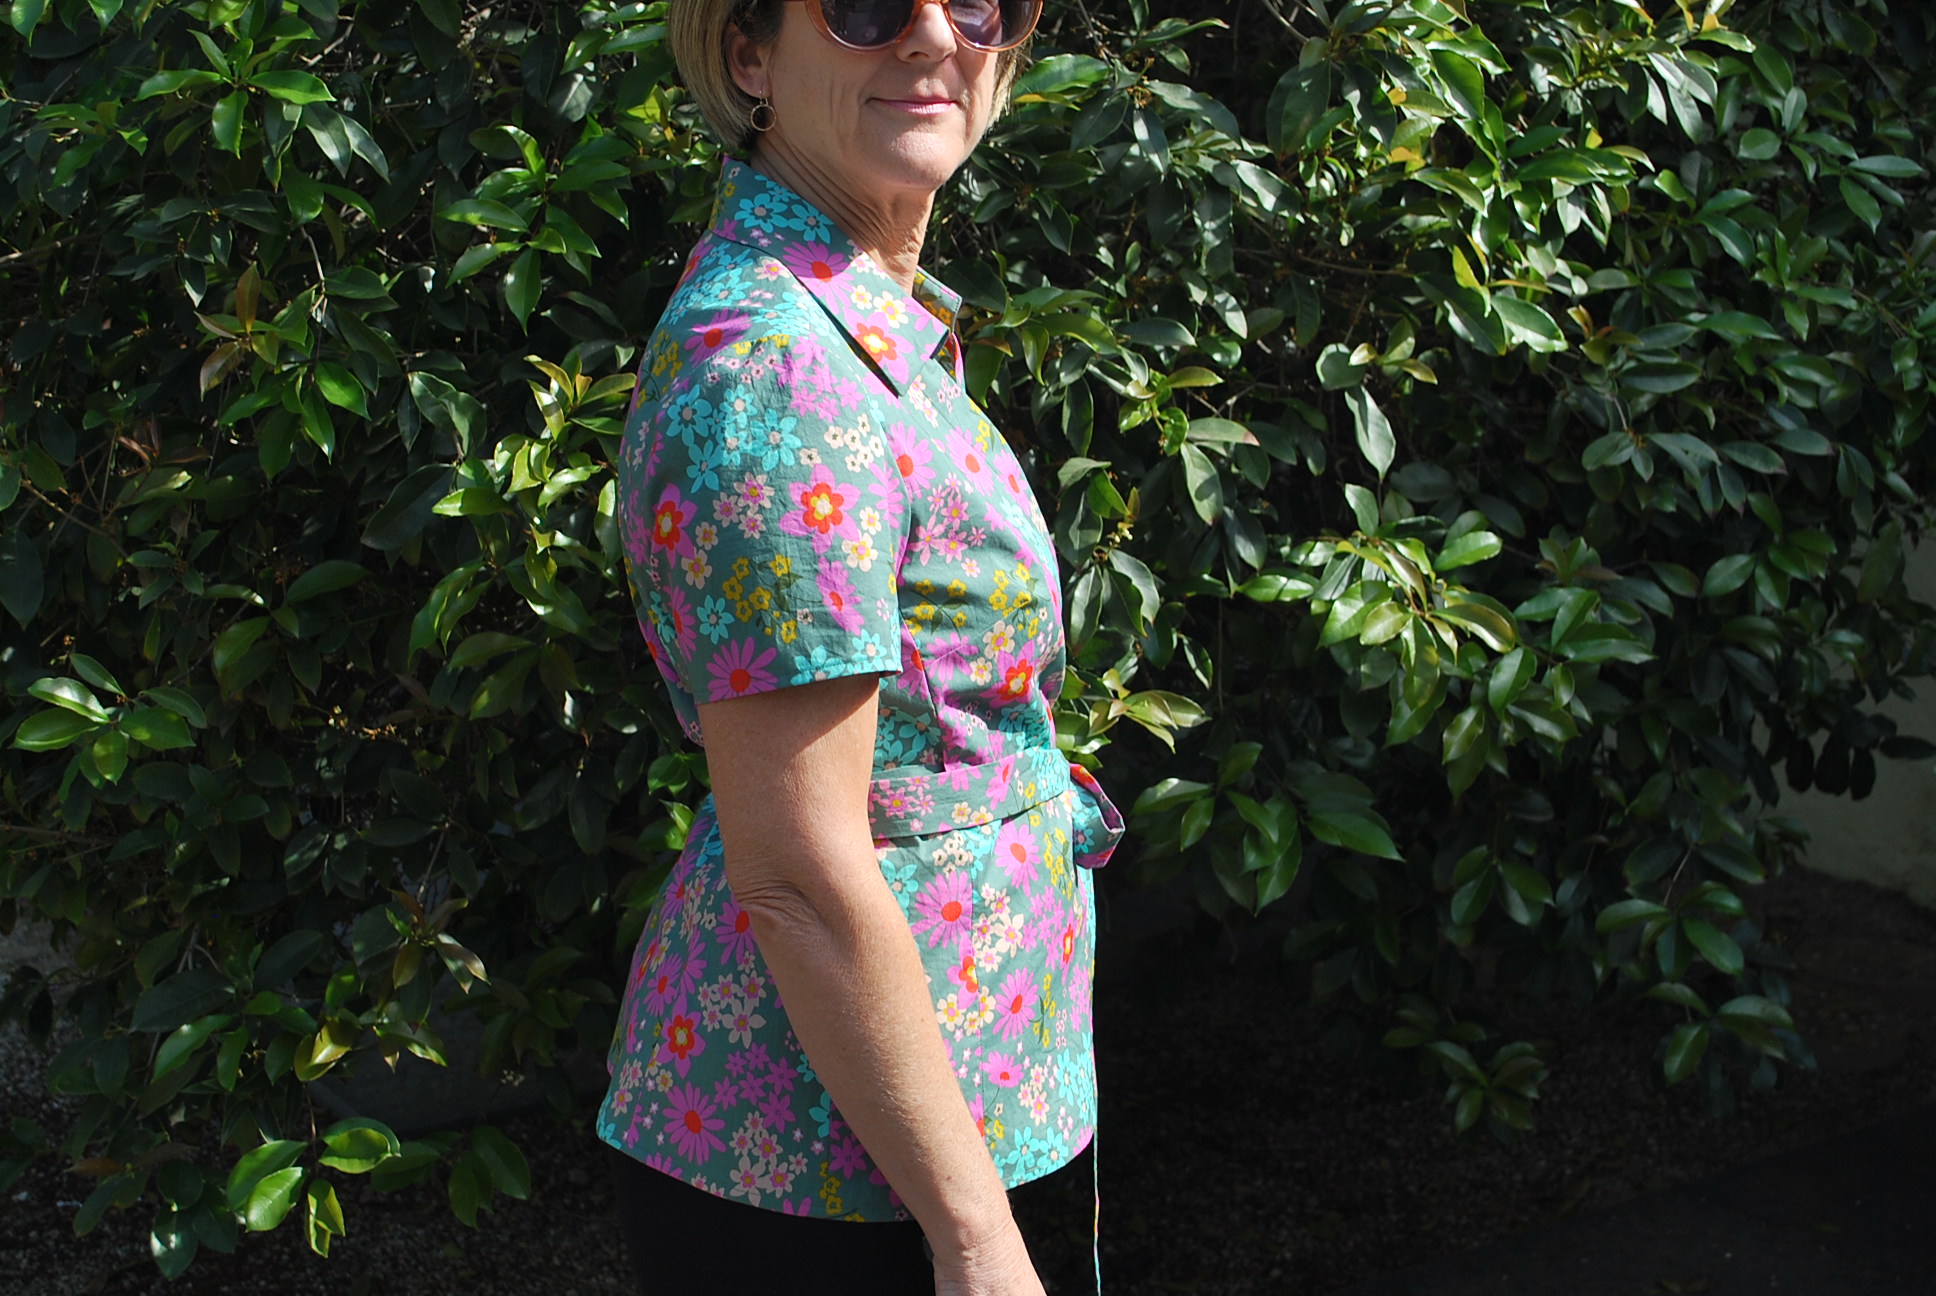
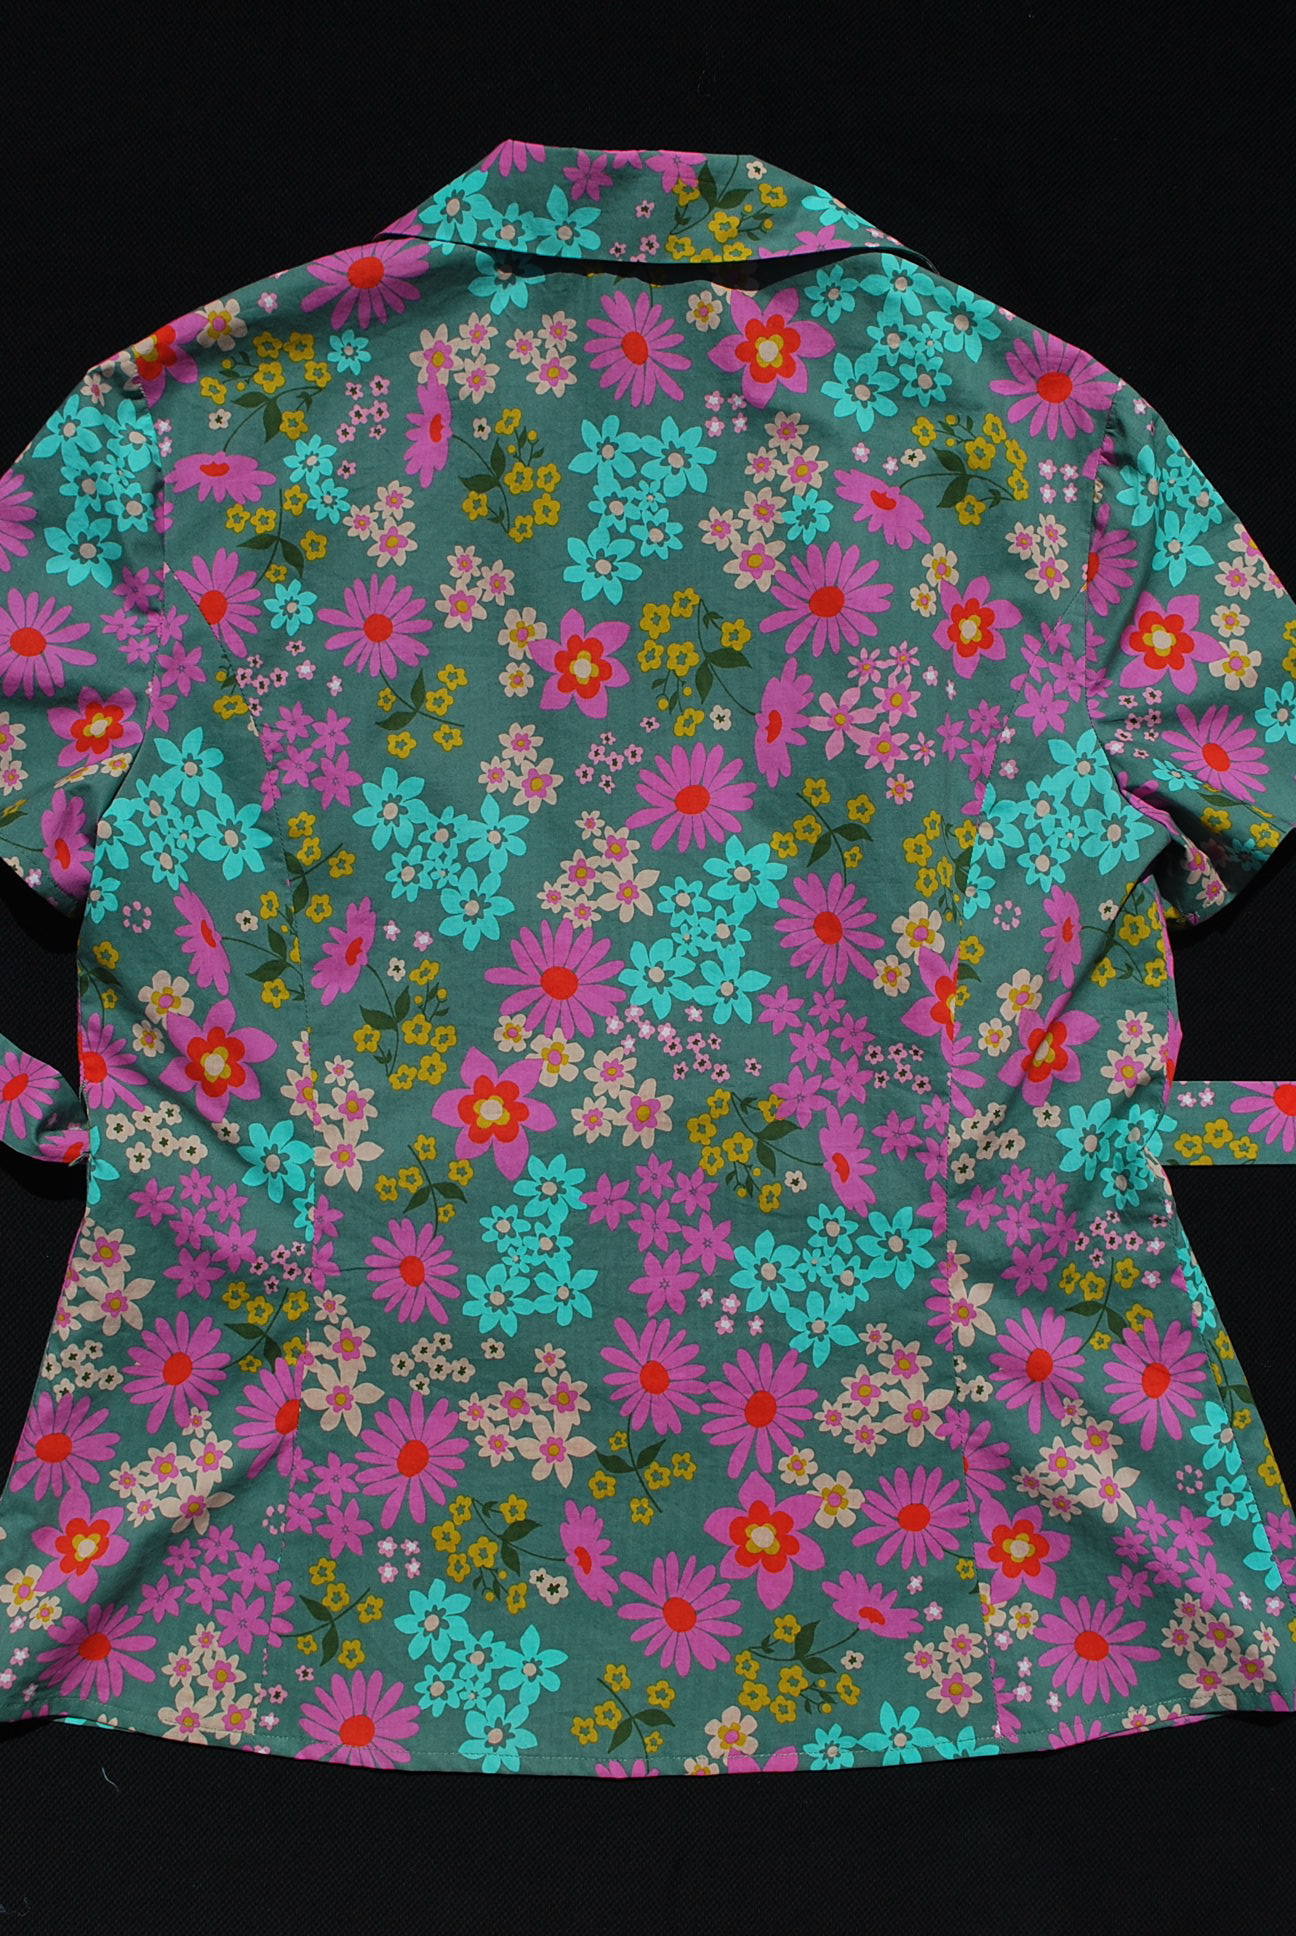
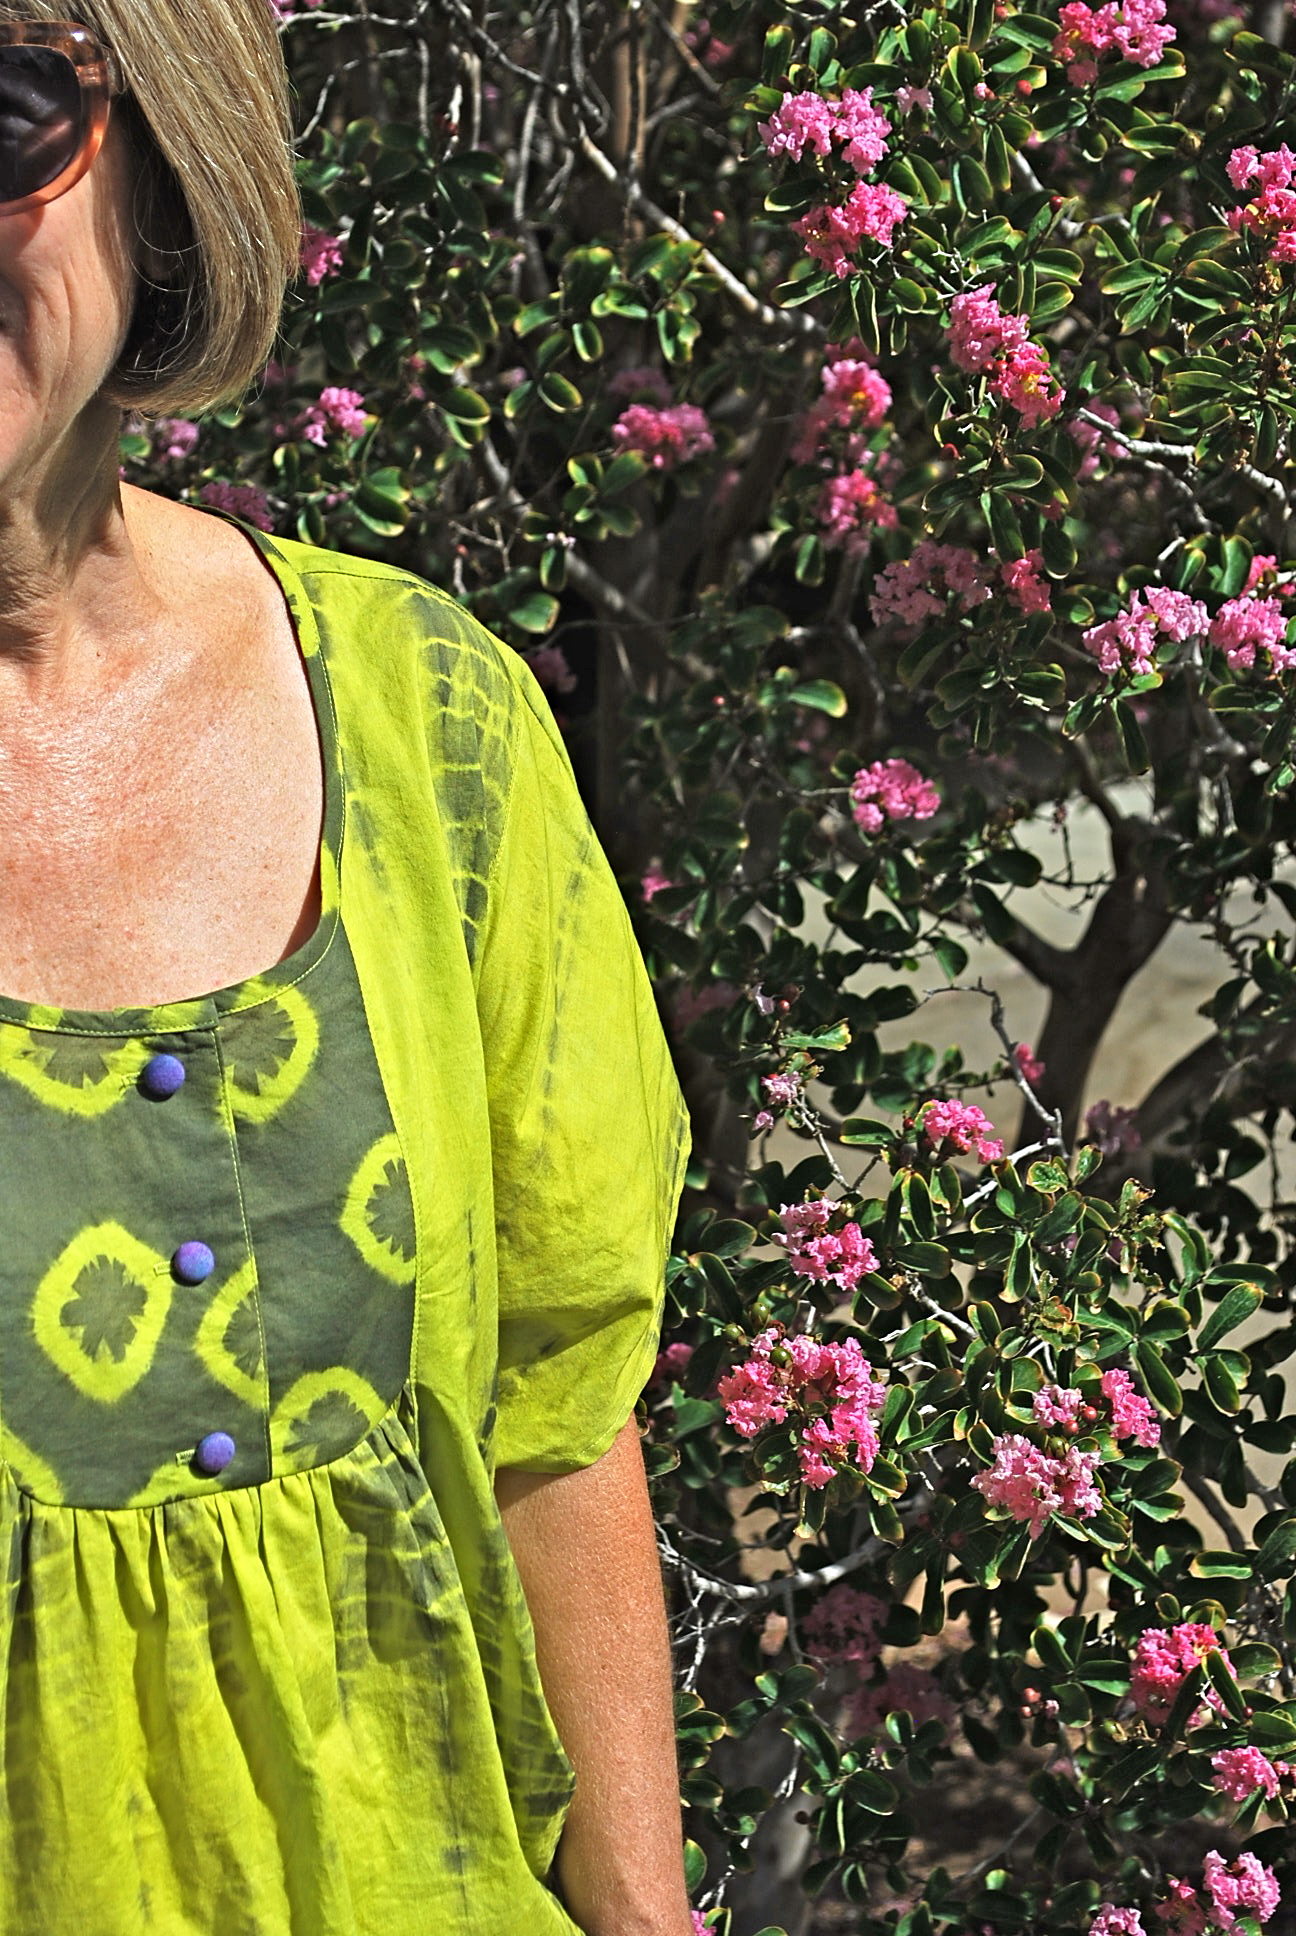
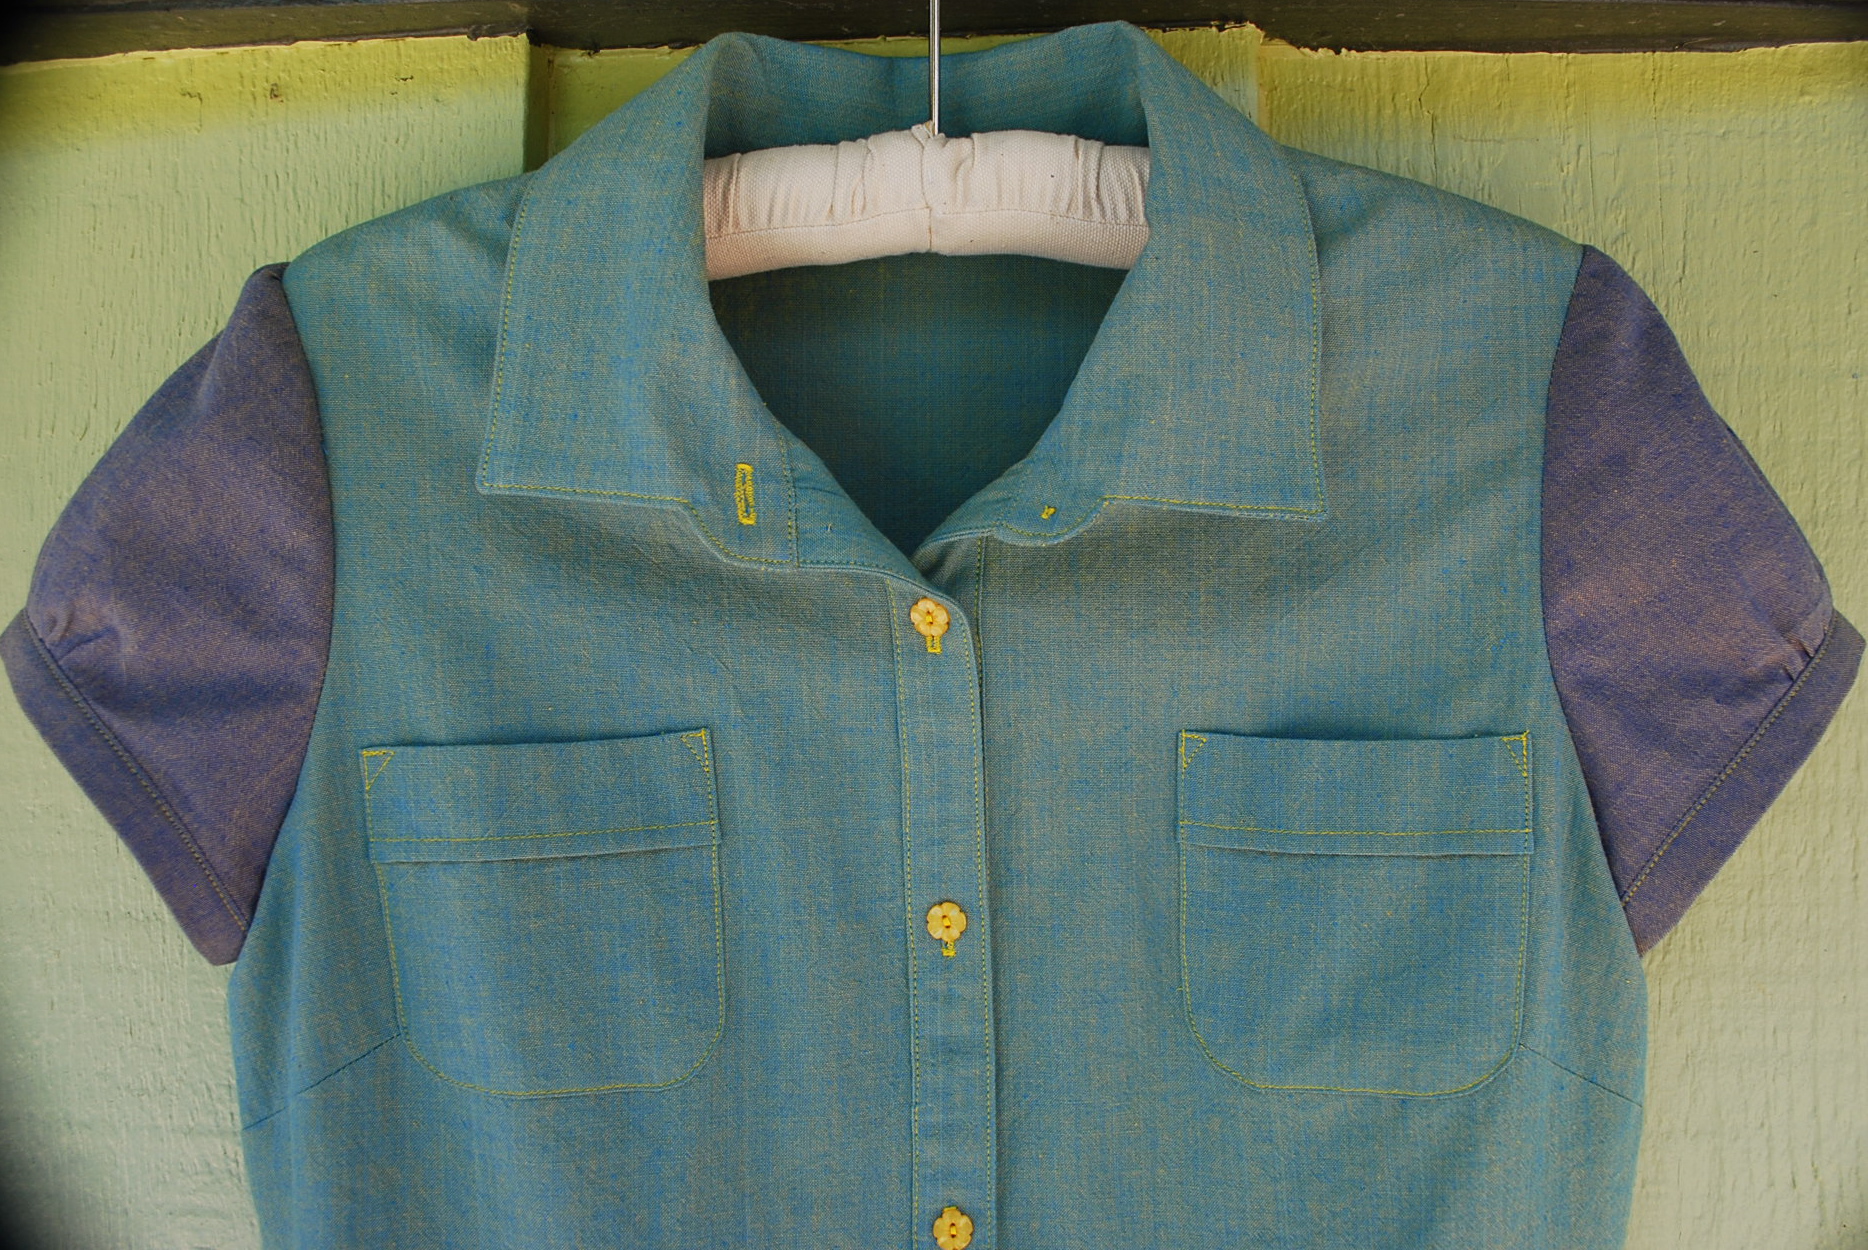
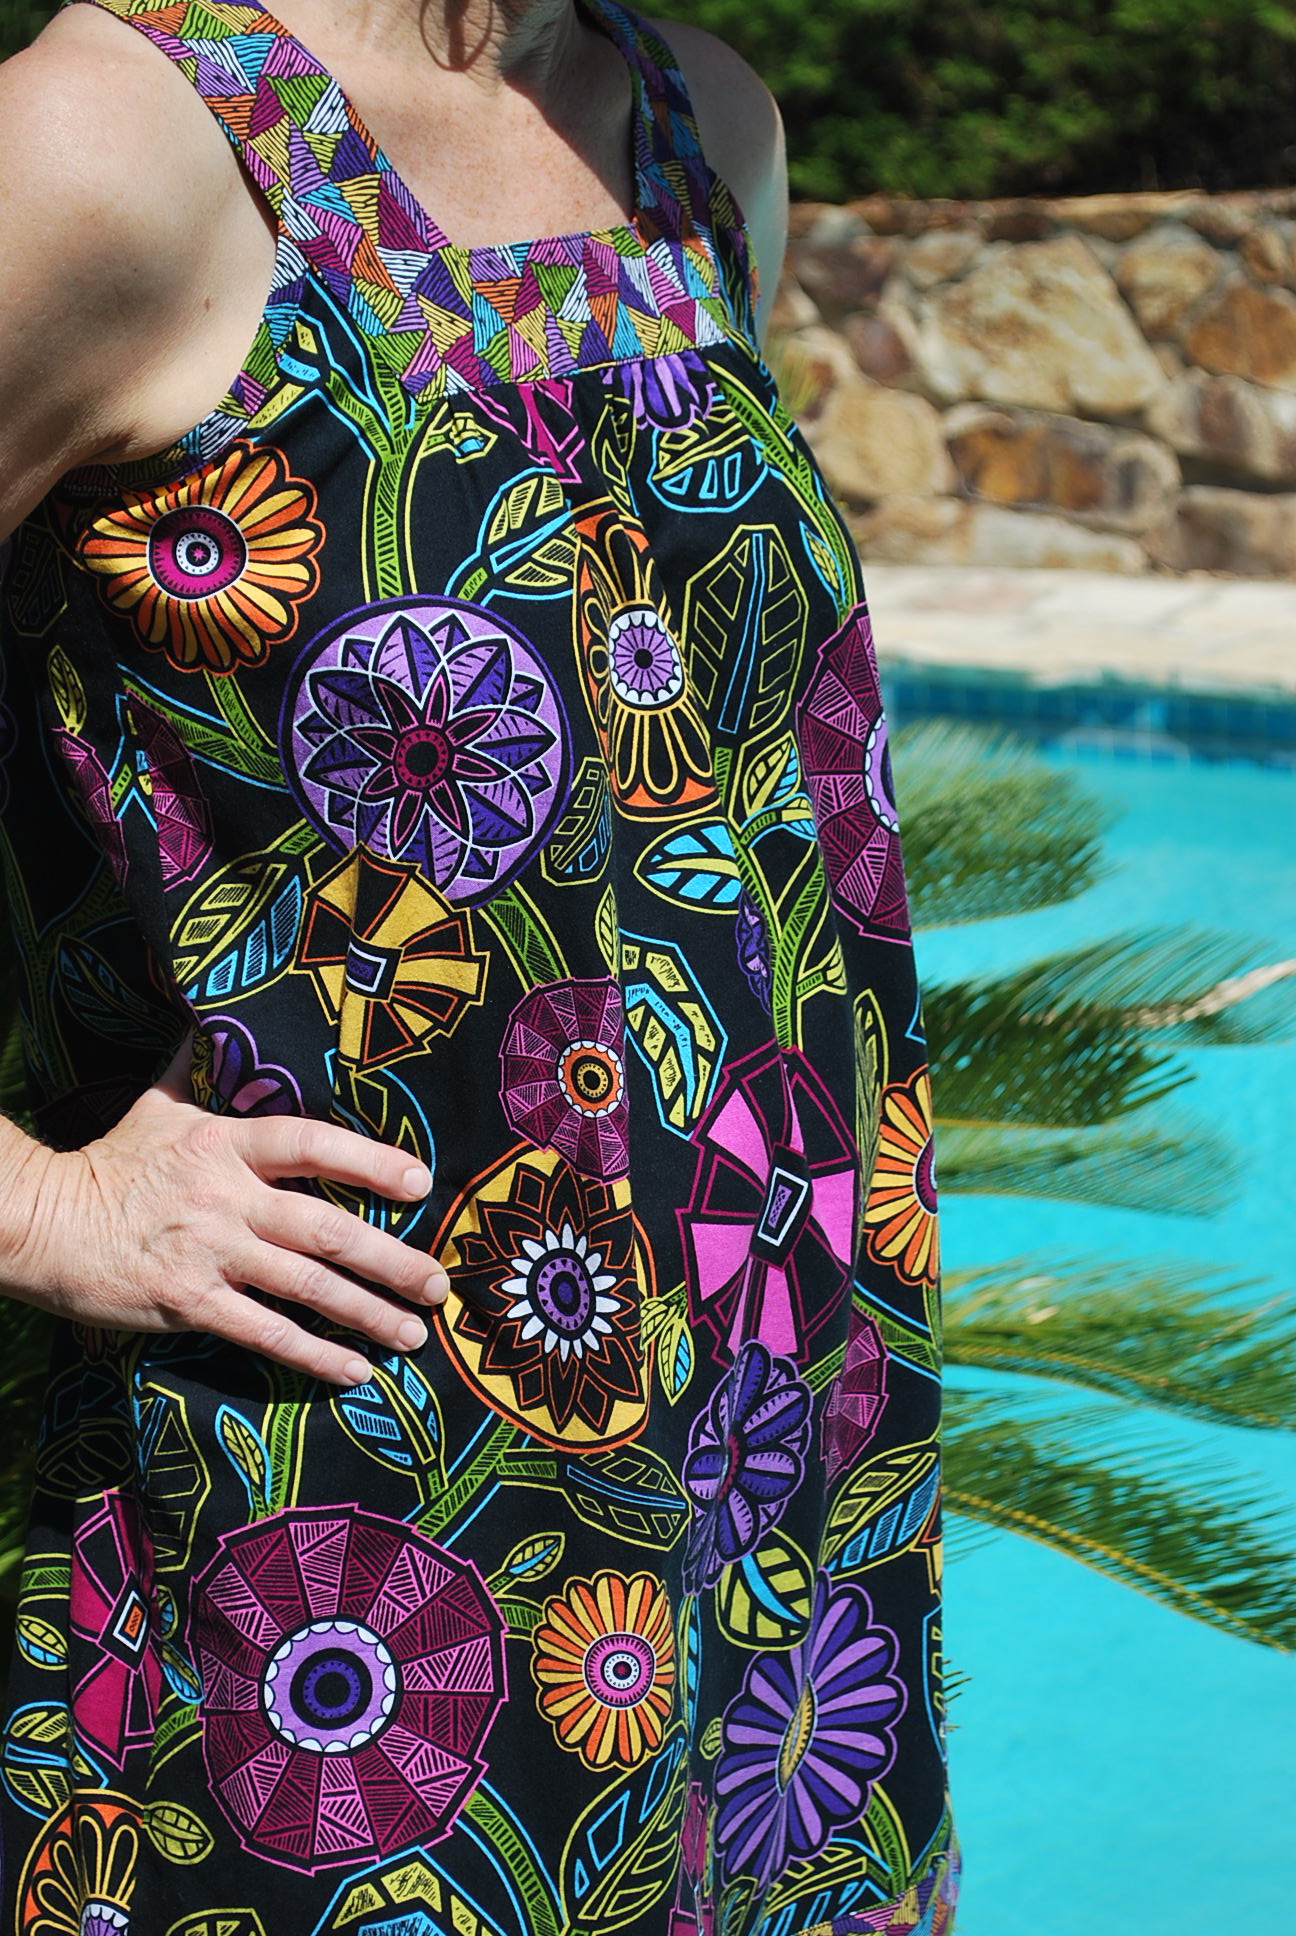
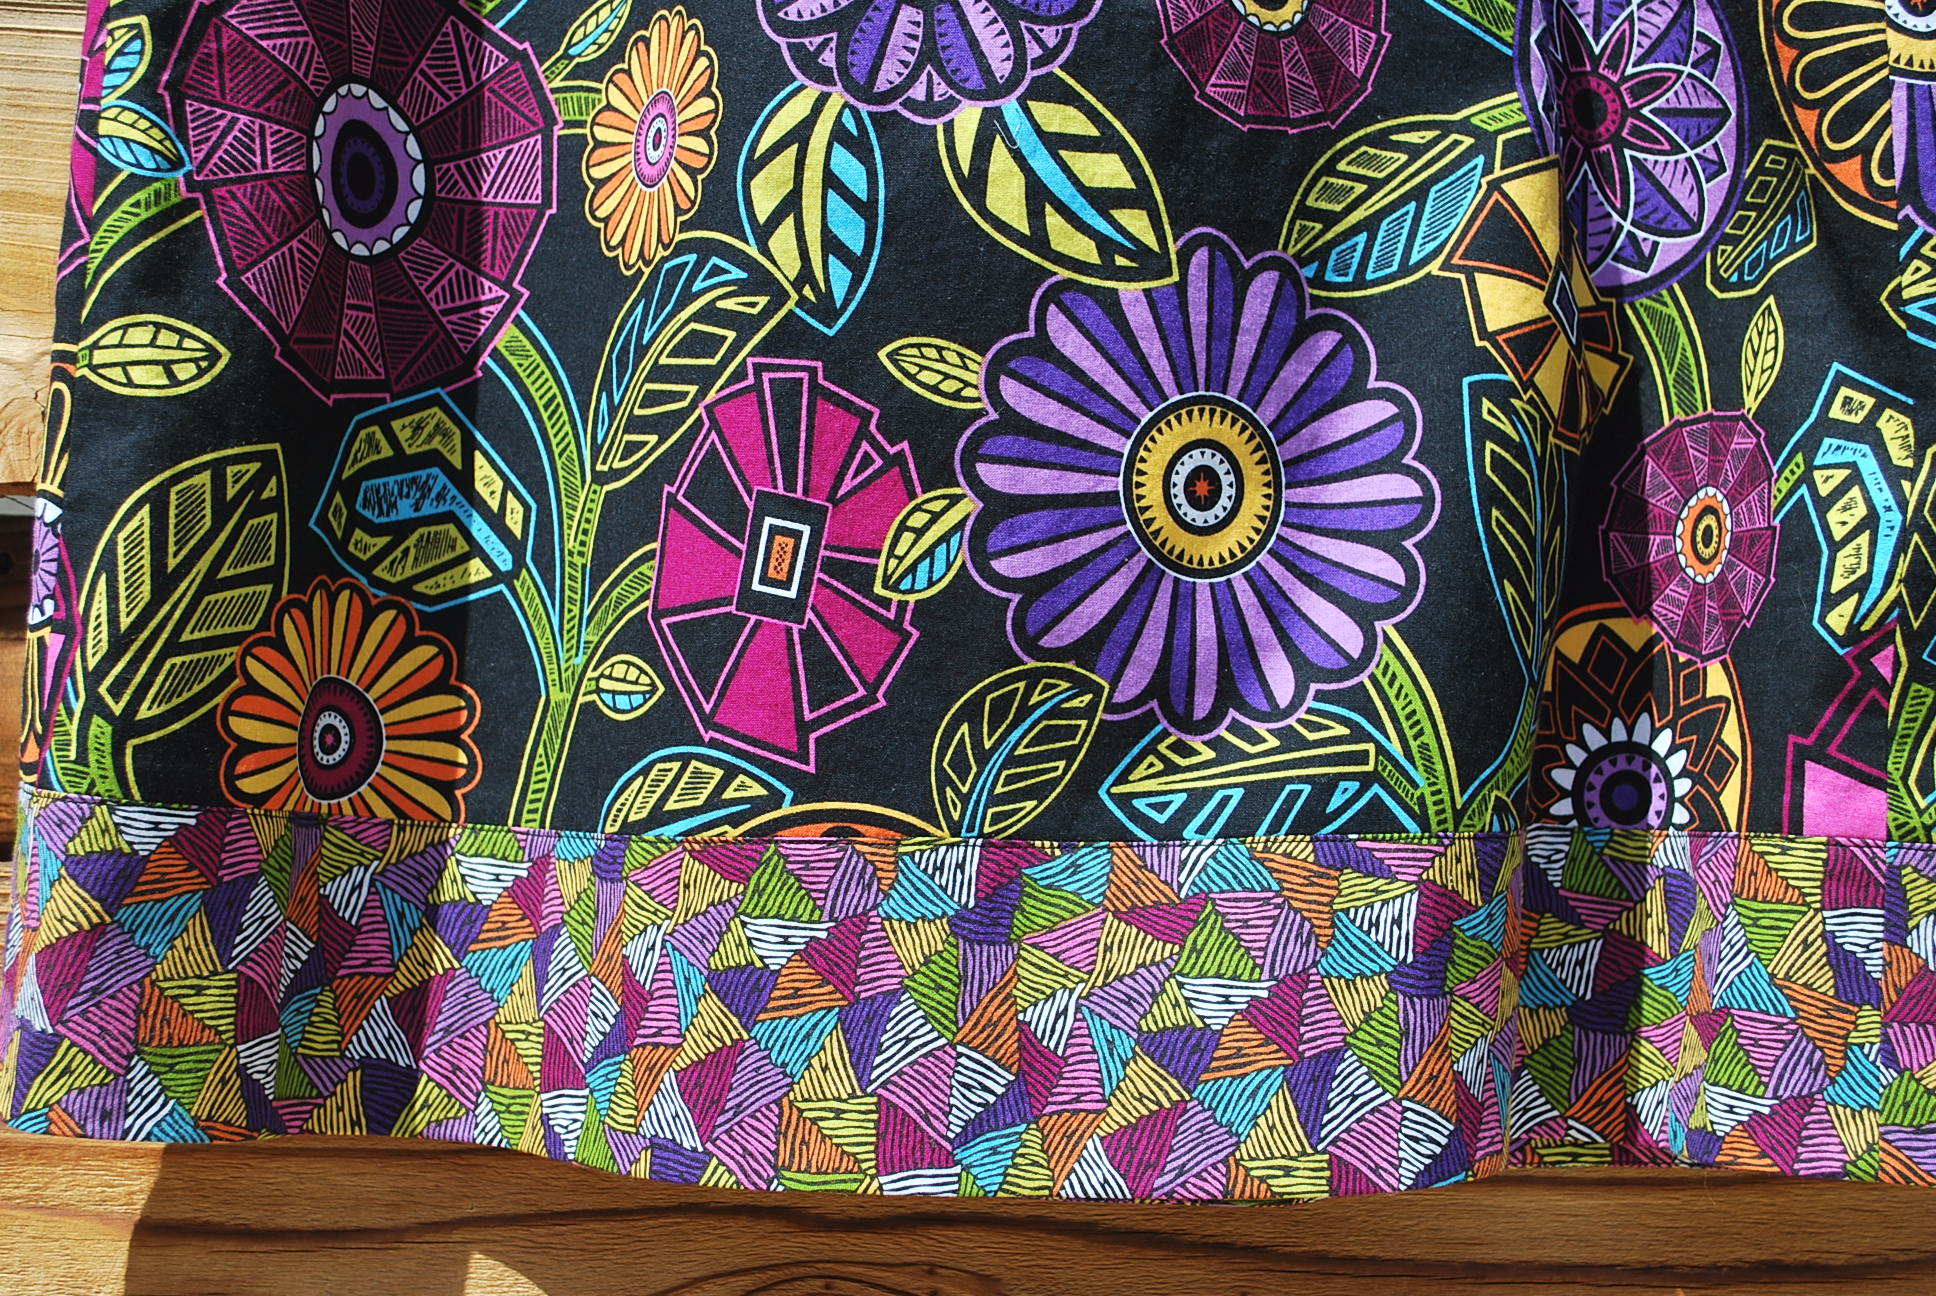
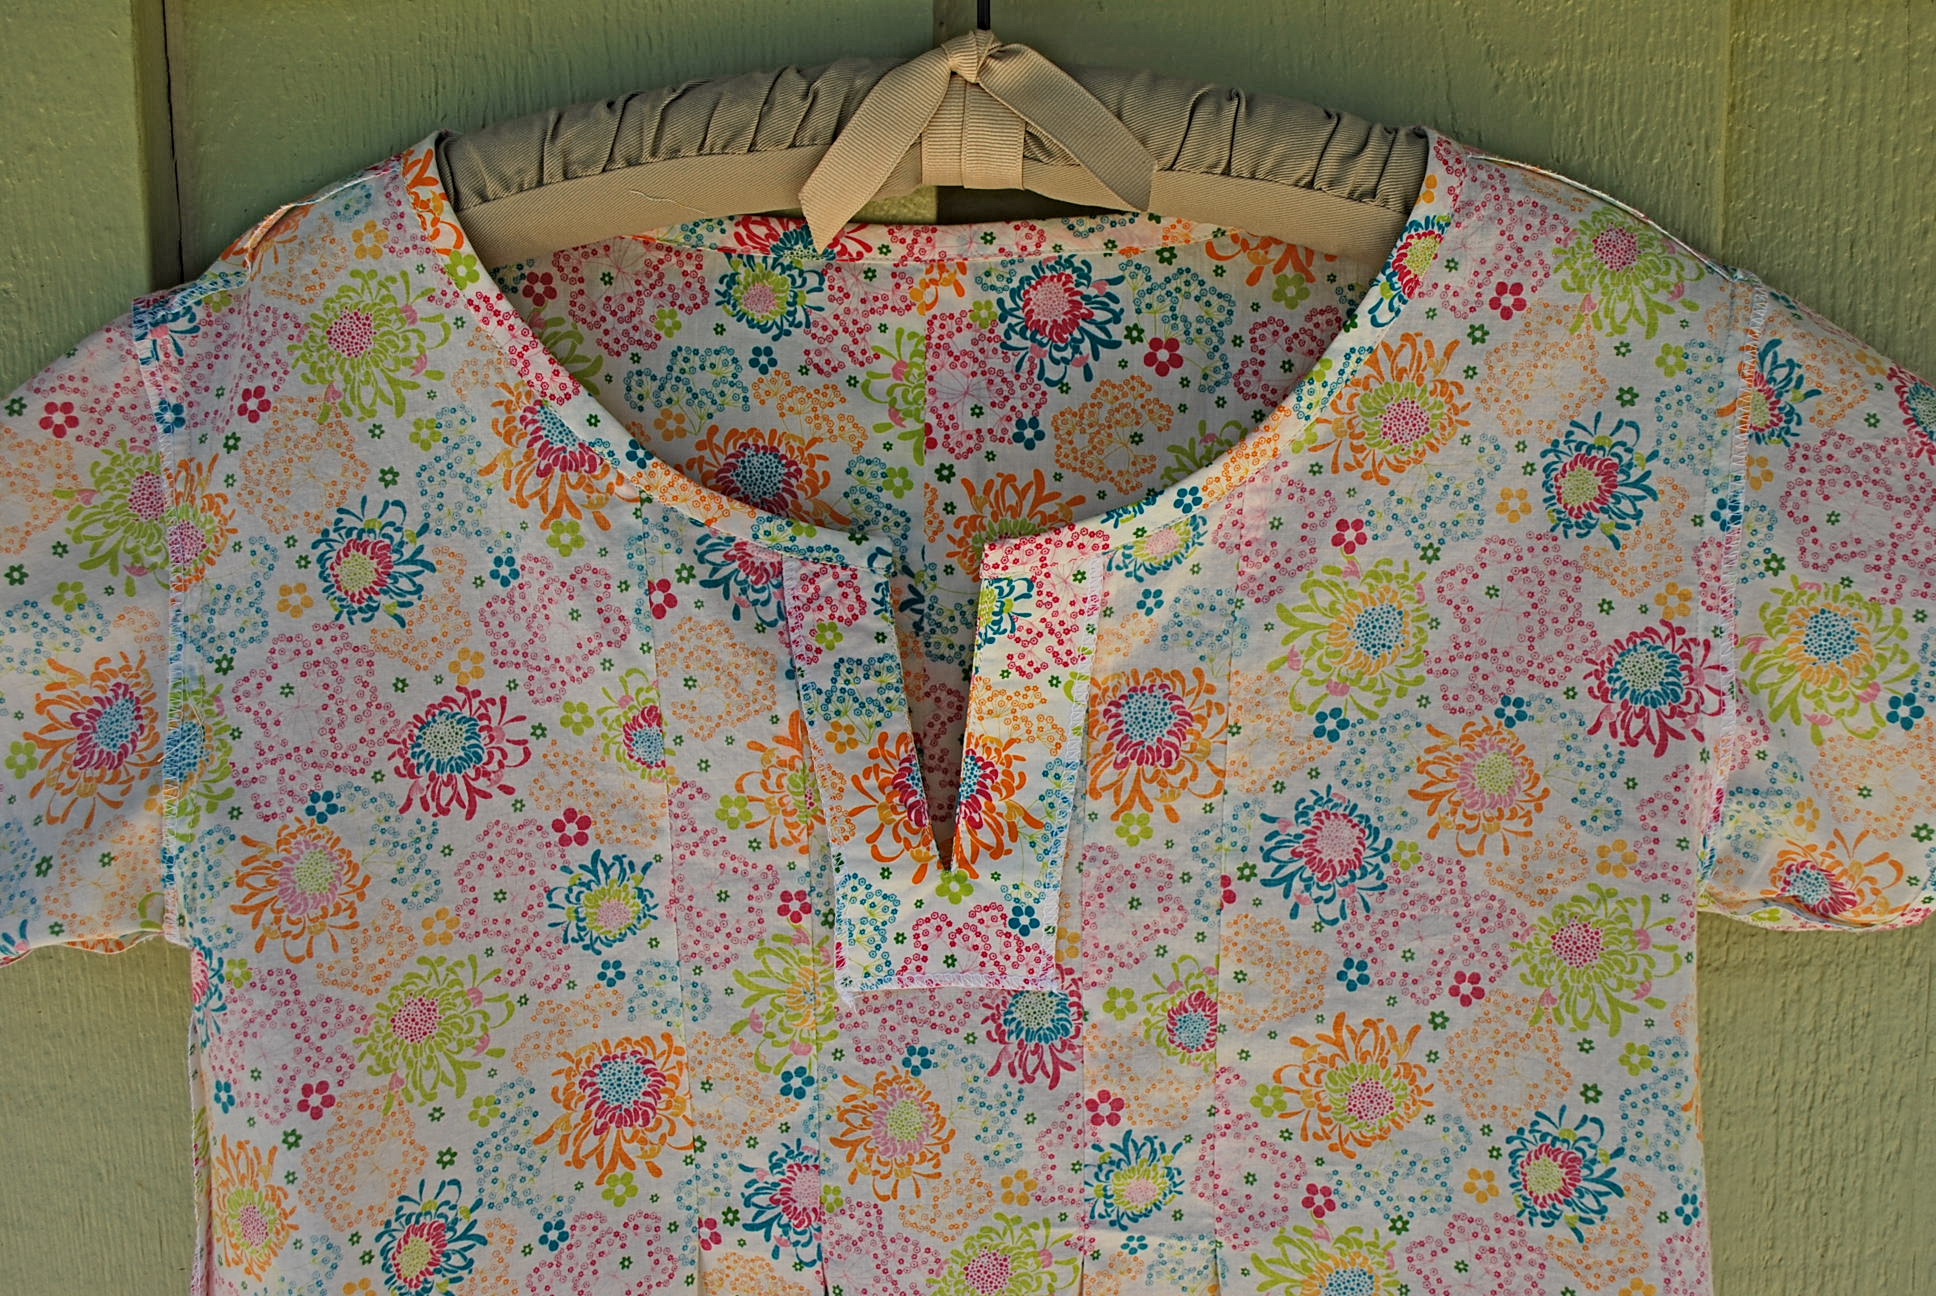
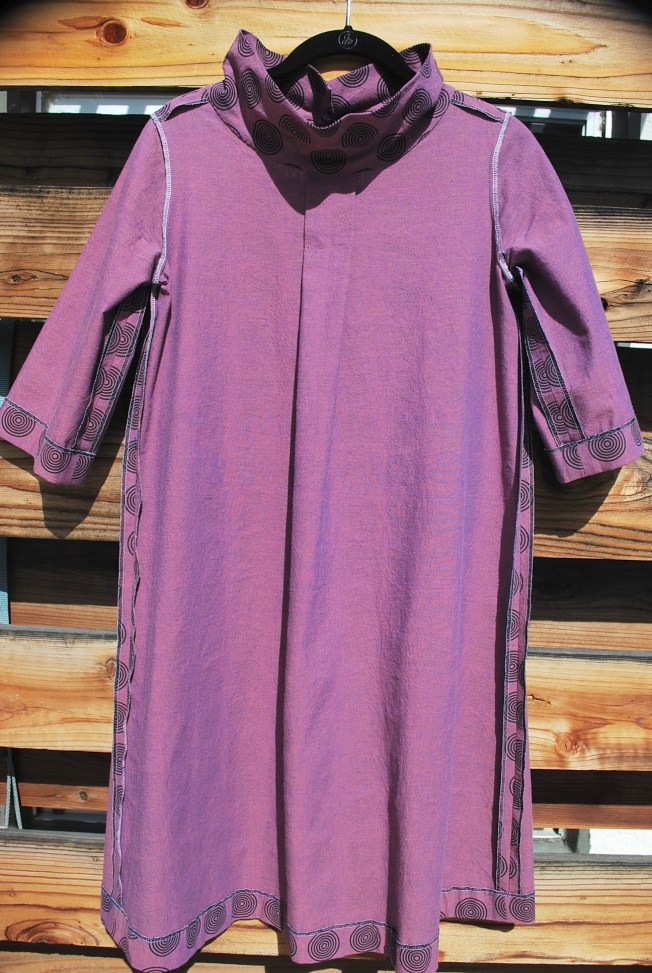
The fabric I used is Geishas and Ginkgos Circles Cotton Mystique by Andover Fabrics. I purchased the fabric from Harts Fabric online store for $12.99 per yard. The dress requires about 3 yards. I love this fabric. It’s a two tone chambray printed with the circles.

fullsizeoutput_45a

fullsizeoutput_45b

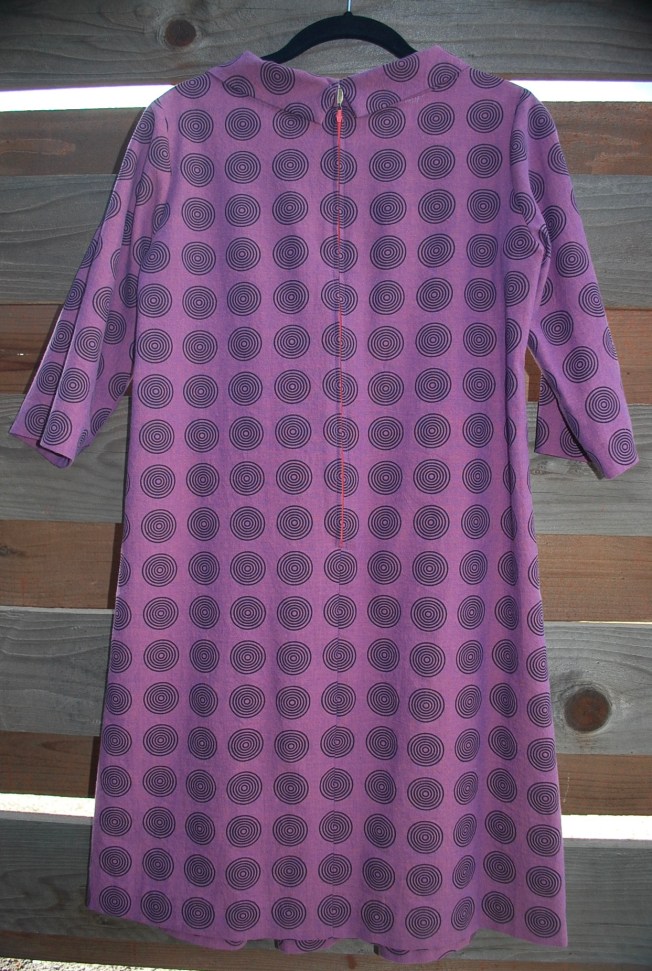
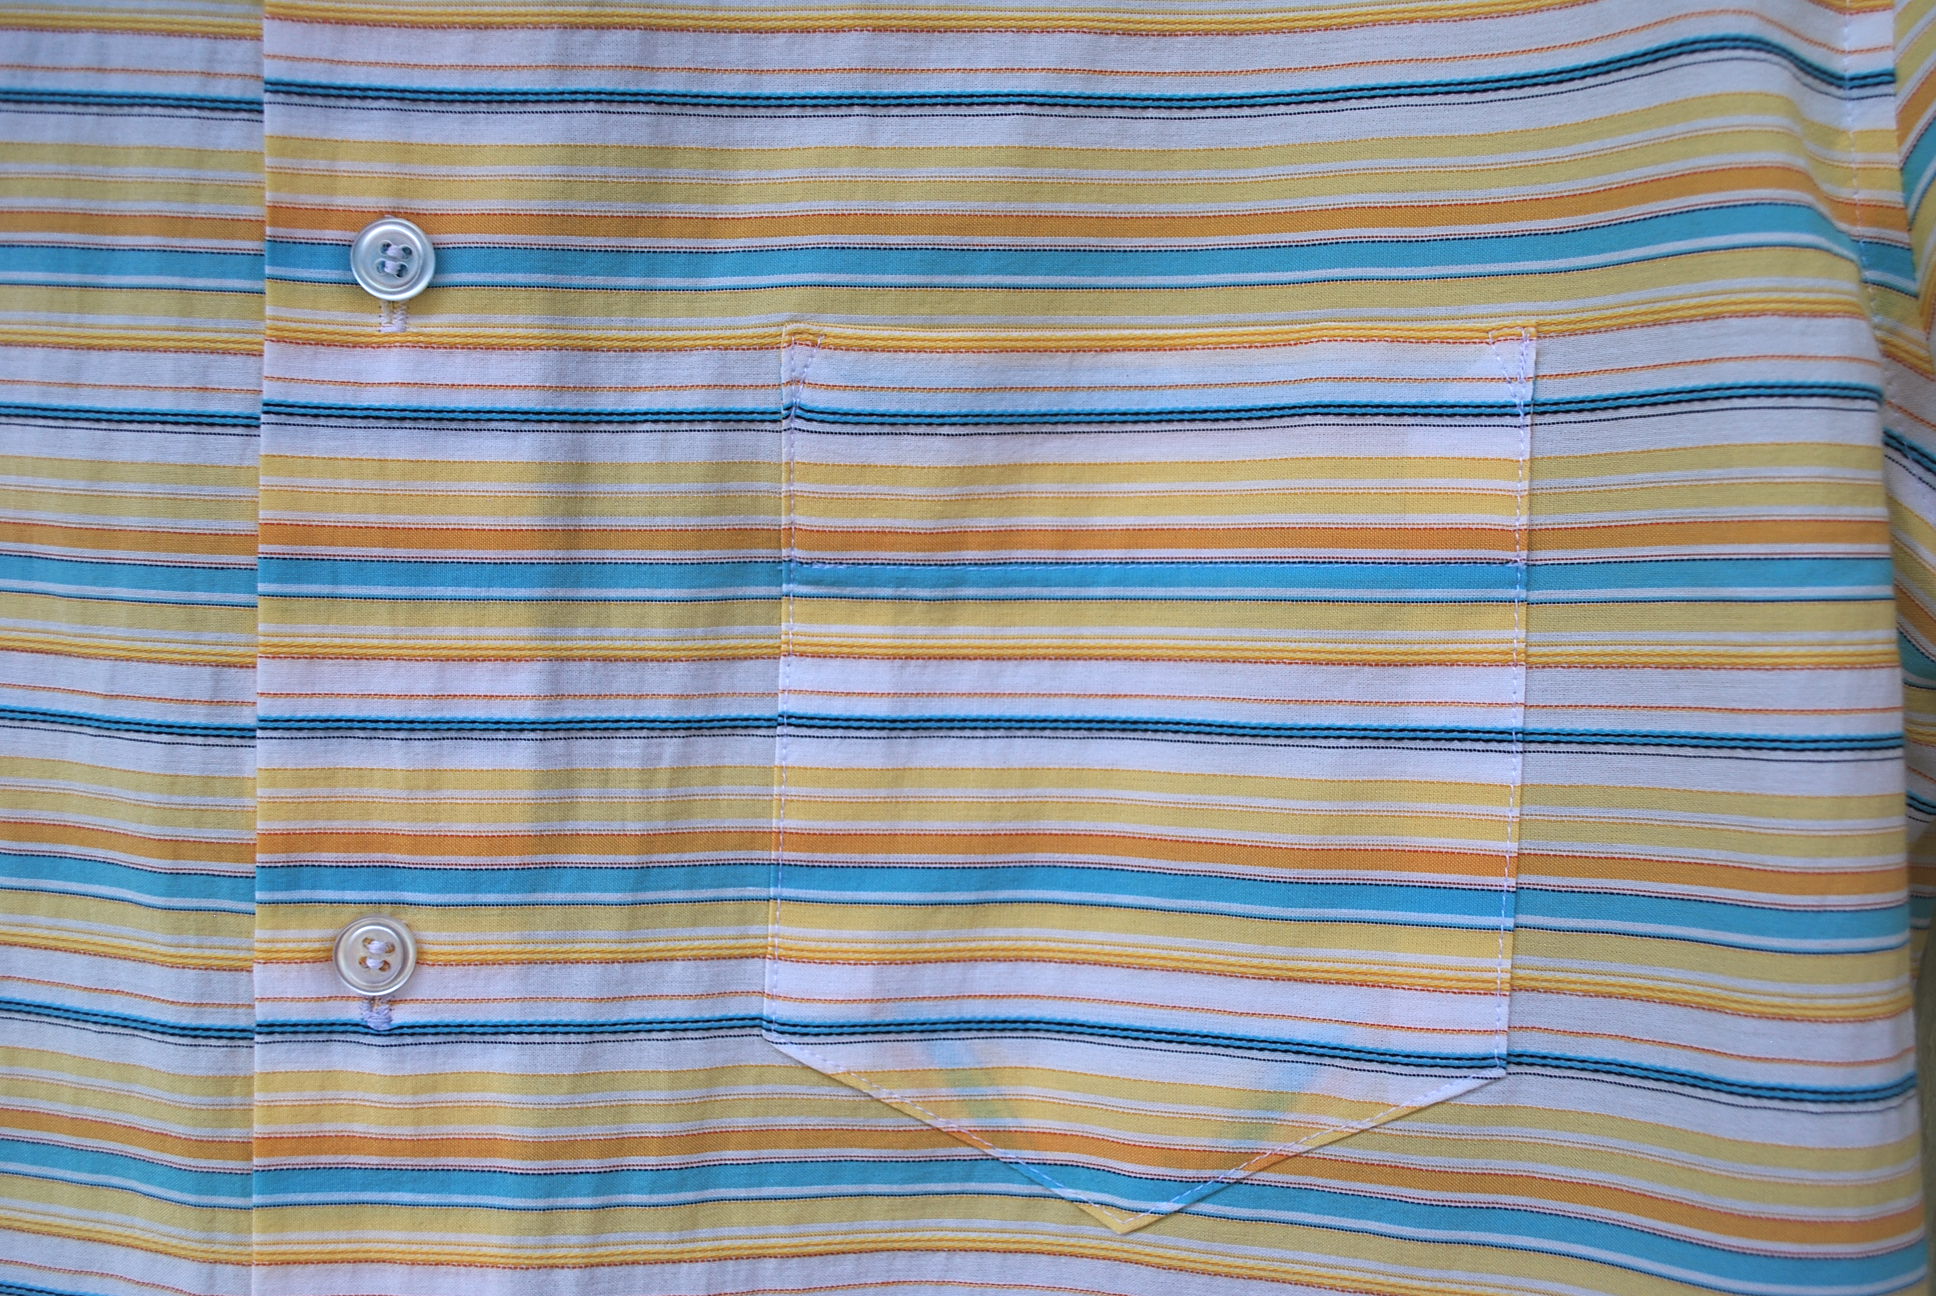
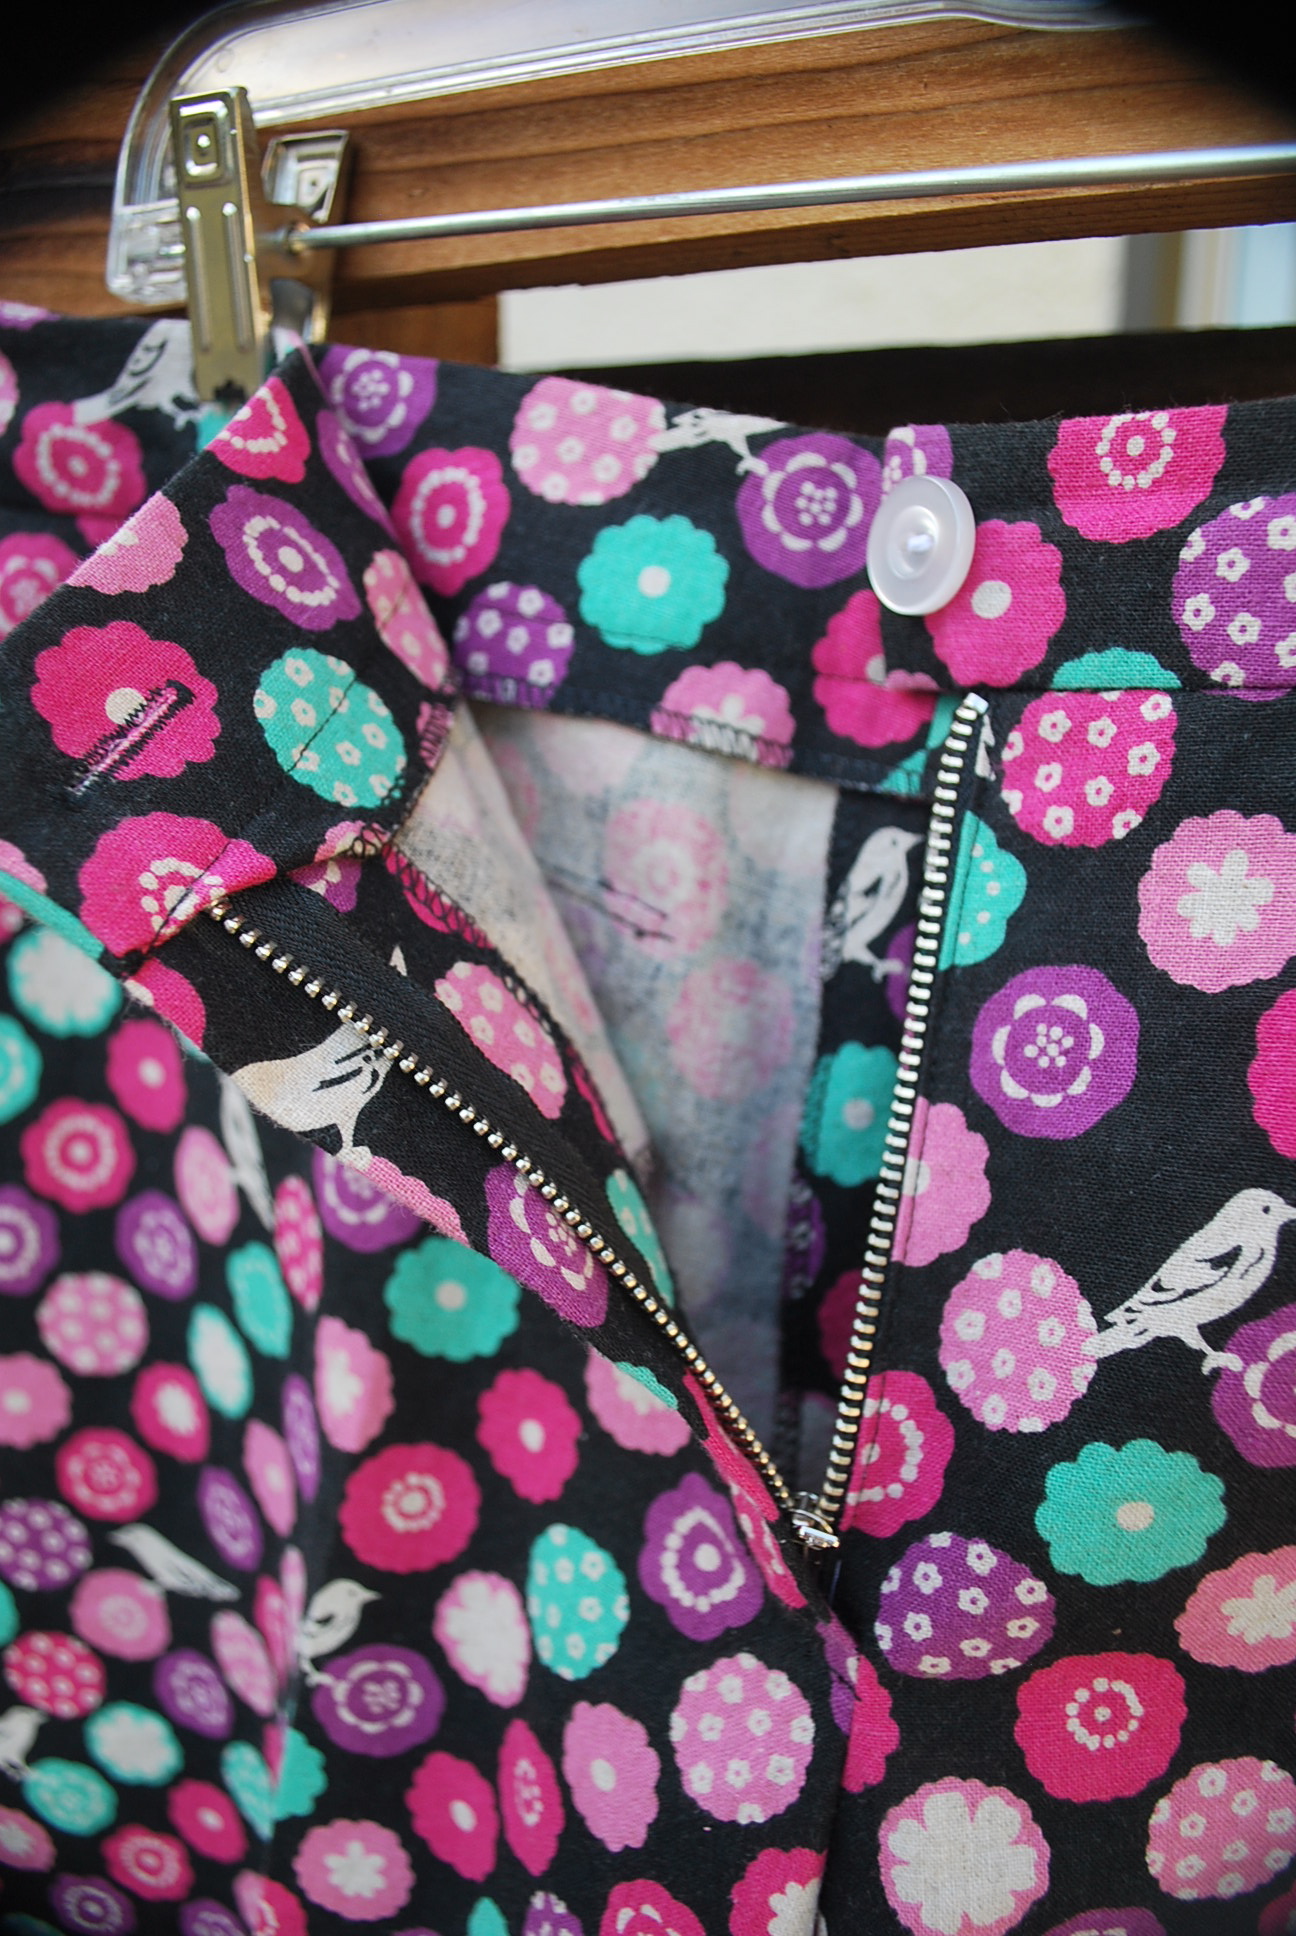
The instructions showed an invisible zipper. I choose to do a regular one in a contrasting color, just for fun. 

fullsizeoutput_45c

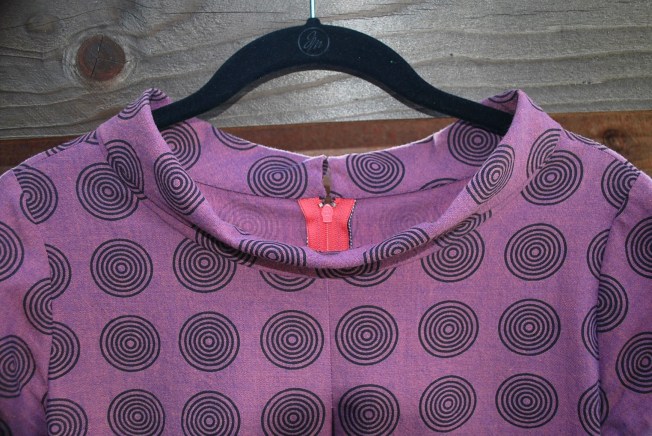
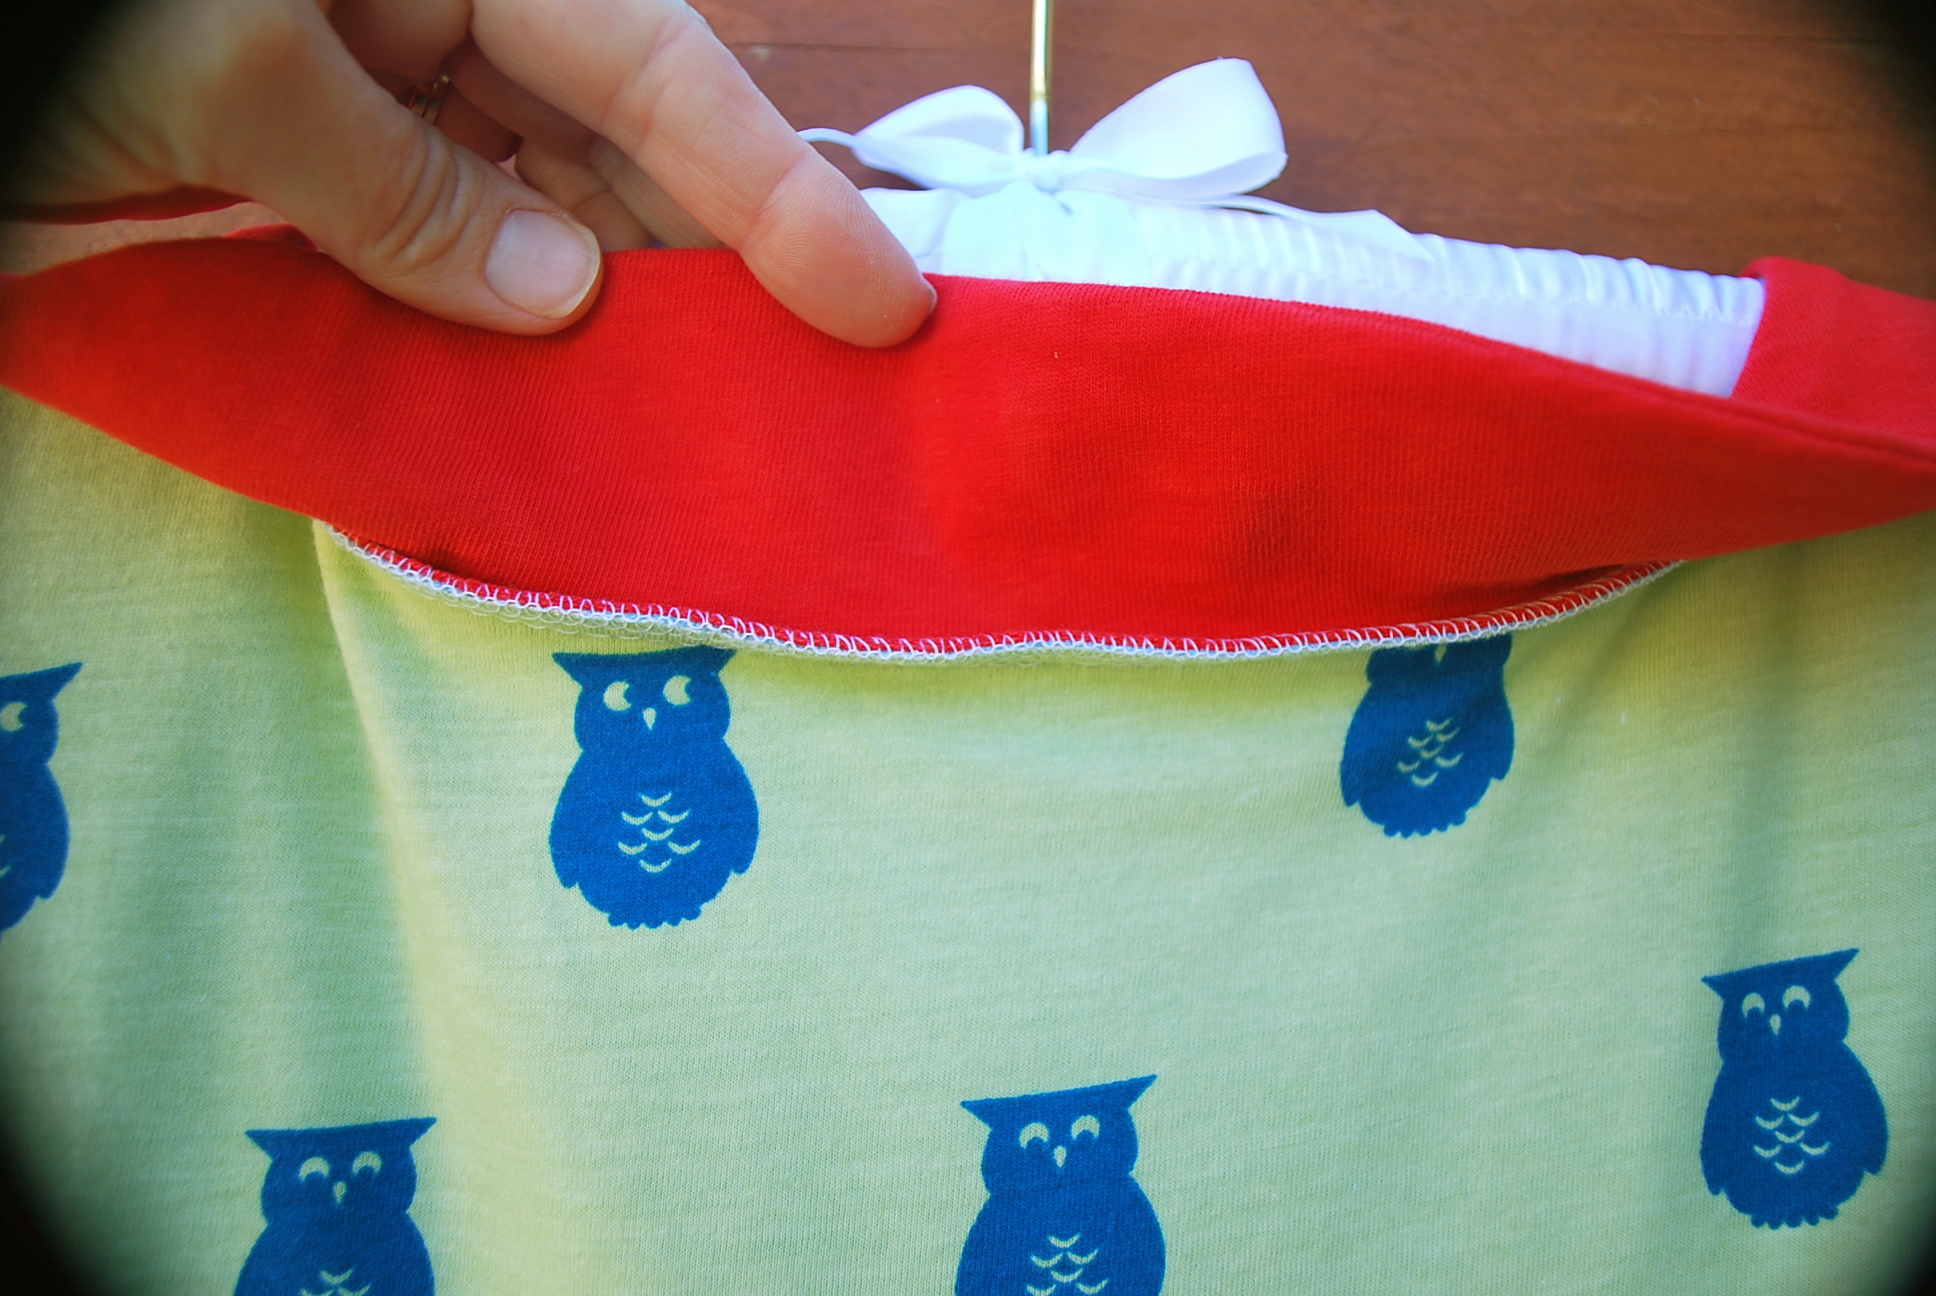
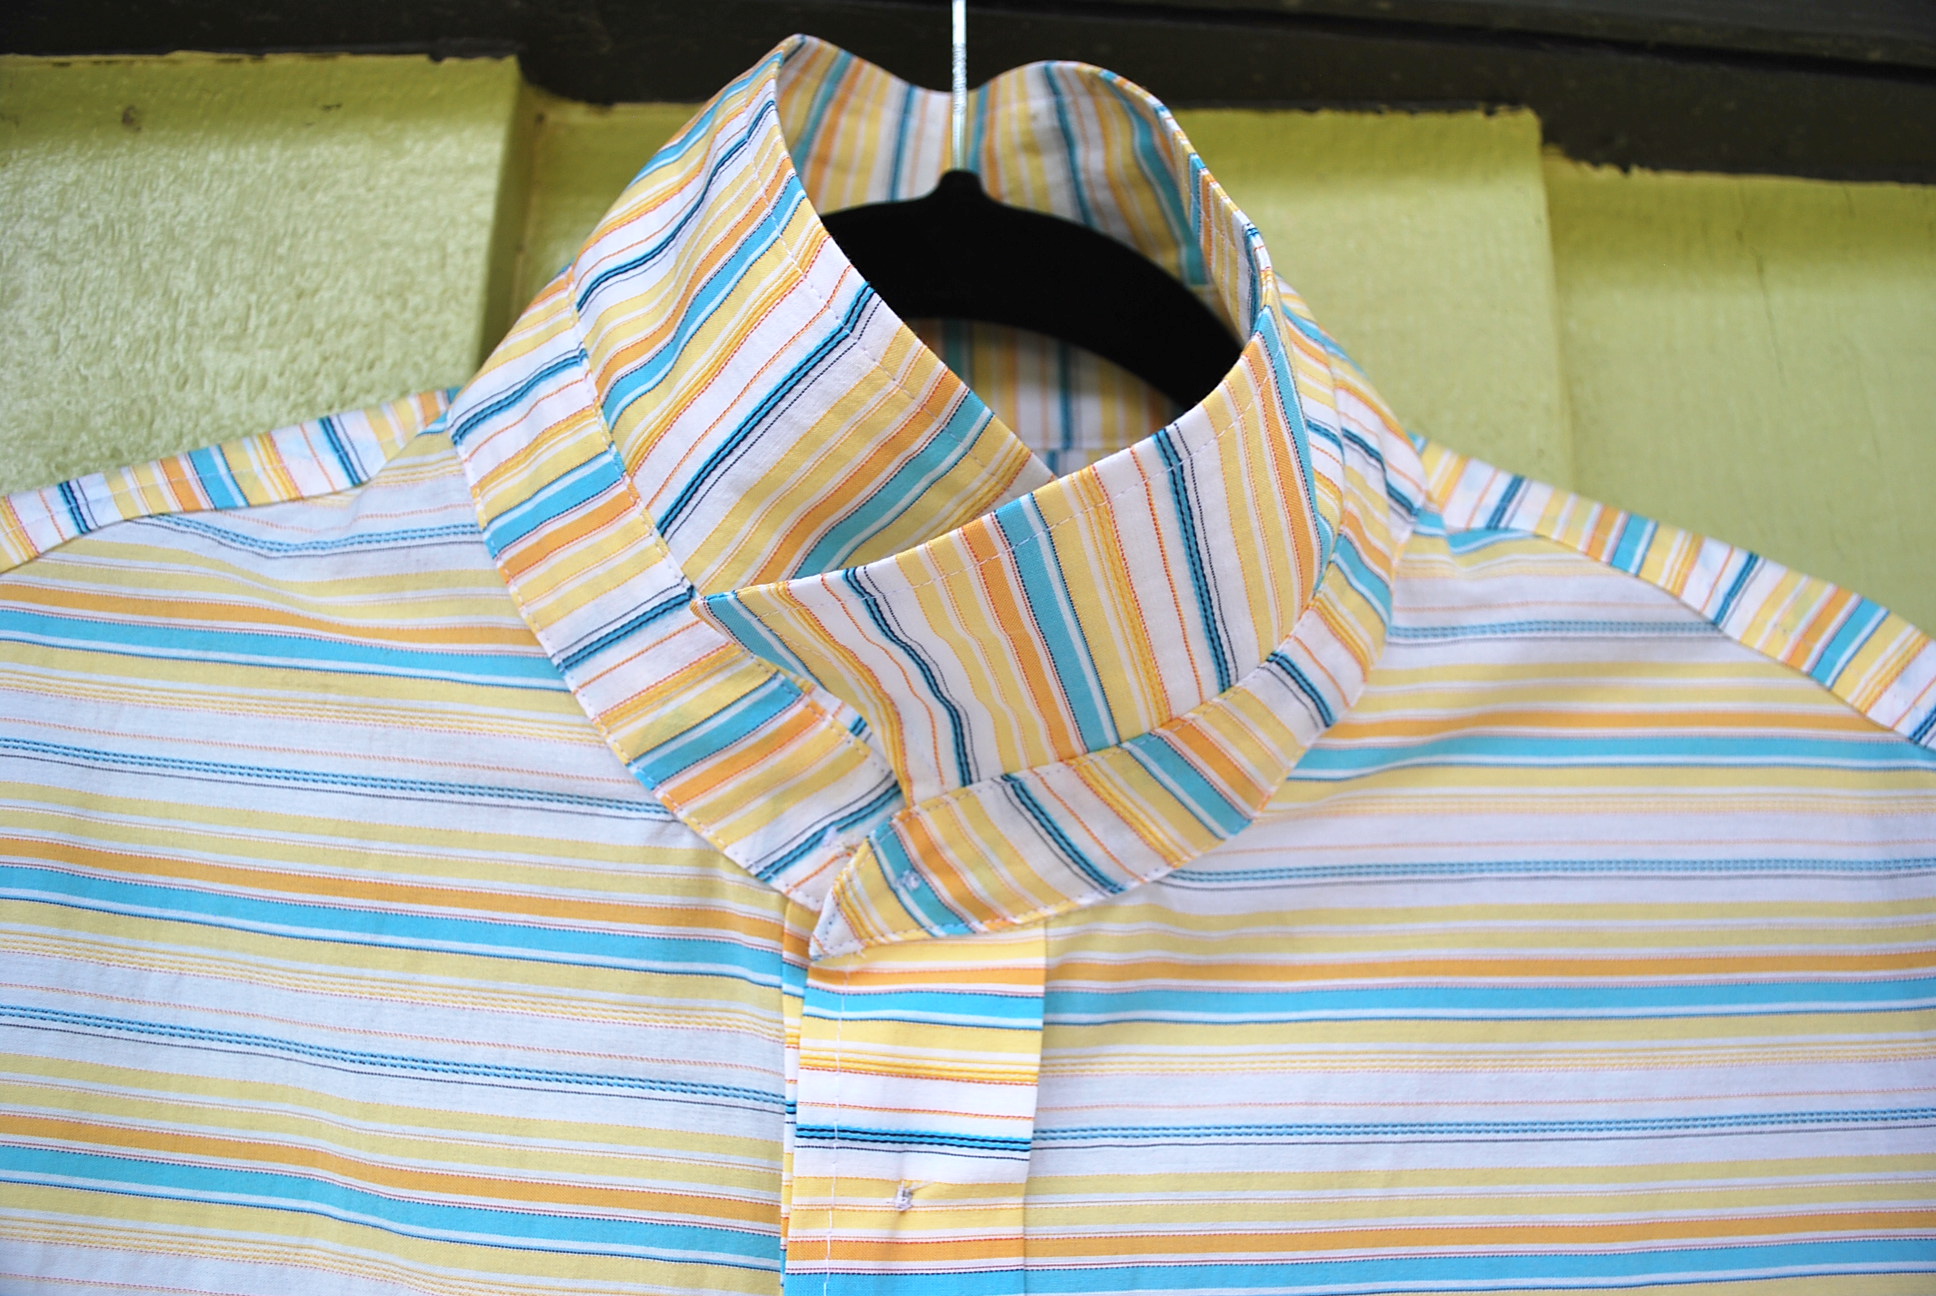
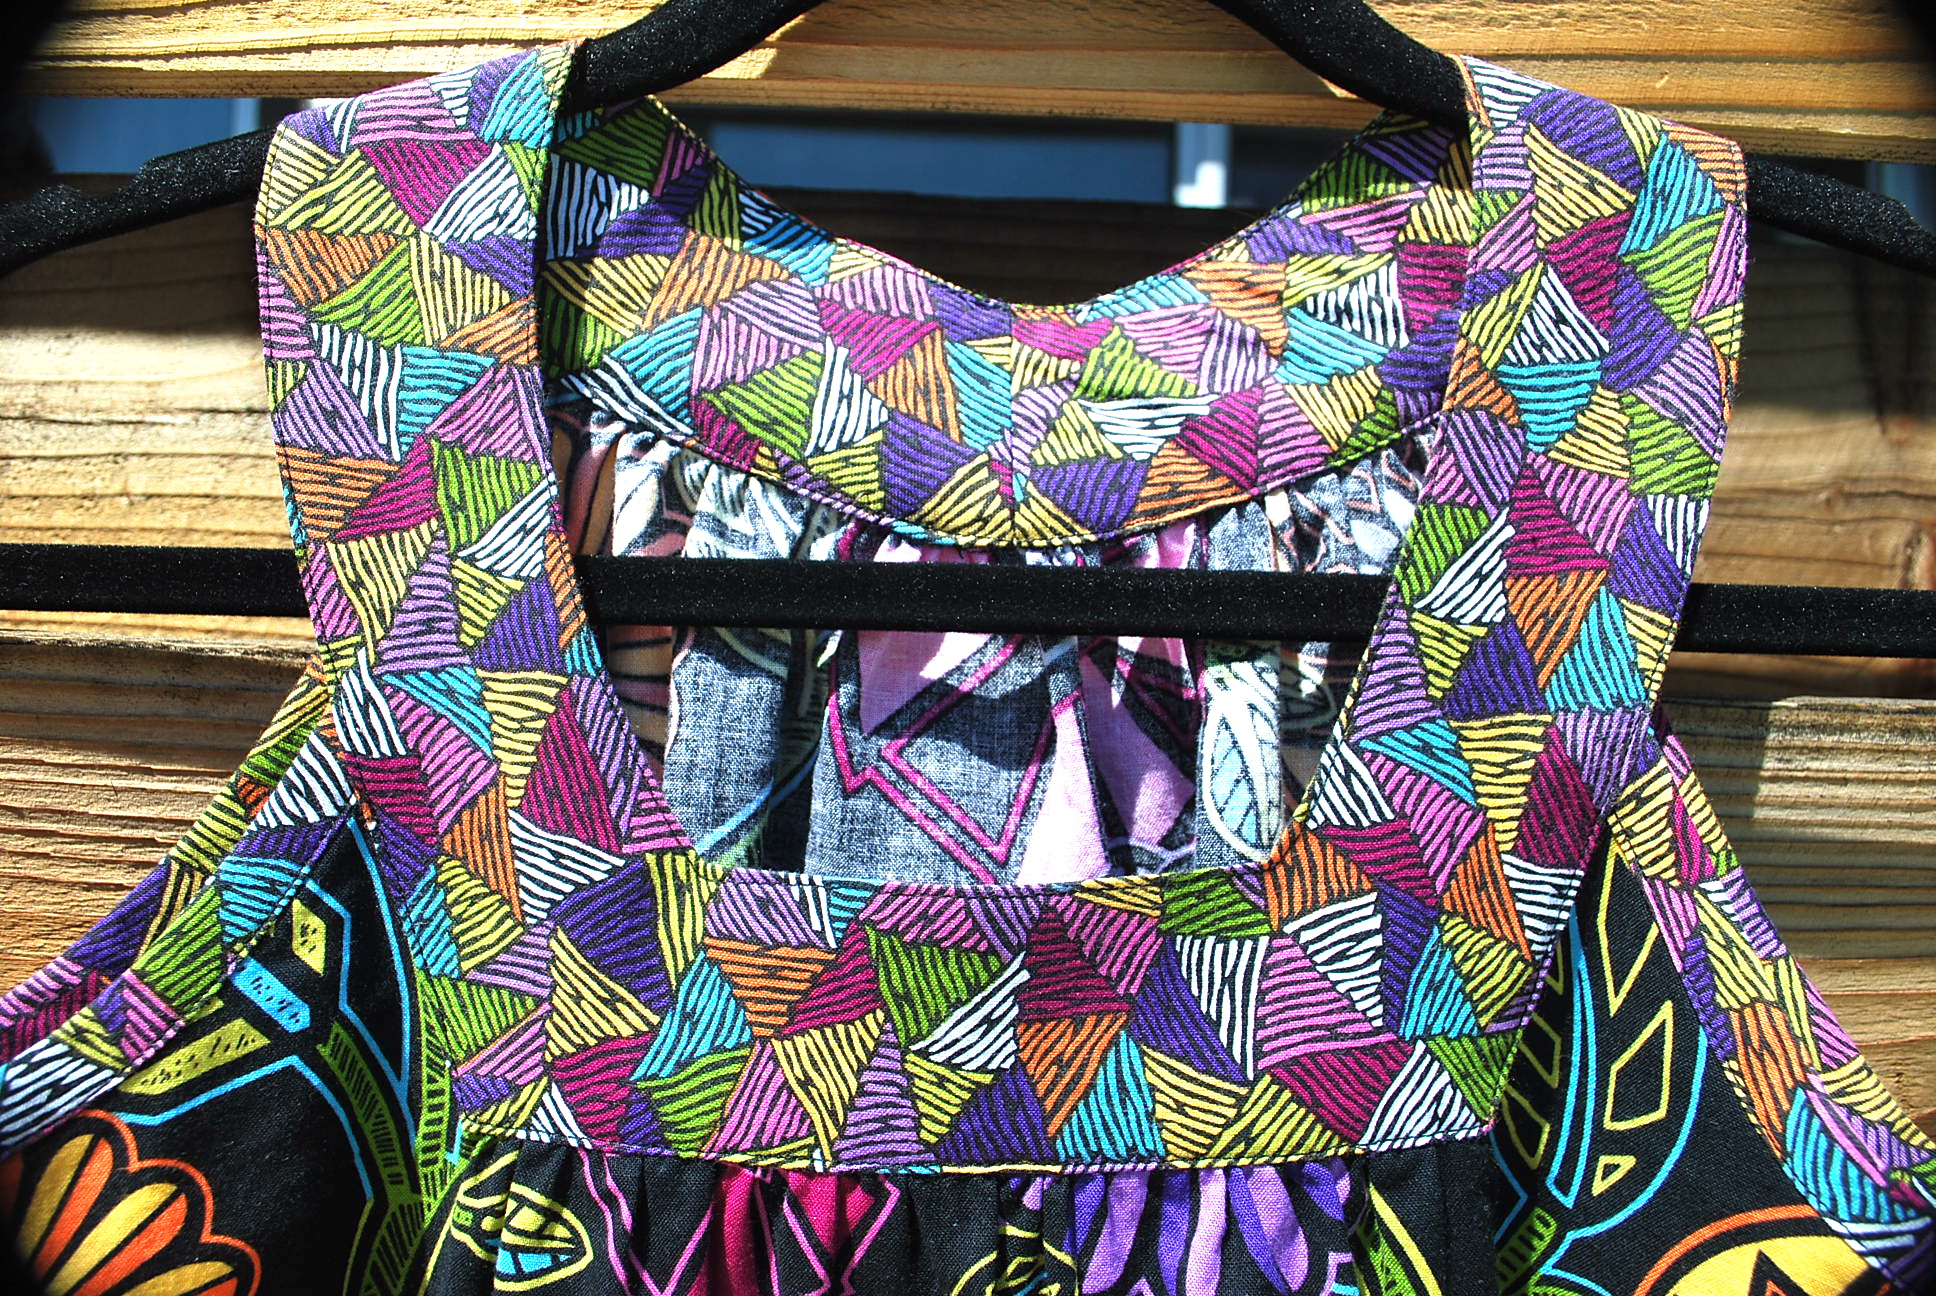
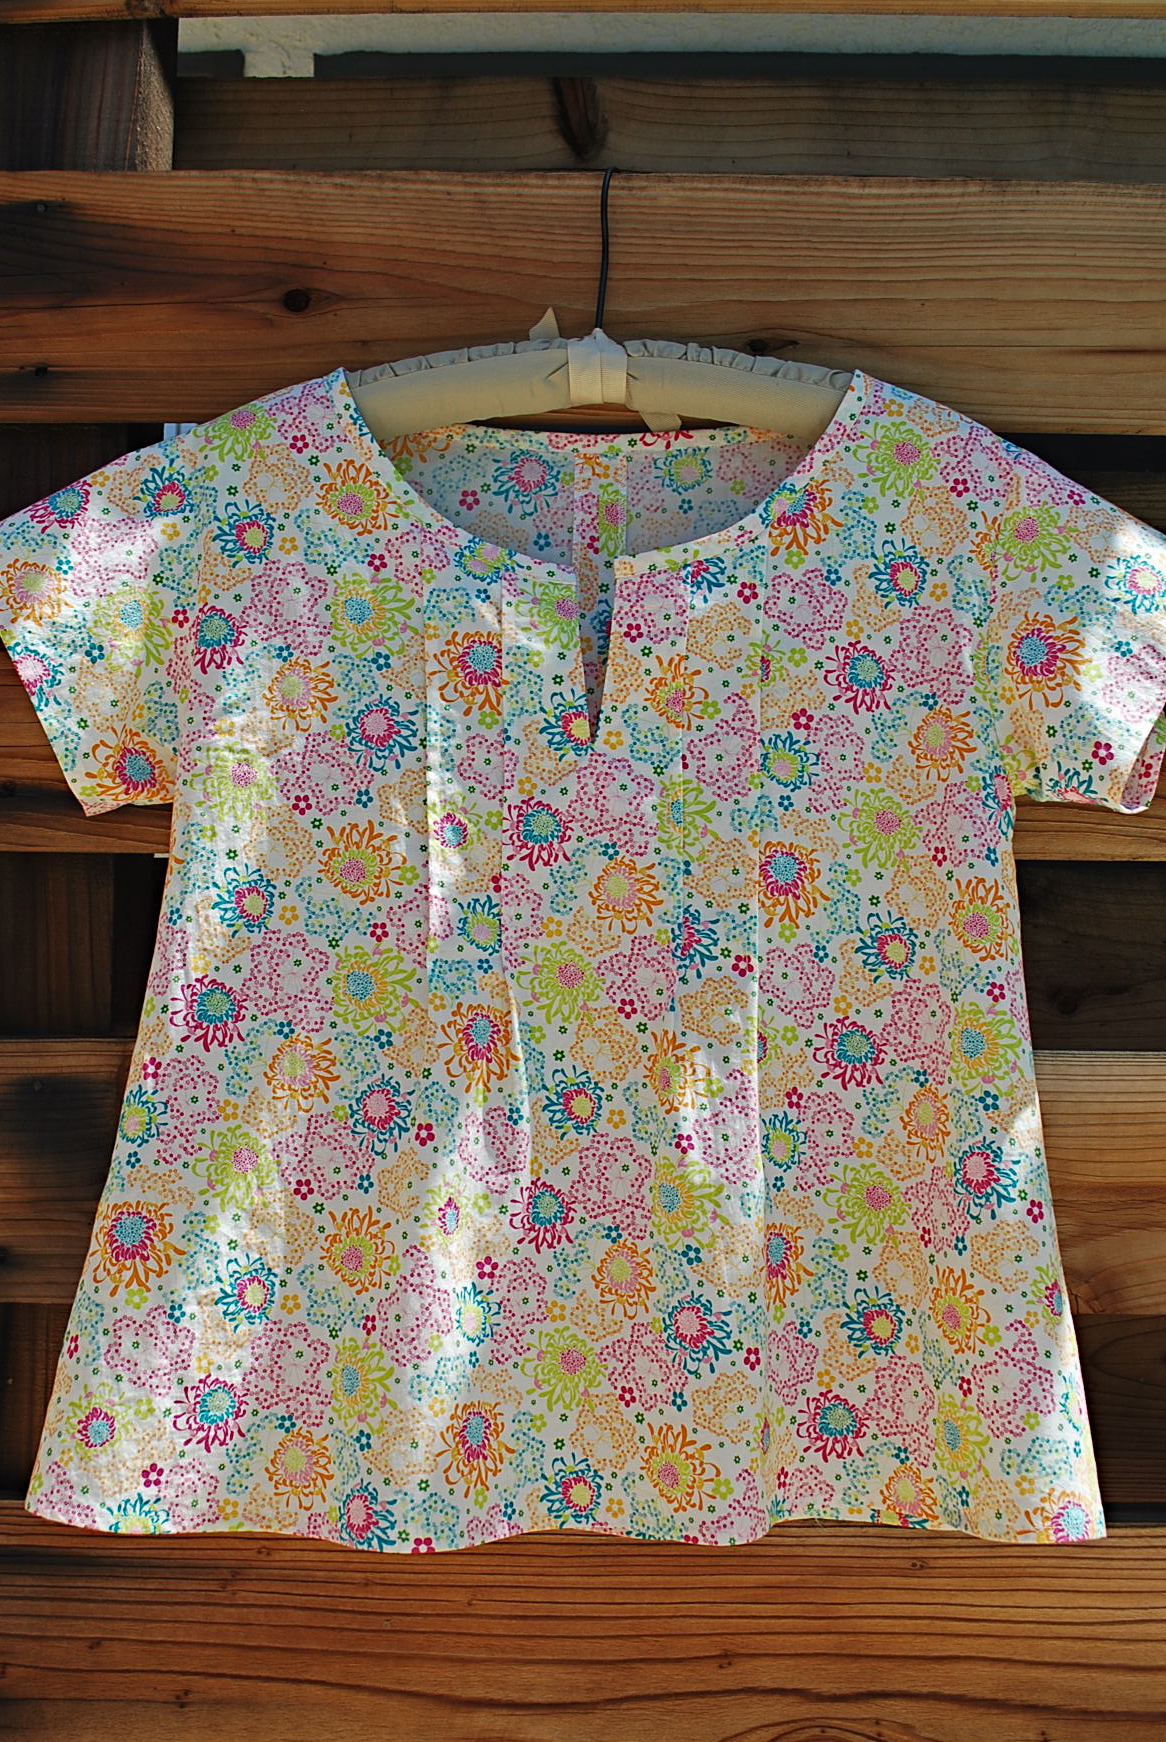
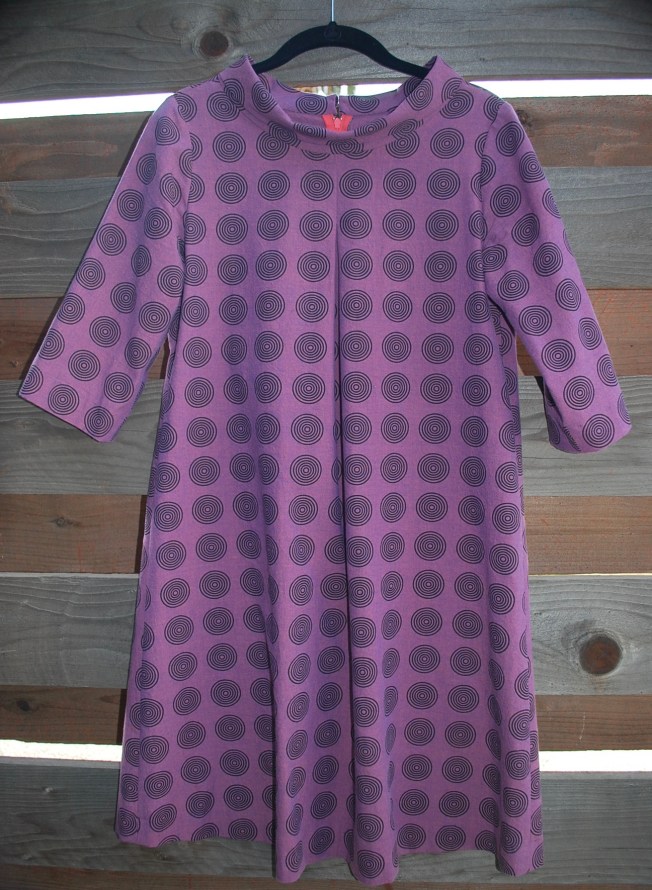
The collar is cut on the bias and folded down.

DSC_0772.JPG

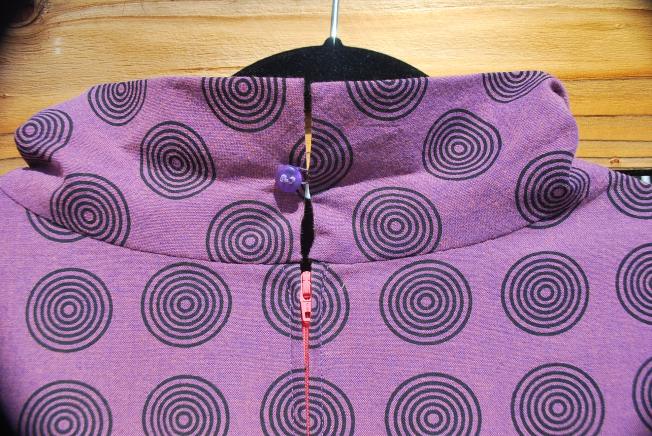
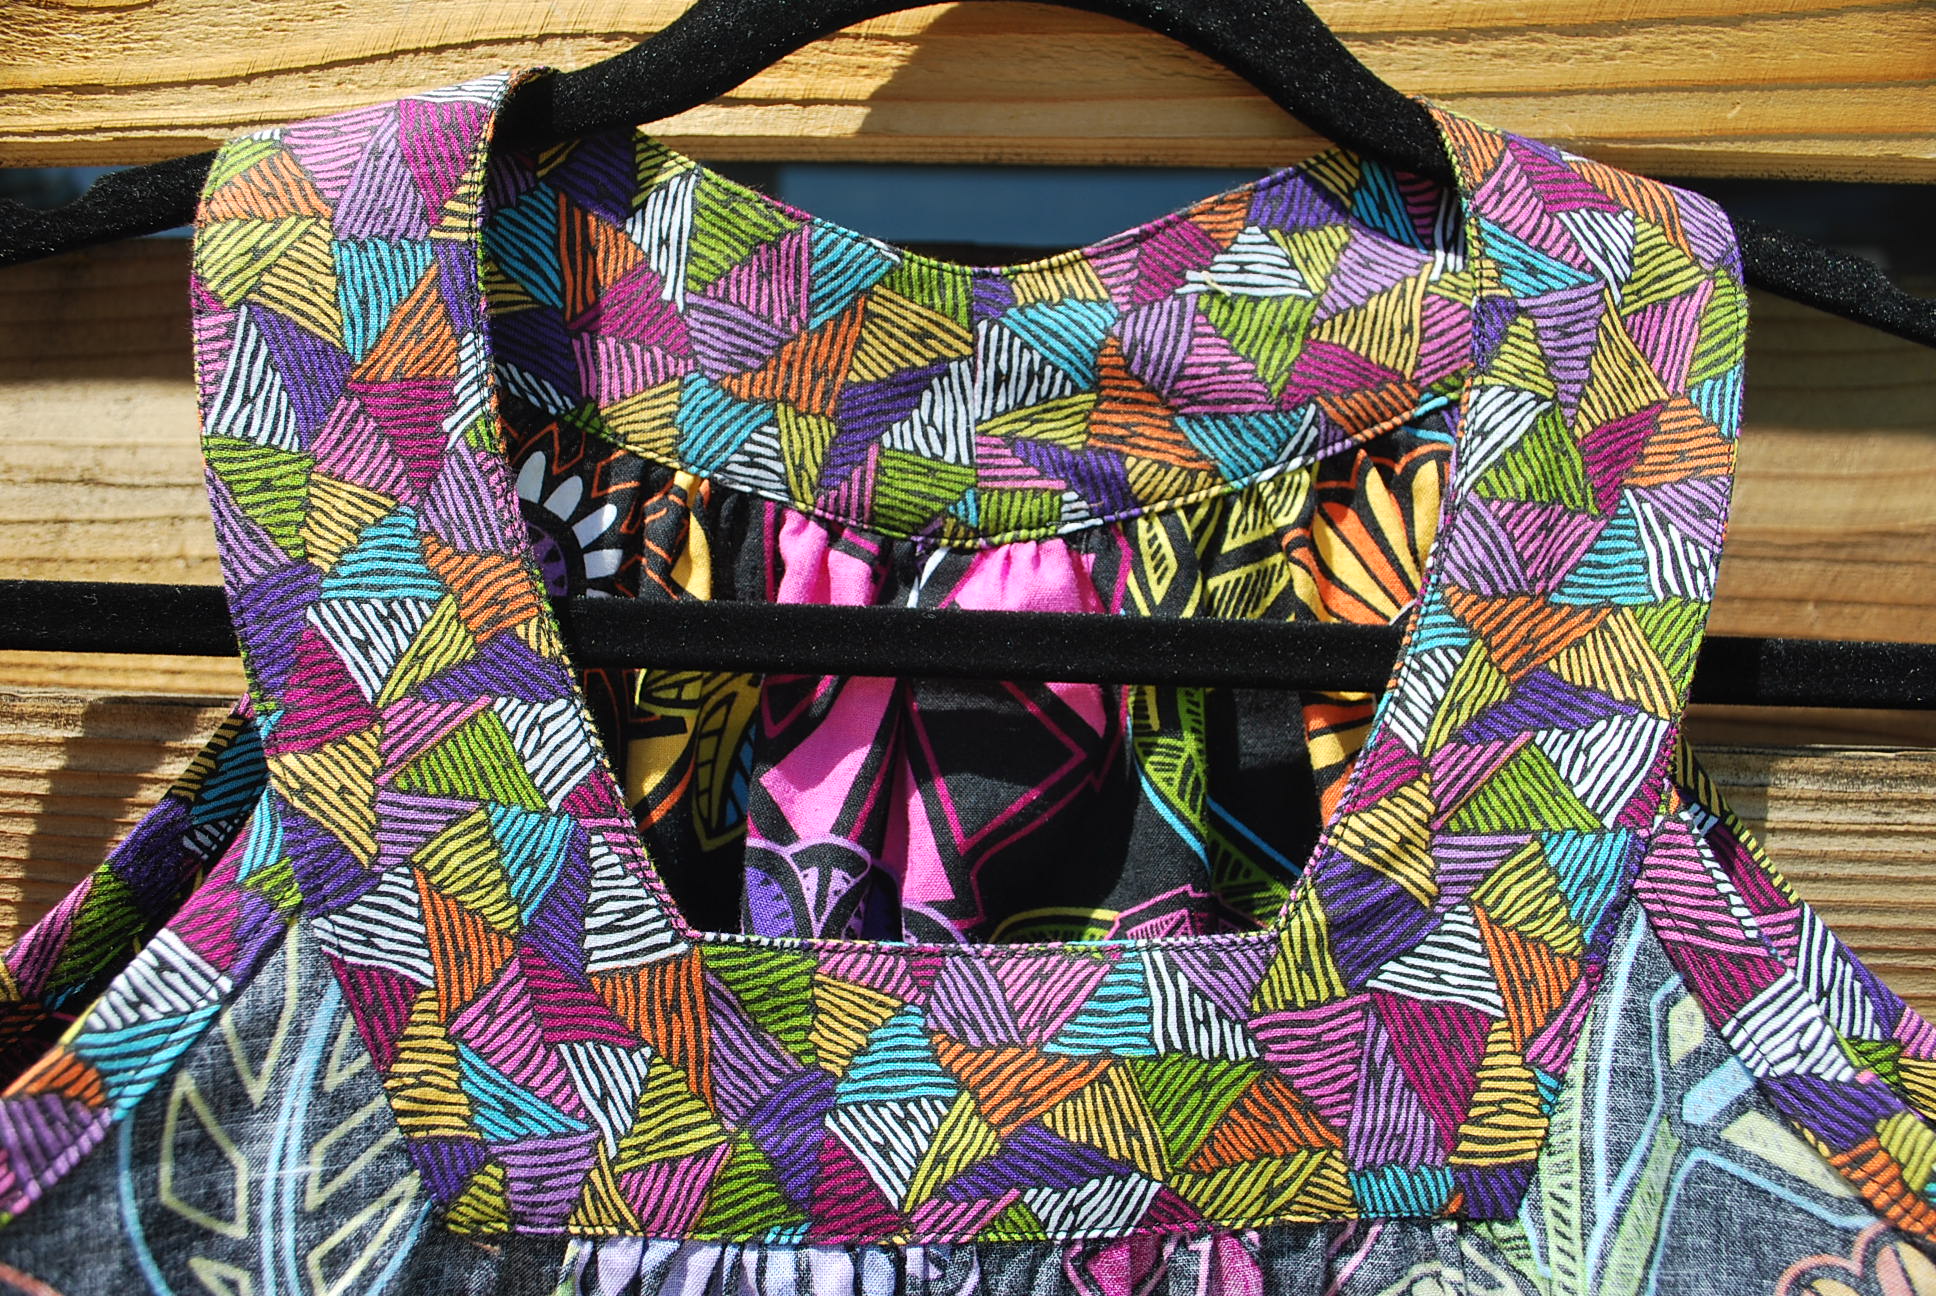
Half way up the collar back is a button with a thread loop button hole.
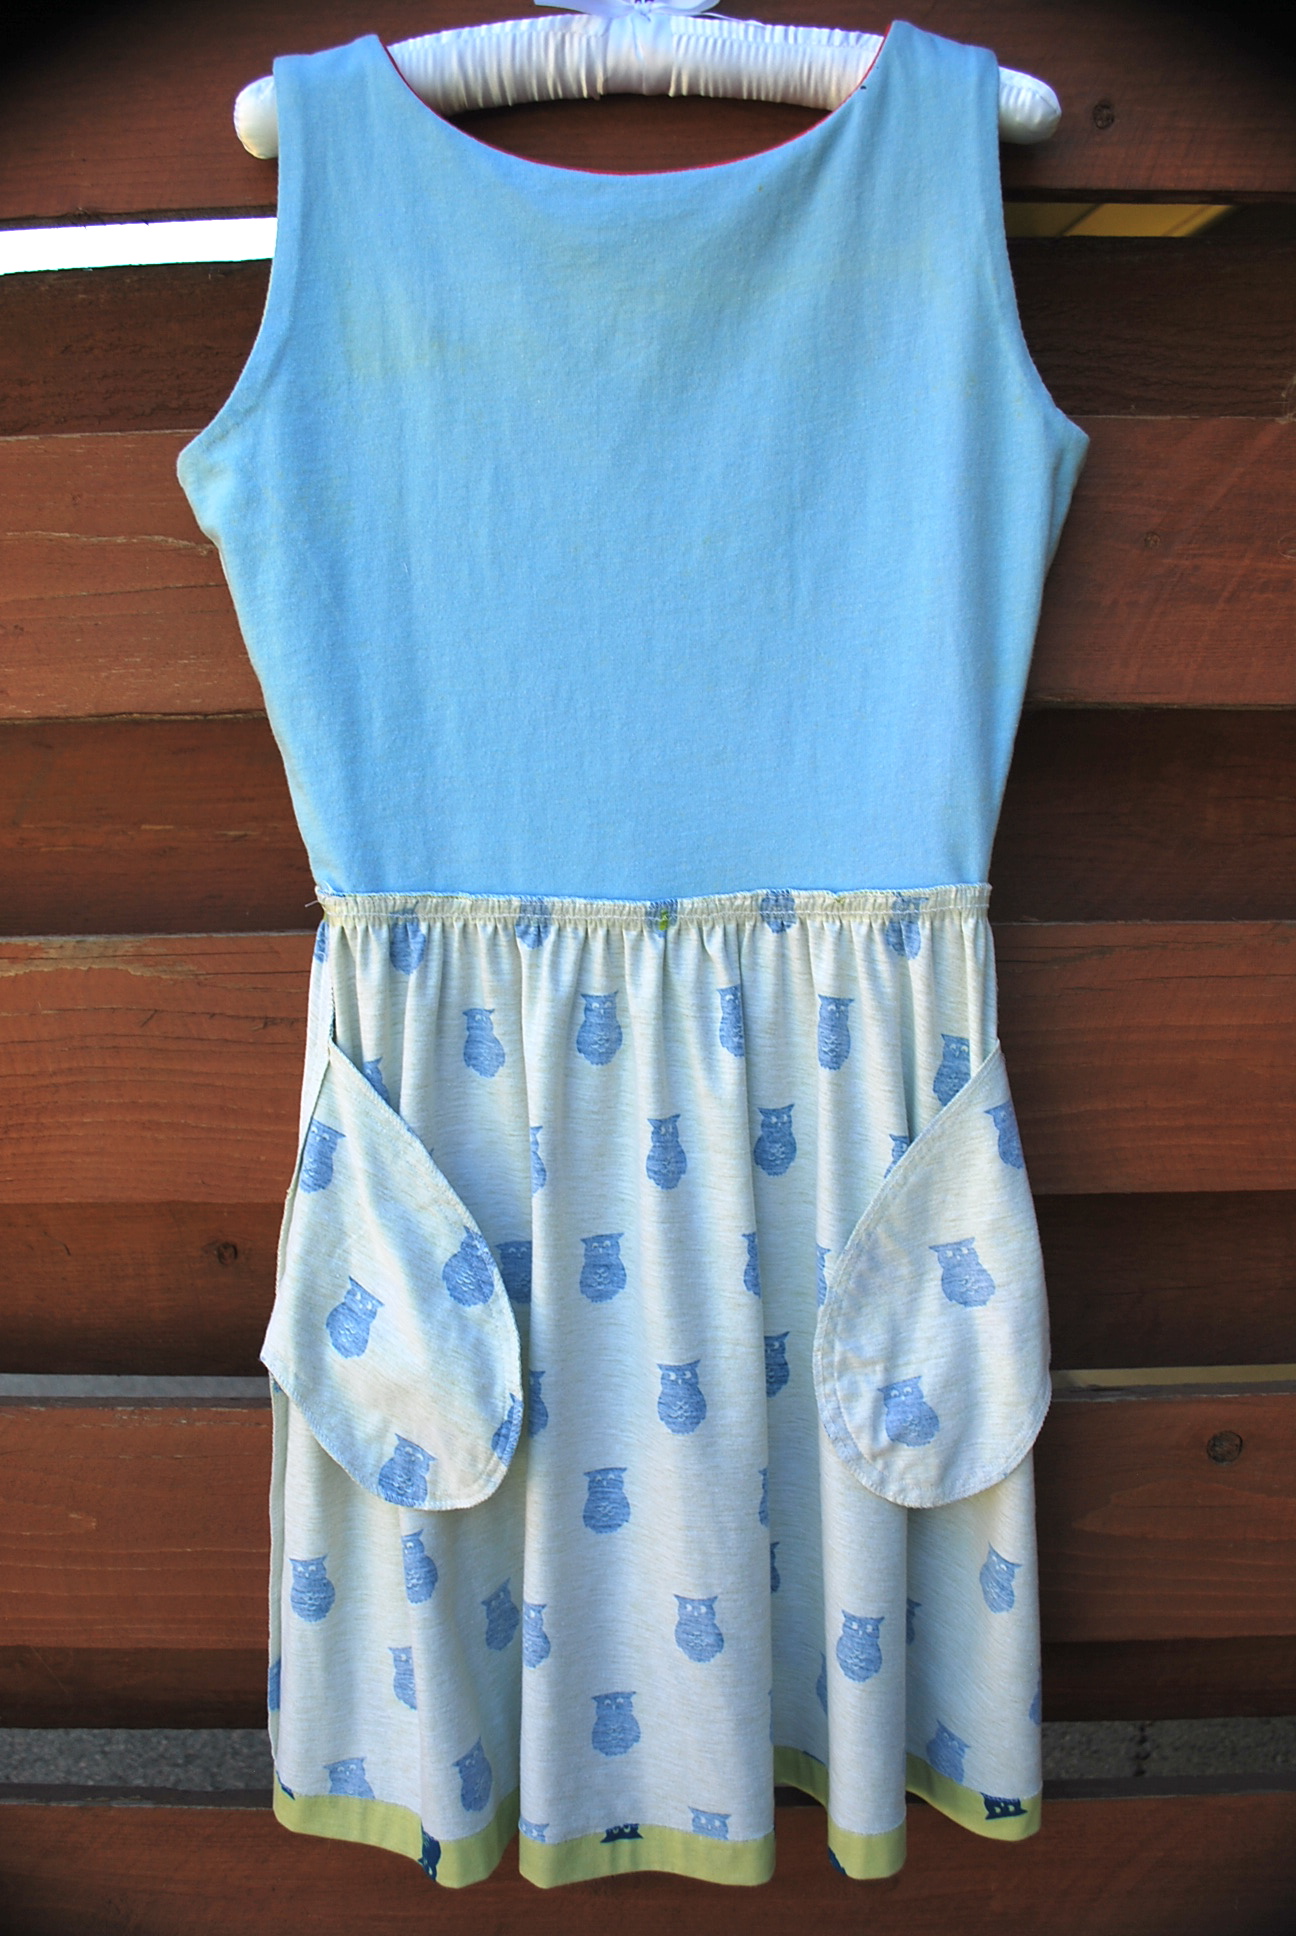
fullsizeoutput_45d

Inside sneak peek.

fullsizeoutput_45e

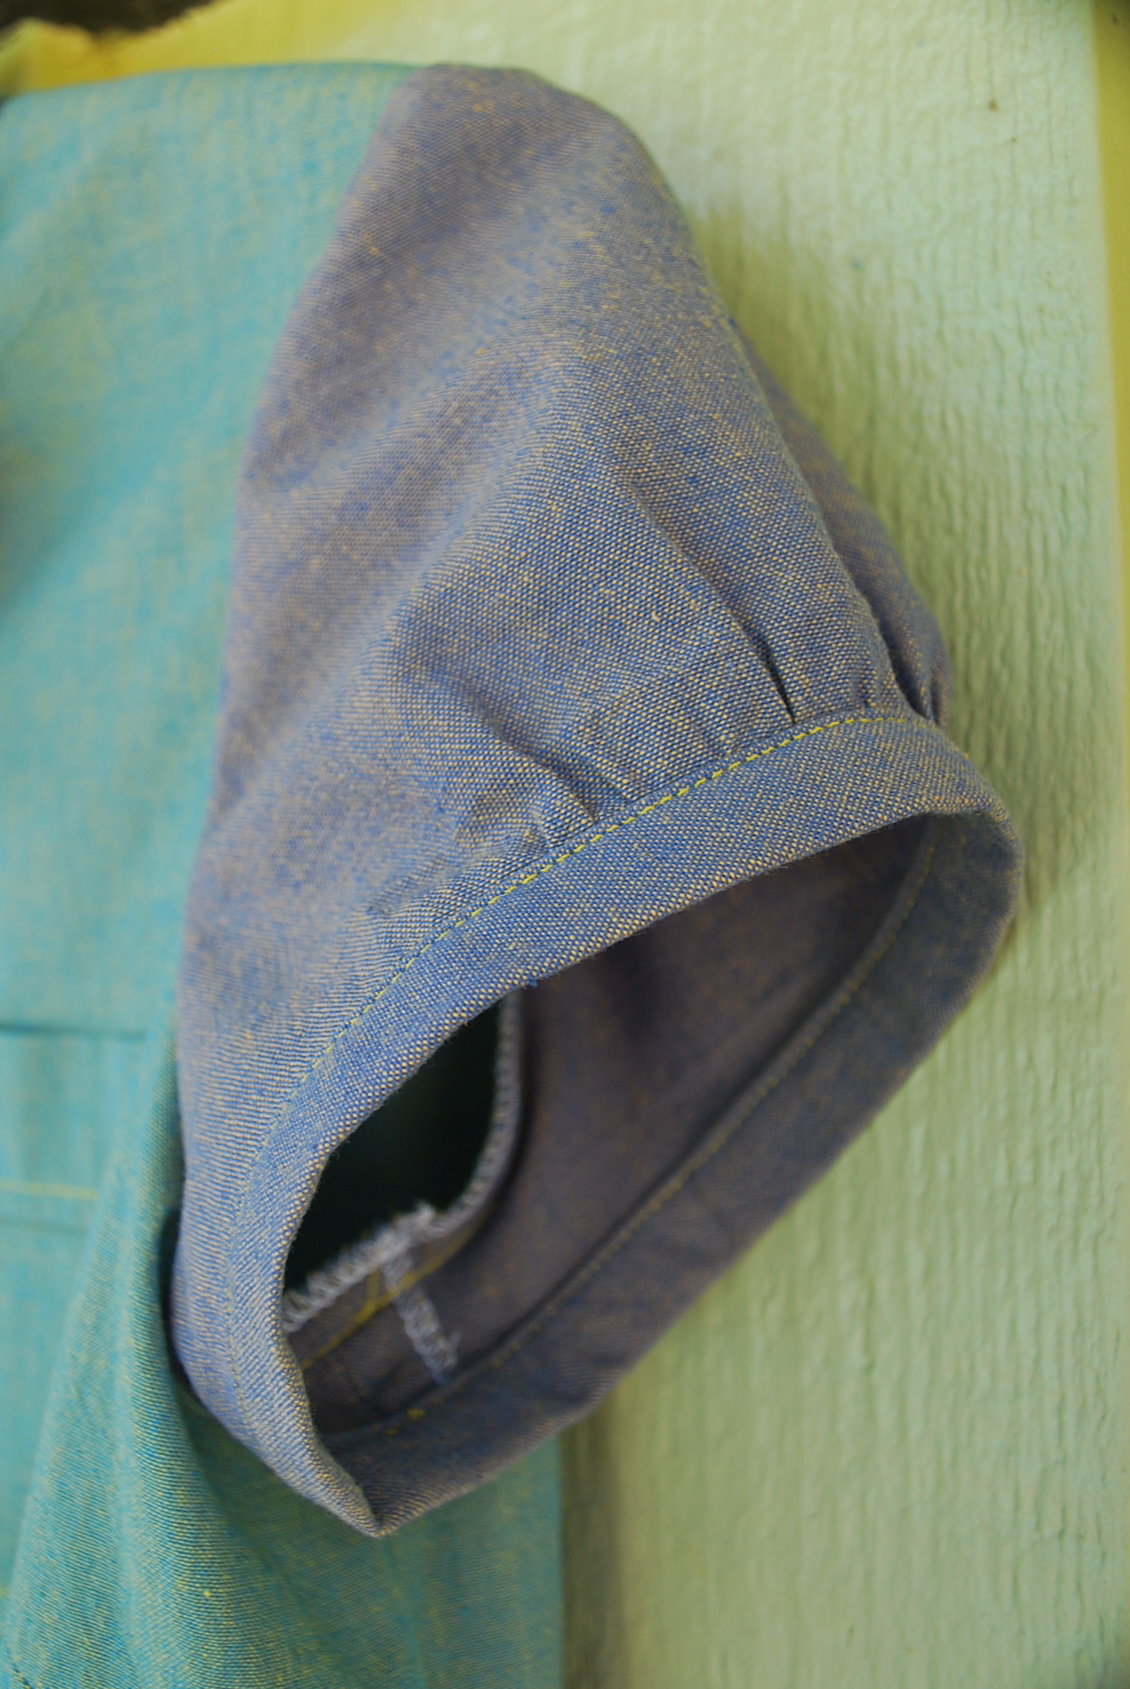
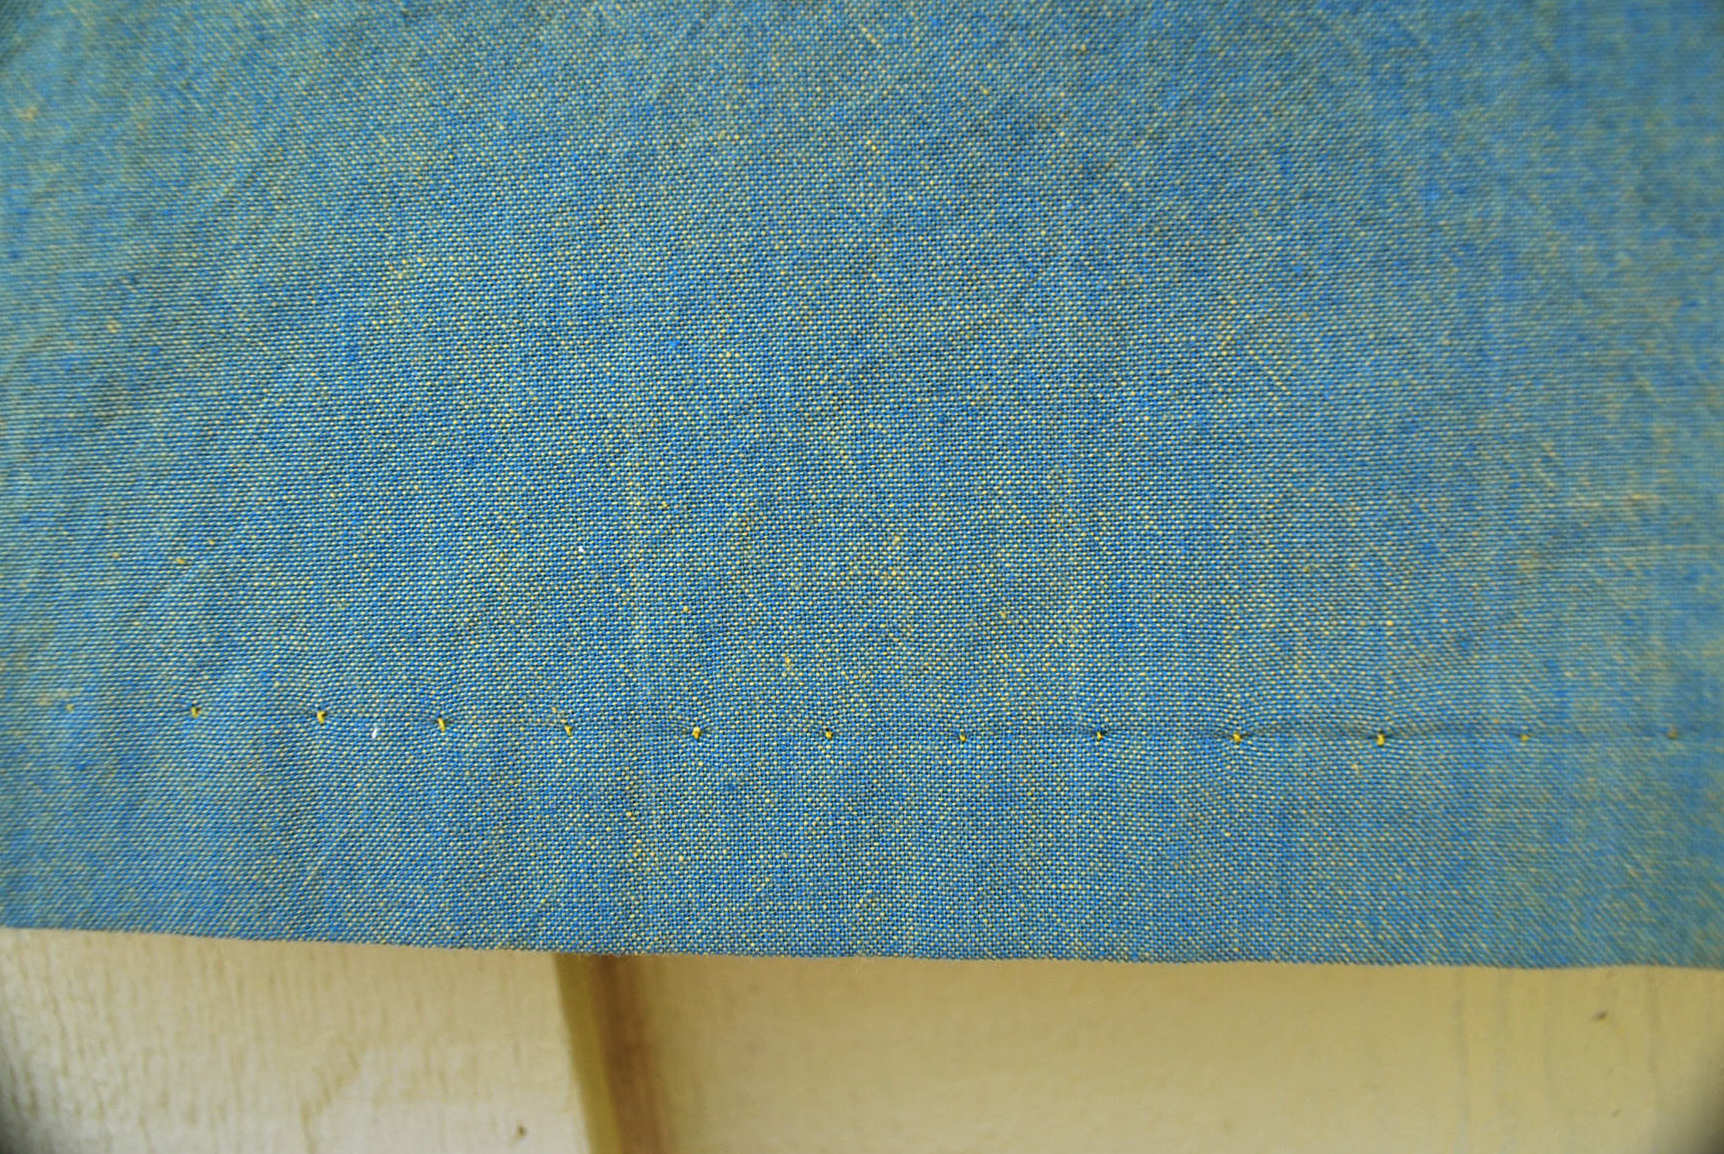
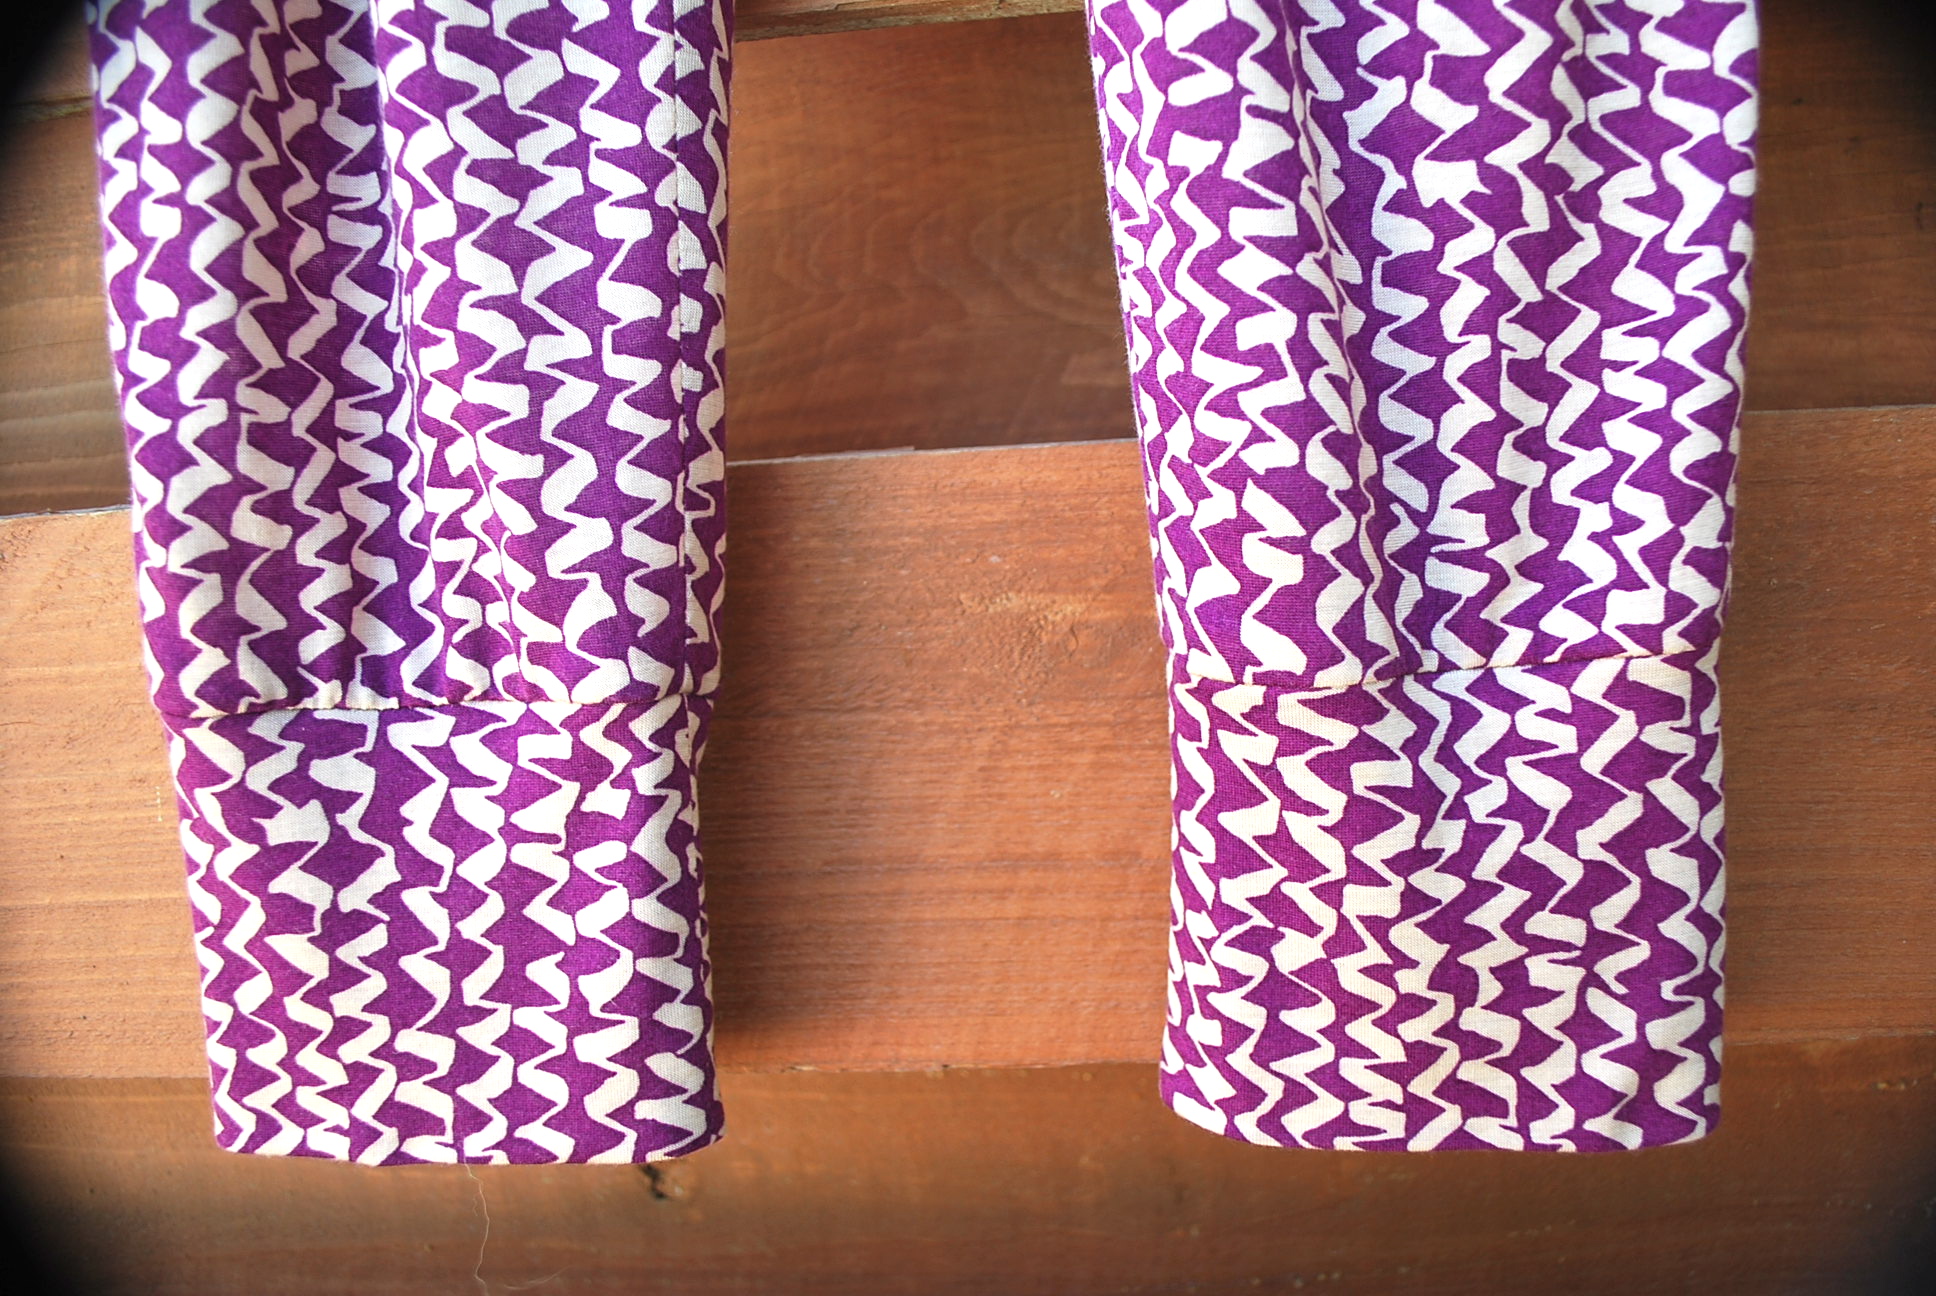
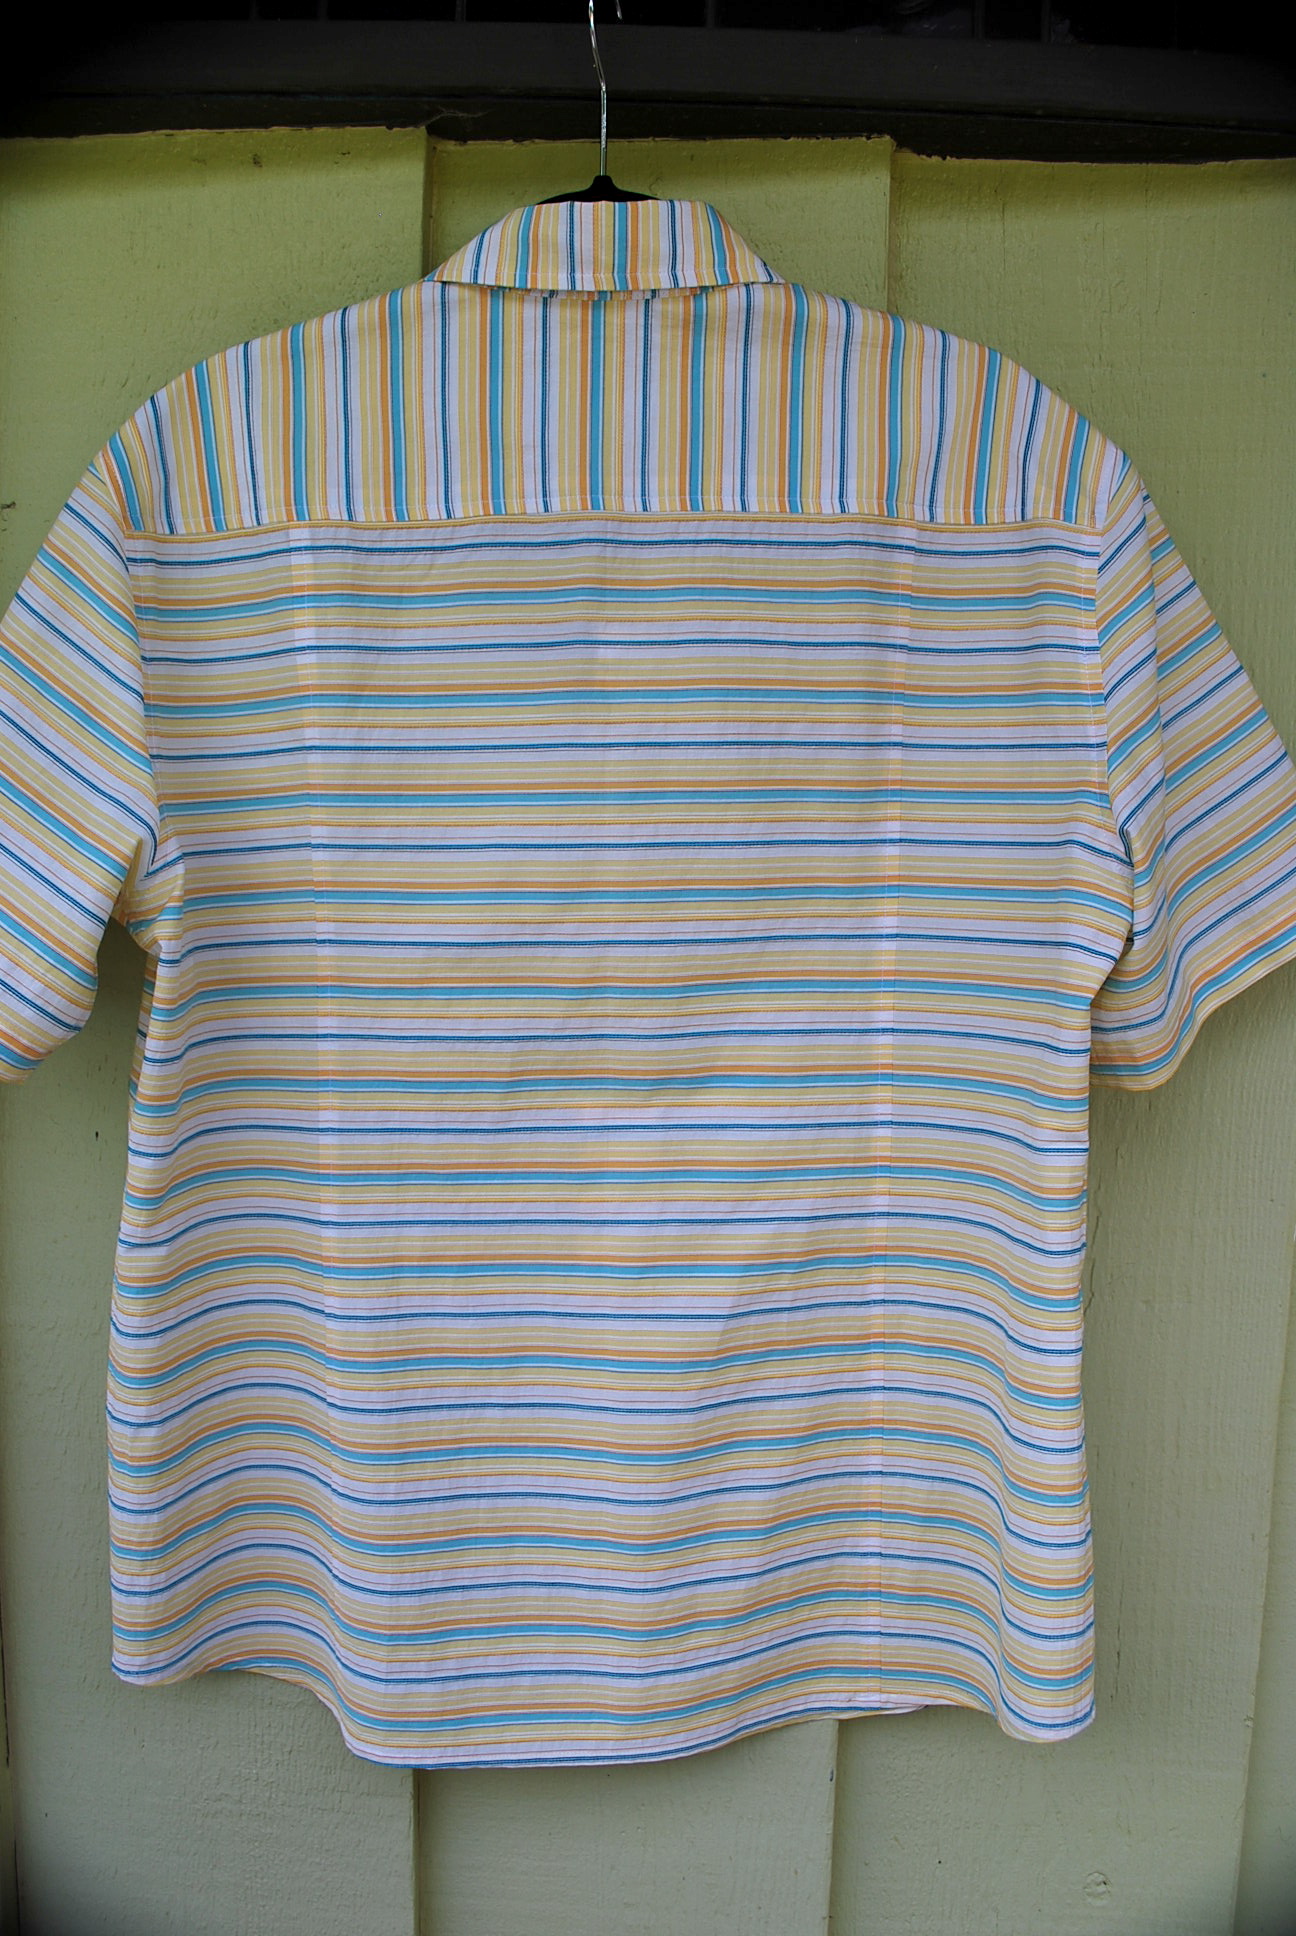
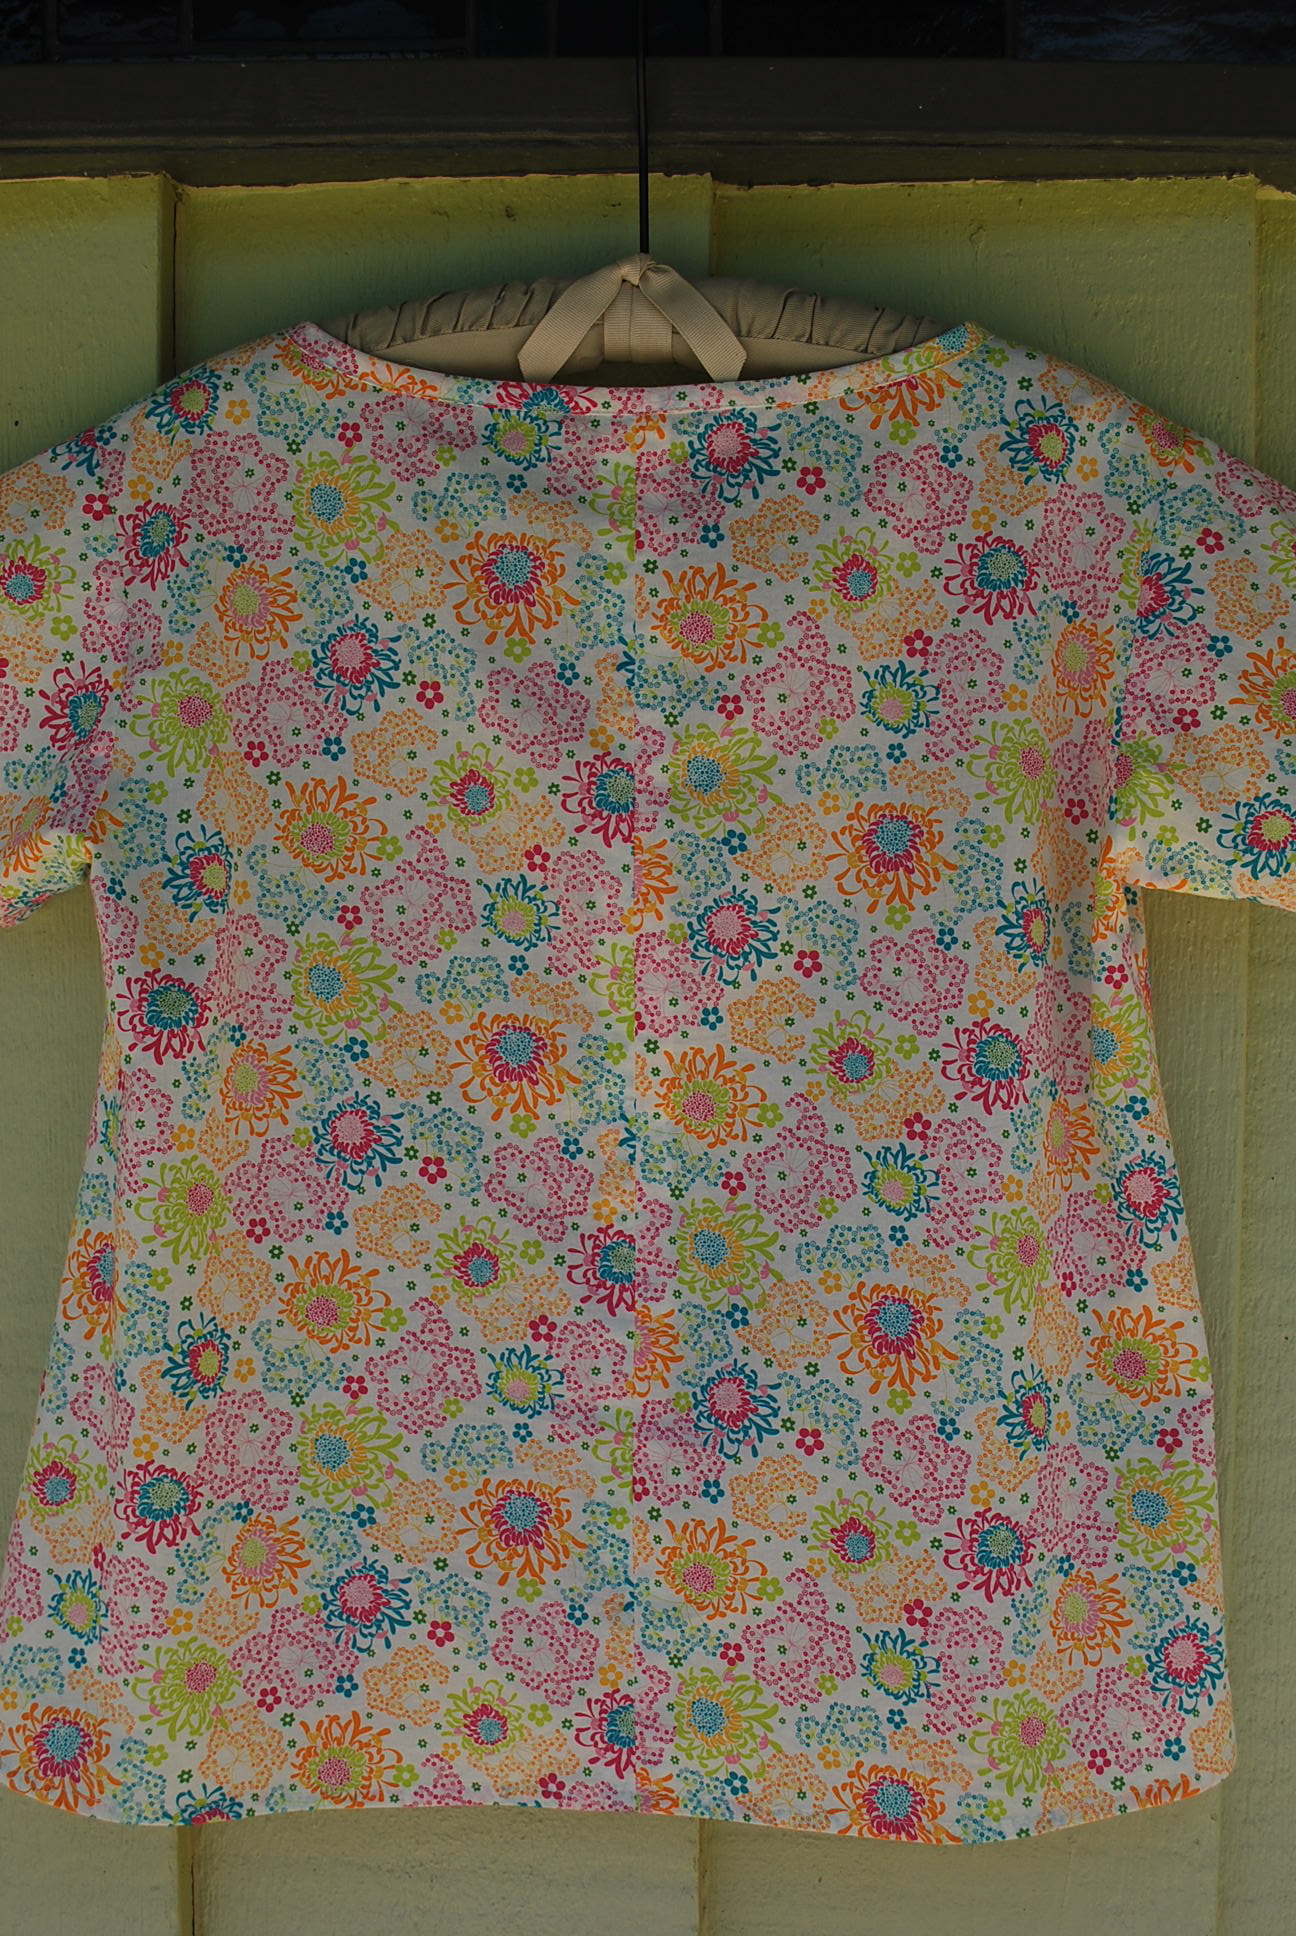
I used a machine blind hem for the sleeves and bottom.

LET’S BE HONEST:

1. The pattern comes in size Small to Extra Large. I cut a size Small and it fit perfect. I don’t remember why I chose a Small. I can’t find a size chart anywhere. It must have been on the thrown-away scraps from the pattern sheet. I usually cut a Medium in Japanese patterns.

2. You do have to add your own seam allowances. I added 5/8″ because that’s what I’m used to.

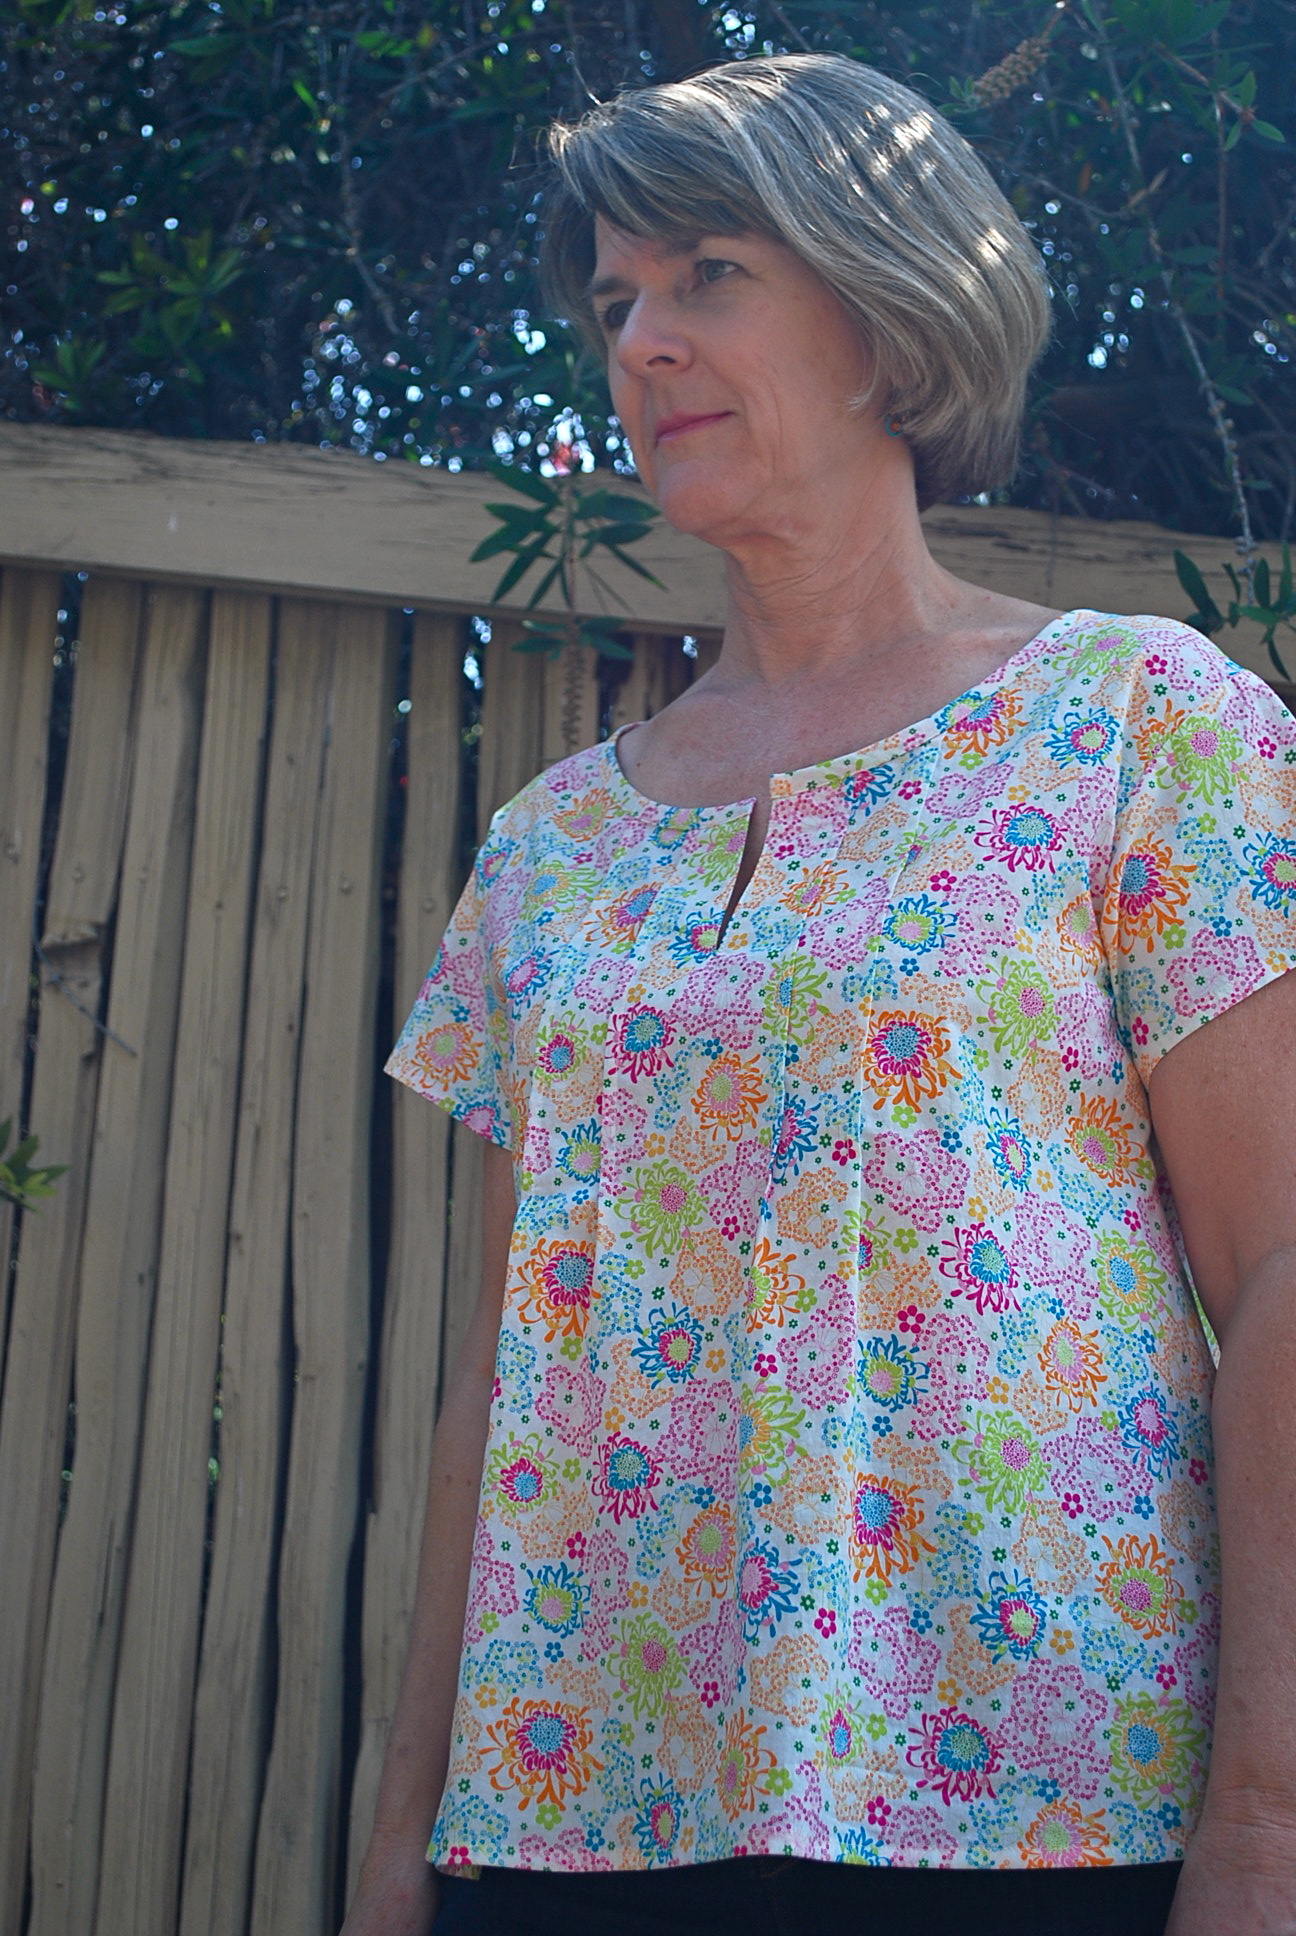
3. The pattern accommodates different cup sizes by giving a suggested range of 6 cm to 10 cm for the length that the front pleat is stitched closed from the neckline. The length of mine is 9 cm, and I can easily see how a larger bust can be accommodated with a shorter pleat.

4. I made no adjustments in this pattern. It’s one of those patterns that from the first try-on, you know it’s a great pattern with a flattering fit.

Thanks for taking the time to read my post! Cheers! Lori

fullsizeoutput_45f.jpeg


Advertisement

The Truly Perfect Blouse

Ok, I broke my New Year’s resolution and got behind on my blogging. Taxes and a wonderful spring break vacation got in the way. I am always envious of other seamstresses who, no matter what, are so prolific all the time. What is their secret? Boundless energy? Hyper disciplined? No day job? Anyway, I have been anxious to share Fresh Make #26 with you because I am so pleased with it turned out. I have made a wrap blouse perfect for work or a fun spring event.

DSC_0037

I was inspired to make another wrap top after my success with the second try of The Every Woman Top. Unlike RTW, I discovered a custom made wrap top can actually look decent on me because I can adjust for my bust to hip ratio.

DSC_0044DSC_0073DSC_0054 The pattern I used was Vogue 8833, which I purchased on sale at JoAnn’s for $4.99. (I always mark the sale dates for Vogue patterns on my calendar.) I choose this pattern because of my new enthusiasm for the wrap design and my constant need for verstile, causal professional wear. Additionally, I am a big fan of the patterns that have the A,B,C,D cup size options.

vogue blouse

The fabric, which I ordered online, more than met my expectations. It is a smooth, lovely lawn cotton from Hawthorne Threads. Here are the specifics: Melody Miller, Playful Lawn, Vintage Flora lawn in Aqua. I love the fresh, modern color palate. It also comes in a couple of other colorways. I purchased 2 1/2 yards at $13.95 per yard.

DSC_0074

It has princess seams both in both front and back which add to a flattering fit. There’s an opening in one of the princess seams for the tie to go through. I added a thread loop on the opposite side seam at the waistline to hold the tie in place.

DSC_0084 DSC_0078

Because the lawn cotton sews up and irons so beautifully, I decided not to top-stitch the edge of the collar or facings.

DSC_0085 Here’s an inside peek so you can get a better idea of how it all goes together.

LET’S BE HONEST:
1. I think I say this everytime I make a Vogue pattern, but I feel I need to keep making this comment – this pattern is labeled “Easy.” I believe this rating is relative to other Vogue patterns, not sewing in general. This pattern has a collar with a band, set-in sleeves, and some other features that wouldn’t be appropriate for a beginning seamstress to attempt independently.

2. I cut a Size 12 on top and graded to a Size 16 on the bottom. I choose the B cup option. Overall I was very pleased with the fit and did not make any adjustments after trying it on while sewing.

3. The only thing I added that wasn’t suggested in the instructions, was a thread loop at one side seam to hold the tie in place.

4. Honestly, I have nothing more to say about this pattern, except it sews up exactly like it looks. I am very happy with it. I truly think it would be great on all figure types.

REFLECTIONS, REVELATIONS, AND CONFESSIONS:
I’m just anxious to publish this post. Even when I’m on a fabulous vacation, I miss sewing and blogging. I still look on Instagram and scan through other blogs to keep up on what others are doing. How about you? How do you feel when you don’t have time to sew….even when you’re having a fabulous time doing something else?

DSC_0025

The Escalante Top

This is always my story. After I do one thing for I while, I get the urge to do something else. I have many creative loves. In addition to sewing, I love dyeing fabrics. Since January, I have been focusing my creative time on sewing for this blog, so recently I’ve had an itch to do some dyeing. So for Fresh Make #16, I have done both, and made a billowy, tie dyed blouse.DSC_0468DSC_0474DSC_0480The pattern I choose is McCall’s 6962 which I purchased recently at JoAnn’s on sale for $1.99. Since starting this blog, I have become a collector of big 4 patterns. When I stumble upon a sale at JoAnn’s, I sit down and leaf through the books. I challenge myself to consider patterns that aren’t necessarily my “style.” Kind of like agreeing to try on ready mades that you would not normally pull off the rack because you’ve taken to heart the advise of Clinton and Stacy of “What Not To Wear.” M6962 is one of those patterns. I was curious to see what I could do with it. I have named it the Escalante Top because I relate the organic feel of the top to the beautiful nature I experienced on our family vacation to Utah’s Escalante Grand Staircase National Monument this month.

I made view A.

I made view A.

I had some white, cotton, lawn fabric from Dharma Trading Co on hand. So I satisfied my dyeing fix by using it for this project. I used also Dharma Trading’s procion dyes in Chartruse and Steel Grey. (Please feel free to ask me about my dyeing process if you wish. That’s another topic for another day!) My fabric was 60″ wide, and view A required 1 1/2 yards.DSC_0466DSC_0475
A few decades ago, I was obsessed with using covering buttons in all my makes (actually, "projects," that's what we called them back then) I thought it would look cute to do a contrasting hand dyed covered button.

A few decades ago, I was obsessed with using covering buttons in all my makes (actually, “projects,” that’s what we called them back then) I thought it would look cute to do a contrasting hand dyed covered button.

I contemplated elastic or not. After a few try-ons, I decided to go for it. I'm happy I did.

I contemplated elastic or not. After a few try-ons, I decided to go for it. I’m happy I did.

DSC_0482
LET BE HONEST: 
1. This pattern is labeled EASY. For an experienced sewist, it is. I think a beginner would require some assistance on some parts, especially attaching the gathered part to the bib and doing the biased tape neckline.

2. To a degree, one’s measurements are not too important when determining what size to make on this pattern because there is so much design ease. I choose to make a Small (8-10) mainly because my biggest concern was that the neckline not be too big. It turned out that I am very happy with the fit and the way the neckline lies.

3. I waivered between elastic and no elastic at the bottom. Even though this fabric is fairly lightweight, it is a bit stiff, so I felt it needed to be corraled at the bottom so it wouldn’t be tent like. If I used a fabric that had a softer hand and a nice drape, I might have done no elastic.

4. This blouse is not my typical style. But, hey, I like it! I’m going to wear it!

Thanks for visiting me again! Have you sewn something recently that’s out of your style wheelhouse?

The Traveler Dress

Since starting this blog, I have rediscovered the joy of wearing dresses, I mean everyday, grab-n-go dresses, especially for hot summer weather. Even though we’re in the dog days of summer here in inland So Cal, I’ve started to turn my sewing thoughts to fall. So for Fresh Make #15 I have made a transition dress, one take will take me from end of summer onto fall.

I asked my filmmaker son to take photos of me and he told me to stand in the dirt in the field across the street from our house.

I asked my filmmaker son to take photos of me and he told me to stand in the dirt in the field across the street from our house.

DSC_0443DSC_0462 The pattern I chose is Simplicity 2246. This is part of the “lisette” collection, which I think is Simplicity’s attempt to appeal to the young, hip, indie sewist. Like all the indie patterns, they have even given it a name, Traveler Dress. (I didn’t have to make one up this time.) It’s an adorable shirt dress with lots of options to “make it your own.” I purchased my pattern at JoAnn’s Fabrics for $1 several months ago during one of their 5 for $5 Simplicity pattern sales.

I made View A, leaving off the hips pockets (I do not need to bring emphasis to that area of my body!). I also made the cap sleeve in View C because just looking at longer sleeves in the middle of summer makes me sweat.2246 The fabric I used is from an awesome chambray collection by Andover Fabrics. I purchased 2  1/2 yards of Chambray in Bluegrass and 1/2 yards of Chambray in Tailor at $9.25 per yard from Hawthorne Threads, my favorite online fabric store.DSC_0440 You can’t go wrong with a basic shirtdress but I couldn’t resist putting my own little twist by using a different color for the sleeve. I had seen some denim blouses and dresses that had different shades of denims on the sleeves on Pinterest, so I was hoping to be a little trendy. Maybe not. Oh, who cares, I really like it. DSC_0448

I am a big proponent of blind hme on dresses and skirts, regardless of what is shown in the directions. I'm not opposed to a machine blind hem when possible like here.

I am a big advocate of blind hems on dresses and skirts, regardless of what is shown in the directions. I am not opposed to a machine blind hem when possible, like here.

DSC_0451

LET’S BE HONEST;
1. This pattern, unlike most, does not have a difficulty rating. A shirt dress is never an appropriate project for a novice, but I have to say for a shirt dress, this pattern is “easy.” The collar does not have a separate neckband which simplifies construction, however it does sacrifice a more tailored look. Maybe you care, maybe you don’t. The instructions are typical of a big 4 pattern, only additionally there are “lisette tips” which I actually thought could be helpful for a new sewist.

2. I graded between a size 12 at the bodice to a size 14 on the bottom. As I always do, I measured the actually pattern pieces at key spots with a tape measure and then put the tape measure around me at the same spot. Then, I decide if I like that amount of wearing ease, and determine what size (or sizes) I cut from there. If you spend time doing this you should get fairly good fitting results. I’m saying this because I have to get something off my chest…I have noticed with the online sewing community, it seems to have become standard practice to make “muslins” for regular garments. That seems unappealing and time consuming to me. I just think careful measuring of the paper pattern can allow you to skip this step. To each her own, if you like making muslins, don’t let me stop you.

3. I am very happy with the cut and fit of this pattern. The slight A-line makes it possible to flatter those of us with a bit of a pear shape. The only change I would make is to the circumference of the sleeve band. I measured my upper arm and added an 1″ to the band, but I would actually add yet another 1″. It’s comfortable when my arms are at my side, but the range of motion is limited because there is no “give” in the fabric.

4. Overall, there were no surprises or oddities with pattern and I would definitely recommend it to an intermediate sewist.

Thanks for reading this post. What will you make to help you comfortably transition into fall?

Anima Pants

I’m not back to selfish sewing yet. I stumbled upon a competition using New Zealand indie company, Papercut Patterns “Anima Pant.” So Hanna wins out again with this modern, sport pant for Fresh Make #14.

DSC_0427DSC_0397DSC_0417
This is my second indie pattern (I made the Moneta dress on my previous post.) I was convinced to purchase Papercut’s Anima Pant when they were offering 20% off the $25 price, plus free shipping (all the way from New Zealand!). And I have to say it arrived sooner than I expected. It comes packaged in a nifty cardboard, hanging envelope.
DSC_0437

The pattern comes with different length options.

The pattern comes with different length options.

The competition is co-sponsored by The Fabric Store. Their only U.S. location is only La Brea Avenue in Los Angeles. Lucky us! A great excuse for Hanna and I to go into the city, and also stop in for a delicious drink and yummy goodie directly across the street at The Sycamore Kitchen. Hanna had free reign in the fabric selection. I always like to see what my art student daughter will choose. The fabric is a beautiful, drapey, single knit jersey. I regret to say that I’m not sure of the fiber content. It looks and feels like a cotton/rayon blend. I pre-shrunk it in the washer and dryer, and it came out beautifully. We bought 1 1/2 yards at $12 per yard. Hanna also chose a waffle ribbed knit for a contrasting waistband.

Fabric in hand in La Brea Avenue.

Fabric in hand on La Brea Avenue.

DSC_0370

The waistband is made with 2″ wide elastic and a drawstring. My buttonholes did not end up in the middle of the waistband, so I put an extra row of shirring at the top, different from the pattern instructions.

I sewed the seams with my regular machine and then serged them together.

I sewed the seams with my regular machine and then serged them together.

The pants have 4" cuffs at the leg bottom.

The pants have 4″ cuffs at the leg bottom.

Back side.

Back side.

DSC_0392

LET’S BE HONEST:
1. The pattern comes in sizes XXS to XL. For Hanna, I cut between a XS and S, and it fit perfectly. Her hips are about 37 1/2″. The rise on the waist/crotch was also perfect for her, not too low, not too high. (I have to say that it is definitely styled to flatter a young, fit gal. And there’s nothing wrong with that. At this point in my life, the most effective way, even more so than watching what I eat, to avoid a “muffin top”, is to wear my pants at my waist!)

2. Besides cutting in-between sizes, the only adjustment I made to the pattern was on the leg length. Hanna’s legs are on the shorter side, so I took off 2″ with a pattern adjustment before cutting out the fabric, and another inch at the bottom once she tried them on before attaching the cuffs.

3. I wrote quite a bit about pattern instructions on my last post about the Moneta Dress, so I won’t repeat a lot of my comments here, except that I feel the same way about this pattern’s instructions. It has a fun graphic presentation printed on brown paper bag like paper. But again, just like on the Colette pattern, and many of the big 4 patterns, the details just aren’t there for the novice sewist.

4. The waffle knit ribbing that Hanna chose for the waistband actually did not end up being a practical choice when it came to sewing with the elastic. The fabric was super stretchy and was difficult to attach the 2″ elastic to it without getting a lot of puckers on the back side. (I finally told myself – Who cares? – no one will see the inside. And it certainly doesn’t matter to Hanna.)

5. I have to say again that this a fabulous, modern, fresh, knit pant pattern. It drapes perfectly on Hanna. The leg width is perfect too. I know for a fact that Hanna will be wearing these pants a lot when she returns to her college campus this fall.

Thanks again for reading my post! Happy sewing! Lori

The Moneta Dress

Having my daughter home for the summer gives me an excuse to try some fun projects that are more suited to the younger crowd. For Fresh Make #13, I decided to make Hanna a Moneta which is an indie design by Colette Patterns that is wildly popular with the online sewing community. DSC_0354 DSC_0348 DSC_0346 The Moneta is available online as printed paper pattern for $18, or as a PDF for $14. I splurged for the printed pattern plus an additional $5.50 for shipping because I’m not fond of PDFs, and I was curious to see the hip graphic design and packaging. Now, $23.50 is a lot for me to spend on pattern, but I felt I needed to try an indie pattern to keep up with the online community. I have to say, the dress is adorable and a smartly designed pattern. I will save my knit picky comments to the end of my post.
cp1028-moneta-cover-med-37a80b85ae73088a6d790a6771162577 The fabric I chose is from the online store, Girl Charlee. I have to be honest that I hesitantly ordered from them as I have been disappointed in their fabrics more than once. I was swayed by the claim that the fabric was made in Los Angeles, and I like to buy American made if possible. Unfortunately, this fabric was no improvement over my past purchases. Basically there is very litte stretch in this single knit jersey and the design is printed significantly off grain. Previously I thought it wouldn’t be cool to bad mouth a resource, but I recently read a post in another blog in which the author chose to be honest about her disappointment in Girl Charlee, and then several readers commented that they felt the same way about the site’s products. Shouldn’t we be truthful in a blog?

The bodice calls for lining. I always like to find something in my stash for linings and such. I used a recycled t-shirt. I also used a hand-dyed recycled t-shirt for the constrasting collar fabric.

The back neckline is slightly lower than the front. Cool design detail, huh?

The back neckline is slightly lower than the front. Cool design detail, huh?

The collar is cleverly sewn with the seam on the outside, but remains hidden when the collar folds over.

The collar is cleverly sewn with the seam on the outside, but remains hidden when the collar folds over.

The bodice is fully lined, and the instructions provide a technique that was new to me for completely machine finishing the armholes.
DSC_0364 The skirt waist was “shirred” (gathered) with an new version of an old technique of stretching the elastic evenly around the opening and sewing it directly on the fabric. I have done this countless times for elastic waistbands on knits, but never for the purpose of gathering a skirt which attaches to a bodice.

The skirt is shirred with clear, lightweight elastic. This techique enables the waist stretch when pulling the dress on and off.

The skirt, shirred with elastic, enables the waist stretch when pulling the dress on and off.

DSC_0353

LET’S BE HONEST:
1. This pattern is a hip, modern and fresh design for knits. I now understand why everyone loves their Monetas.

2. Although Hanna’s measurements more closely corresponded to a SMALL, and the pattern provided an explanation about “negative ease” with knits, I cut a MEDIUM because the fabric had little stretch and the recycled t-shirt I used for the lining was of a thicker fabric. It fit her perfectly for the type of fabric used. I could see though, that if it was made with a stretchy fabric like a rib knit, a smaller size would be appropriate.

3. Please allow me to go on record as staying that I don’t think it necessary or a good technique to serge your 2 collar pieces when it is being flipped right-side out and the bulky serged seam will lie around the inside edge of the collar. This was done on a sewalong I followed, and I’ve seen it done other places online. With knits, even if they curl a bit, I still grade the seam allowances for a smooth outside finish when I am encasing them. A gentle pressing with the iron does wonders too for a nice quality finish.

4. Thoughts on instructions: I know the instructions on the big four pattern companies are ugly and hard to follow. Nobody likes to read them. The Moneta pattern comes with a thread-bound 32 page instruction booklet with simple illustrations on uncluttered, spacious layouts. While I was captured by the novelty of the instructions being visually different, when I really dove into them taking the perceptive of someone with little background experience/knowledge, they were just as hard to follow as traditional patterns instructions. I am not knocking people who write sewing instructions for any company. I know it must be hard; I wouldn’t want to do it. These instructions also contain some shaded boxes that direct you to websites with videos that contain further instruction details on some of the main techniques. This is a good thing, but I’m going to say that I’m glad that I could rely my own knowledge rather than go watch a video.

To conclude, Hanna did not pick out the fabric and did not ask me to this make this dress. I wanted to make it and I think it’s adorable, but I am not of the age or have the figure to wear it. I think she likes it; I hope she wears it. Whatever the case, it is still is joy to sew for her as I have done since she was very young.

Again, thanks for reading this post. I welcome your comments. Cheers, Lori

The Michael Shirt

My wonderful husband, Michael, is always supportive of my endeavors. He never hesitates to drop what he’s doing on a Saturday afternoon to take photos of me for my latest blog post. I thought it fitting to invite him to be a guest model for Fresh Make #12. I made Michael a stylish, modern fitting shirt. Perfect for summer. DSC_0310 DSC_0320 DSC_0321 The pattern I chose was Vogue 8759. I bought it on sale at JoAnn’s Fabrics for $4.99. (I can’t imagine that anyone would ever the $30.00 price tag printed on the envelope. As most of you probably know, Vogue patterns are always on “sale” for at least 40% off.)

I made the lower left view.

I made the lower left view.

Once again the fabric was purchased on one of my trips to my favorite DTLA fabric store, Michael Levine. I bought 1 5/8 yards at 60″ wide and $6 per yard.

Michael is standing next to his favorite fig tree.

Michael is standing next to his favorite fig tree.

DSC_0325DSC_0335DSC_0332 To attach the yoke facing by machine at the back, I rolled the shirt up inbetween the two yoke pieces with right sides facing together and stitched along the edge. This is not shown in the instructions. Please ask me if your actually interested in trying this technique. It’s easy. DSC_0326DSC_0329 The instructions called for French seams. I cheated and just serged the edges together while trimming them to about 3/8 and then top stitching 1/4″ from the seam.

LET’S BE HONEST:
1. This pattern is labeled EASY. Which I guess is OK as long as one doesn’t assume that EASY means “beginner.” A pattern with a collar with a band is definitely not a beginner project and requires careful, slow sewing.

2. I made size 44 for Michael and it fits perfect. It is a “slimmer” fit. There is no room for shrinkage, so even though I prewashed the fabric, we’ll be our best to keep it out of the dryer. This pattern ranges from 34 to 46. I can’t imagine who would actually fit a 34 and I think there are probably a lot of men who would be sized out of this pattern.

3. I think this is a perfect men’s shirt pattern. I didn’t make any adjustments anywhere, and I did not find any odd surprises once I started construction. As is common for me, I didn’t follow the instructions exactly as I draw upon my knowledge if I see an easier way of doing something such as the machine yoke technique I mentioned above.

I thoroughly enjoy putting the attention on someone else, being the photographer instead of being the one photographed. This week, reviving a few techniques and sewing him stylish. As always, thanks for visiting my blog. I welcome your comments and would be happy provide more details on anything I’ve shown. Just ask!

Sunny Day Beach Dress

Without a doubt summer is here in Southern California for the next four months. I know I’ll want to be throwing on clothes that are cool and easy. Fresh Make #11 is one of many sleeveless dresses I’ll be making this summer. DSC_0294 DSC_0291DSC_0298 The pattern I choose was Sunny Day Beach Dress from the Sew Daily pattern store. When I received an email announcing 40% off their PDF patterns, I took a peek and this adorable dress caught my eye. I have not been particularly interested in trying a PDF pattern, but to keep myself well-rounded I decided to give this one a try. The sale price was $3.60.

Sunny Day Beach Dress by Katrin Vorbeck from Sew Daily pattern store

Sunny Day Beach Dress by Katrin Vorbeck from Sew Daily pattern store

The fabric I used is from Andover Fabric’s “Moon Flowers” collection by Jesus Cruz. I am excited to showcase this fabric as Jesus is a local artist in my community. His fabric can be found at many independent fabric stores. Because I knew exactly what I wanted, I ordered mine at Michael Levine’s online store. Michael Levine’s is much more fun to visit in person, but sometimes convenience wins over adventure.

DSC_0277

The armholes are finished with a self-made bias tape.

DSC_0284

The neck yoke is one piece with a seam in the back.

DSC_0280 DSC_0286

The hem band is faced on the inside.

The hem band is faced on the inside.

I understitched the hem facing at the bottom to keep the seam rolled to the inside.

I understitched the hem facing at the bottom to keep the seam rolled to the inside.

LET’S BE HONEST:

1. After using my first PDF pattern, I’m not a big fan. In the future, I will only purchase a PDF pattern if it is a unique design that I love and it is not available in a paper format. I have no problem with, and rather enjoy, leafing through pattern books at fabric stores (OK, maybe I’m showing my age!) Also, I do not mind waiting a few days for a purchase to come in the mail; I have plenty of other projects I can work on in the meantime. Let me state, however, that I do understand one of the purposes of a PDF – it is a cost effective way for an entrepreneurial designer/sewist to sell a pattern. I think it is awesome that the internet provides this opportunity for enterprising individuals.

2. General thoughts on written instructions: Instructions that include illustrations from the established patterns companies are difficult enough to understand. I found the instructions accompanying the Sunny Beach Day Dress hard to decipher especially because there were no illustrations accompanying the text. I know I am at an advantage when I tackle a pattern because I can draw on my 40 years of experience and figure out what I need to do. While this dress is fairly simple, I’m pretty certain that a beginning sewist would have a problem sewing this pattern independently, especially the neck yoke.

3. I made one pattern adjustment. During my first try-on, the top of the back neck yoke stuck out from the base of my neck. I narrowed it a total of 1″ at the top, grading down to the original seam at the bottom. This created a slight V-shape on the back yoke as you can see in the photos. If I were to make this again, I would probably redraw the pattern a bit to make a nice curve.

4. The instructions called for 2 single-sided self-made bias tapes sewn together, outside and inside, to finish the armholes. I decided to make 1 double-folded tape instead. (You can ask me more about this if you are interested in making this dress.) The armholes turn out a little high into the armpit. I couldn’t determine for certain if this was because I changed the method or not. Neverthless, next time, I would trim out 1/2″ before from the armholes before applying the bias tape.

I love my Sunny Day Beach Dress, and I think Jesus Cruz’s Moon Flowers is the perfect fabric for it!

Thank you for reading this post, and please, ask me questions about the construction. I would love to help you if you decide to make this dress. Best, Lori

The Breezy Blouse

I realized only one of my Fresh Makes has been a top, and I think we often overlook the idea of sewing our own tops. Also I’m still staying true to the idea of not always grabbing a plain t-shirt to throw on over jeans. For these reasons I chose to make a cute, warm weather blouse for Fresh Make #10.DSC_0250 DSC_0260
The pattern I used is Butterick 6024. Like always, I purchased this pattern on sale at JoAnn’s for $1.40 (5 patterns for $7. But you really don’t have to buy 5.). I named this top the Breezy Blouse because it seems like an easy, fun, comfortable top to wear to a picnic or other causal outdoor event that doesn’t require athletic wear.

I made view D.

I made view D.

The fabric I used is a Robert Kaufman cotton voile. It’s finely woven, lightweight and soft, like Liberty of London, but for a third of the price. I purchased it at my favorite DTLA fabric store, Michael Levine. I bought 2 yards for $11.25 per yard. DSC_0262 DSC_0268DSC_0272 The neckline is finished with a self-made bias tape. The slit is created with a facing. DSC_0265 Here’s a peek at inside. To sew the bias tape at the neckline, first I sewed one edge to the inside of the neckline. Then I folded it over the raw edges and top stitched it very close to the folded edge of the bias tape on the front side of the neckline. DSC_0275

LET’S BE HONEST:

1. This pattern once again has the very common label of “EASY.” It’s actually not a bad pattern for a beginner, except, doing bias tape on a neckline requires careful sewing for it not to look “homemade.” The front slit also requires some accurate marking to make sure it gets stitched and cut straight down the center. I would say the sleeves, however, are fairly easy for a set-in sleeve as the cap is quite straight and there is not a lot of ease that needs distributed to fit the armhole.

2. About size – I decide to make a Small (8-10) even though my bust is not 31 1/2″ – 32 1/2″ and by no stretch of my imagination is my waist 24″ – 25.” I took the “finished measurement” of the bust area that was printed on pattern piece, and wrapped a tape measurement around my bust at that same measurement. I decided I liked that amount of “wearing ease.” I was afraid I would feel like I was swimming in the next size up. If the fabric had been more drapey like a rayon, I might have preferred more wearing ease.

3. Time to contemplate hem length and body type again. I choose to cut off 5″ from the hem of the blouse to transform it from a tunic length. Don’t get me wrong, I love the tunic style and would even wear it in some cases. If the fabric was soft and drapey, I might be OK with it longer. But with this cotton and the A-line cut, it flairs out from the body and looks kind of tent-like. I definitely do not need a wide hem hitting me at the thighs. Those of you ladies with long, thin legs, go ahead a keep the tunic length! Lucky you.

Overall I love my Breezy Blouse in this cotton voile. It’s lightweight and very comfortable to wear on a hot day when you don’t feel like bearing a lot of skin.

Thank you for taking the time to read this post. And, as always, I welcome your comments.

Best, Lori

The Strolling Shorts

Currently all of my new clothing choices are influenced by the impending summer heat. I’m still standing firm to wear less jean shorts and capris. So to add variety to the warm weather skirts and dresses I’m sewing, I decided to make a fun pair of walking shorts for Fresh Make #9.
DSC_0229
The pattern I used is Burda 8087. I bought this pattern on sale at JoAnn’s for $2.49. I choose this pattern because nowadays I only only wear long shorts, and I thought the wider leg cut would be flattering on my heavier thighs figure. I named them the Strolling Shorts because I imagine that these would be perfect for a day at Disneyland, a walk down Palm Canyon Boulevard in Palm Springs or Ocean Avenue in Santa Monica.
8087-front-envelope I purchased the fabric from Michael Levine’s online store. It is from the Japanese Echino collection. I have drooled over Echino fabrics many times at Michael Levine’s downtown L.A. store. They range from $16 to $20 for their cotton/linen blends. I was alerted to a one day 20% off online sale, so I bought 2 yards of this fabric (amongst others!).
DSC_0235

I like the flap pocket detail and also how nicely the rounded waistband lays in the small of my back.

I like the flap pocket detail and also how nicely the rounded waistband lays in the small of my back.

DSC_0236 DSC_0240 I had probably not done a front fly zipper since high school when I used to make a lot of my own pants. But it came back, just like riding a bike – you never forget. I purchased the 5″ metal zipper at my favorite online zipper store, Zipit Zippers.

To secure the waistband, I used the "stitch-in-the-ditch" technique.

To complete the waistband, I used the “stitch-in-the-ditch” technique.

For the hem, I did a machine blind hem.

I did a machine blind hem.

LET’S BE HONEST:
1. Once again, this pattern is labeled “easy.” I would warn a beginner sewist not to attempt this pattern without access to help from an “in person,” experienced sewist, especially with techniques such as a front fly and waistband. I find the instructions to be a bit assumptive about a person’s knowledge and also found a few small discrepancies in the text and or illustrations that might be confusing without previous experience.

2. I’m not as big as I think. Erroring on the side of caution, I cut an 18! I did end up taking it in on the sides and back middle seam after my first fitting. I realize now that I was a little rusty at estimating my “wearing ease” for close fitting garments. 1″ at the waist and 2″ at the hips beyond your actual measurements should be fine.

3. I wanted the shorts to hit somewhere along my upper knee cap. I ended up cutting off 2″ of fabric before doing my 1 1/4″ hem.

4. Side note – I broke my boycott to not buy any “fast fashion” to have a shirt to wear in my photos. I bought the shirt on sale at Old Navy, and hemmed it up 3″. Hopefully I will find some time to make the perfect shirt to wear with my shorts.

Overall I am happy with my Strolling Shorts. I wore them to make puppets with third graders this morning! Thank you for reading my post and I welcome your comments. Lori