The Jasper Sweatshirt

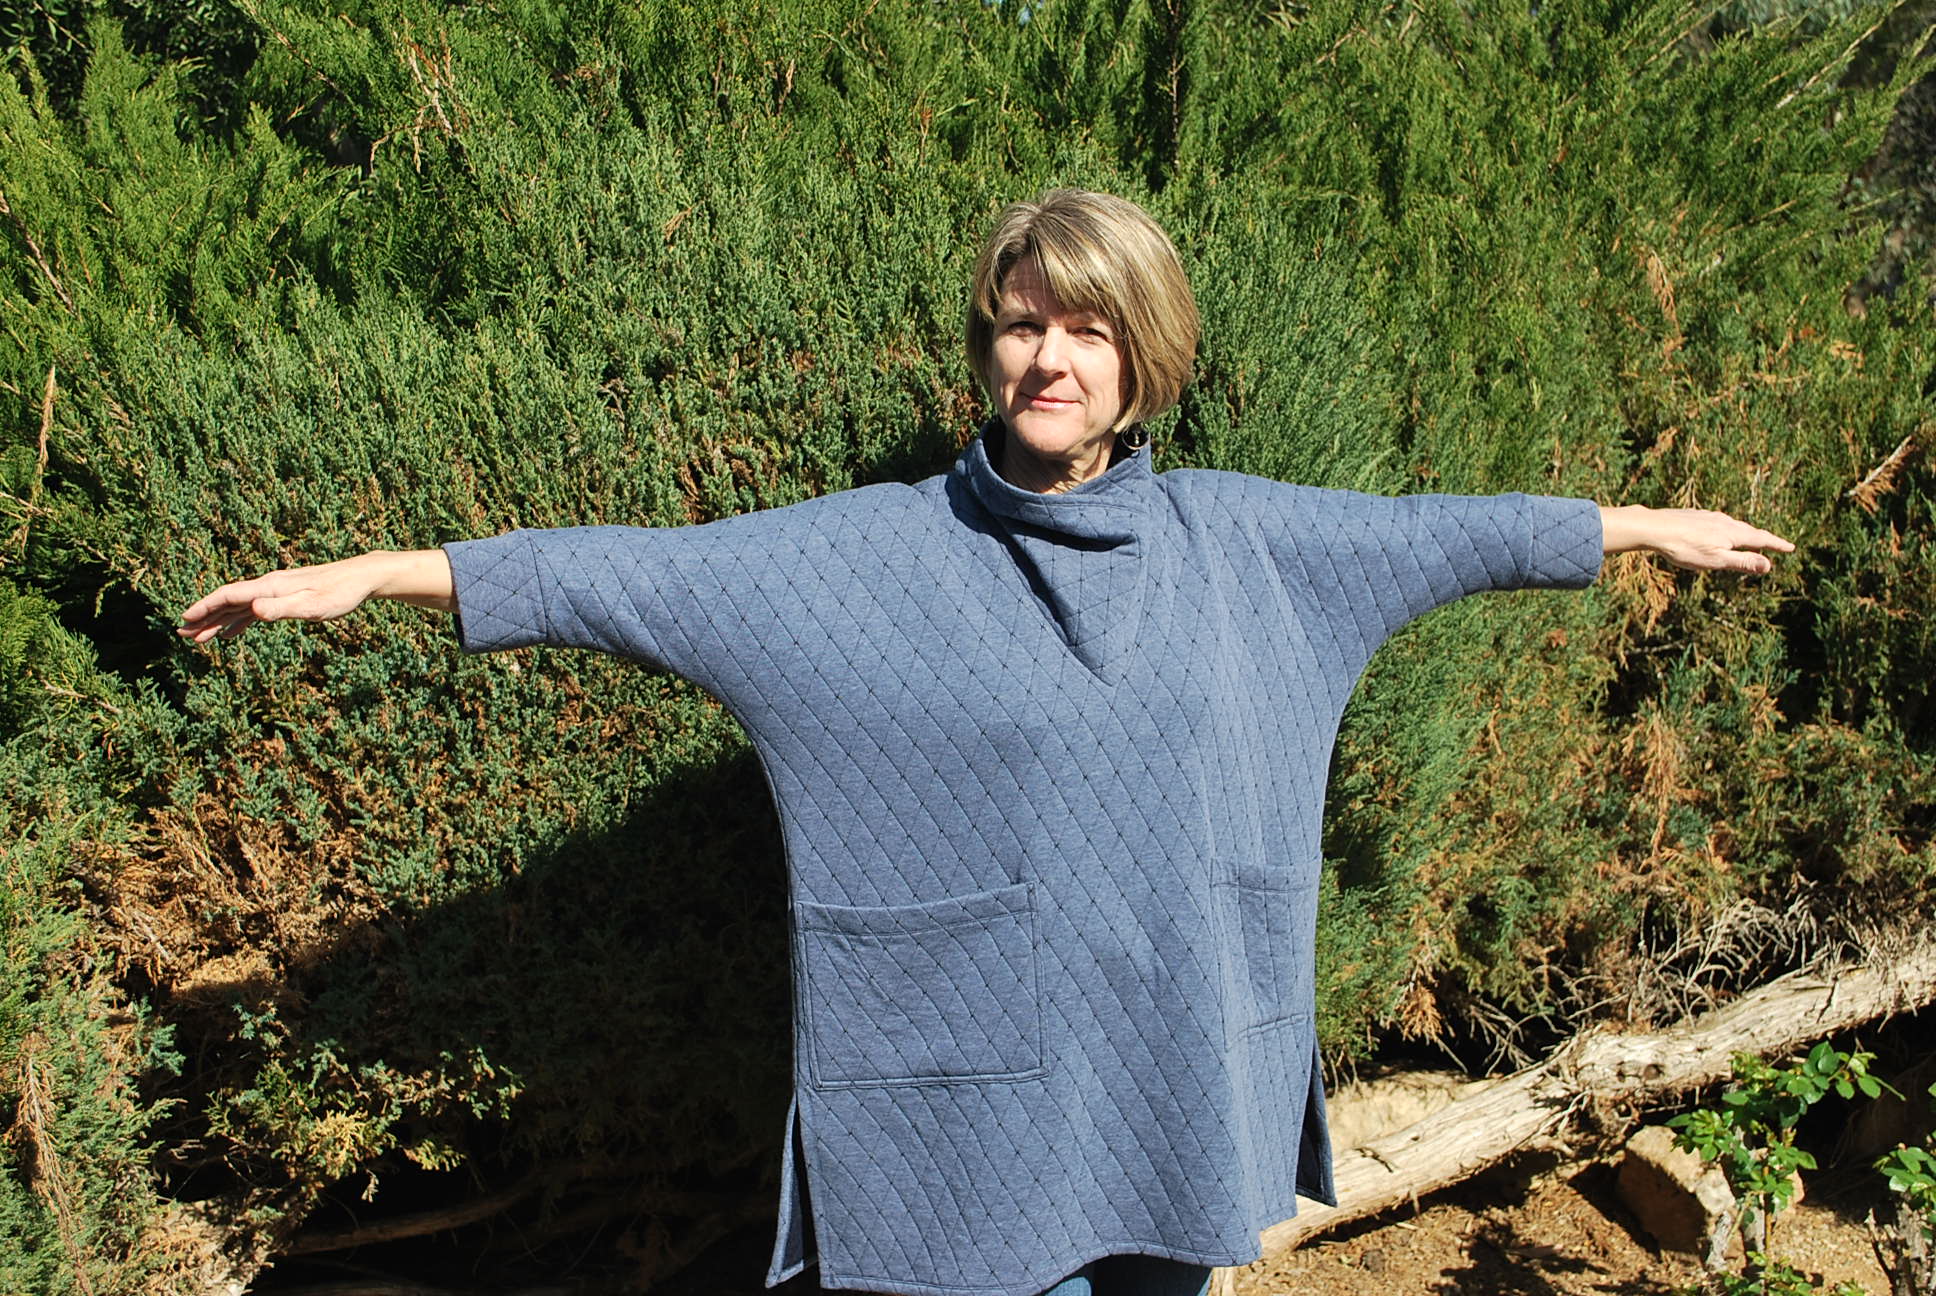
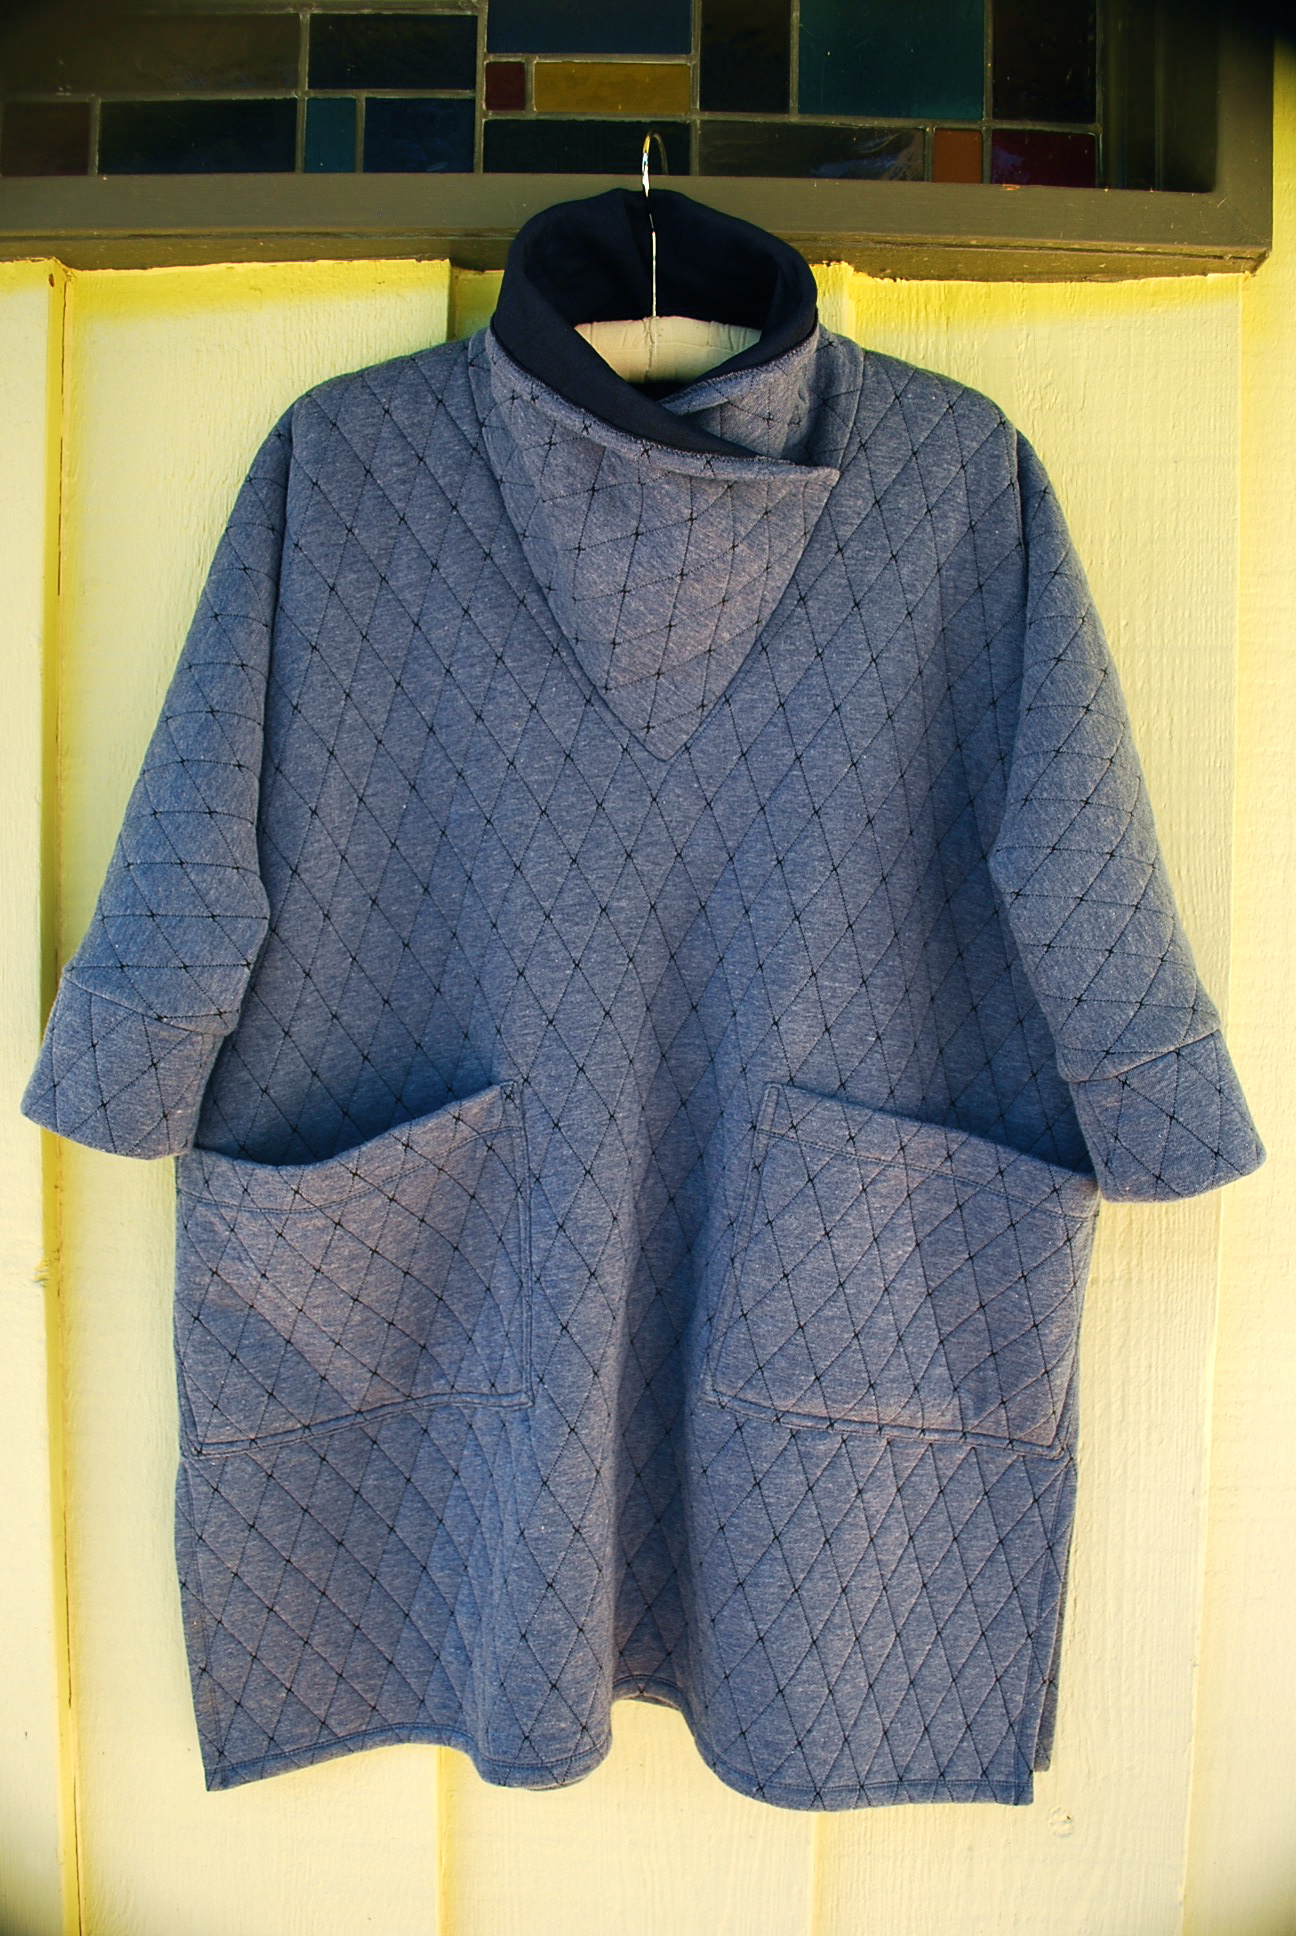
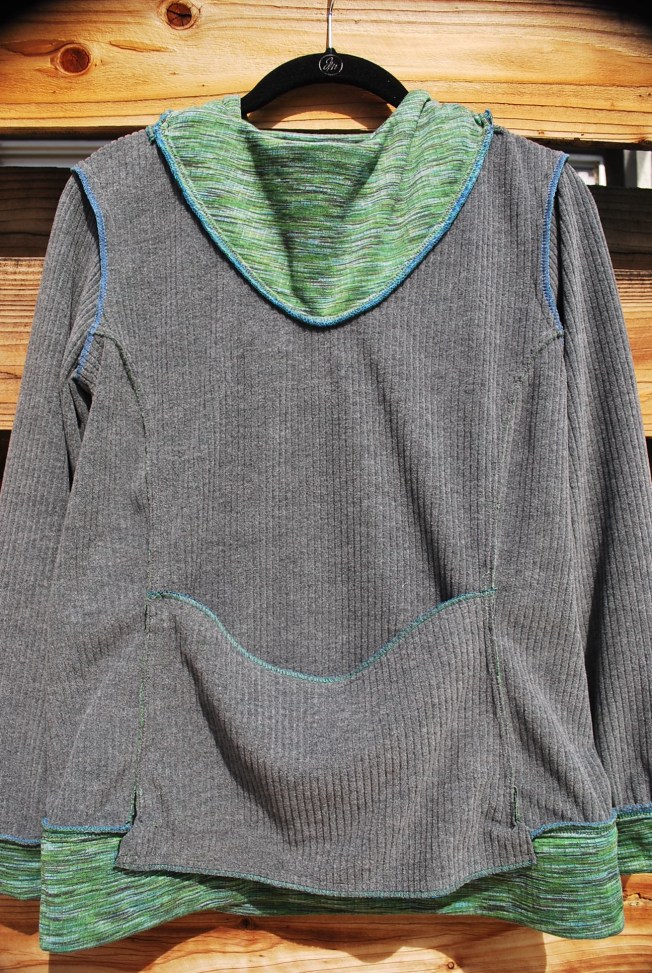
Even though we have said hello to Spring here in So Cal, I could not let the warm weather completely takeover before I share this fabulous winter make. The Jasper Sweatshirt, stylish, fashion forward and modern, looks like it could be a part of an upscale athletic RTW collection.

DSC_0409

DSC_0407

DSC_0413

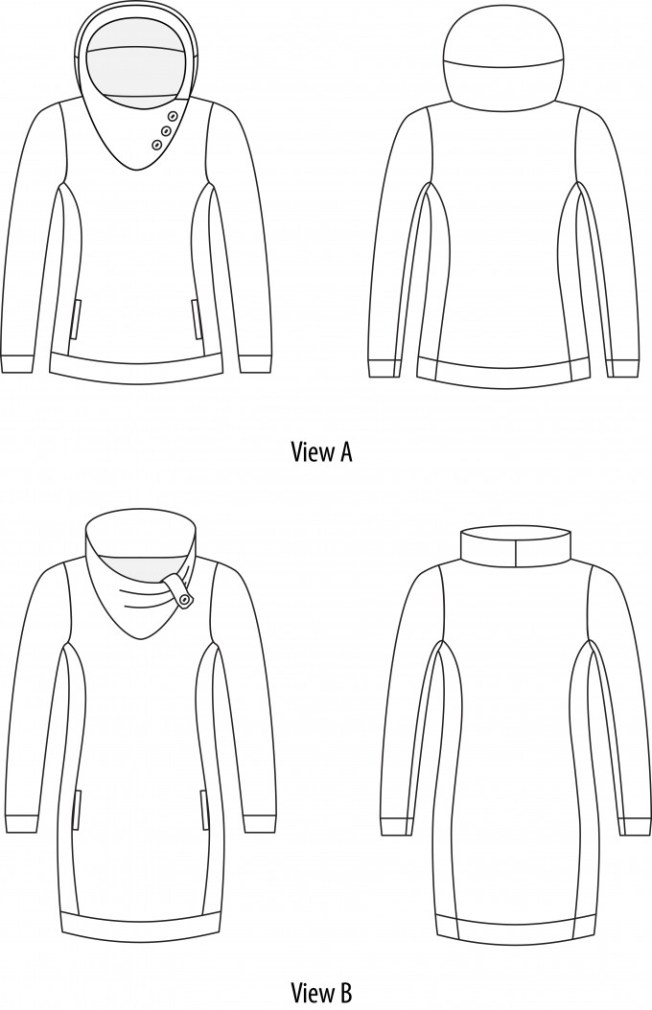
The PDF pattern by Paprika Patterns is actually titled “Jasper Sweater & Dress.” I first discovered this pattern while reading a post from Mahlica Designs blog well over a year ago. I purchased it soon after, but it sat in my pile for quite some time. There is a Sweater and Dress view, and a collar or hood option.

JasperLine-680x1054

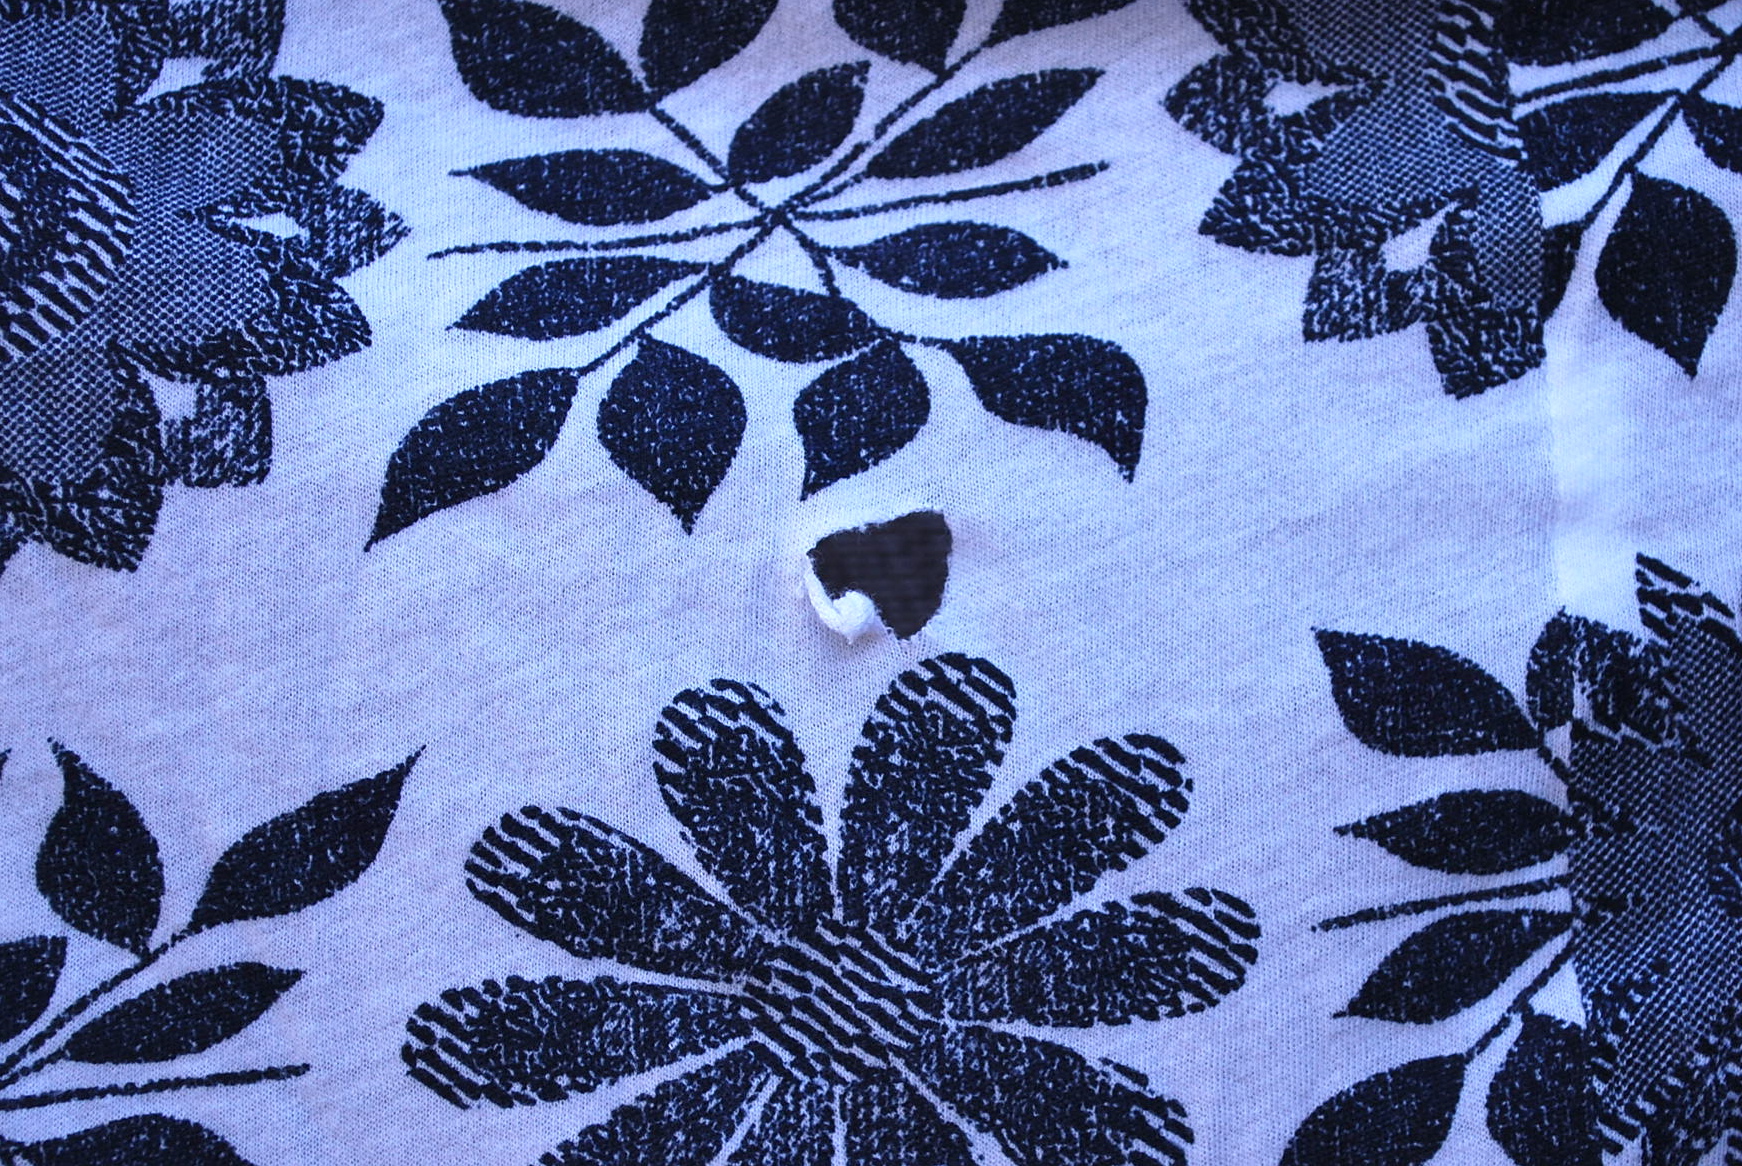
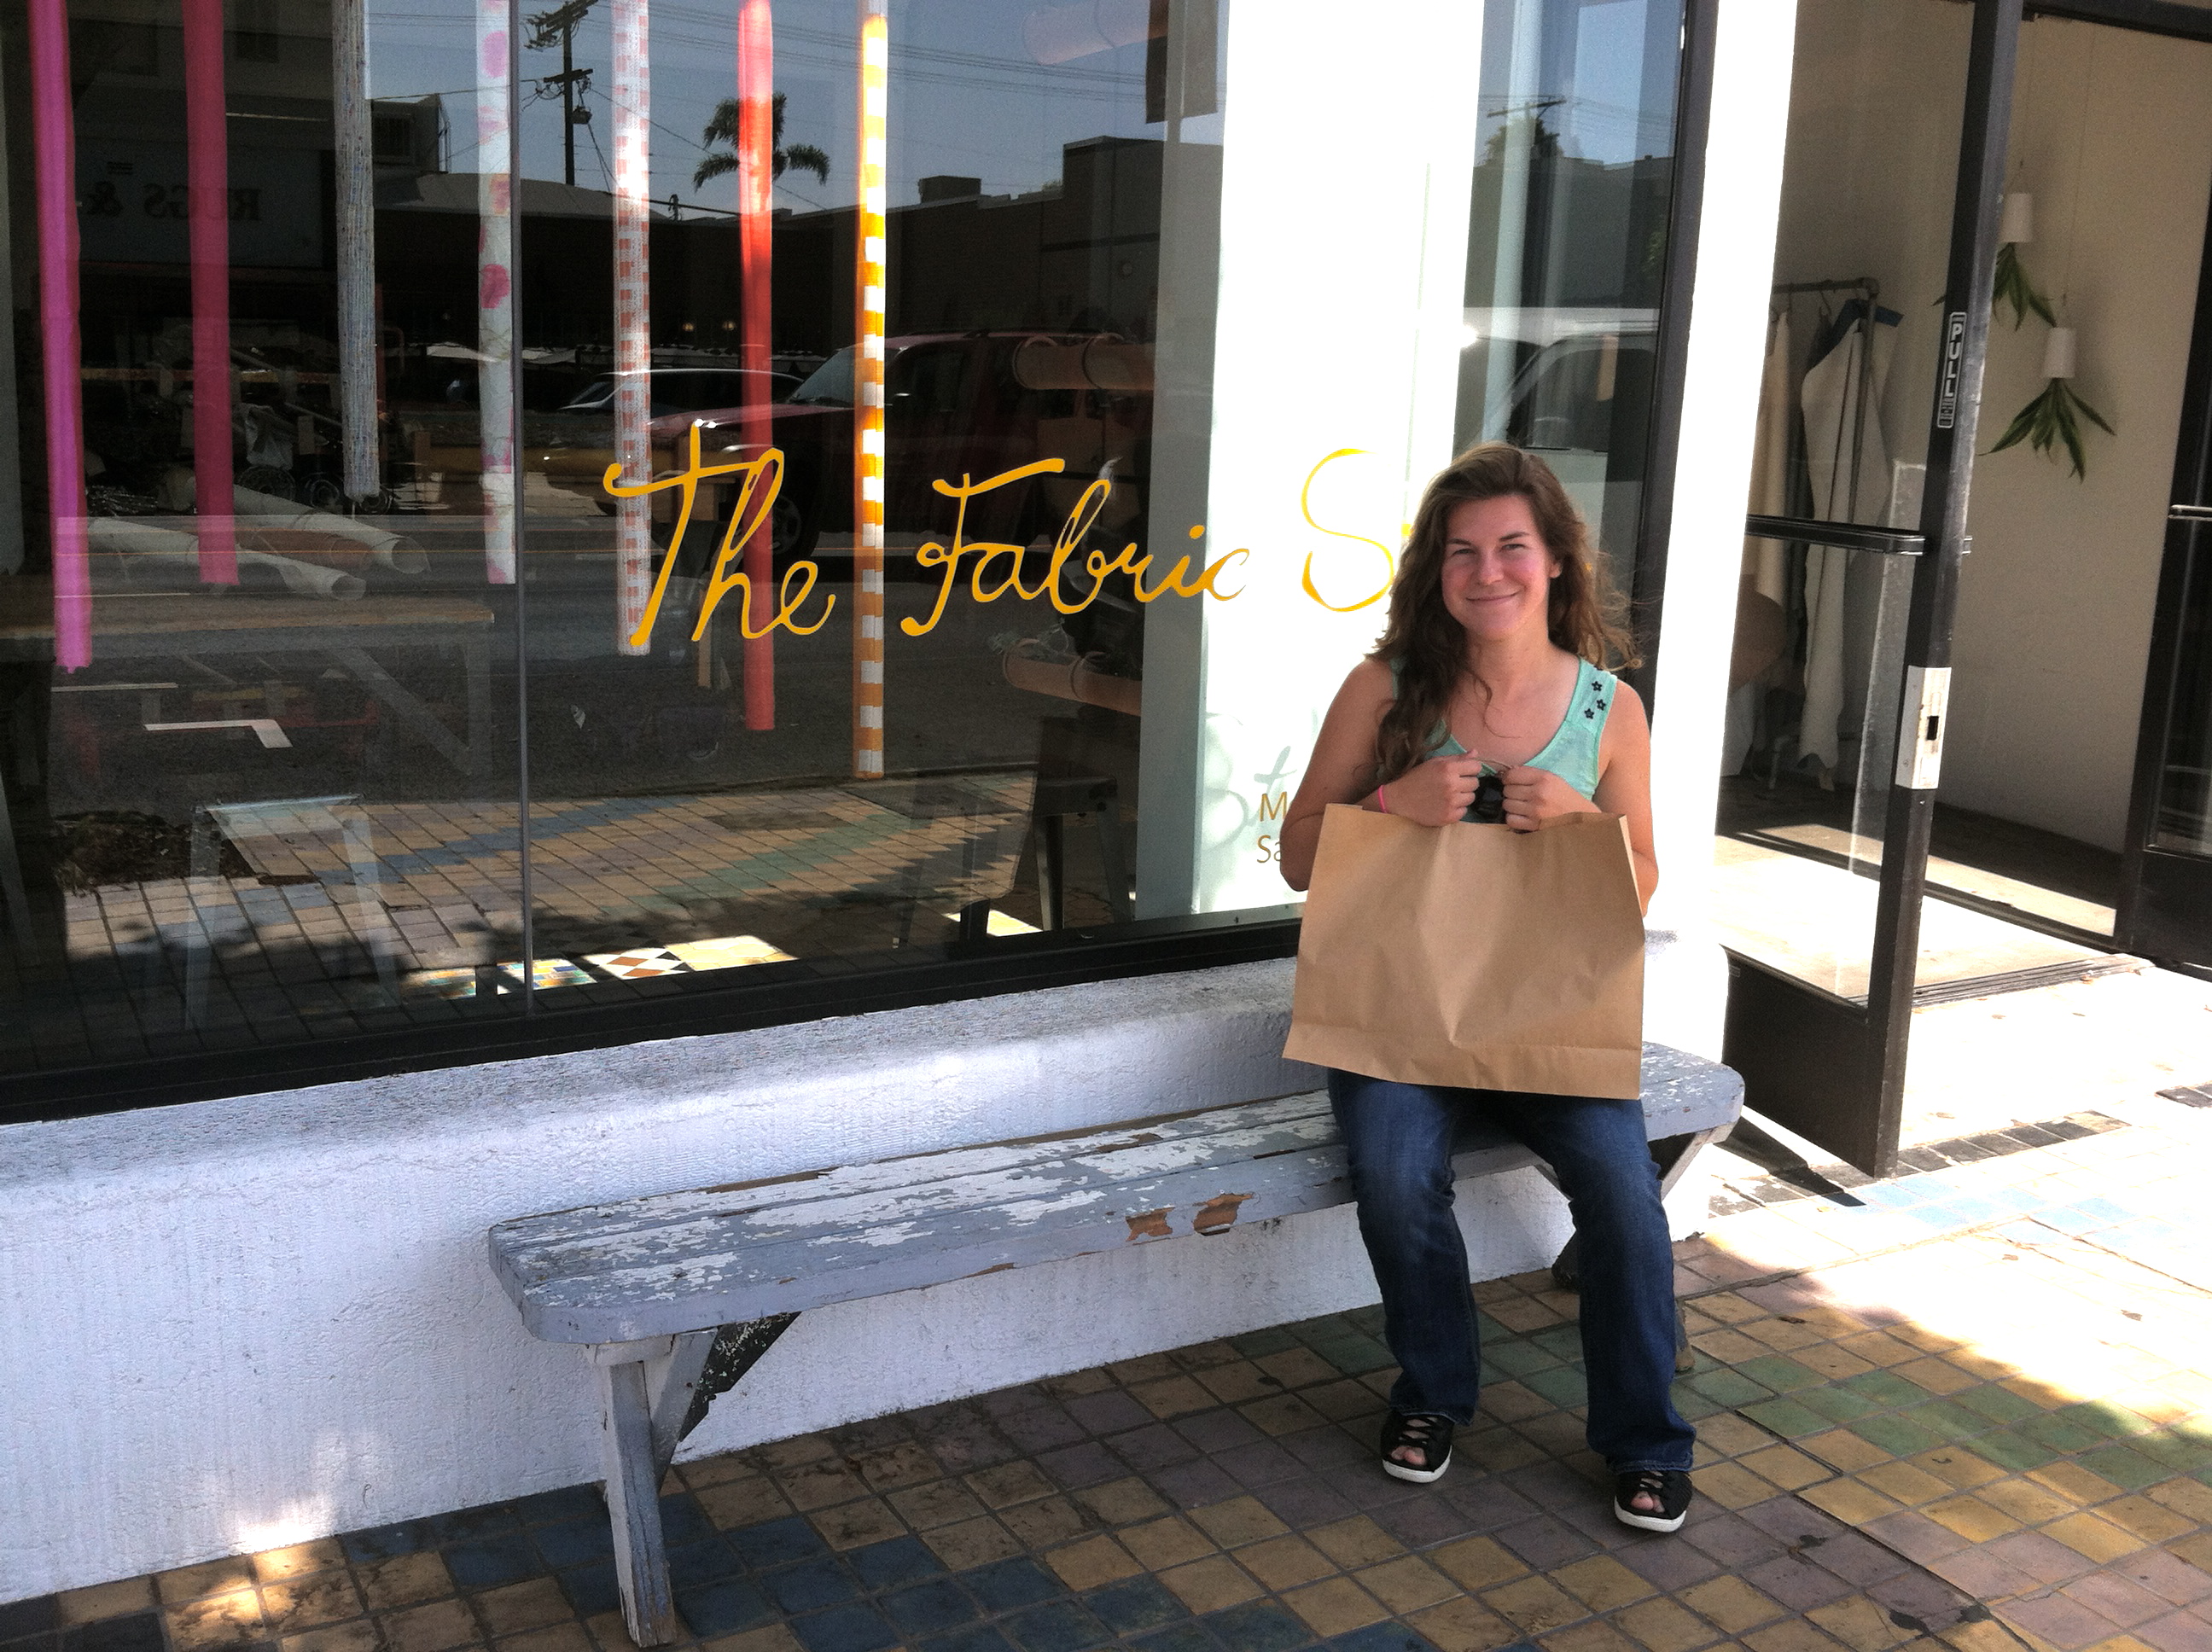
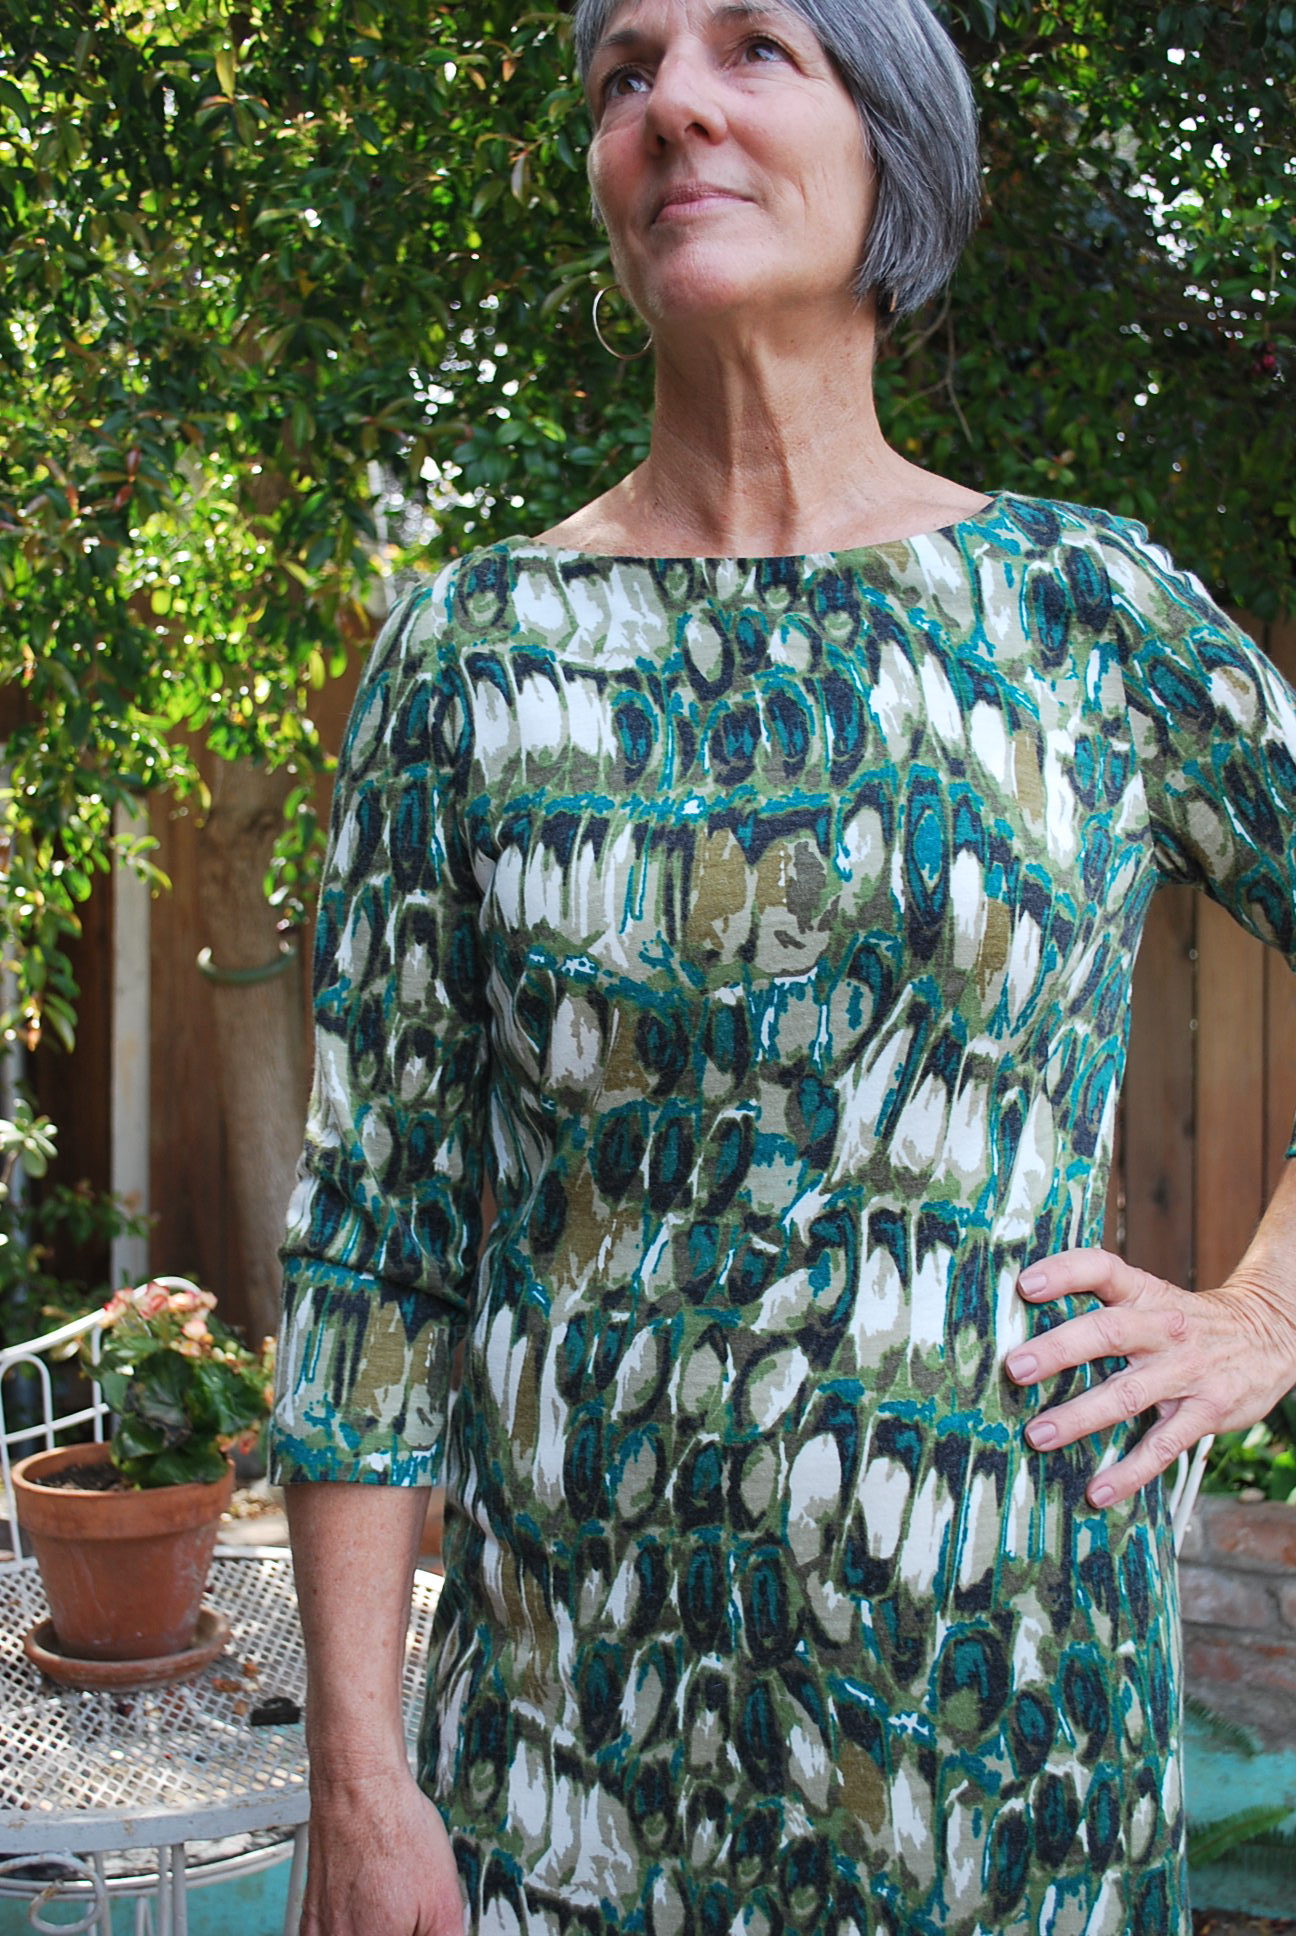
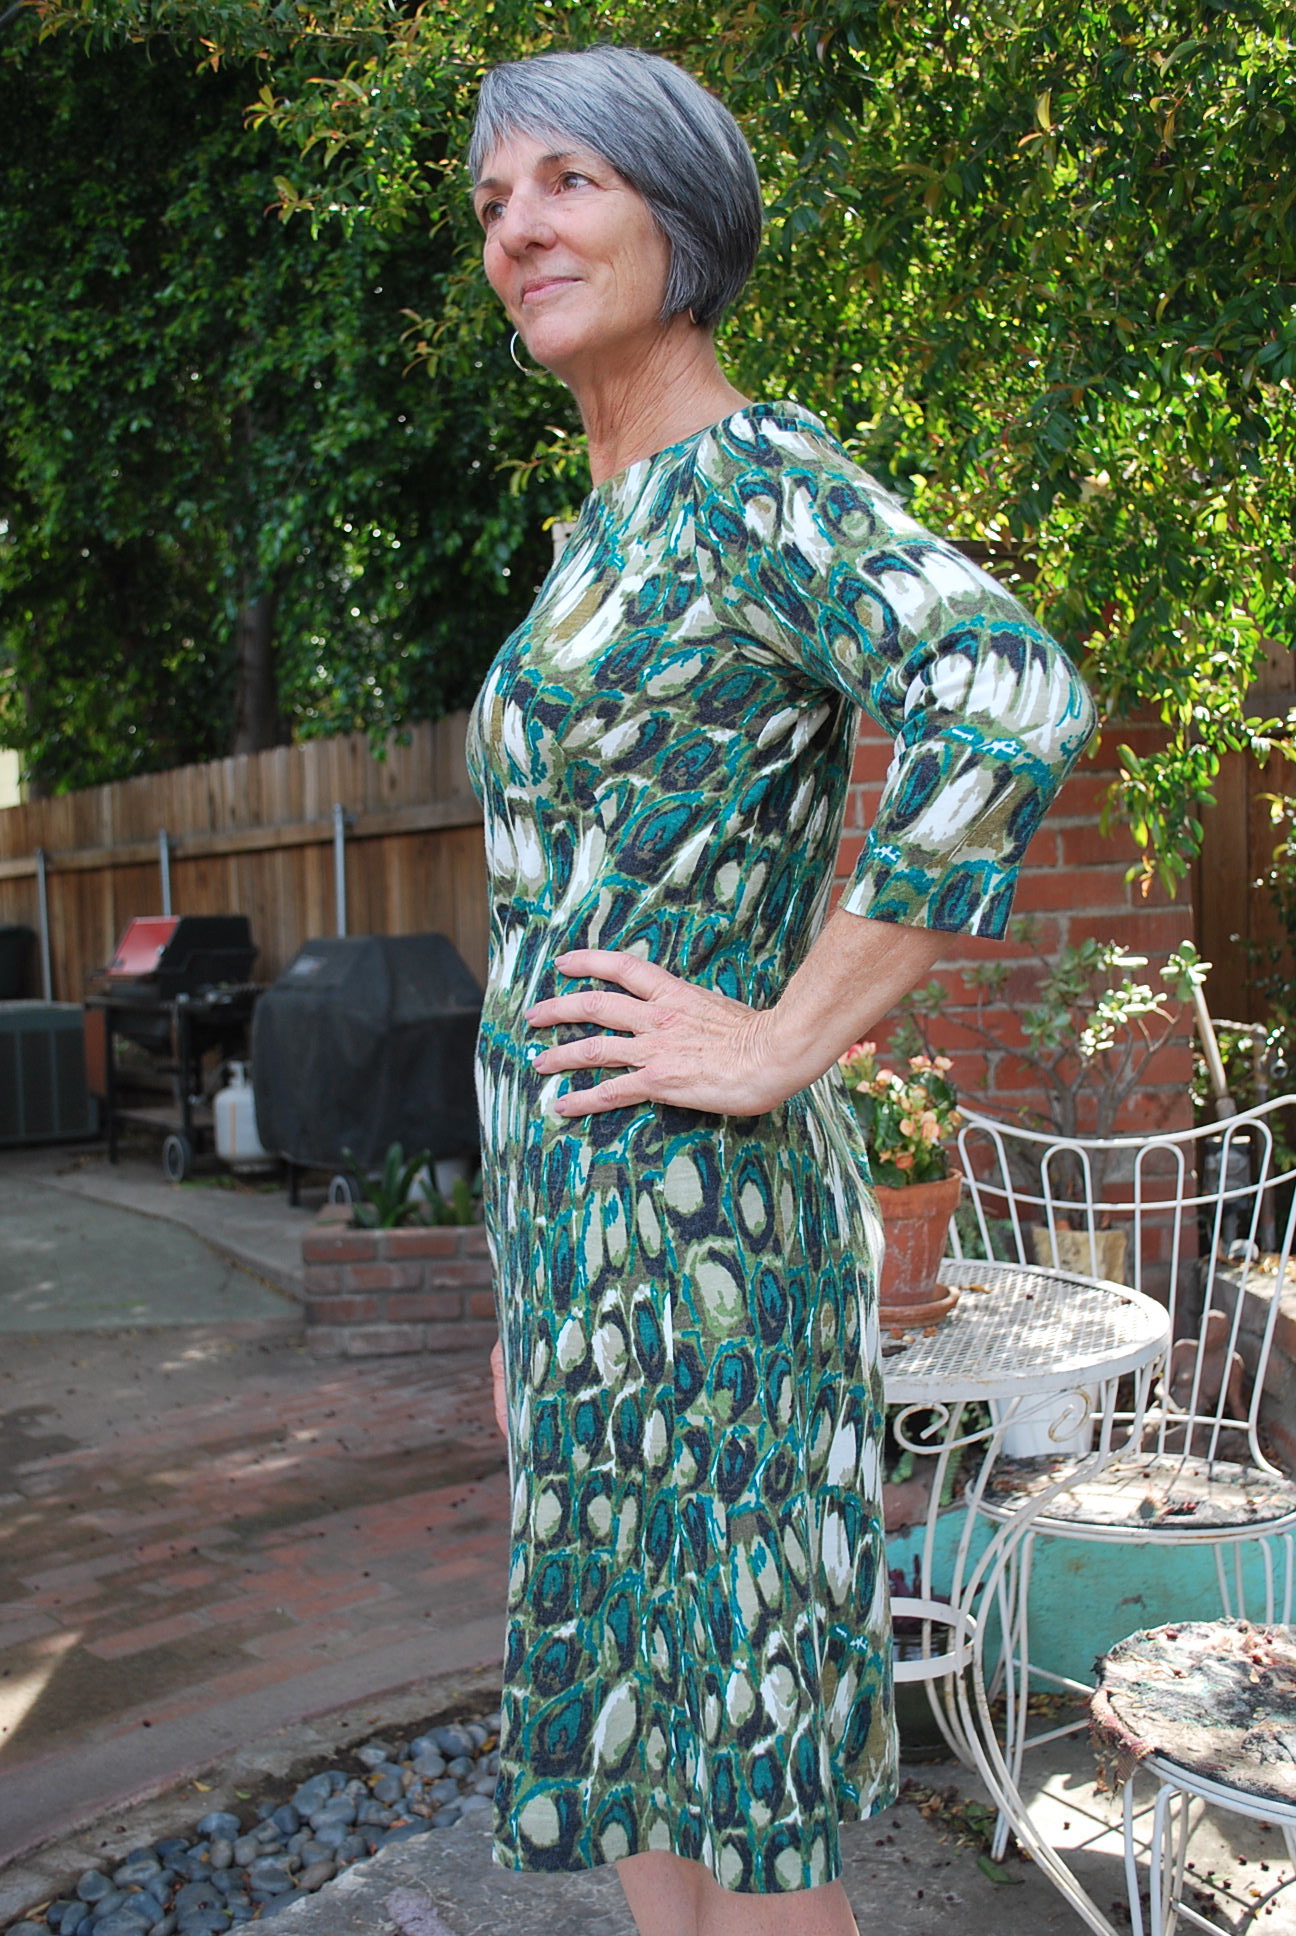
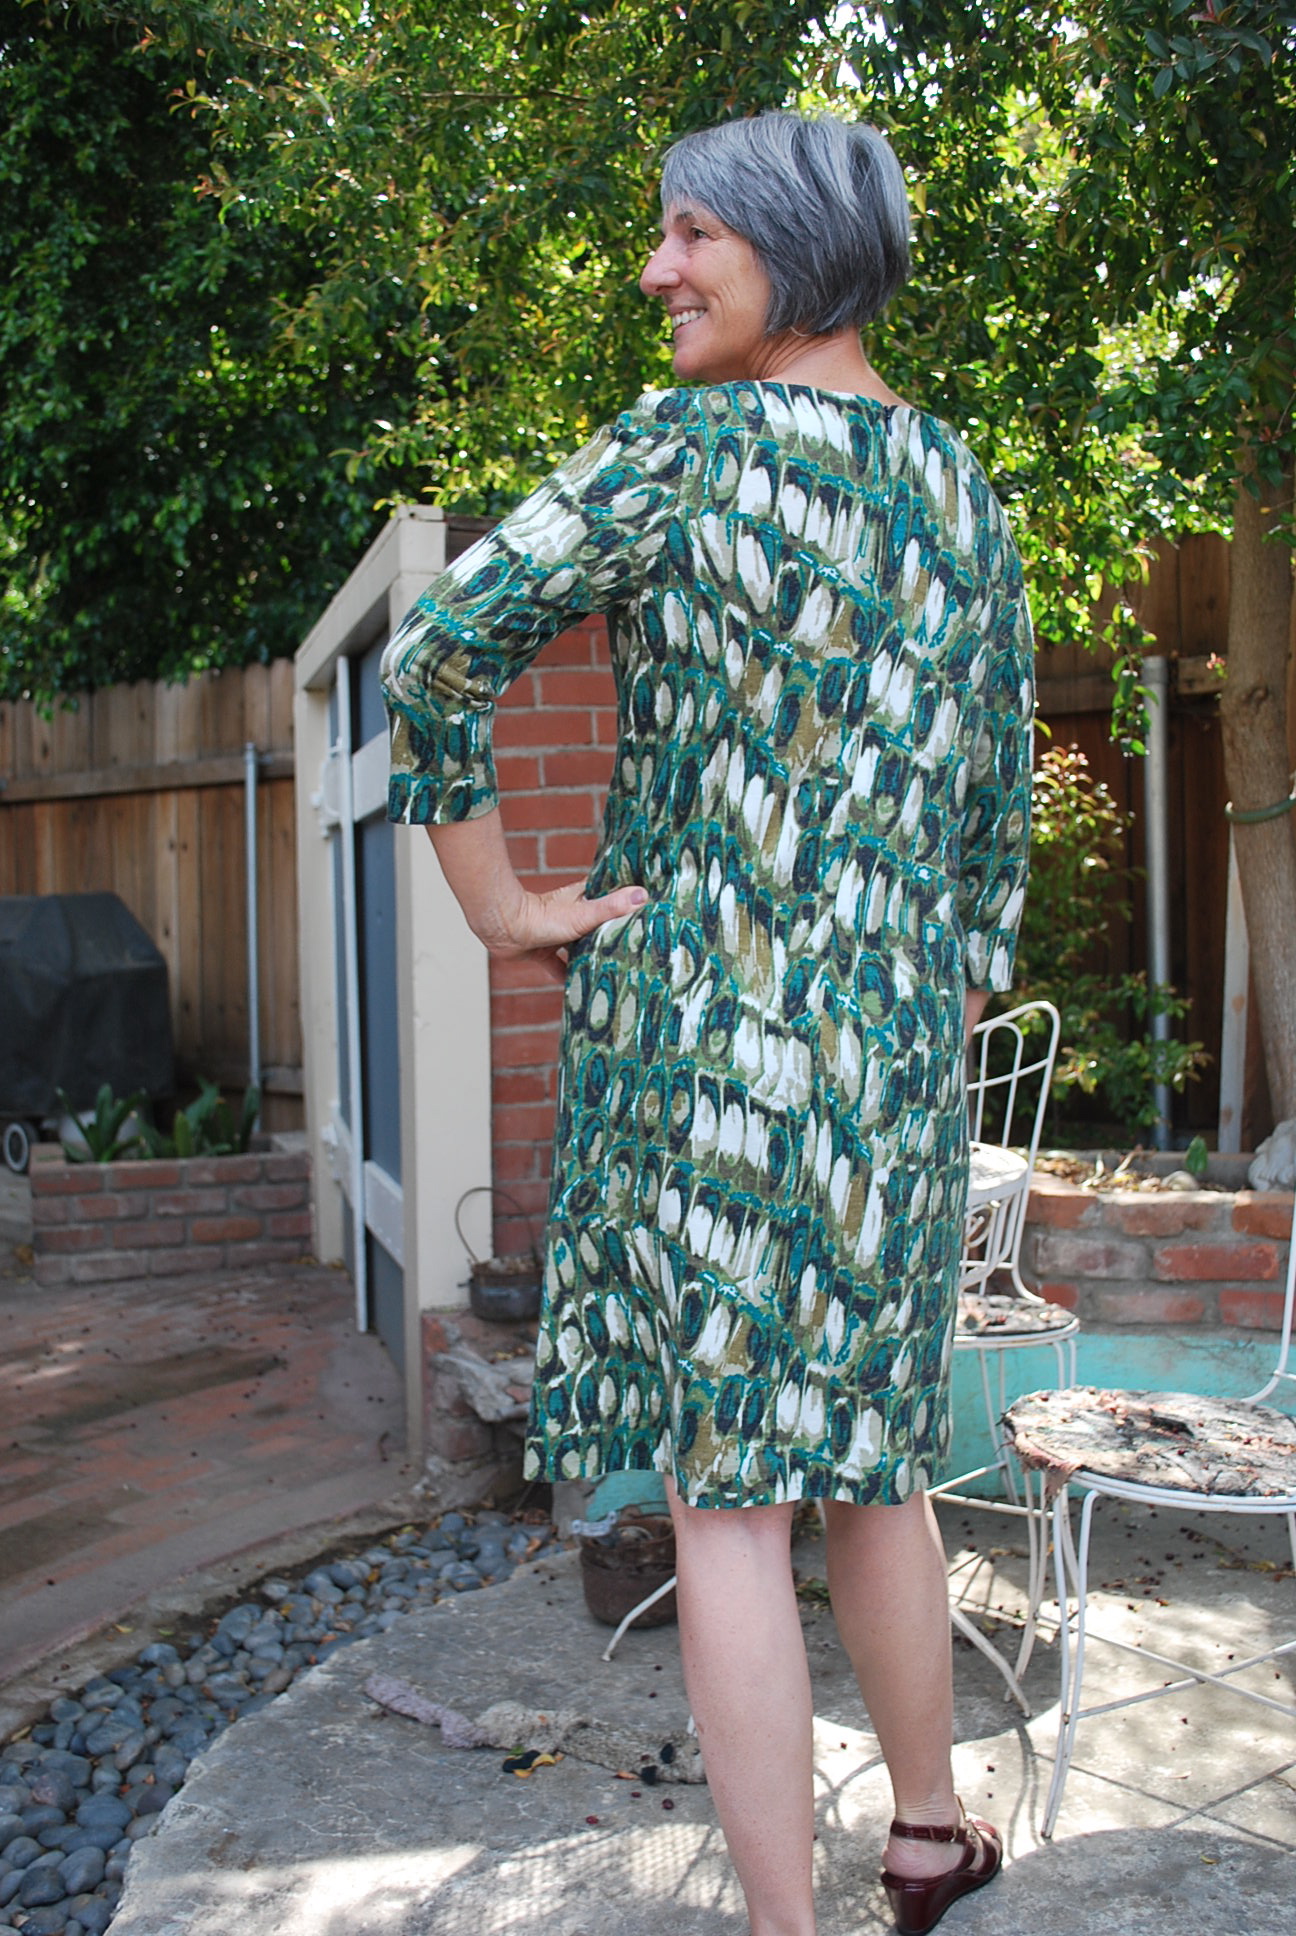
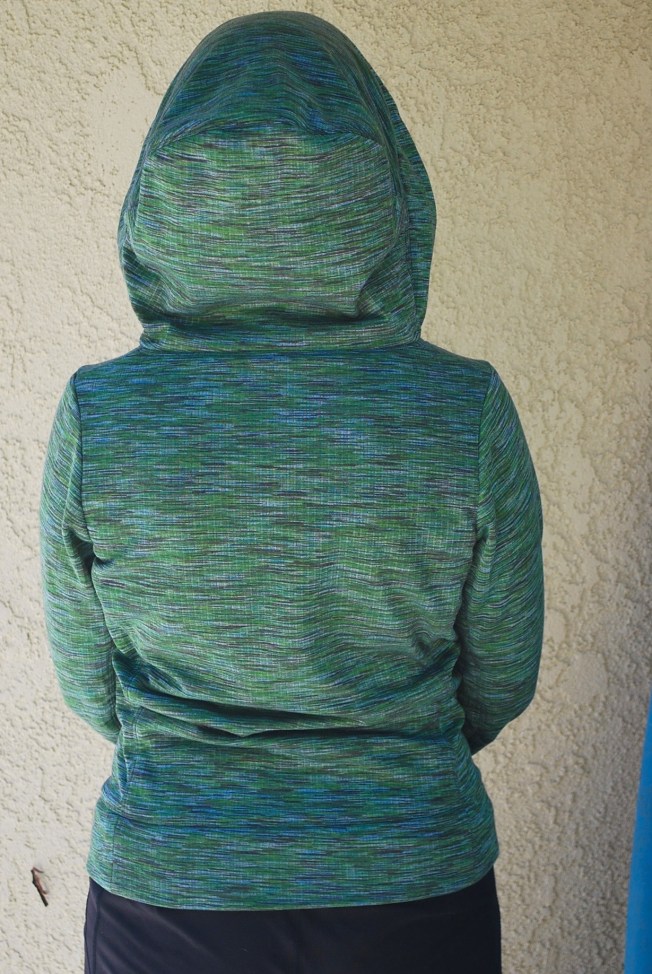
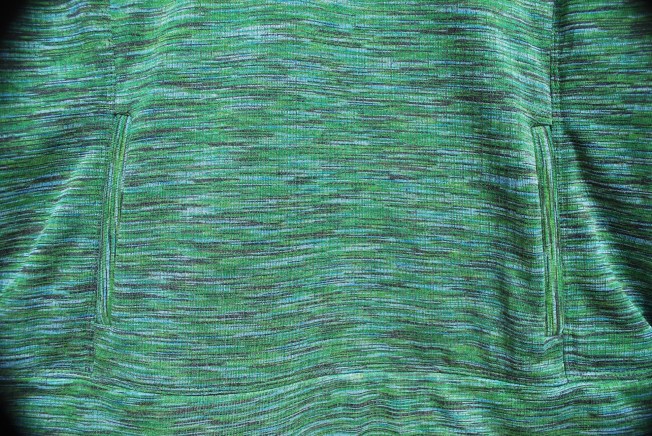
My catalyst to finally make the Jasper was this amazing fabric I found at Mood on La Brea Avenue in Los Angeles. The front side has a smooth texture with snazzy, verigated lines of blue, green and grey. The back side is a cuddly, soft, ribbed, grey fleece. I was obsessed with this fabric when I discovered it stuffed amongst all the sweater knits at Mood. It was $25 per yard, and I didn’t care. I loved it’s unique two sided-ness, and it’s promise of comfy warmth on a winter walk in So Cal.

DSC_0365

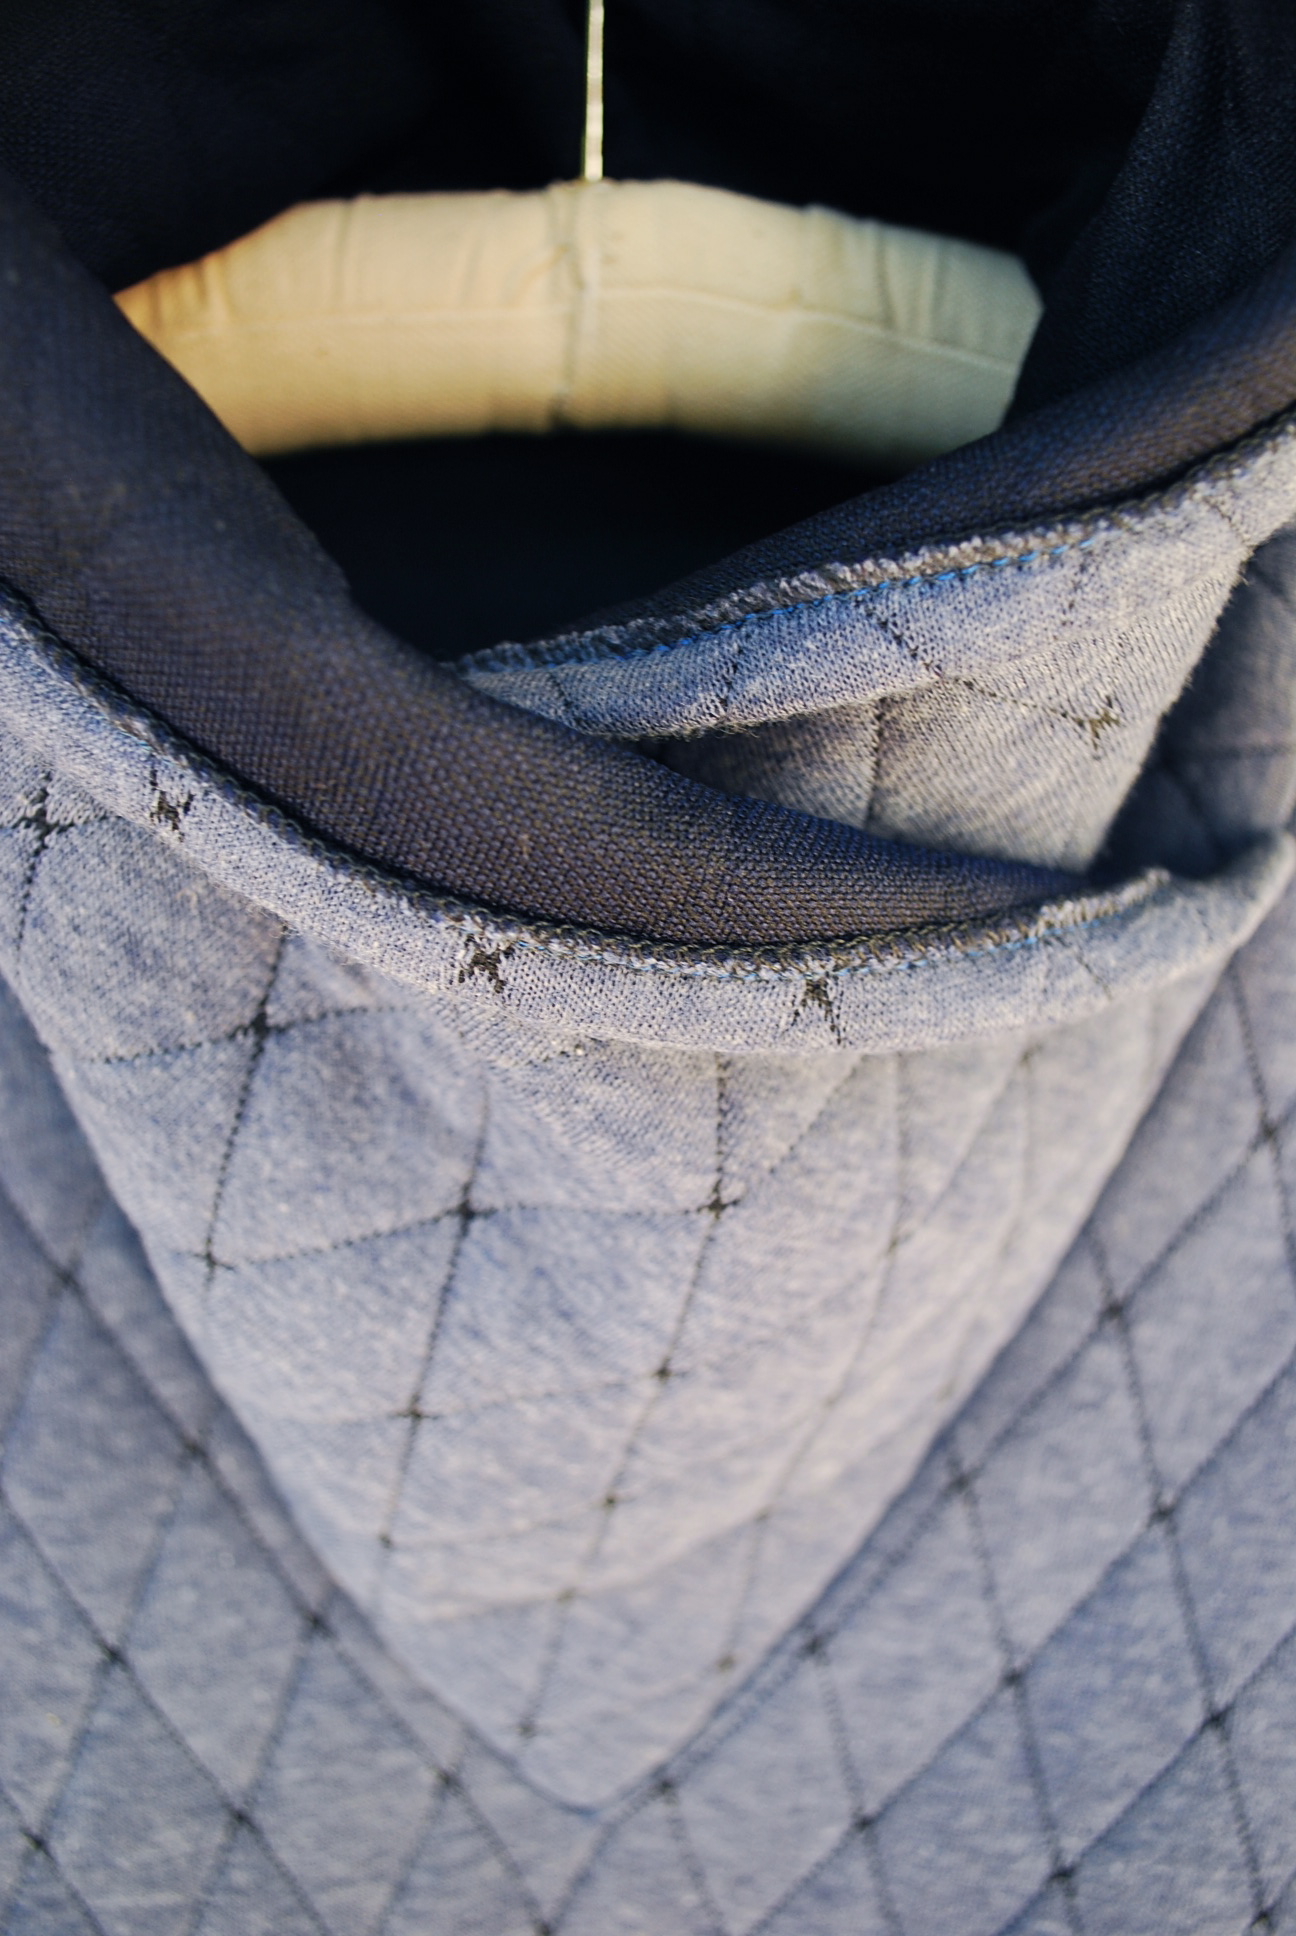
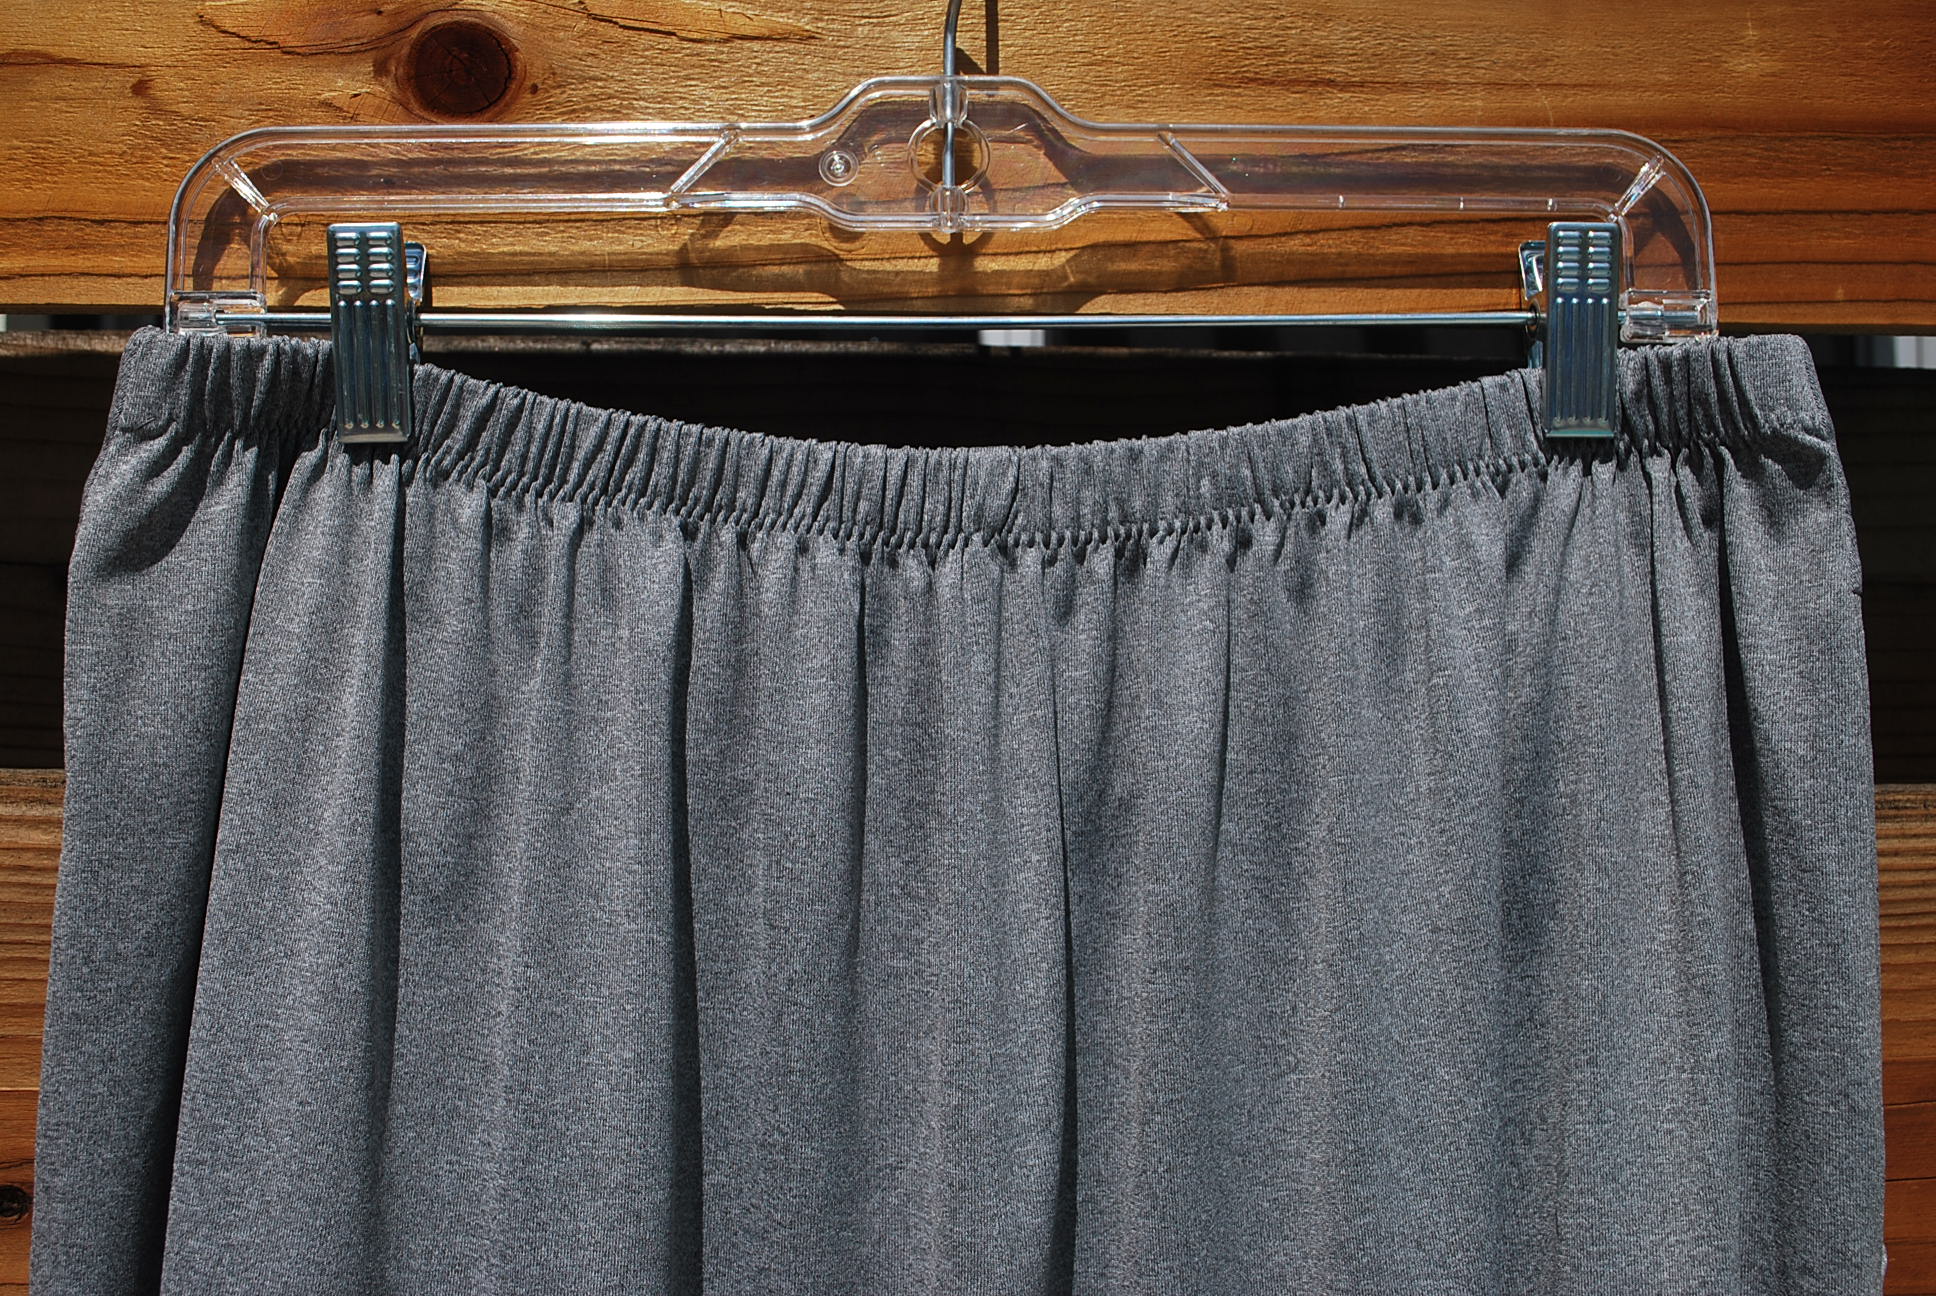
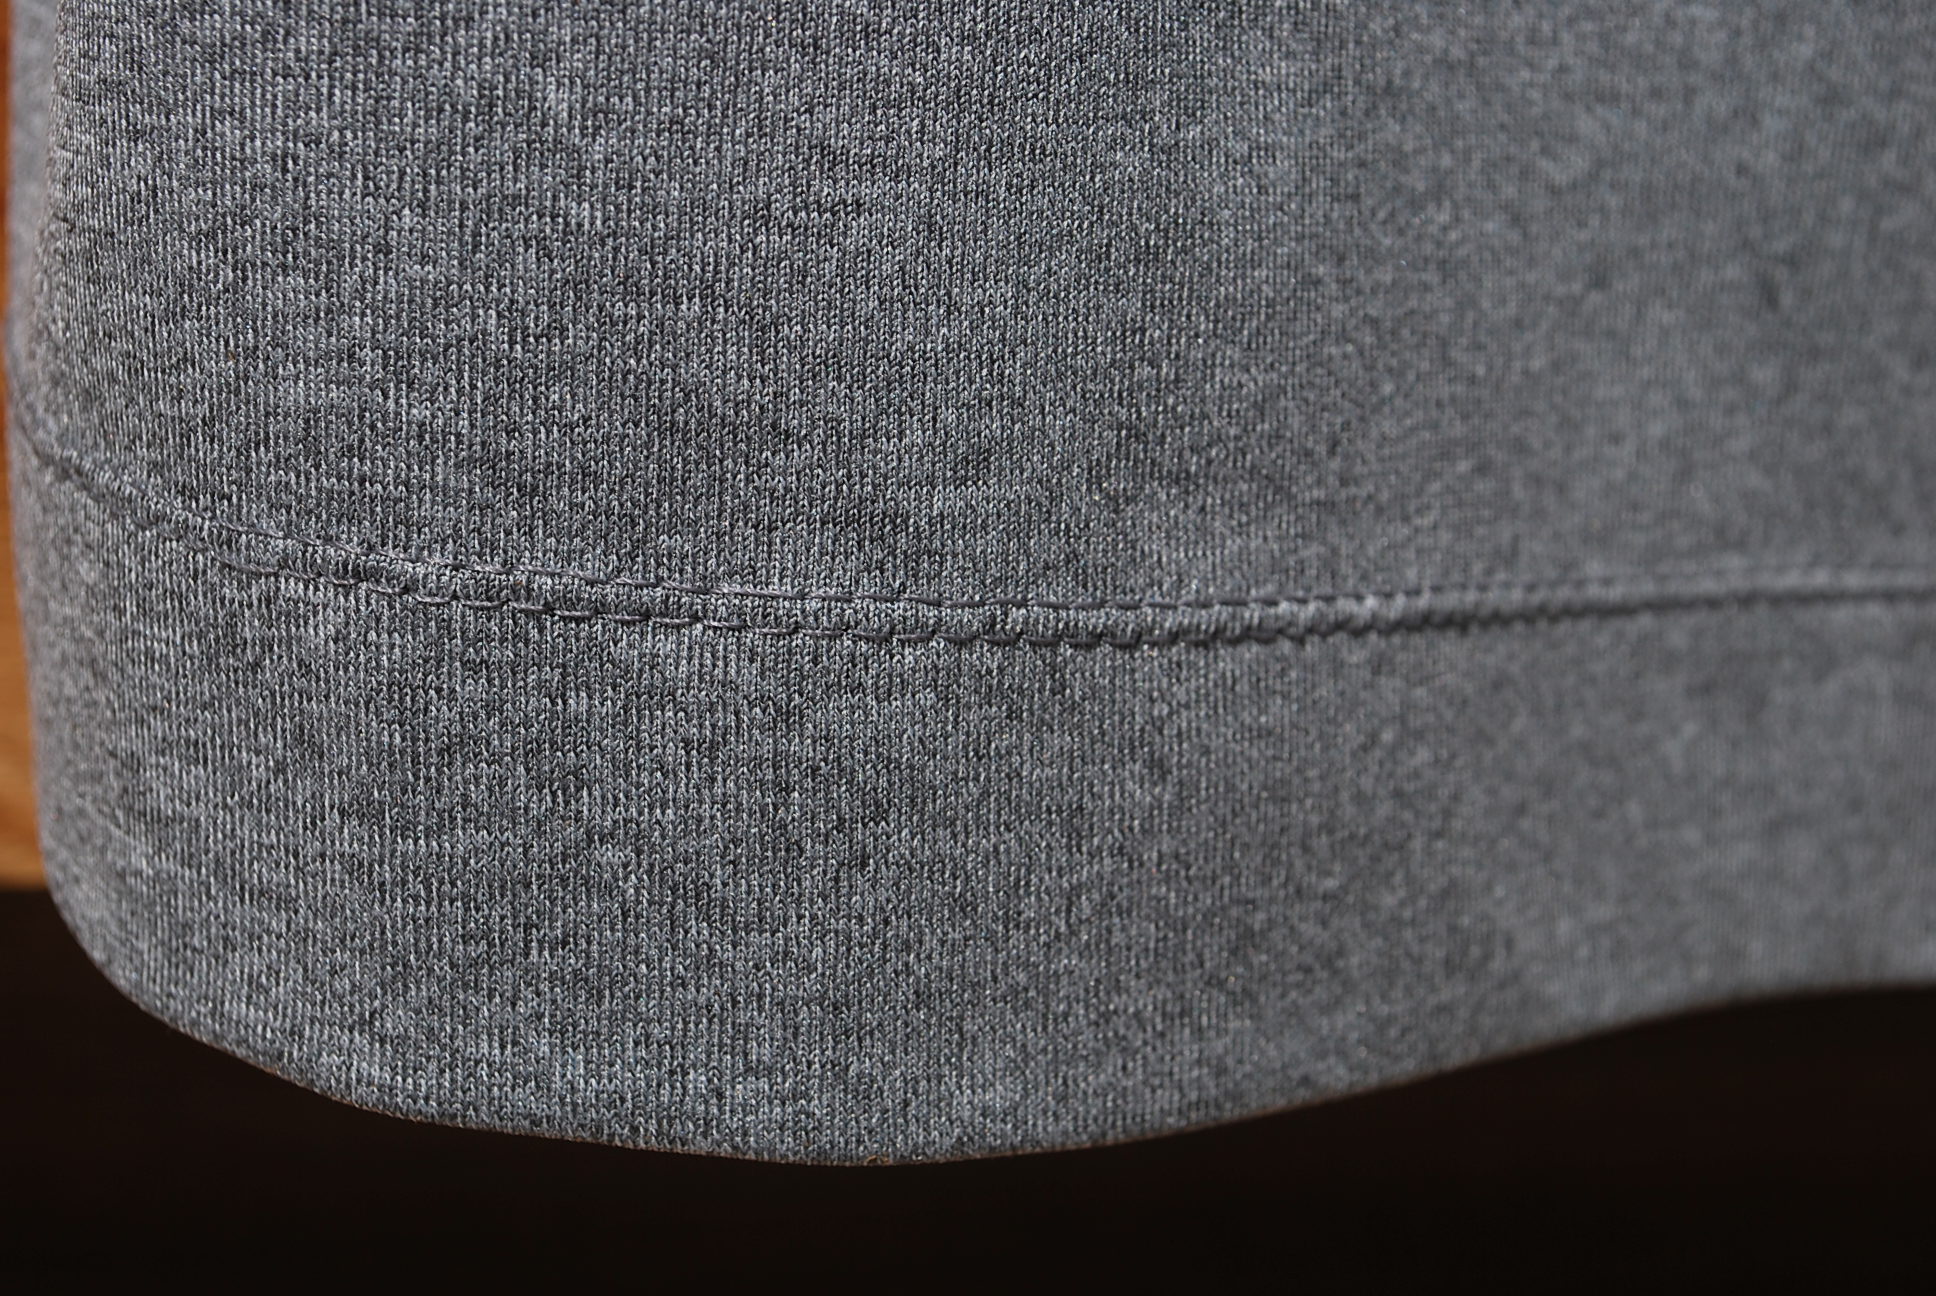
I top-stitched most of the seams with a stretch double needle.

DSC_0364

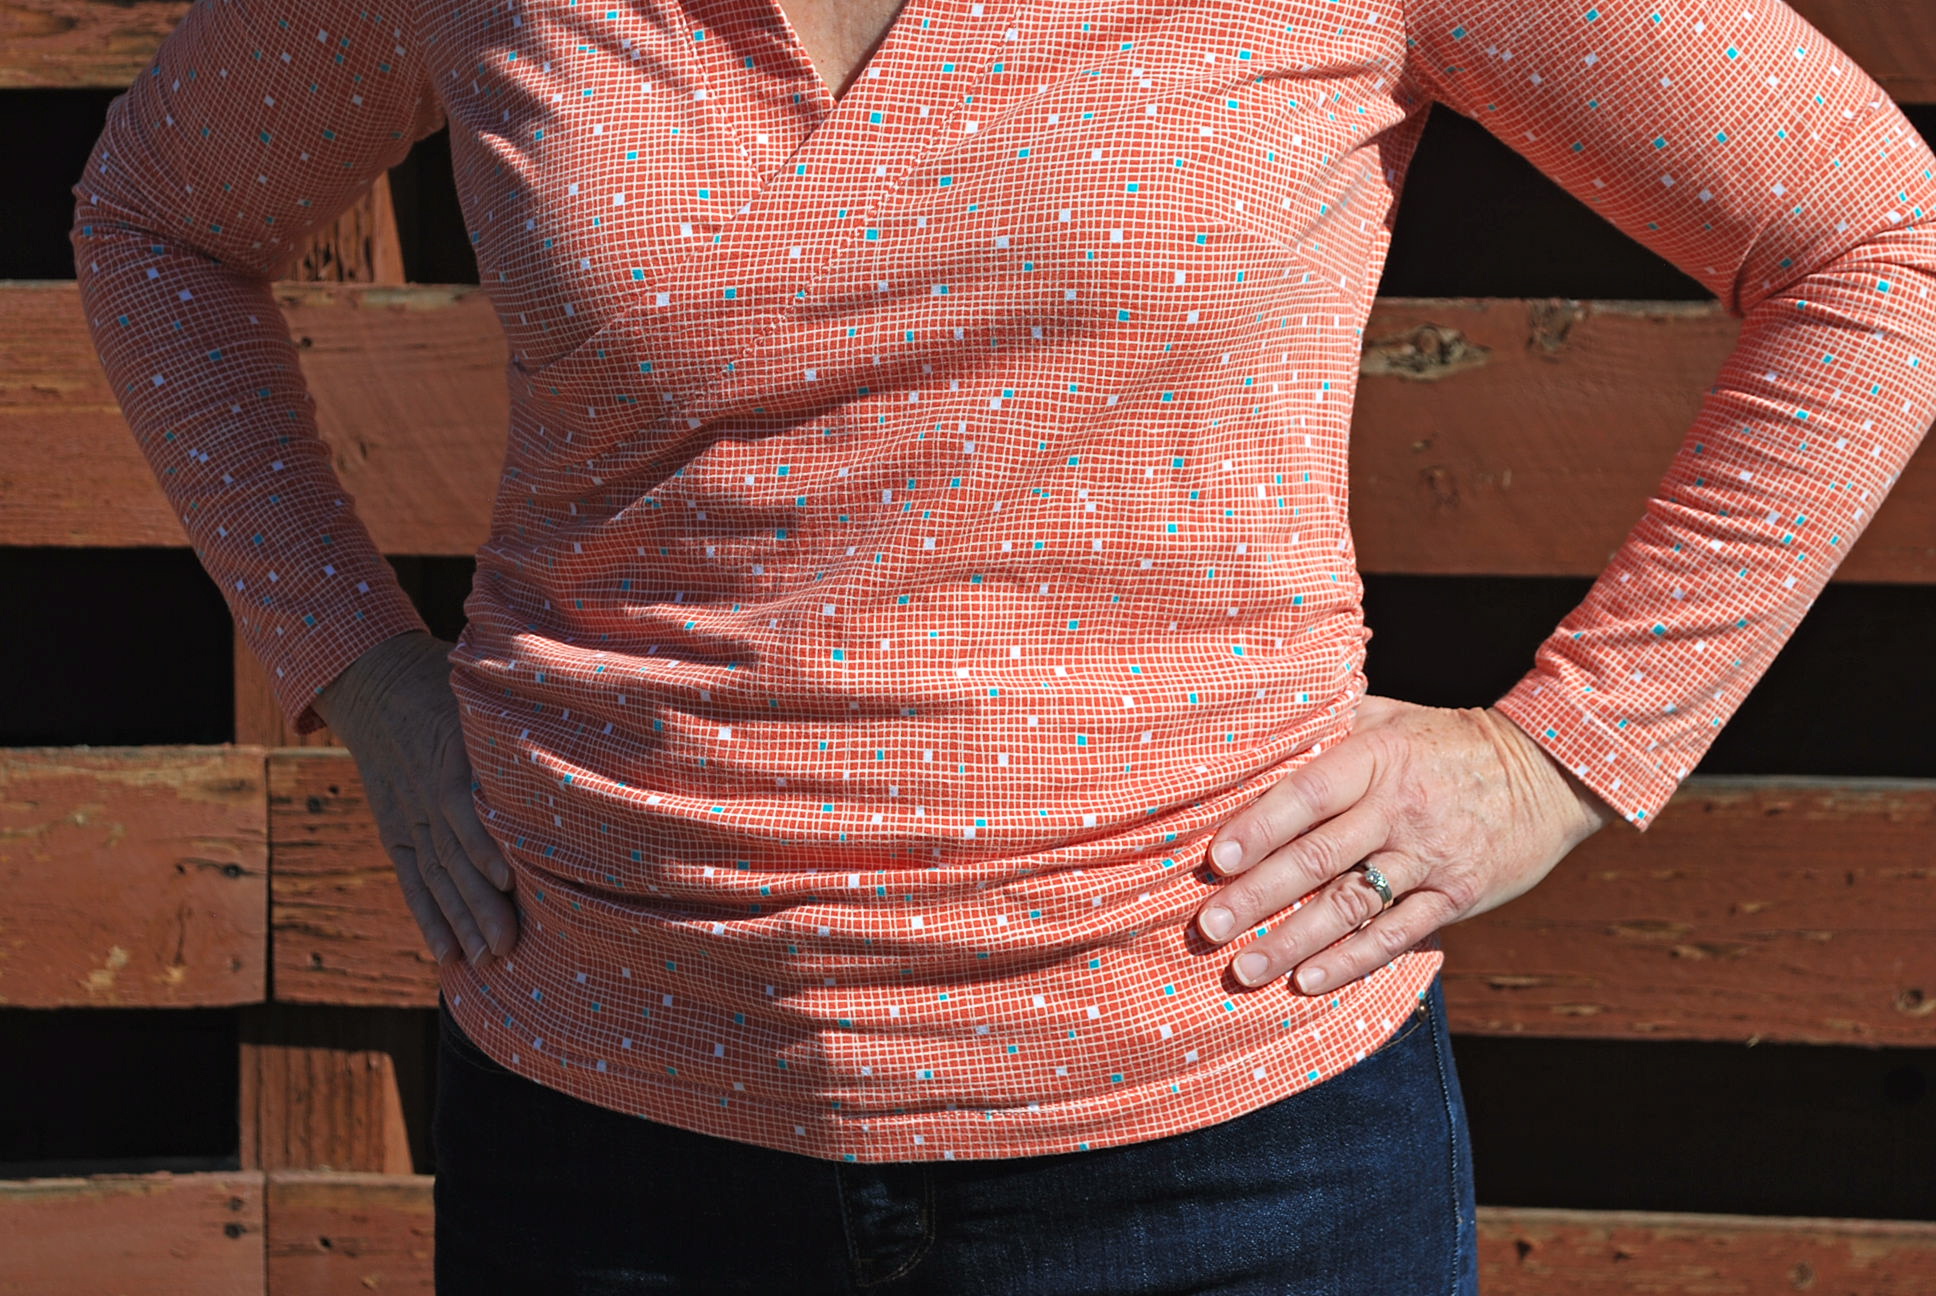
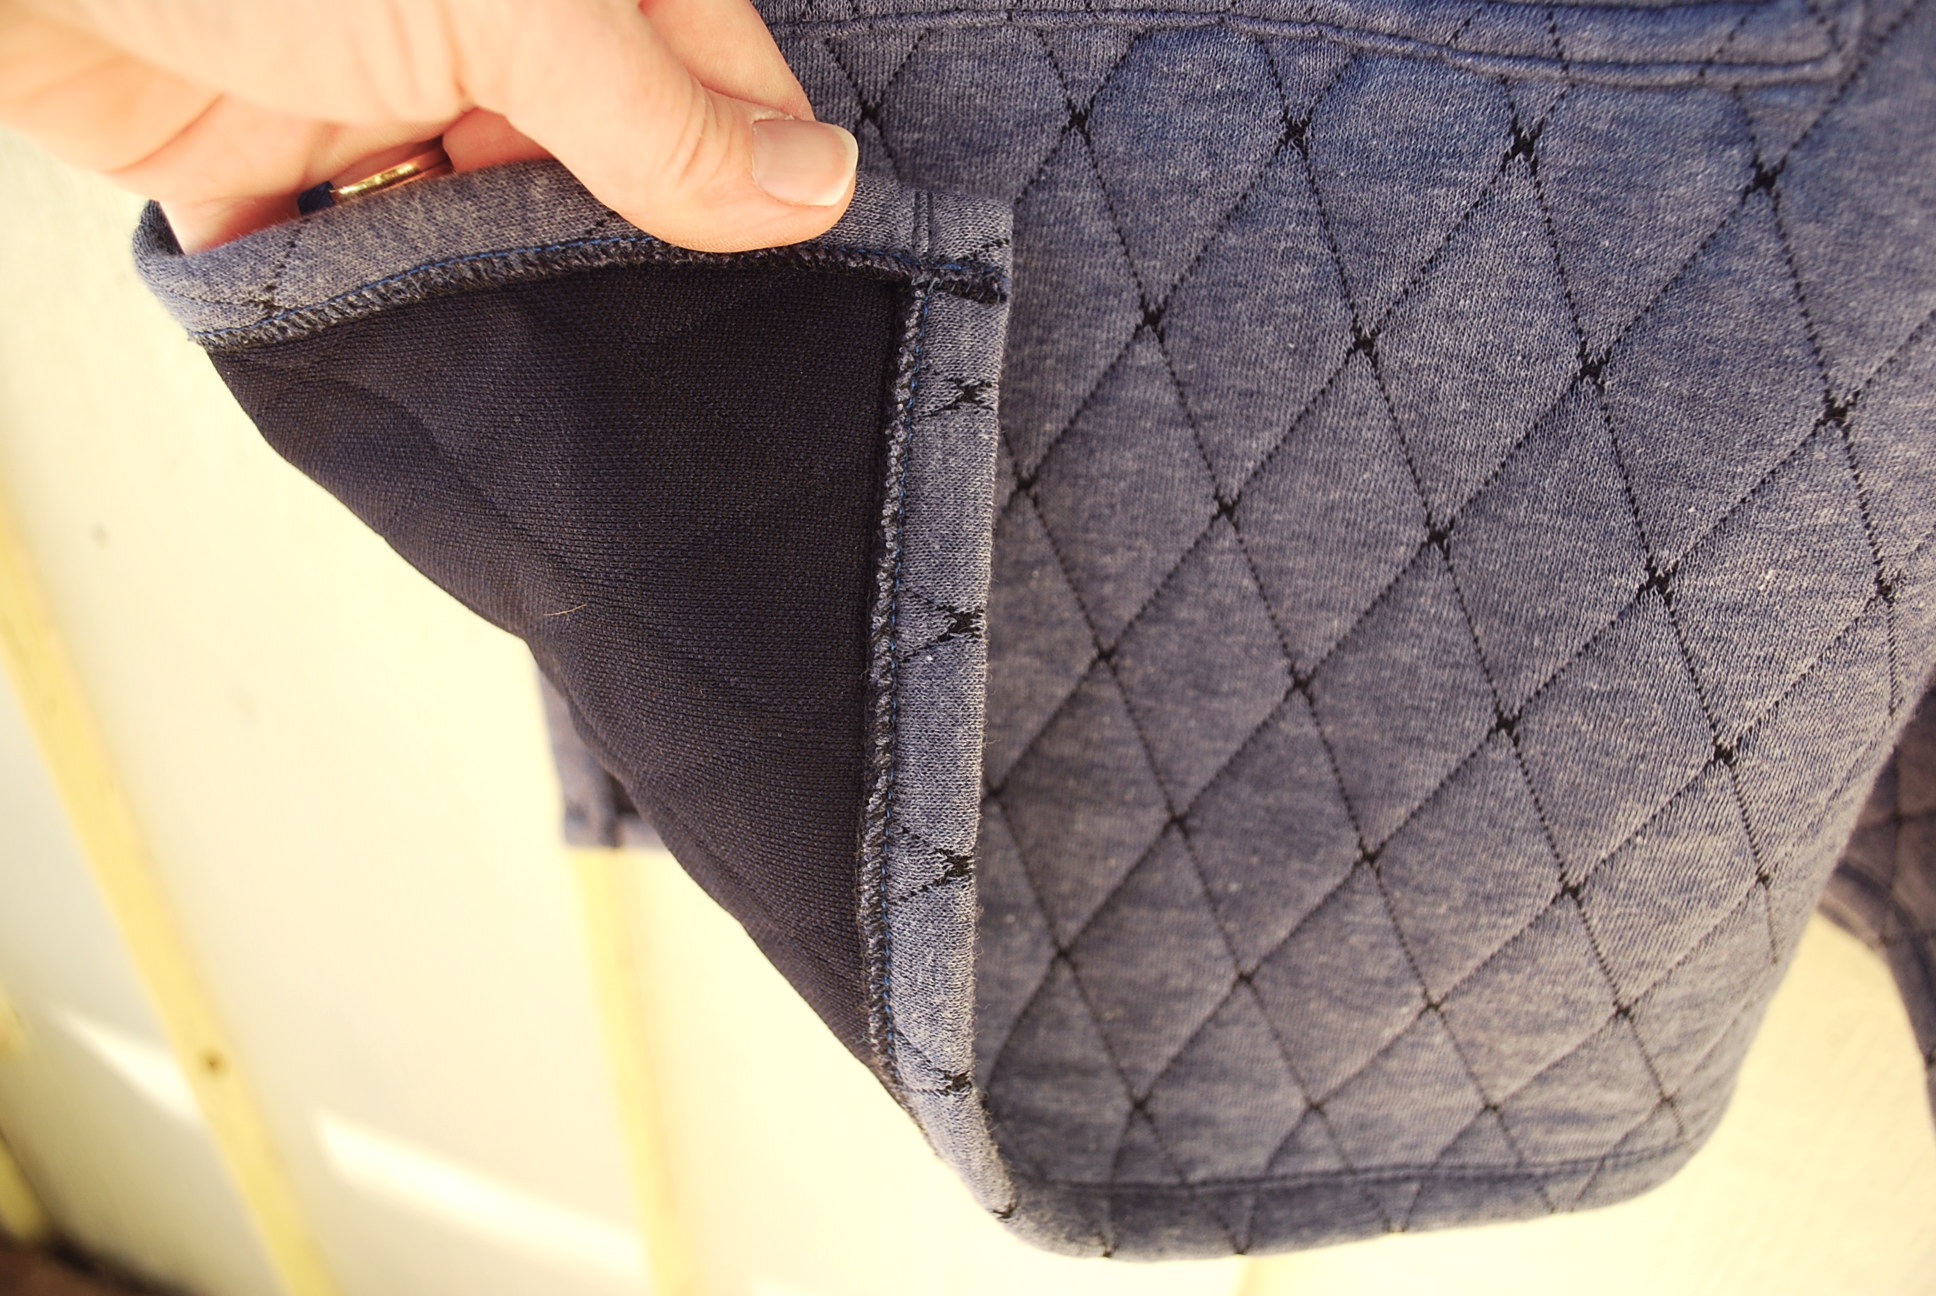
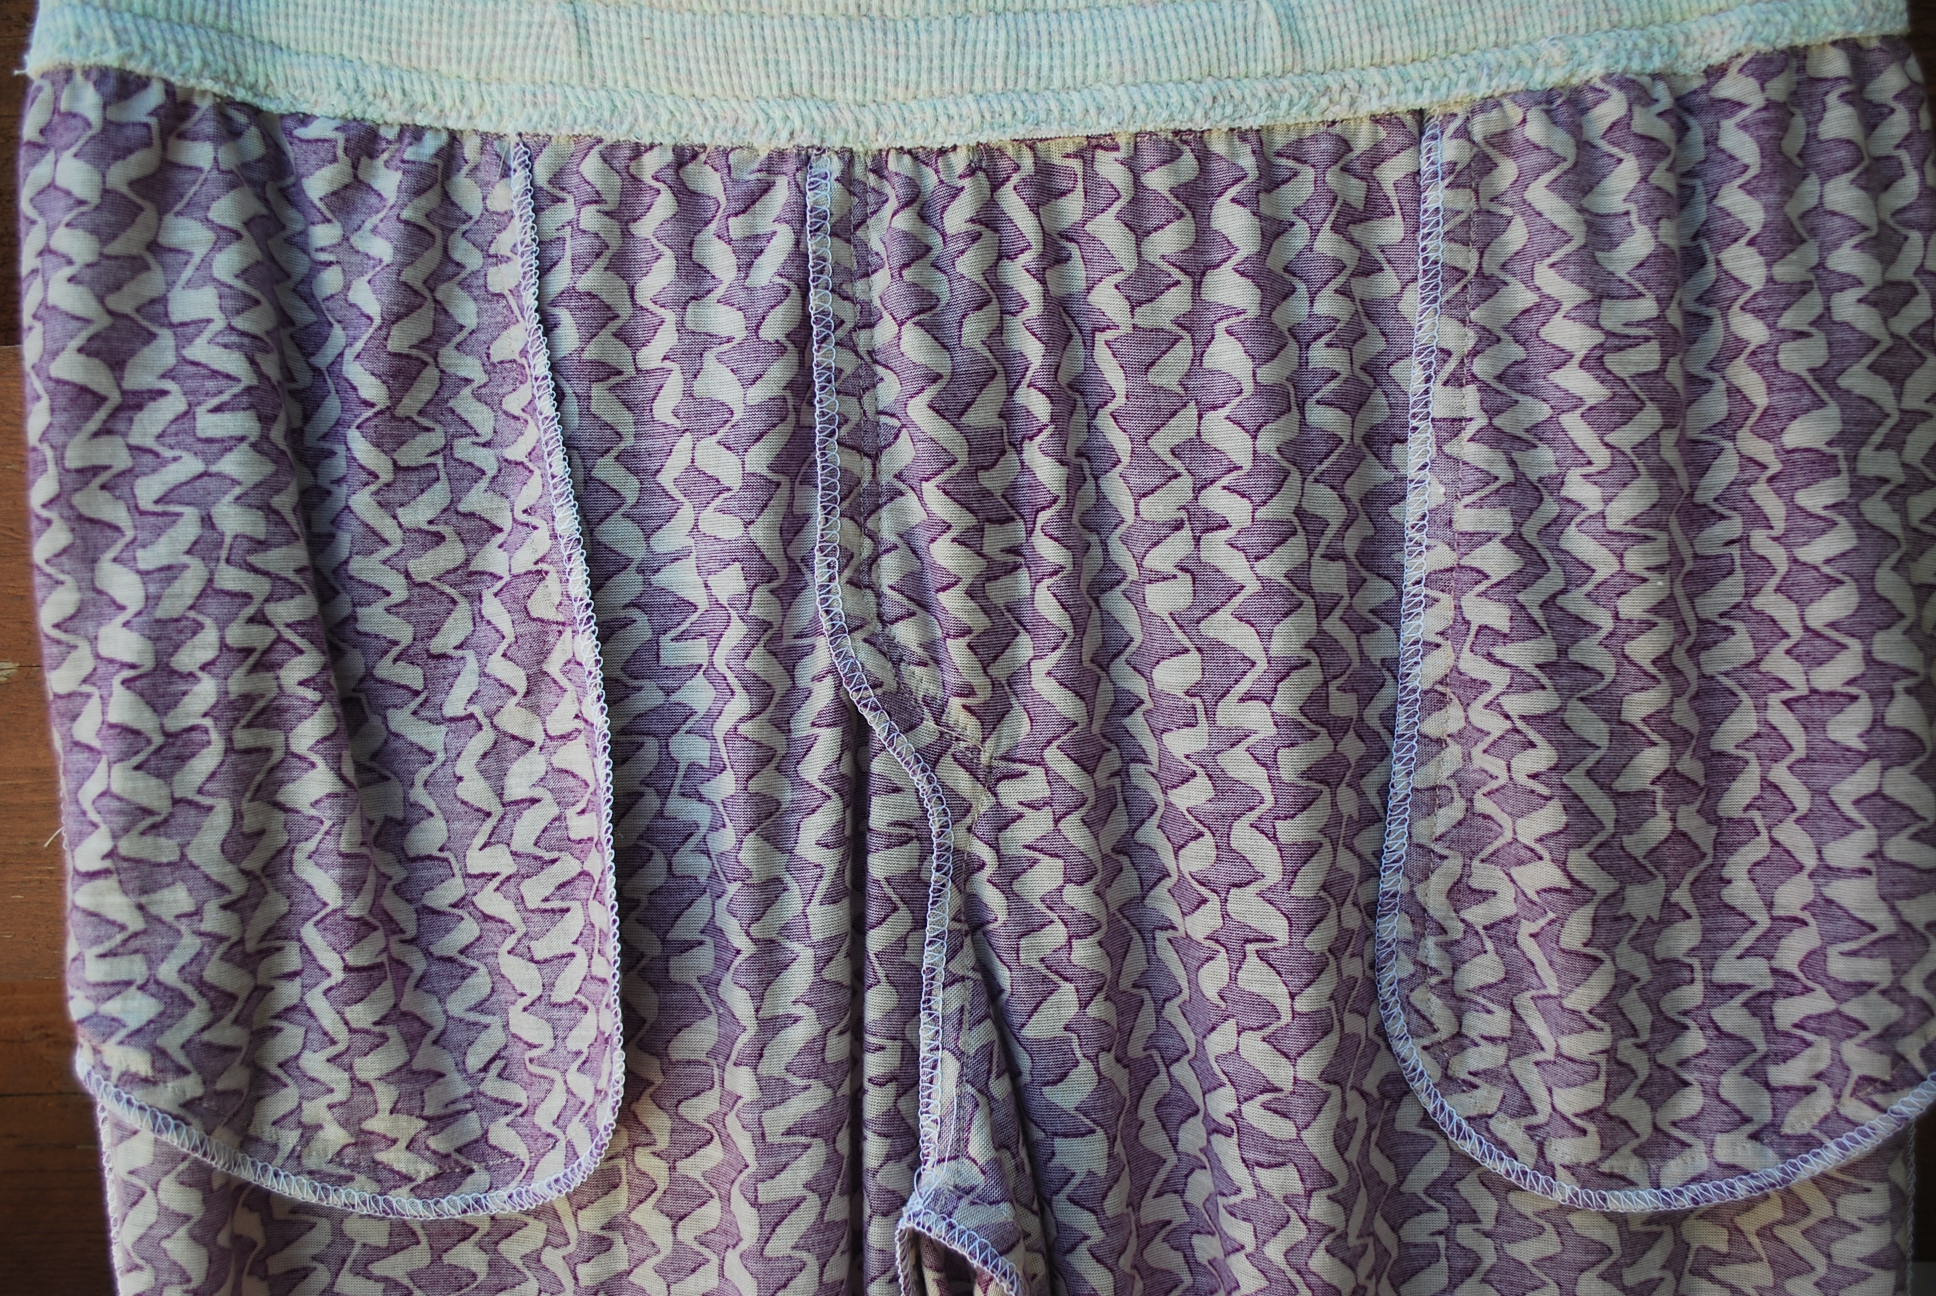
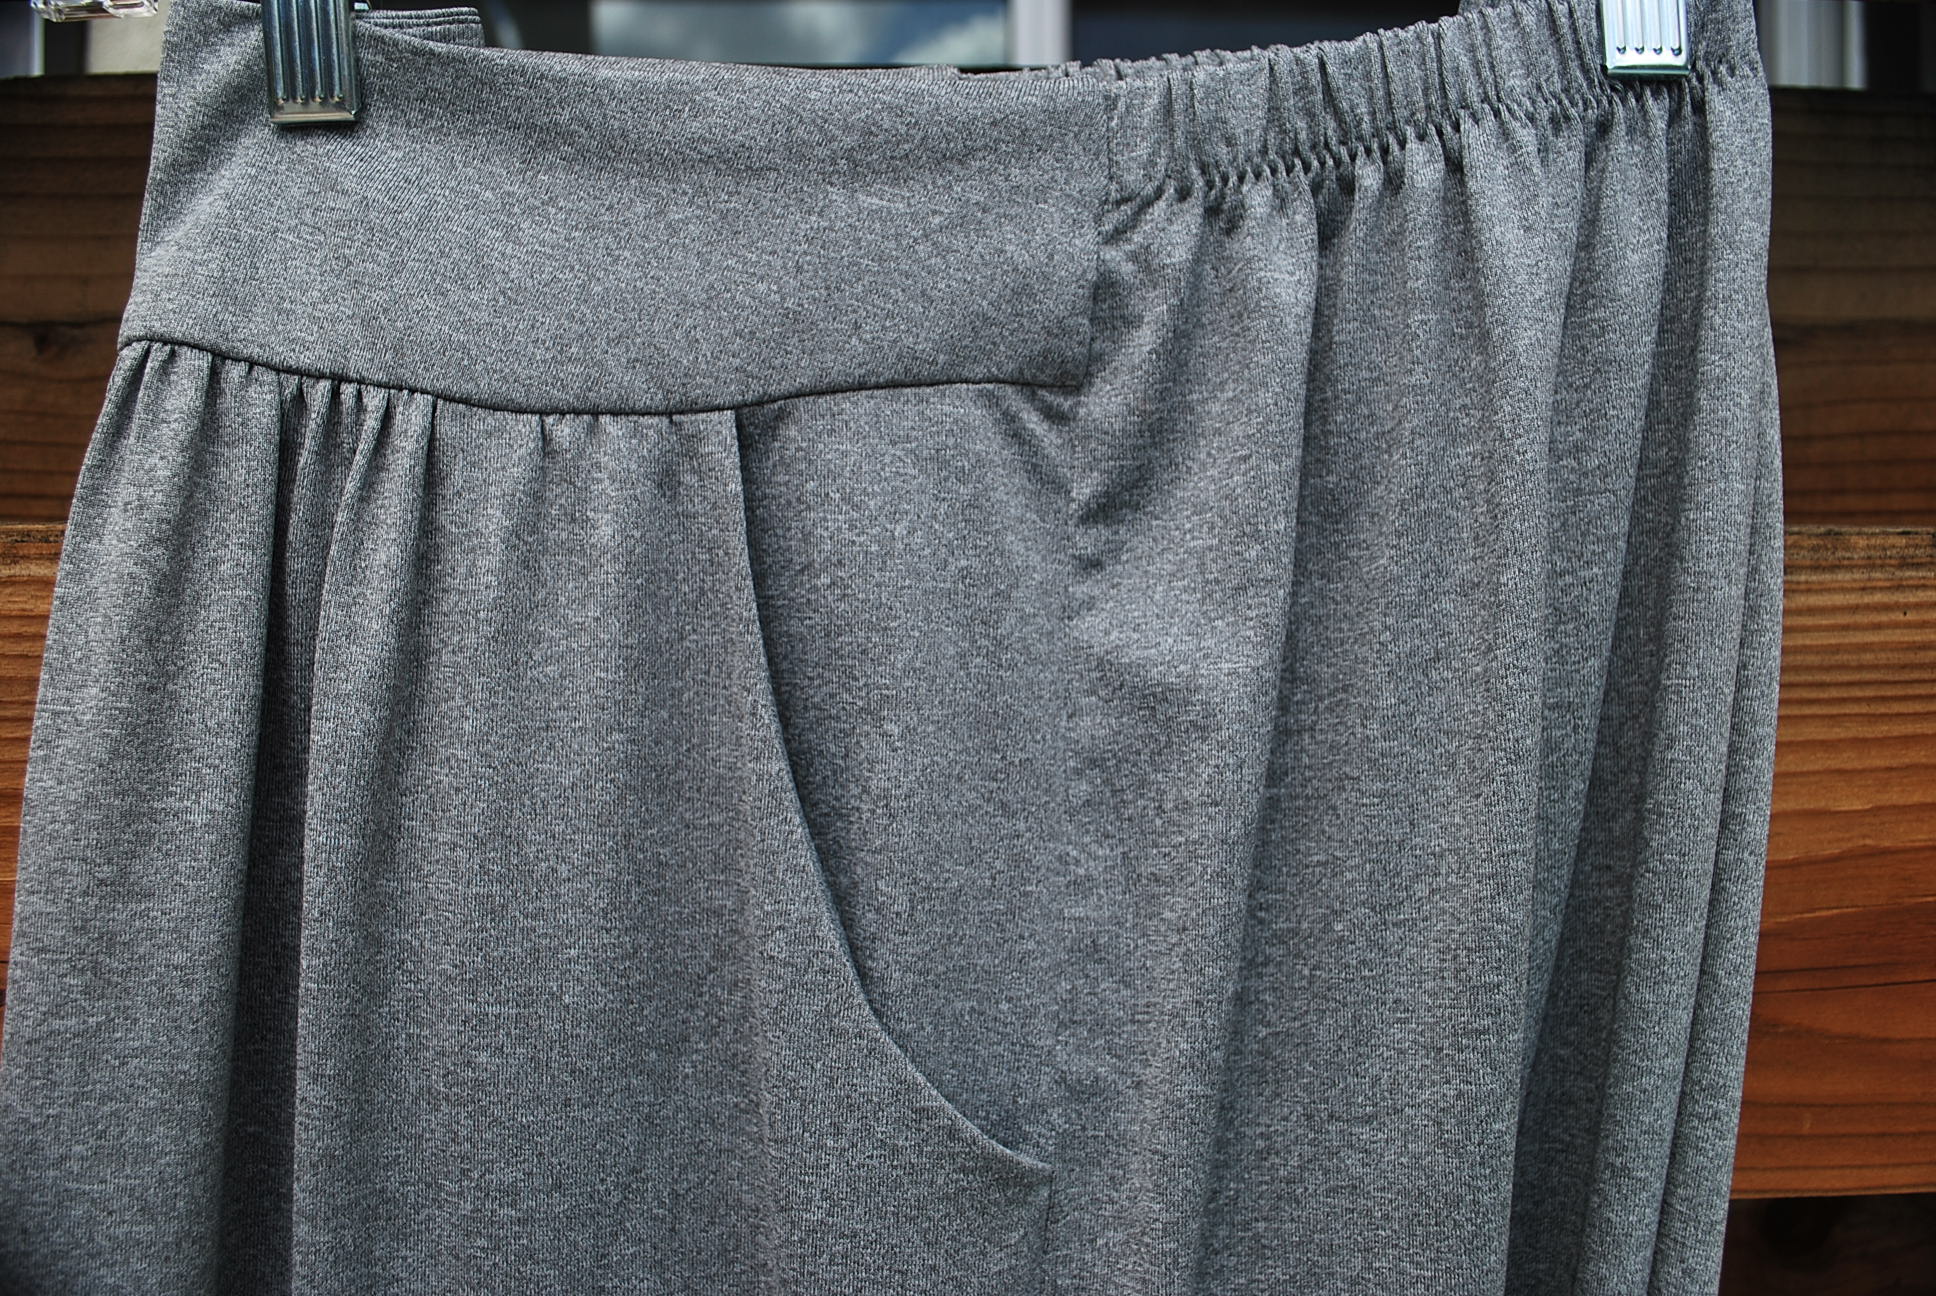
The welt pockets are probably the most intimidating feature of this well drafted stylish, sporty pattern. Once wearing the garment, you realize how well worth the effort they are. Who doesn’t love resting their hands in a comfy pouch across their belly?

DSC_0366

DSC_0373

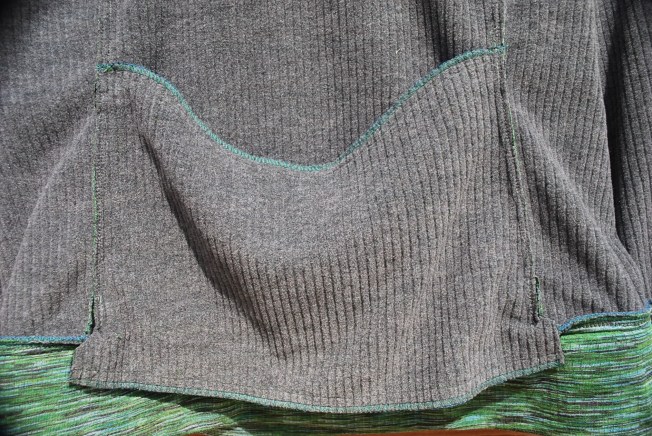
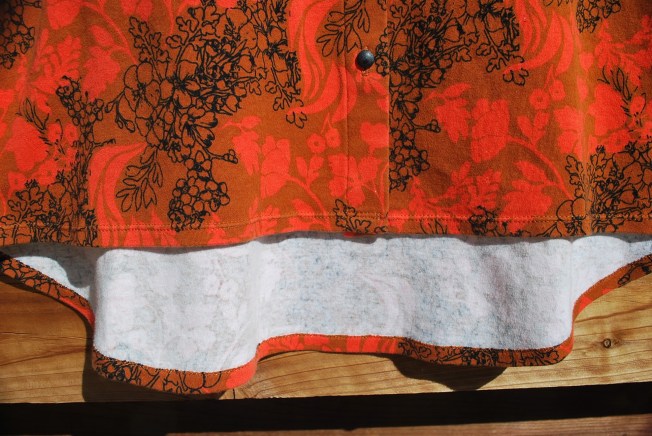
The bottom of the pouch pocket is not sewn into the bottom band. I was afraid it would sag or create bulk on the front side when wearing, but it doesn’t!

DSC_0375

The pattern features princesses seams on front and back which makes for a nice modern fit.

DSC_0371

DSC_0405

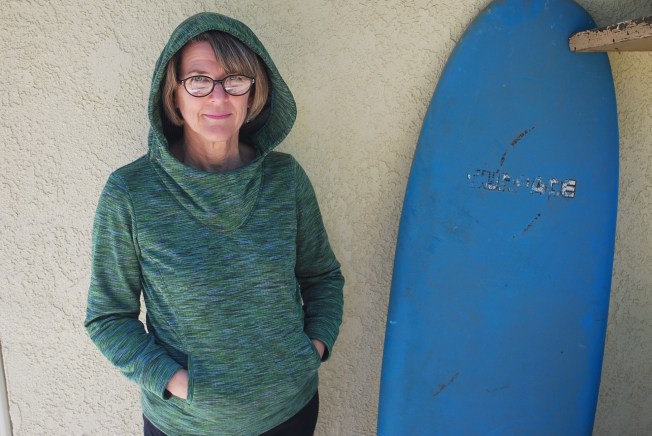
The hood has a unique design. I like how it creates a wide opening at the neck and around the face.

LET’S BE HONEST:

1. I cut a size straight size 4 and I’m very pleased with the fit.

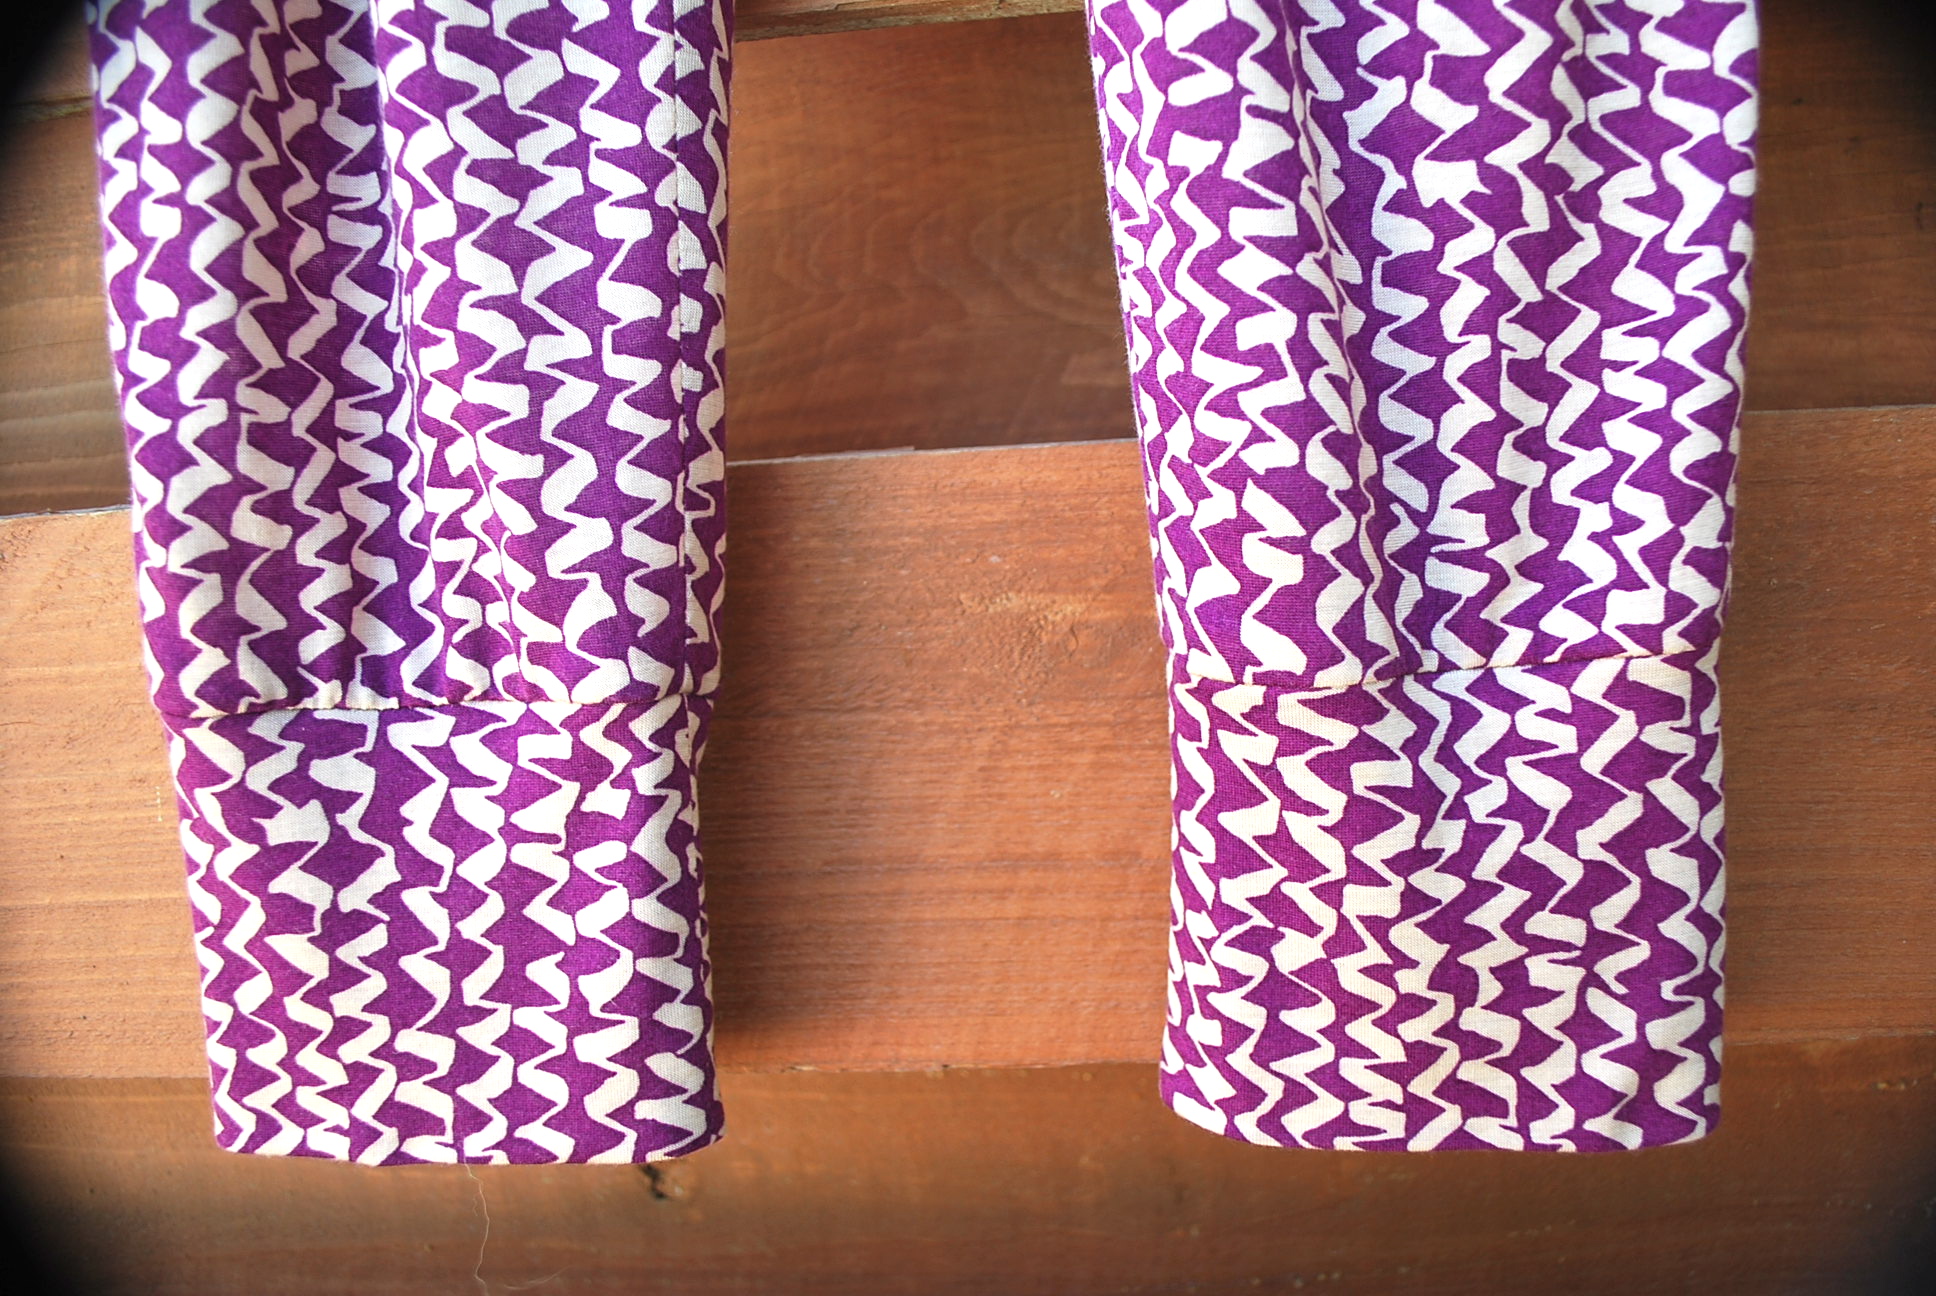
2. I shorten the sleeves by 2″ and narrowed the cuffs by 1″. I realize the longer sleeve and wider cuffs was a carefully thought out detail by the designer. But I wanted the sleeves to be a bit more practical for me, and not have the cuffs falling halfway down my hands all the time. (After wearing it, however, I have determined that I would put a 1/2 inch back on the sleeve.)

3. I was confused as to why the pouch pocket was longer than the main front piece, also, as to whether the bottom of the pocket got sewn into the bottom band. The instructions were not clear to me. I emailed Lisa at Paprika Patterns with my questions. I was very pleased that I heard back from her within a few hours. Those of you that follow her on social media, know she lives somewhere in France in a yurt.

Overall, I am very pleased with my Jasper Sweatshirt, and so happy I finally made it! My only disappointment is my days of wearing it are numbered as 80 degree days are here to stay. This is a pattern, however, that will not go out of style. So there’s always next year, and the year after…

Thanks for taking the time to read my post. I always welcome your comments. Have you been wanting to make a Jasper?

photo-17

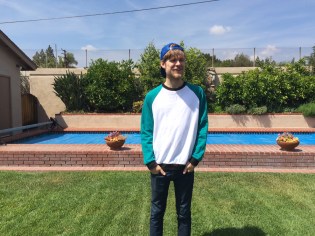
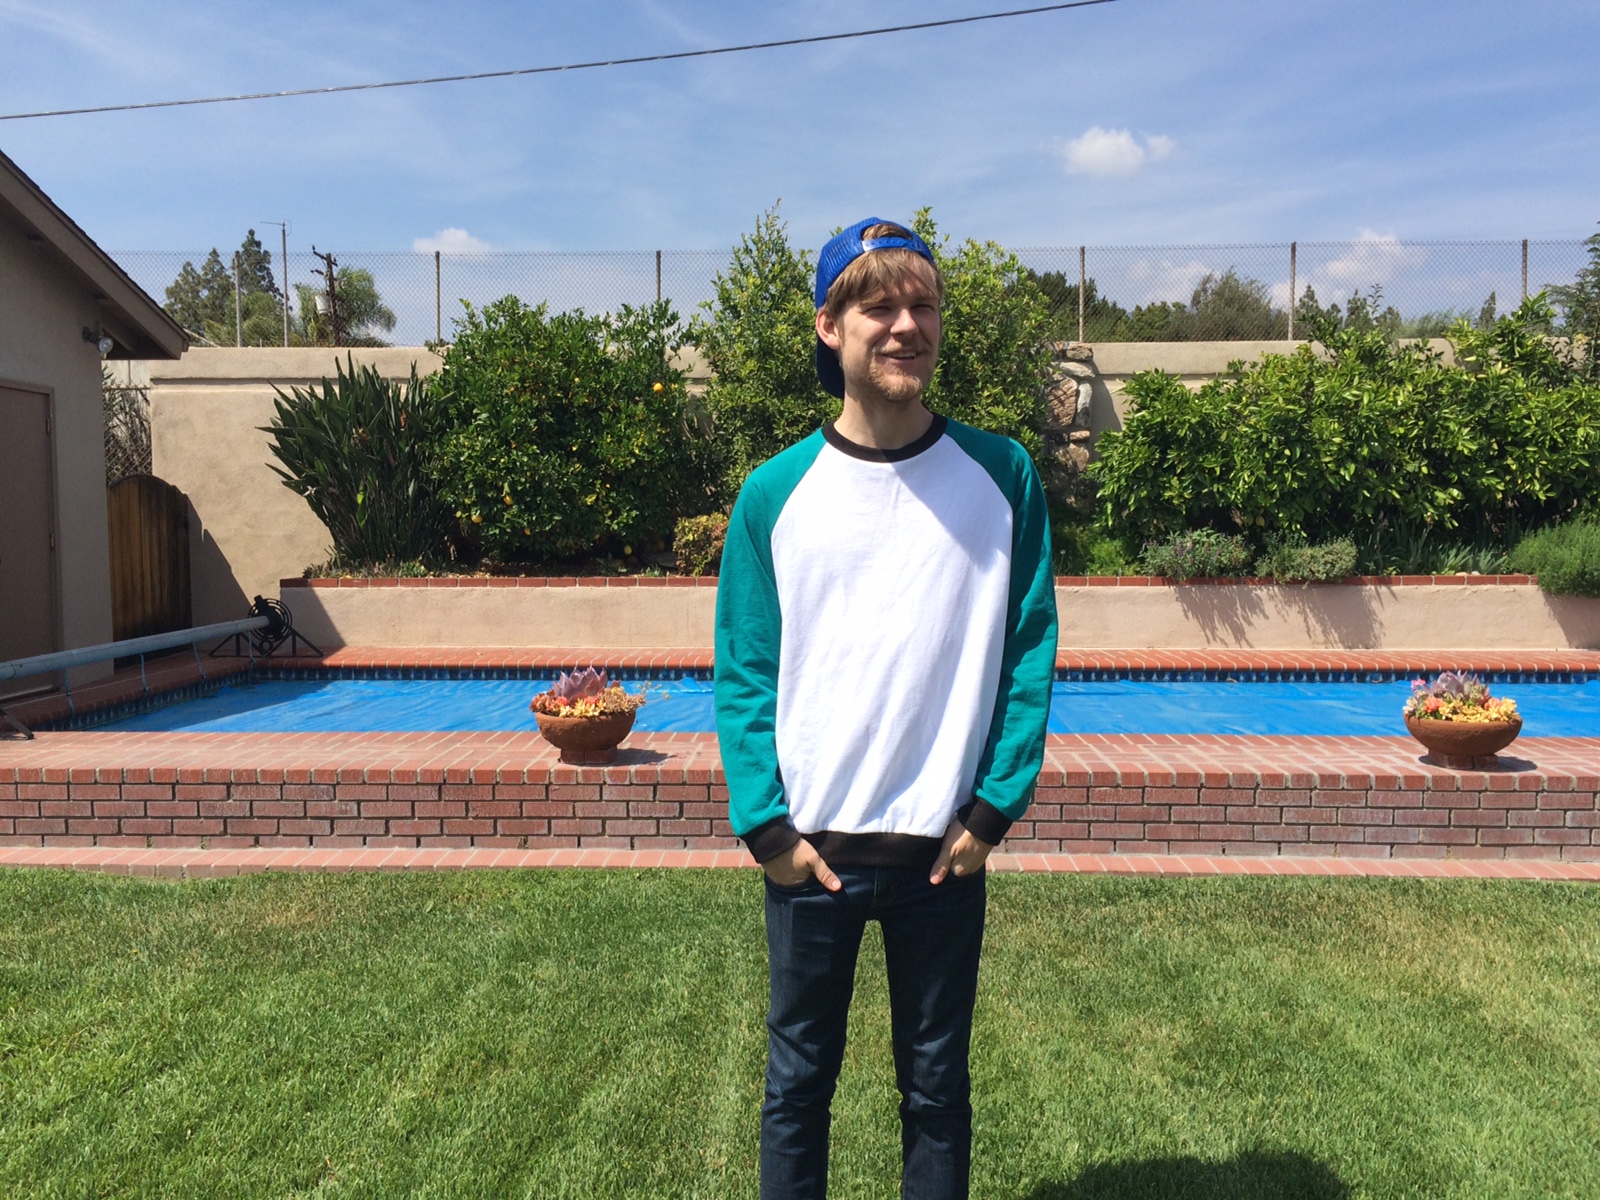
This is my son named Jasper! That’s really why I bought the pattern!


Advertisement

The Allay Shirt

So I need to ask myself again at the two year anniversary of my blog – have I sewn myself stylish yet? I have to say no, not completely. At times, I still feel frumpy or a lack of clothes. When the weather finally cooled down this fall, sometime in the middle of November, I really felt like I had no cool weather clothes. I say cool weather, not cold weather because I live in Southern California. I’m talking about everyday, nice, casual – something more interesting than a long sleeved, plain t-shirt. I thought this loose-fitting shirt was a great way to start filling this void in my wardrobe.

DSC_0318

DSC_0321

DSC_0329

The pattern I used is McCall’s 7018. I had this pattern for quite some time, bought on sale at JoAnn’s, probably 5 for $7. I made view E. I was attracted to it’s loose fit and versatility. We do have chilly mornings and evenings in the winter, so one feature I look for is a simple, narrow sleeve that will easily slide into a jacket or sweater.

DSC_0347

The fabric I used is Anna Maria Horner, Tangle Knit in Rust. I bought this knit online at Hawthorne Threads during their Black Friday Sale. I bought 1.75 yards for $9.70 per yard. I am always leery about buying knits online because the quality of the fabric and the printing can vary greatly. But, I have purchased Anna Maria Horner knits before and knew it was a sure bet. I was not disappointed, this is a perfect top weight cotton interlock with a nice print quality.

DSC_0289

I like the not-too-drastic high-low feature of the hem.

DSC_0295

This shirt washes beautifully. When I took these photographs, it had been worn and put through the washer and dryer.

DSC_0299

I slipped stitched the bottom of the collar down by hand before top stitching on the front side.

DSC_0300

DSC_0293

Simple narrow double needle hem. No serging on the edges, just trimming close to the stitching.


LET’S BE HONEST:

1. I cut a straight size 12. The only adjustment I made was taking off 1″ in the length before cutting. This is standard practice for me as my widest part is my thighs and I never want to top to end at that spot. Since this top is “loose-fitting,” I did not have to grade wider at the hips were I am about a size 16. I am very pleased with the fit and like the look of the shaped hemline.

2. The pattern is labeled as “EASY.” Doing a collar with a button front is never easy for a beginner especially with a knit. I guess we should assume that EASY does not equal Beginner?

3. Before top stitching on the collar, I hand-based all around close to where I was going to top stitch to prevent the fabric from stretching/pulling under the machine foot when stitching.

I love this shirt. I’ve worn it 3 or 4 times already, and very time it makes me feel happy that I’m wearing it.

DSC_0319

What about you? Do you find the start of a new season upon you and suddenly feel like you have nothing to wear?


Pack n Party Dress

A few months ago I flew out of state to attend my nephew’s wedding. I was flying one of those budget airlines where every amenity, even water, is an extra cost. I paid for one carry on bag for a four day trip, so I needed a wedding guest dress that could be rolled and stuffed into a small suitcase. A comfy, wrinkle-free polyester jersey knit dress fit the bill perfectly.

DSC_0272

The pattern I used is Simplicity 2580, which of course I bought the only way to buy big four patterns, on sale at JoAnn’s for about $1.00. I was attracted to the neckline of View C and the slightly A-lined silhouette. I traded out the short, petal sleeve for a straight, 3/4 length sleeve (from McCalls 6697).

2580

While JoAnn’s is my go to stop for patterns and notions, I rarely buy fabric there. But I was limited on my fabric shopping opportunities for the project, so I forced myself to make a selection at JoAnn’s, and I rather like this out-of-the-box choice for me. The colors are fun, and there’s plenty of pattern to hide bulges that can so easily show on a slinky knit.

DSC_0273DSC_0275DSC_0276DSC_0279

The front bodice is self-lined and is actually folded at the front neckline which creates a nice, smooth finish. I finished the back neckline with a double needle and trimmed the raw edge close to the stitching.

DSC_0286

I added clear elastic on the seam where the bodice is attached to the skirt. This is a technique I first learned making the Moneta Dress and have used it several times since.

DSC_0283

I am not a big fan of machine hems on dresses, but I think a double needle on a super stretchy knit is a safe bet.

LET’S BE HONEST:

1. I cut a straight size 14 for the bodice and the sleeve (from McCalls 6697). For the skirt, I graded to a size 16, and then additionally added a slight bit of flair which totalled 8″ of width at the bottom. I wanted to make sure the fabric draped nicely over my mid-section, hips, and thighs. I am very happy with the fit.

2. I have wrestled with skipped stitches for years using the double needle on slinky or thick knits. I finally bought a STRETCH double needle (had to order it online) and, oh my gosh, it has solved all my problems. Had I known what a difference it makes, I would have bought one 30 years ago!

3. I love the neckline on this dress! I think it is probably universally flattering on women of all bust sizes.

4. This pattern sews up easily for a seamstress experienced with sewing on knits.

IMG_4116

Here I am sitting with my dad and my son’s girlfriend, Ryley. Ryley is wearing a Alder Dress by Grainline Studio that I made for her!


Mother and Son Sweatshirts

Just a quick post, without the usual details and close-ups, to share a basic make. Several months ago I made this sweatshirt and it has become one of my favorite comfy grab-n-go basics.

At this point, my sweatshirt has been through the washer and dryer several times.

At this point, my sweatshirt has been through the washer and dryer several times.

It is McCall’s 6992. I purchased it on sale at JoAnn’s for $1.40. I made view B, and cut a size 14 with no alterations except taking off 1 1/2″ from the sleeve length.

My son was around while I was making this sweatshirt, and he told me that is was cool! How often does a 22 year-old young man comment on and like a garment his mother has made? Very rarely! “Would you like me to make you one?” I actually can’t remember his answer, but I ordered some fabric anyway thinking I would make him one for Christmas. Of course, I never got around to making it. Four months later, his birthday was two days away, I had no gift and a free Friday afternoon. So I whippped up a sweatshirt from New Look 6321.

Modeling his birthday gift at grandma and grandpa's.

Modeling his birthday gift at grandma and grandpa’s.

This is a unisex pattern. My son is quite slender, so I cut a Medium. I made View B and added ribbing to the sleeves and bottom. The only alteration I made was a gradual narrowing the sleeve to subtract 2″ off the bottom circumference before adding the cuff.

The fabric for both shirts is 100% organic cotton which I purchased online at Fabric.com. I am not actually a big fan of this site. Their shipping is always slow. But I like this sweatshirt fleece. It is super soft and reasonably priced for an organic knit at $10.98 per yard. However, I wish the color selection was larger. I would order more!

It would be nice to have a picture of us together wearing our sweatshirts, but the post would be delayed several weeks waiting for the opportunity for that to happen! Upon his most recent visit home, I ask my son if he had worn his sweatshirt. He said yes, he wore it to the movies with friends. “Well, did you get a compliment?” I asked. “Yes. They thought is was cool.” “Did you tell them that your mom made it?” “Yes, and I told them you had a blog and were pretty big in the middle-aged sewing community.” Well, not all true…but thanks…I guess.

Fresh Makes, Take Twos

I have made 25 garments since starting this blog, and I have probably mentioned in most of my posts, “When I make this again, I’m going to…….” So how many have I actually made again? I will admit that 90%+ of my makes are one-time adventures. Mainly because with the limited time I have to sew, I find the most enjoyment out of trying a new pattern from my large pattern stash each time I make a garment. But there are two that I have been compelled to revisit, and I’m excited to share these Take Two makes with you.

The first Take Two is The Jean Skirt, Fresh Make #1.DSC_0001Sometimes the garments that “wow” the least are the ones we grab the most because they are a great basic. And that is the case with The Jean Skirt, Simplicity 1616. I really like how it fits, lays flat across the stomach, yet has plenty of width through the hips and thighs. AND it is quick and easy to make. I wanted to make another as soon as I finished the first and what finally spurred me into action was, sadly, I tore my first Jean Skirt.DSC_0005DSC_0016 The fabric, which I ordered online, was disappointingly thin. While wearing it, it got caught on something, I don’t even remember what, and now it’s wadded up on the top shelf of my closet.

I learned my lesson that you usually “get what you pay for.” So for Jean Skirt, Take Two I shelled out the big bucks for 2 3/4 yards at $14.50 per yard for Anna Marie Horner’s beautiful, thick, soft, interlock knit, Mary Thistle, in navy, from my favorite online fabric store, Hawthorne Threads.DSC_0004This fabric goes through the washer and dryer beautifully. The dark blue with a black print acts like a neutral. You can really pair it with almost any color. A true grab and go skirt.

My second Take Two is The Every Woman Top, Fresh Make #21.DSC_0011
I was initially drawn to this pattern for it’s potentially figure flattering variation of a basic knit top.

My first version of The Everywoman Top, Vogue 8151, was a fit fail from the waist down. The biggest fit fail of my 25 Fresh Makes. I describe this all in my original post, but basically the fabric was too thick and the fit was too loose, resulting in one big belly sag instead of flattering, fabric folds created by the side ruching. BUT I loved the fit from the waist up. The small bust adjustment I did worked well and neck band laid perfectly in front and back.

Through the waist and belly, it's a bit of a blob silhouette. Go ahead and click to enlarge to see what I mean.

Through the waist and belly, it’s a bit of a blob silhouette. Go ahead and click to enlarge to see what I mean.

Version two, much better!

Version two, much better!

I vowed to redeem myself by making another with a thinner, single jersey knit. I did just that with a 95% cotton, 5% Lycra, Threaded Shreds Knit in Mamey, again, from Hawthorne Threads. I splurged in purchasing 1 7/8 yards at $15.95 per yard. I love this fabric. It washes beautifully, and is super soft and stretchy. It is also thin enough that bulk is not created by the double thickness of the wrap front. This time when contructing the garment, I followed the instructions of making a one inch seam allowance down the sleeves and sides. And after trying on, I even took in the side seams another 1/2 inch to get enough negative ease to form the fabric folds across the belly instead of a sag. I am truly 100% happy with the results of this Take Two. It you would like more construction details of these patterns, just go to the original posts, Jean Skirt and Every Woman Top

There seems to be a lot of prolific sewists in the online sewing community who post new versions of the same pattern frequently. I know it makes sense to perfect a pattern that really fits your lifestyle and can potentially become an integral part of your wardrobe. I just don’t like repetitive sewing. It becomes labor to me rather than a creative experience. What about you? What are your thoughts and practices when it comes to sewing up the same pattern several times?

My Snuggie Tunic

Do you ever make a random project from your patterns-bought-on-sale stash and you instantly love it so much, you wonder how you survived without it? That’s now I feel about Fresh Make #24. When I put it on I feel engulfed in yummy comfort.DSC_0520DSC_0537DSC_0540The pattern I used is Simplicity 2289. I bought this pattern on sale at JoAnn’s for $1.40, probably about a year ago. It was one of those “let’s stock up” and “who cares if I never make it, it’s so cheap” purchases.2289I bought the fabric at Mood Fabrics at La Brea Avenue in Los Angeles. Prior to cutting the fabric, the saleswoman says to me sort of apologetically, “It’s $20 per yard.” “Oh, I thought is was $18.” “The label says it’s Theory.” She shrugs her shoulders. “Whatever, that’s fine,” I say. So, I purchased 2 3/8 yards which totaled $47.60. More than I usually spend for a random project, but I had a $75 giftcard from my wonderful FIL! I have to admit I was not completely in-love with the fabric on it’s own. But the marriage of the fabric and this pattern is unexpectedly perfect and elevates them both. (I googled “Theory” and it’s a clothing company much hipper than me.)

You can wear the collar turned down if you prefer.

You can wear the collar turned down if you prefer.

DSC_0564The fabric is actually not sweatshirt fleece. It is a quilted knit with a polyester backing; it might even be moisture wicking or some such thing. There a thin, middle layer of a soft, synthetic batting that sheds all over the place on the raw edges. For those of you that might not know, Mood Fabrics sells leftover rolls of fabric from RTW clothing lines, so it’s not possible to get detailed information like exact fiber content on the fabric. DSC_0566 I hemmed the neckline and bottom with a double needle, and finished my seams with a serger after sewing them with a regular stitch on a regular machine. There is not enough stretch in this fabric to warrant any special knit stitches.

LET’S BE HONEST:
1. The pattern comes in size XS – XXL. I cut a size Small (10-12). As you can plainly see, this is BIG tunic and I’m definitely glad I made a Small.

2. Being so loose fitting, there was no need for any adjustments. However, as I often routinely do, I took off an inch off both the sleeve and body length before cutting.

3. I am small busted, and I like the way this garment hangs on me. I did google some other reviews on this pattern and there were some negative comments from larger busted woman about how it made them feel even larger, like a linebacker.

4. Overall this is an easy pattern to sew up provided you are comfortable sewing with knits. I had to do my most “careful” sewing when I was making the patch pockets. I hand basted them in place first before machine stitching them to the body because I thought the knit fabric might pucker and stretch if I just secured the pockets with pins.

REFLECTIONS, REVELATIONS, AND CONFESSIONS:
This blog has forced me to look at myself in a lot of photos and I rarely like what I see. I alway tell my photographer to take lots and lots of pictures so I will find at least three good ones. Even though I am very conscientious about dressing to flatter my body, I always look fatter than I envision myself as being. But, oh well, I’m sort of getting used to that. What I hate even more is seeing the winkles on my face! My 78 year old mother has less wrinkles than I do. Every time I look at my face in a photo, I get why so many women have “work” done.DSC_0560

Thanks again for visiting my blog. I’d love to hear your comments. Or if you have a question about this project, please ask! Cheers, Lori

Anima Pants

I’m not back to selfish sewing yet. I stumbled upon a competition using New Zealand indie company, Papercut Patterns “Anima Pant.” So Hanna wins out again with this modern, sport pant for Fresh Make #14.

DSC_0427DSC_0397DSC_0417
This is my second indie pattern (I made the Moneta dress on my previous post.) I was convinced to purchase Papercut’s Anima Pant when they were offering 20% off the $25 price, plus free shipping (all the way from New Zealand!). And I have to say it arrived sooner than I expected. It comes packaged in a nifty cardboard, hanging envelope.
DSC_0437

The pattern comes with different length options.

The pattern comes with different length options.

The competition is co-sponsored by The Fabric Store. Their only U.S. location is only La Brea Avenue in Los Angeles. Lucky us! A great excuse for Hanna and I to go into the city, and also stop in for a delicious drink and yummy goodie directly across the street at The Sycamore Kitchen. Hanna had free reign in the fabric selection. I always like to see what my art student daughter will choose. The fabric is a beautiful, drapey, single knit jersey. I regret to say that I’m not sure of the fiber content. It looks and feels like a cotton/rayon blend. I pre-shrunk it in the washer and dryer, and it came out beautifully. We bought 1 1/2 yards at $12 per yard. Hanna also chose a waffle ribbed knit for a contrasting waistband.

Fabric in hand in La Brea Avenue.

Fabric in hand on La Brea Avenue.

DSC_0370

The waistband is made with 2″ wide elastic and a drawstring. My buttonholes did not end up in the middle of the waistband, so I put an extra row of shirring at the top, different from the pattern instructions.

I sewed the seams with my regular machine and then serged them together.

I sewed the seams with my regular machine and then serged them together.

The pants have 4" cuffs at the leg bottom.

The pants have 4″ cuffs at the leg bottom.

Back side.

Back side.

DSC_0392

LET’S BE HONEST:
1. The pattern comes in sizes XXS to XL. For Hanna, I cut between a XS and S, and it fit perfectly. Her hips are about 37 1/2″. The rise on the waist/crotch was also perfect for her, not too low, not too high. (I have to say that it is definitely styled to flatter a young, fit gal. And there’s nothing wrong with that. At this point in my life, the most effective way, even more so than watching what I eat, to avoid a “muffin top”, is to wear my pants at my waist!)

2. Besides cutting in-between sizes, the only adjustment I made to the pattern was on the leg length. Hanna’s legs are on the shorter side, so I took off 2″ with a pattern adjustment before cutting out the fabric, and another inch at the bottom once she tried them on before attaching the cuffs.

3. I wrote quite a bit about pattern instructions on my last post about the Moneta Dress, so I won’t repeat a lot of my comments here, except that I feel the same way about this pattern’s instructions. It has a fun graphic presentation printed on brown paper bag like paper. But again, just like on the Colette pattern, and many of the big 4 patterns, the details just aren’t there for the novice sewist.

4. The waffle knit ribbing that Hanna chose for the waistband actually did not end up being a practical choice when it came to sewing with the elastic. The fabric was super stretchy and was difficult to attach the 2″ elastic to it without getting a lot of puckers on the back side. (I finally told myself – Who cares? – no one will see the inside. And it certainly doesn’t matter to Hanna.)

5. I have to say again that this a fabulous, modern, fresh, knit pant pattern. It drapes perfectly on Hanna. The leg width is perfect too. I know for a fact that Hanna will be wearing these pants a lot when she returns to her college campus this fall.

Thanks again for reading my post! Happy sewing! Lori

The Moneta Dress

Having my daughter home for the summer gives me an excuse to try some fun projects that are more suited to the younger crowd. For Fresh Make #13, I decided to make Hanna a Moneta which is an indie design by Colette Patterns that is wildly popular with the online sewing community. DSC_0354 DSC_0348 DSC_0346 The Moneta is available online as printed paper pattern for $18, or as a PDF for $14. I splurged for the printed pattern plus an additional $5.50 for shipping because I’m not fond of PDFs, and I was curious to see the hip graphic design and packaging. Now, $23.50 is a lot for me to spend on pattern, but I felt I needed to try an indie pattern to keep up with the online community. I have to say, the dress is adorable and a smartly designed pattern. I will save my knit picky comments to the end of my post.
cp1028-moneta-cover-med-37a80b85ae73088a6d790a6771162577 The fabric I chose is from the online store, Girl Charlee. I have to be honest that I hesitantly ordered from them as I have been disappointed in their fabrics more than once. I was swayed by the claim that the fabric was made in Los Angeles, and I like to buy American made if possible. Unfortunately, this fabric was no improvement over my past purchases. Basically there is very litte stretch in this single knit jersey and the design is printed significantly off grain. Previously I thought it wouldn’t be cool to bad mouth a resource, but I recently read a post in another blog in which the author chose to be honest about her disappointment in Girl Charlee, and then several readers commented that they felt the same way about the site’s products. Shouldn’t we be truthful in a blog?

The bodice calls for lining. I always like to find something in my stash for linings and such. I used a recycled t-shirt. I also used a hand-dyed recycled t-shirt for the constrasting collar fabric.

The back neckline is slightly lower than the front. Cool design detail, huh?

The back neckline is slightly lower than the front. Cool design detail, huh?

The collar is cleverly sewn with the seam on the outside, but remains hidden when the collar folds over.

The collar is cleverly sewn with the seam on the outside, but remains hidden when the collar folds over.

The bodice is fully lined, and the instructions provide a technique that was new to me for completely machine finishing the armholes.
DSC_0364 The skirt waist was “shirred” (gathered) with an new version of an old technique of stretching the elastic evenly around the opening and sewing it directly on the fabric. I have done this countless times for elastic waistbands on knits, but never for the purpose of gathering a skirt which attaches to a bodice.

The skirt is shirred with clear, lightweight elastic. This techique enables the waist stretch when pulling the dress on and off.

The skirt, shirred with elastic, enables the waist stretch when pulling the dress on and off.

DSC_0353

LET’S BE HONEST:
1. This pattern is a hip, modern and fresh design for knits. I now understand why everyone loves their Monetas.

2. Although Hanna’s measurements more closely corresponded to a SMALL, and the pattern provided an explanation about “negative ease” with knits, I cut a MEDIUM because the fabric had little stretch and the recycled t-shirt I used for the lining was of a thicker fabric. It fit her perfectly for the type of fabric used. I could see though, that if it was made with a stretchy fabric like a rib knit, a smaller size would be appropriate.

3. Please allow me to go on record as staying that I don’t think it necessary or a good technique to serge your 2 collar pieces when it is being flipped right-side out and the bulky serged seam will lie around the inside edge of the collar. This was done on a sewalong I followed, and I’ve seen it done other places online. With knits, even if they curl a bit, I still grade the seam allowances for a smooth outside finish when I am encasing them. A gentle pressing with the iron does wonders too for a nice quality finish.

4. Thoughts on instructions: I know the instructions on the big four pattern companies are ugly and hard to follow. Nobody likes to read them. The Moneta pattern comes with a thread-bound 32 page instruction booklet with simple illustrations on uncluttered, spacious layouts. While I was captured by the novelty of the instructions being visually different, when I really dove into them taking the perceptive of someone with little background experience/knowledge, they were just as hard to follow as traditional patterns instructions. I am not knocking people who write sewing instructions for any company. I know it must be hard; I wouldn’t want to do it. These instructions also contain some shaded boxes that direct you to websites with videos that contain further instruction details on some of the main techniques. This is a good thing, but I’m going to say that I’m glad that I could rely my own knowledge rather than go watch a video.

To conclude, Hanna did not pick out the fabric and did not ask me to this make this dress. I wanted to make it and I think it’s adorable, but I am not of the age or have the figure to wear it. I think she likes it; I hope she wears it. Whatever the case, it is still is joy to sew for her as I have done since she was very young.

Again, thanks for reading this post. I welcome your comments. Cheers, Lori

The Sandra Dress

Sewing others stylish is just as much fun as sewing myself stylish! That’s why I’m so excited to feature my beautiful friend, Sandra, as a guest model in this post. For Fresh Make #7, I have made a versatile shift dress.
DSC_0198
The pattern I used is Burda 7031. I purchased on sale at JoAnn’s for $2.49. A few months ago, I posted it to my Facebook page as a pattern that I thought would be flattering on all figure types. “Who would like to make it?”, I posed. And Sandra said, “I would!” Sandra’s machine and sewing skills were a bit rusty, so I offered to make the dress for her and feature it in my blog.
7031
Now here’s the super fun part about sewing for friends – the shopping trip to buy the fabric! We went to Mood on La Brea Avenue in Los Angeles and had a blast imagining ourselves as designers on Project Runway.

Sandra is captivated by all the luscious fabrics.

Sandra is captivated by all the luscious fabrics.


We spent at least 90 minutes wondering up and down the aisles, drooling and touching fabrics. Sandra finally choose this luxurious knit wool jersey. The pattern requires 2 5/8 yards. I think the fabric was $18 per yard. And did Sandra care? No, it was gorgeous!

Fabric bought, time for lunch! We walked up four blocks on La Brea to Sycamore Kitchen and both had salads were to die for. The Sycamore Kitchen is also directly across the street from recent Austrialian transplant, The Fabric Store. What a great day!

Here’s the results of our efforts:
DSC_0205DSC_0207DSC_0209

LET’S BE HONEST:
1. I when sew for others, the size I make is confidential, even to my client! I want having a garment custom made to be a wonderful, feel-good experience.

2. Sandra wanted the sleeve to become narrower towards the hem instead of the slight bell shaped of the pattern. I took about 4″ total off the bottom of the sleeve width.

3. I thought an interesting element to this otherwise very basic pattern was the bust dart. Sandra loved the shape that it created, too.

This dart may look unusual, but it creates a great shape.

This dart may look unusual, but it creates a great shape.

4. I found a big surprise as I began cutting and sorting through the pattern pieces. There was a dart at the top of the sleeve.

I don't think I've ever encountered a sleeve with a dart at the top before.

I don’t think I’ve ever encountered a sleeve with a dart at the top before.

I considered manipulating the pattern to remove the dart because I was concerned that the sleeve might be a bit pointy where the dart ended. But then I decided I would go with it. It was part of the design vision for this pattern. To my delight, the sleeve actually turned out beautiful. This amazing wool jersey fabric molds itself like cake fondant when a steam iron is gently used on it. The dart is not even noticable.

5. I added 2″ to the hem when cutting the fabric to be sure I had enough length to create a hem that hit slightly past the midpoint of the knee. This is a flattering spot for a hem as it accentuates the narrower part of your upper calf without showing your whole knee.
DSC_0206

Sandra and I were giddy with excitement when I brought her the finished dress. We were thrilled with the perfect, flattering fit. For Sandra, wearing it is as comfortable as a nightgown, and no shape wear required!

Thank you for taking the time to read this post. As always, I welcome your comments.

My Chill Pants

Sometimes when I am going out, I want to pull on something quickly, be super comfortable, and still feel like I’m wearing something unique and stylish. I decided to make a casual pair of wide-legged pants as an interesting alternative to jeans for Fresh Make #6.
DSC_0120
The pattern I choose was McCall’s 6514. I purchased this pattern for $1.40 as part of a 5 McCall’s patterns for $7.00 sale. I named this pattern My Chill Pants because these pants seem like a something you might pull on when you are going to just lounge around with friends. Or when you are going out to dinner and don’t want to feel constricted after a great meal.
M6514
I have to admit that I rarely shop for fabric at JoAnn’s. It is the only fabric store within miles of my house, and sometimes as a last resort I need buy fabric there. The fabric for this project was purchased at JoAnn’s because I was under a time constraint, and, I have to say I really like it! It is a light weight polyester knit with smooth feel and nice drape. I actually had these pants stuffed in a suitcase for 10 days, and when I unpacked them, they barely had a wrinkle. The fabric cost $10.49 on sale per yard. The pattern requires 2 3/8 yards.
DSC_0122DSC_0125

There is a front yolk.

There is a front yoke.


The back waist is elastic.

The back waist is elastic.


The front and back come together like this.

The front and back come together like this.


My favorite way to hem knits is with a double needle.

My favorite way to hem knits is with a double needle.

LET’S BE HONEST:

1. This pattern had no surprises for me!

2. This pattern is labeled EASY. I would say that a fairly accurate label, accept for the waist band features. Sewing the side seams together at the waist was a bit tricky, and the front yoke requires hand stitching on the inside facing.

3. The front yoke piece is the only area where fitting is crucial because it needs to hit exactly at the middle of the sides of your waist. I cut that piece exactly between the size 14 and 16, and it worked out perfectly. The legs are so full, it doesn’t really matter what size you cut!

4. The only alterations I made to the pattern pieces before cutting was I took 1 inch off the crotch length and 2 inches off the hem length. Since I’m not the tallest person in the world, I ended up cutting off a few more inches off the bottom of the legs when I hemmed the pants.

Overall I am very happy with my Chill Pants. They couldn’t possibly be more comfortable or easy to care for.

As always, I appreciate you taking the time read my post and welcome your comments. Happy sewing! Lori