
I waited for months for the weather to change, and then when it finally did I realized I had quite a shortage of professional, casual clothes for cooler temperatures. You know the category – not jeans and hoodies, and also not dress slacks and blazers. These are the clothes I need to wear to my teaching job every weekday morning. So I choose to make this long sleeve, knit, wrap top for Fresh Make #21, not to wow you with my sewing skills (which I confess is sometimes how choose my makes), but because it is a garment that I truly need.

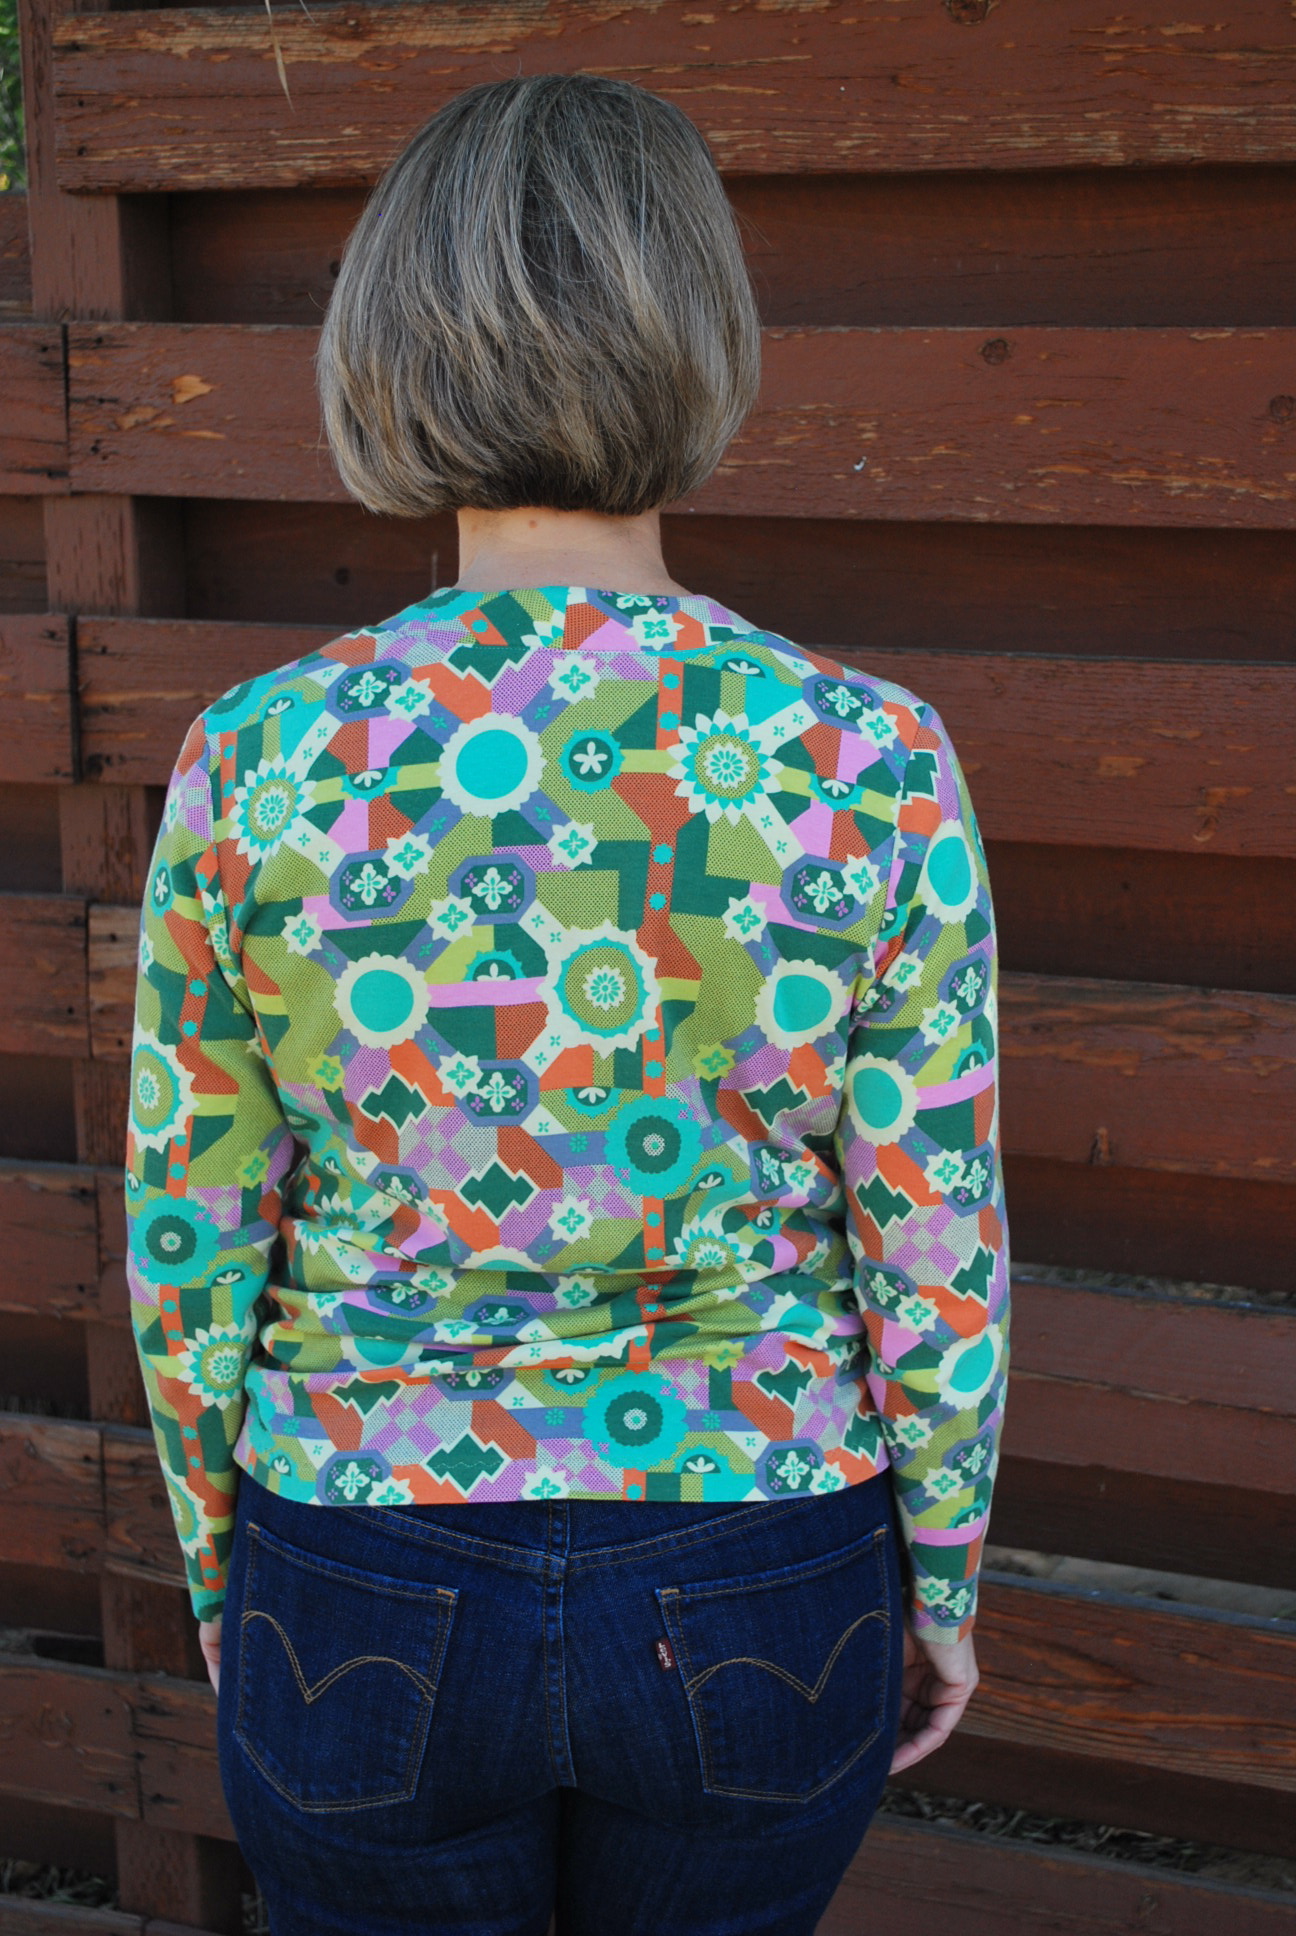
The neckband lays beautifully in the back. The gathers formed by the side shirring are more successful in the back because of the single layer of fabric.
 I originally purchased this fabric with the intention of making an easy wearing, short sleeved dress. But the weather turned cooler, and another warm weather dress was not what I needed at the moment. I bought this fabric because I was anxious to try an Amy Butler knit as I know hers is a name I could trust for quality fabrics. There are a lot of bad knits out there. This cotton interlock is Cross Roads in Citrus from Amy Butler’s Glow collection. The weight is substantial and it feels as soft as a favorite pair of PJs. I purchased it from my favorite online fabric store, Hawthorne Threads. I purchase 2 yards at $14.50 per yard, plus tax and shipping. Not cheap but well worth it, I think.
I love the neckline on this top. I usually do not look good in a wrap neckline because of my small bust, but this it cut just right for me.
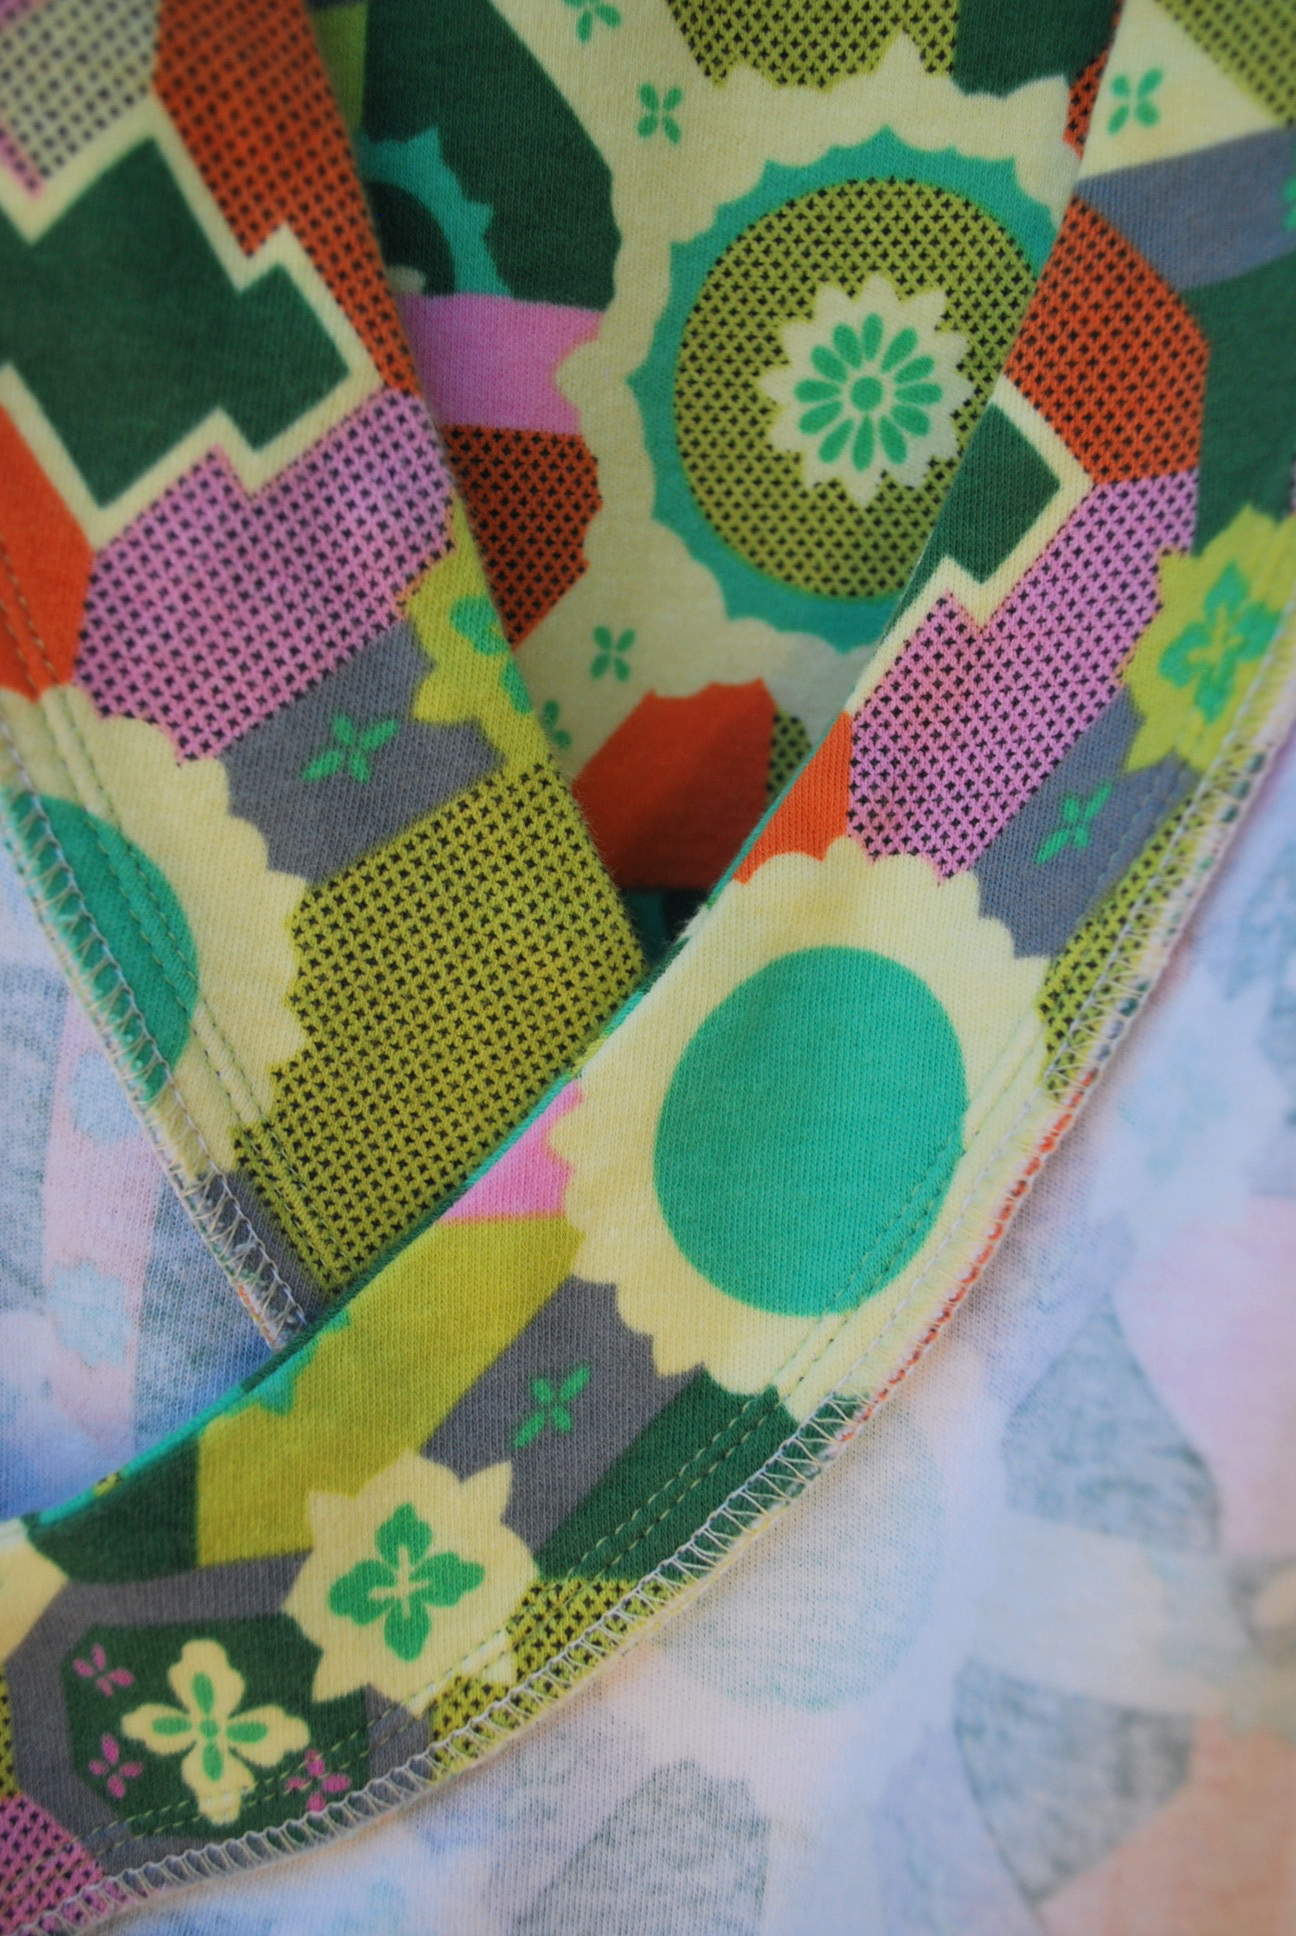
Inside peek!
 I used clear elastic for the shirring on the sides. I first used this elastic on my Moneta Dress.
LET’S BE HONEST:
1. I cut a size C. The sizes range from A to J. The measurements on size C are: bust – 36″, waist – 28 1/2″, hips – 38 1/2.” I still have a pear shape even with these adjusted ratios. The pattern offered simple adjustment instructions for different body types. I followed the small bust adjustment and folded out 1/2″ through the middle of the dart to reduce dart width.
2. I followed the instructions by looking at the illustrations (which is what I usually do, unless the picture is confusing, then I read.) When I did my first try on, it felt a little too roomy, and I honestly felt I cut the right size for me. So I did a gradual take in on the sides from the armhole through the bust and waist and gradually came back out near the hip. Just today, when I glanced over the pattern, before writing this post, I noticed the instructions says to sew a 1″ seam down the sleeve and sides, then adjust if necessary depending on the stretch of your knit. Ah, that’s why it was big, I had stitched a standard 5/8″ seam! Oh well, next time.
3. You can’t really tell exactly how it’s going to look and fit until the elastic is sewed into the side seams to create the shirring. After I had done that, I wasn’t compelled to remove it to adjust the side seams. (Maybe I shouldn’t have been so lazy.)
3. While I love this fabric, I don’t think it’s a perfect choice for this pattern. Aside from the fact that the top should just fit me more snugly, I think the shirring at the bottom would form nicer folds with a thinner fabric such as a single jersey knit.
4. I shortened the sleeve by 1″ before cutting.
Despite not achieving the fit I envisioned based on the photo on the front of the envelope, I still like this top and I have something new to grab in my closet. I am actually very anxious to make this pattern again with a single knit and a more snug fit. I think it has the potential to be very flattering. Thanks for reading this post. I welcome your comments! Cheers, Lori

It will be interesting to see a second version in a finer knit as it appears to be a flattering pattern. I look forward to seeing your next one!
You are holding me accountable to make a second one! Thank you!
This is such a cute top! Love the print. I have a top with this cross over that I really like in cotton but haven’t worn it because I can’t figure out how to keep the top from gaping open too much. Any suggestions?
Hmm….since it’s already made, the only thing I can think of is a mini safety pin on the on the inside. I’ve done that a few times on ready mades.
Pingback: Fresh Makes, Take Twos | Sewing Myself Stylish
I just started sewing again after a very long hiatus and I see you’ve made this top over and over. I’m having a lot of trouble with the four piece neckband. Could you give simpler explanation than the pattern. Thx