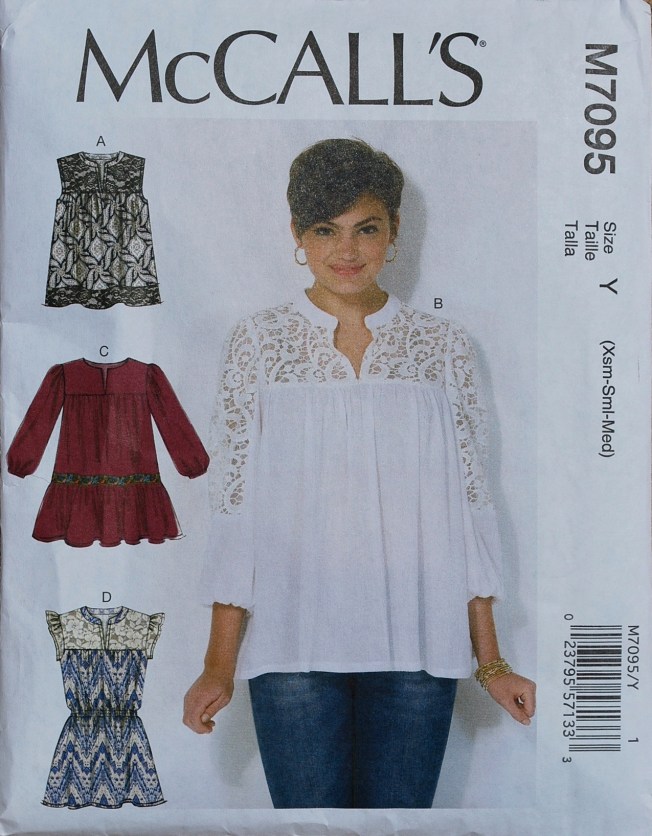
Guess what?! I’m a contestant on the Super Online Sewing Match II! I want to thank Beth and Kristin of Sew Mama Sew for selecting me as one of the ten contestants. It is truly an honor and a big surprise. So, here in this post, I present Challenge #1, the Sutton Blouse by True Bias.


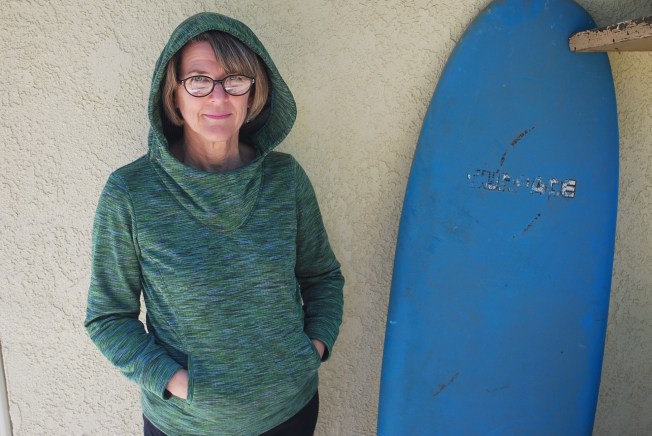
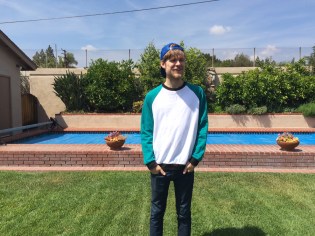
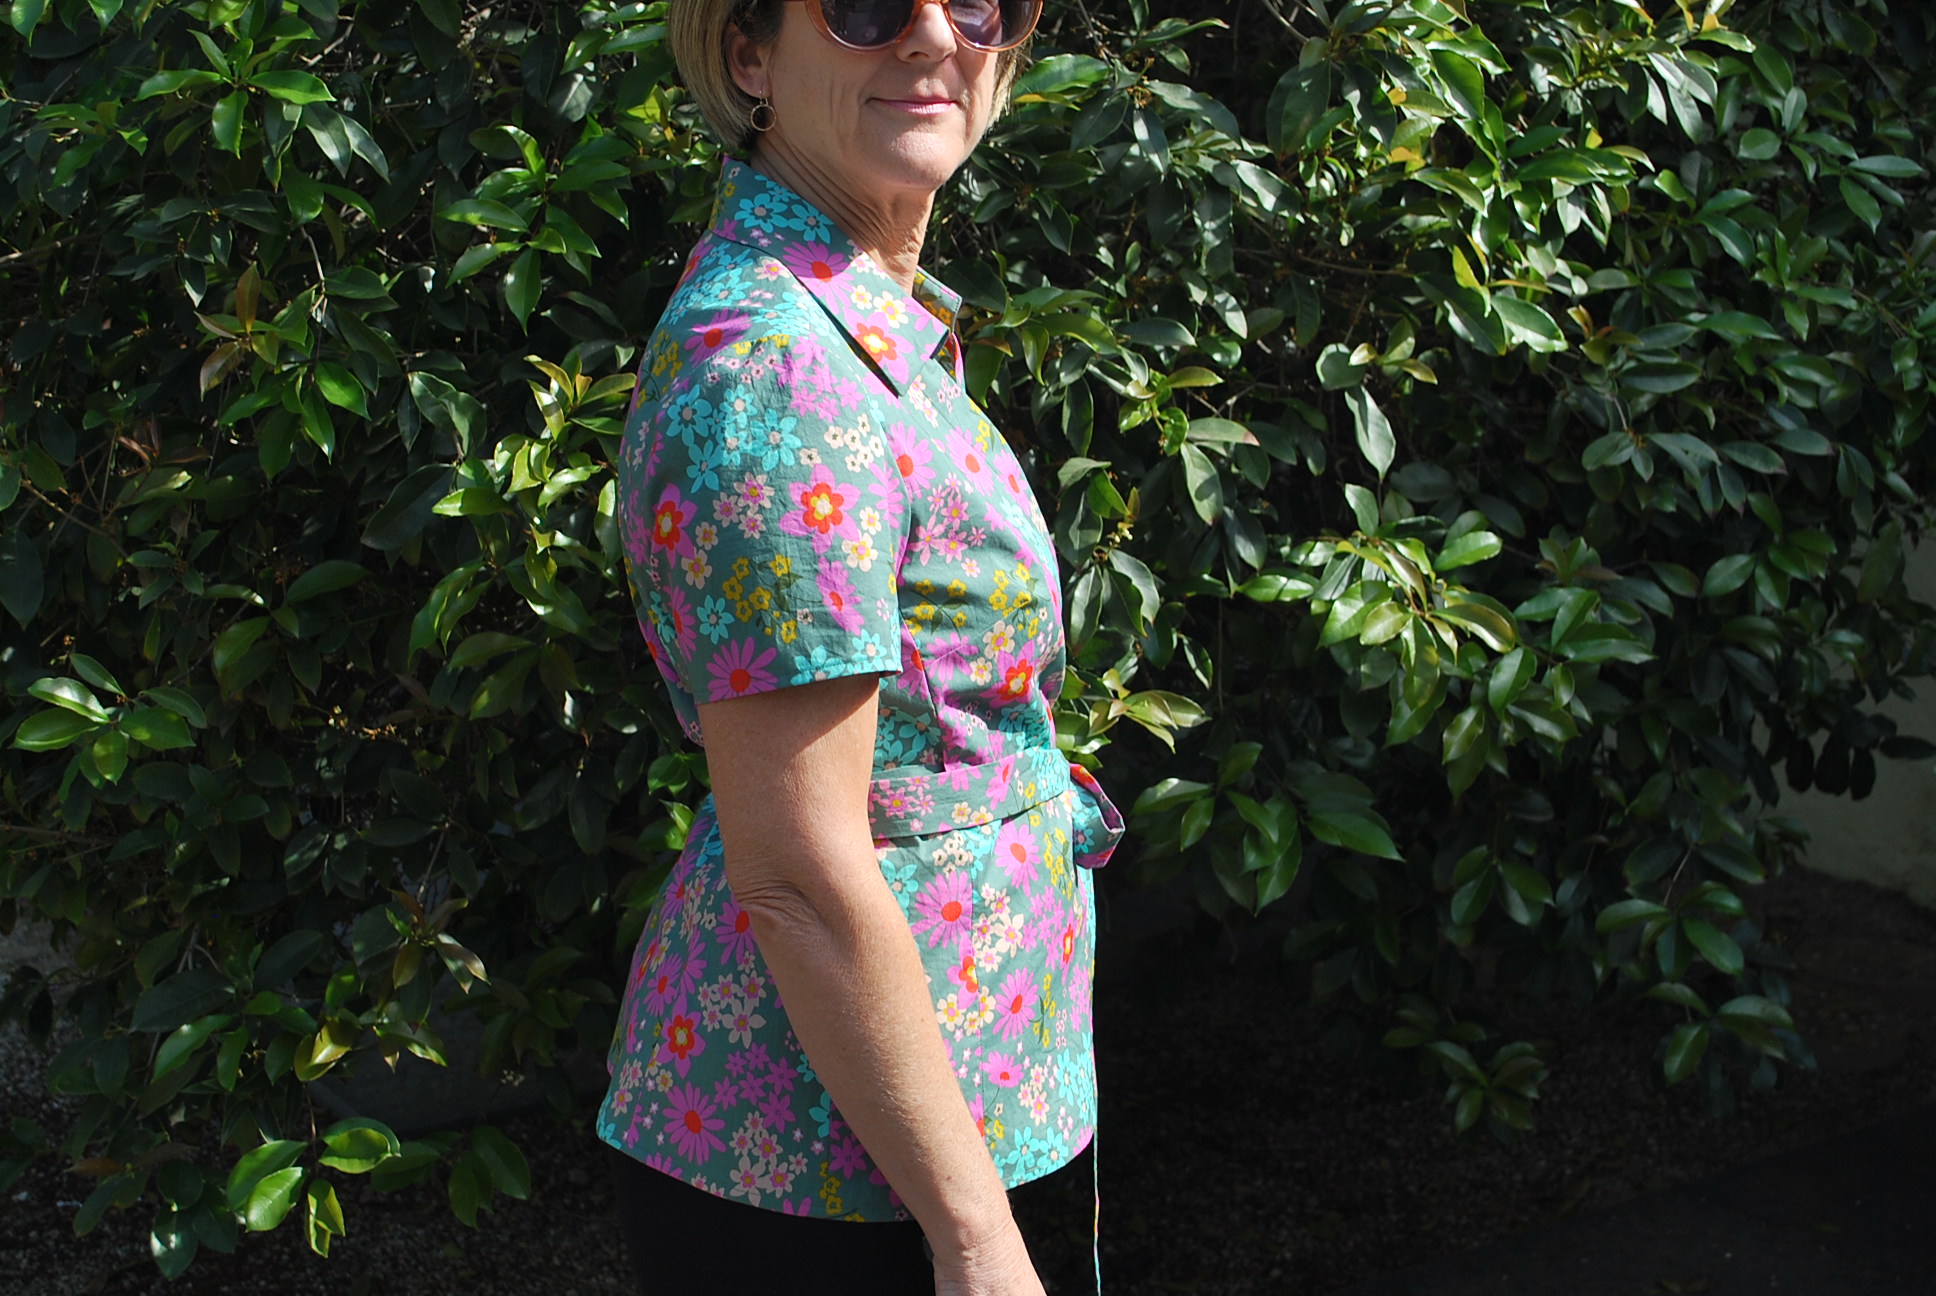
As soon as the Sutton Blouse was revealed as the challenge pattern, I knew my inspiration would be my new pair of white jeans. These jeans are a big deal for me. I’m stepping out of my comfort zone. I have never had a pair of white jeans nor did I think I ever would buy some. I didn’t think my white pants wearing would go beyond the ones I made for my Good Life Shirt. But then my children’s third grade teacher, and now Facebook friend, extolled the virtues of white pants to me and insisted I should have them as a summer staple. I opened my mind to this idea, and found a great fitting pair at Talbots.
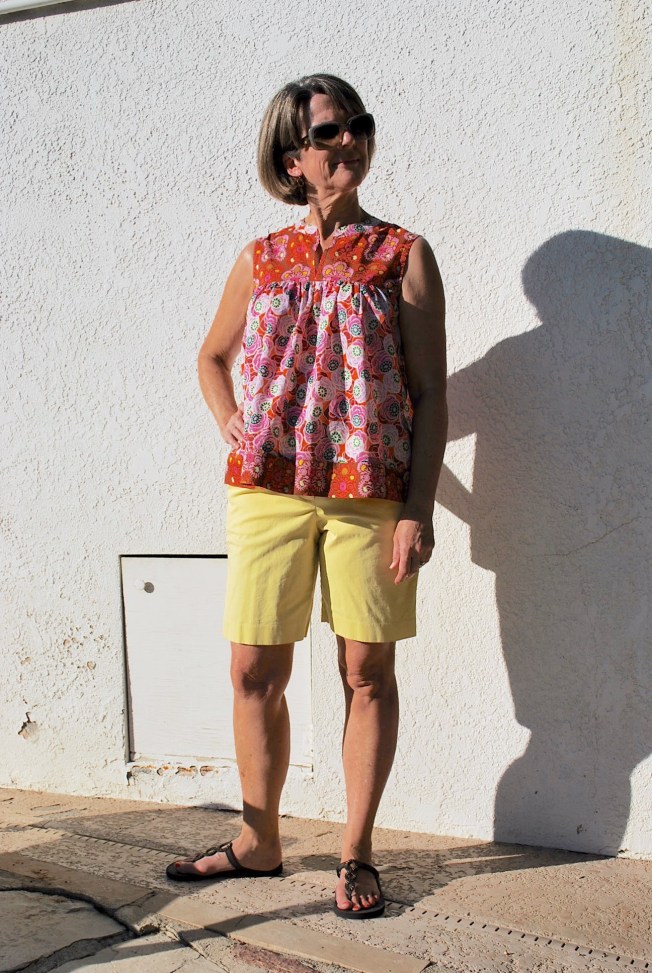
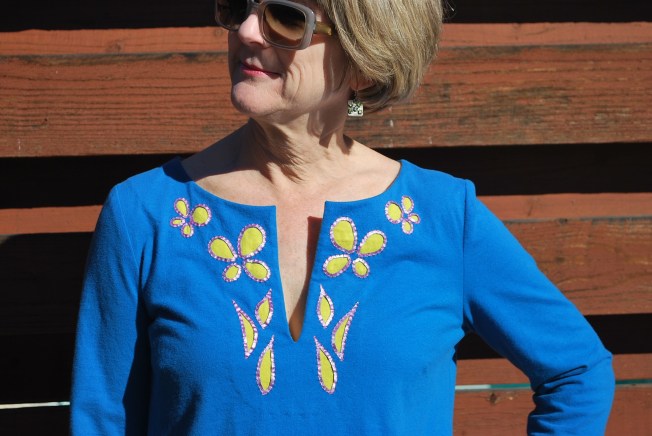
I instantly decided I wanted my soon-to-made Sutton and my new jeans to create a fresh, new summer outfit.

HERE IS MY STORY OF ROUND ONE
I received this first challenge on Wednesday morning during my busiest “work” week of the summer. I was co-director of a morning puppet camp and director of an afternoon sewing camp for kids. The project was due the following Tuesday. If I had not been tied down, I would have high tailed it into Los Angeles, 60 miles from my home, to buy fabric. So, appreciatively, I took advantage of the offer from Harts Fabric online store. Harts’ customer service was fantastic. After placing my order, they called me up the next morning, while I was at my camp, to deliver the unfortunate news that they only had one yard left of the fabric I had ordered. I quickly made a second choice so the fabric would still ship Thursday afternoon with an arrival date of Saturday. I did have some concerns about drape, as I switched from a rayon to a cotton voile. But I thought the print would be suitable for the center front seam on the pattern. I ordered a contrasting solid voile for the yoke.
Saturday arrives, and so does my fabric. I am free all weekend to sew. No muslin for me. I’m diving right in. I never make muslins. Only on my wedding dress, my daughter’s prom dress, and my cousin’s daughter’s Irish dance dress.
Come Sunday morning, after about my fourth try-on, when all was finished but the hem, I had to finally confront the fact that the line that was created by the contrasting solid yoke fabric, in combination with stiffness of the voile, made me look like a linebacker. The sleeves stuck out straight. I stopped and took the dog for a walk.
While I was on my walk, I made the decision that I must start over. I couldn’t submit something I didn’t feel good about. Afterall, this was my time to shine!
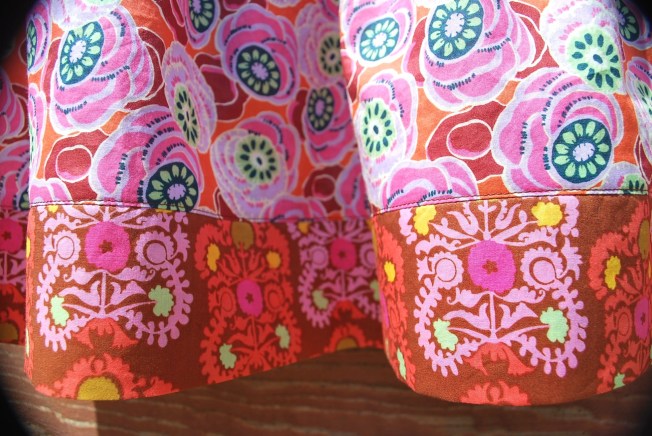
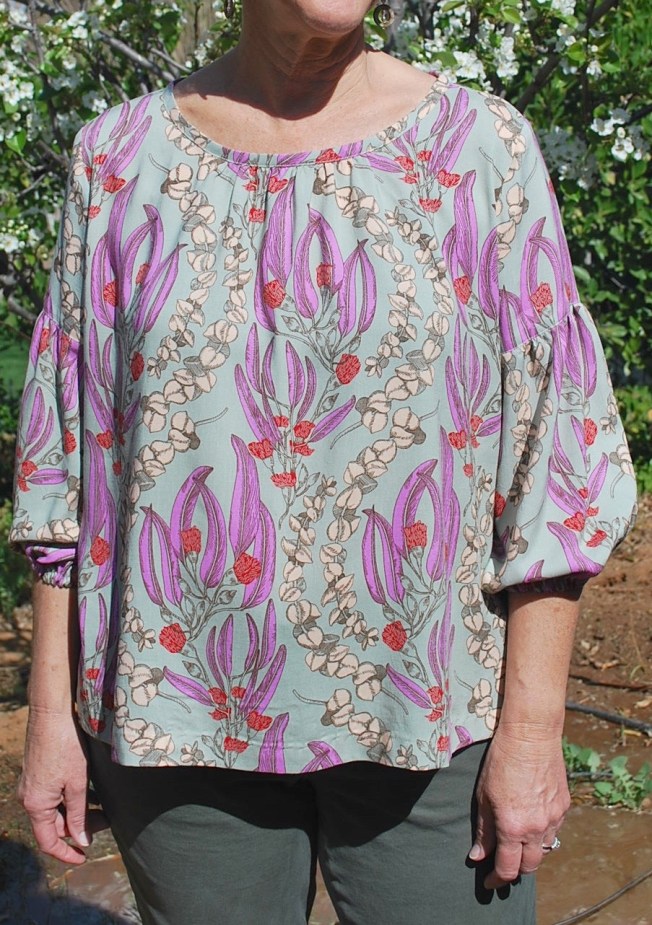
OK, there’s something I haven’t told you, but now is the time. Back to Thursday evening – while my fabric from Harts was in transit, I was looking through my closet for trims to use at my sewing camp. In a bag, I stumbled upon two pieces of mystery silk, meaning I had no recollection of how they came into my possession or that I even had them. I assume they came from my mom, because she will often accept sewing stuff from her friends who are cleaning out their closets, thinking I might be interested in them. Each piece was about two yards. This vintage silk was kind of retro hip and grandma-ish at the same time. I immediately thought, wow, combining these fabrics together would make a unique Sutton. But my Harts fabric was on the way, and I felt obligated to use it. So I suppressed any more thoughts about the silk.
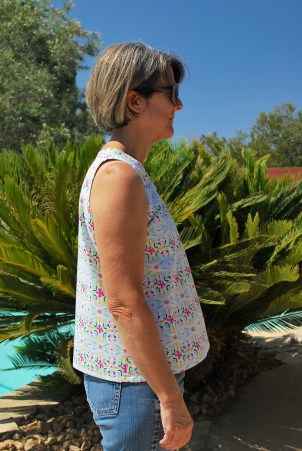
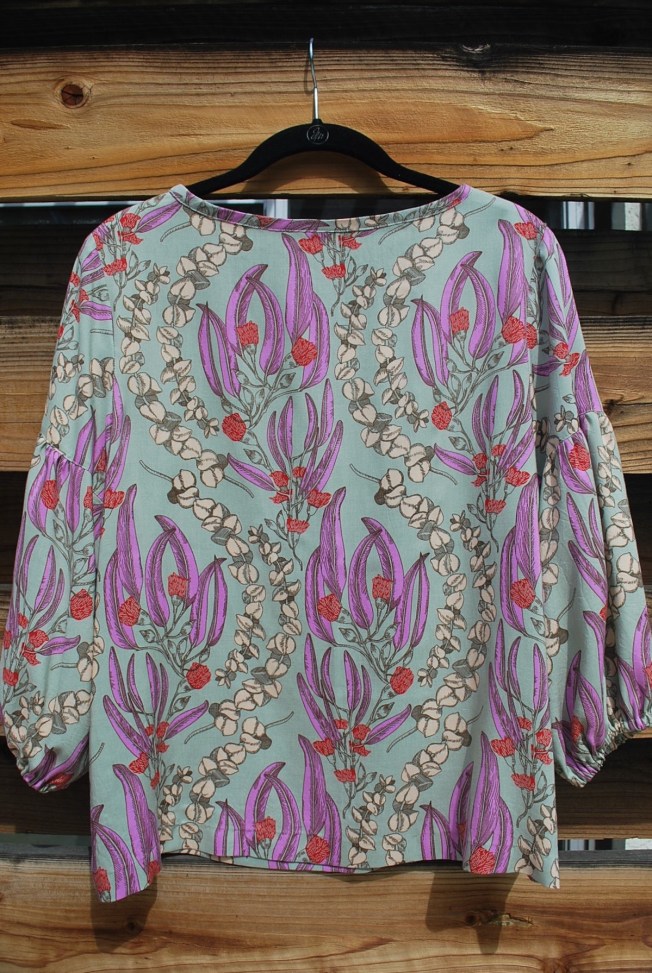
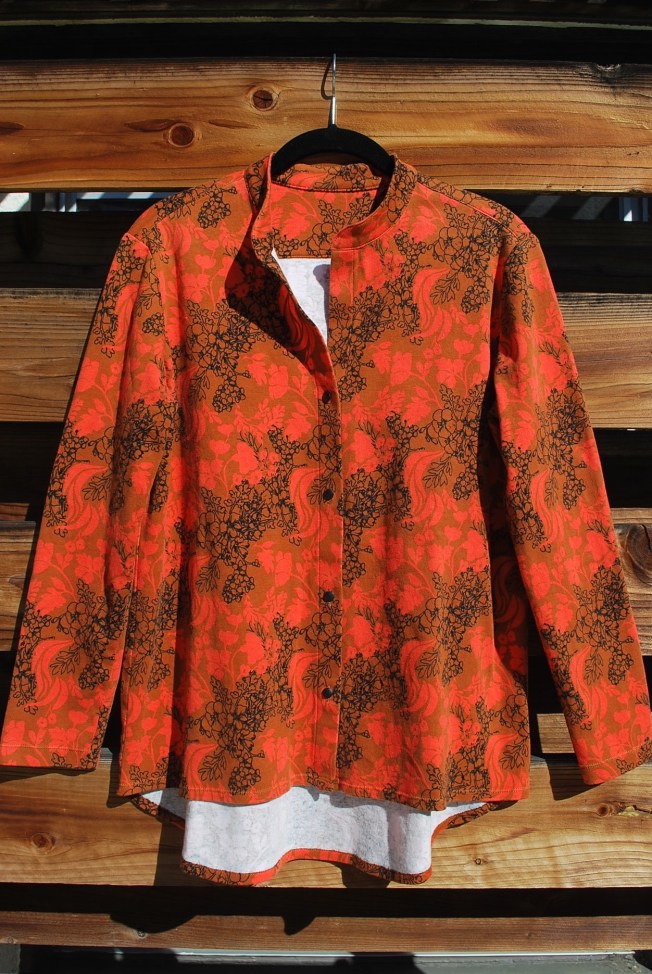
Let’s return to Sunday morning. What I really decided was, not only was I starting over, I was going to use the mystery silk! Call it fate or some sort of a Devine intervention I found that silk when I did. It was meant for my Sutton!
I knew sewing on silk would be a challenge, but it would give me the drape for the fit I desired. I sewed slowly, and did a lot of hand basting.
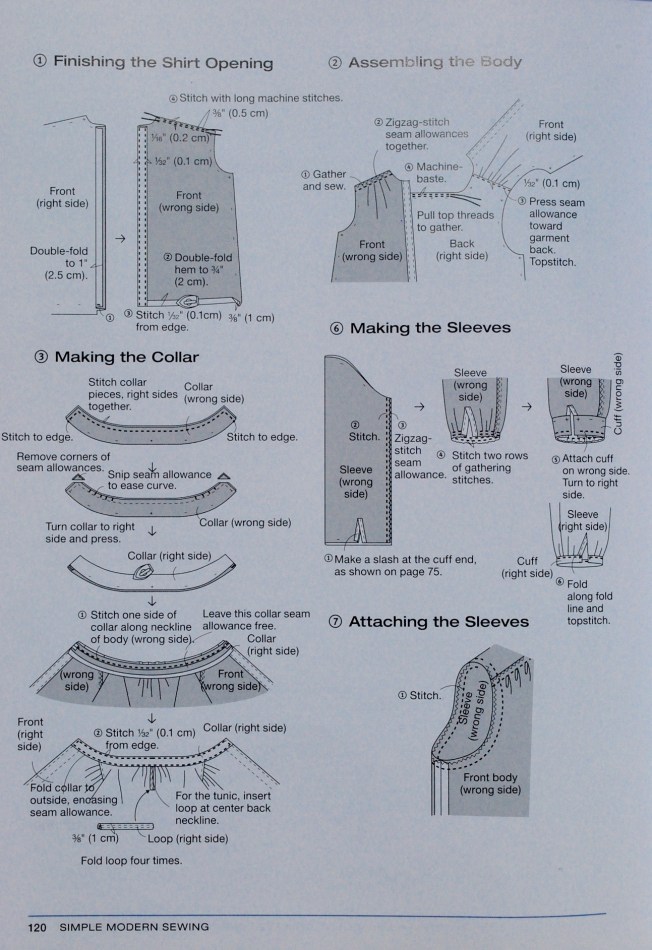
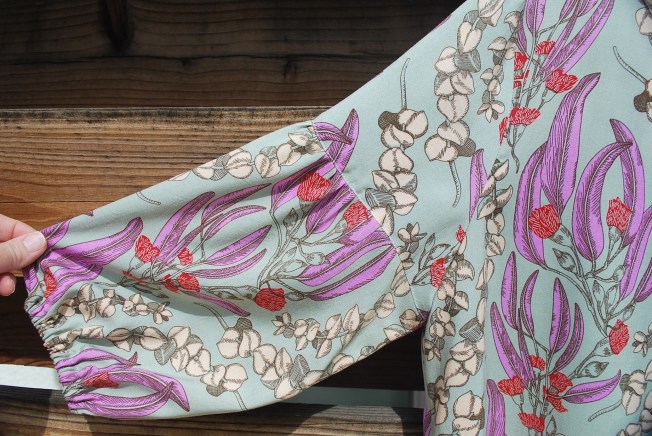
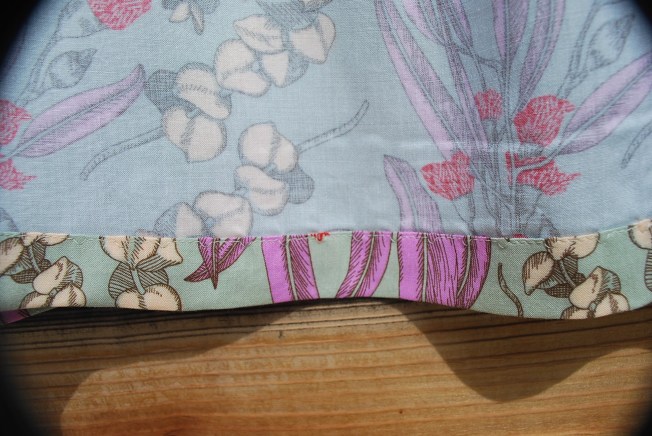
Since this was a contest, I followed the instructions exactly including all of the seam finishes. This is something I don’t normally do. Just like you, I have my own way of doing things. I am happy to say, I found these instructions easy to follow, the clearest of any indie pattern I have tried so far. Thank you, True Bias! The only thing I changed was the hem. I did this by hand because the the silk did not lend itself well to machine hemming. After carefully hand basting the sleeve hem, I did the 1/4″ machine hem, and it ruffled the fabric. I actually ended up turning it in one more time and doing a hand hem. Having done this, I knew I would hand hem the bottom, also.

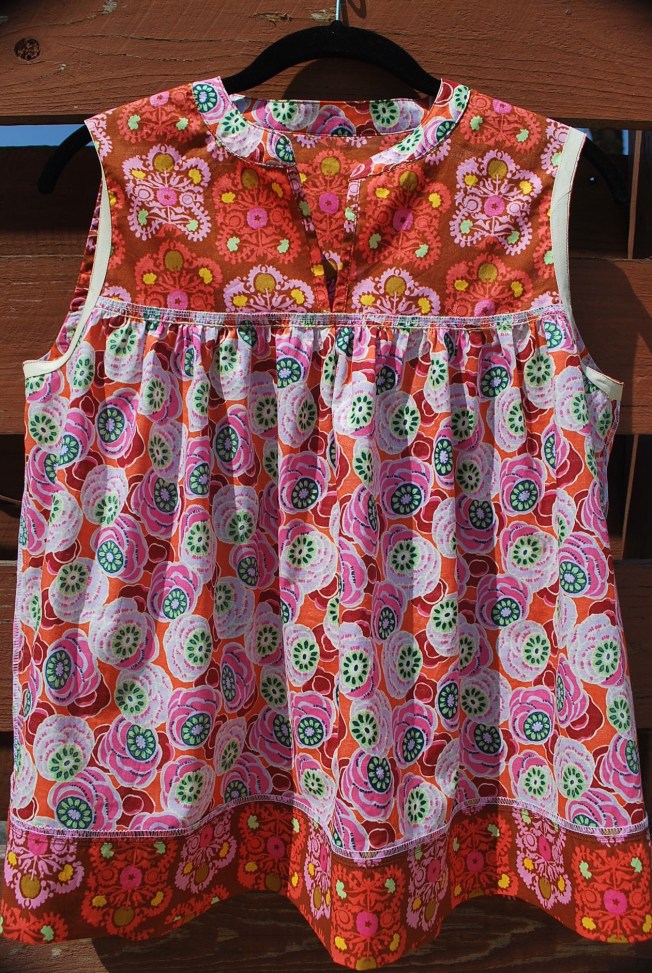
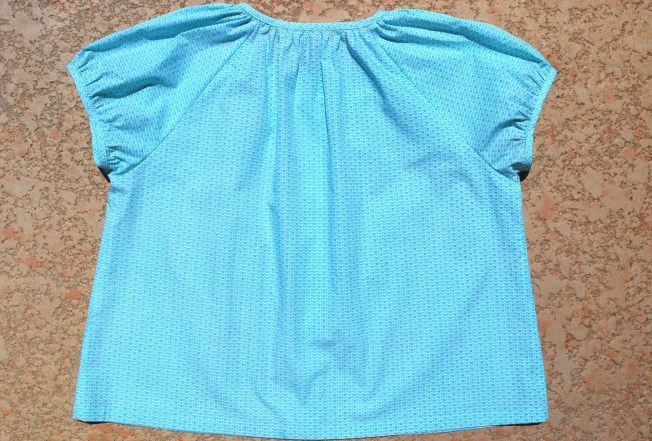
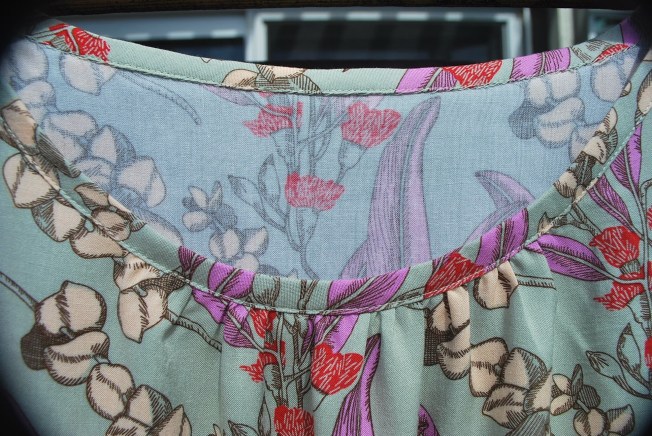
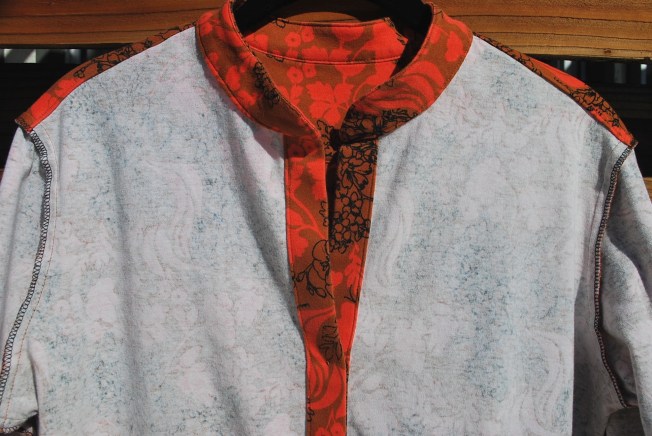
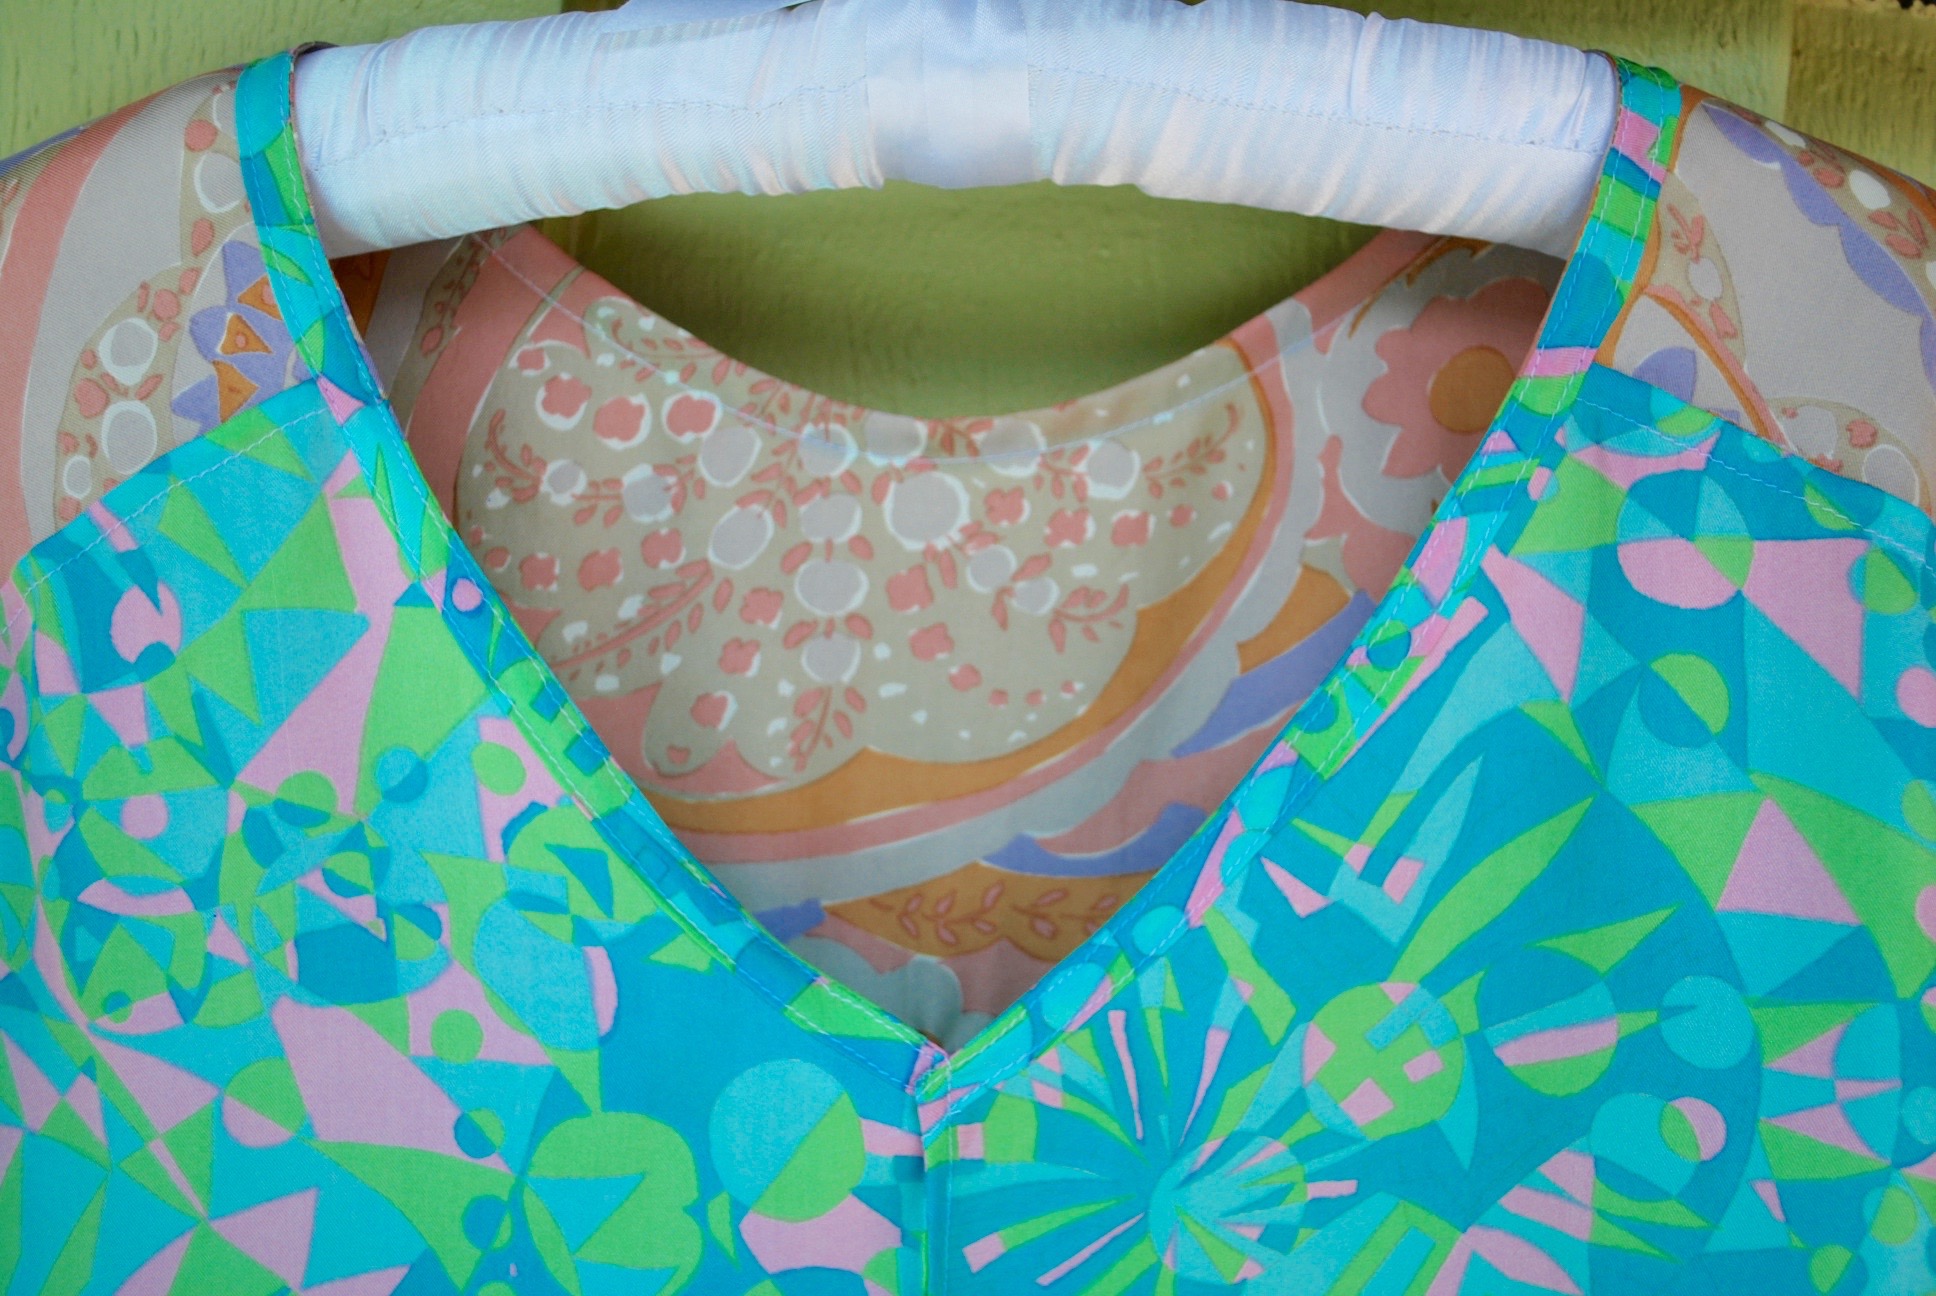
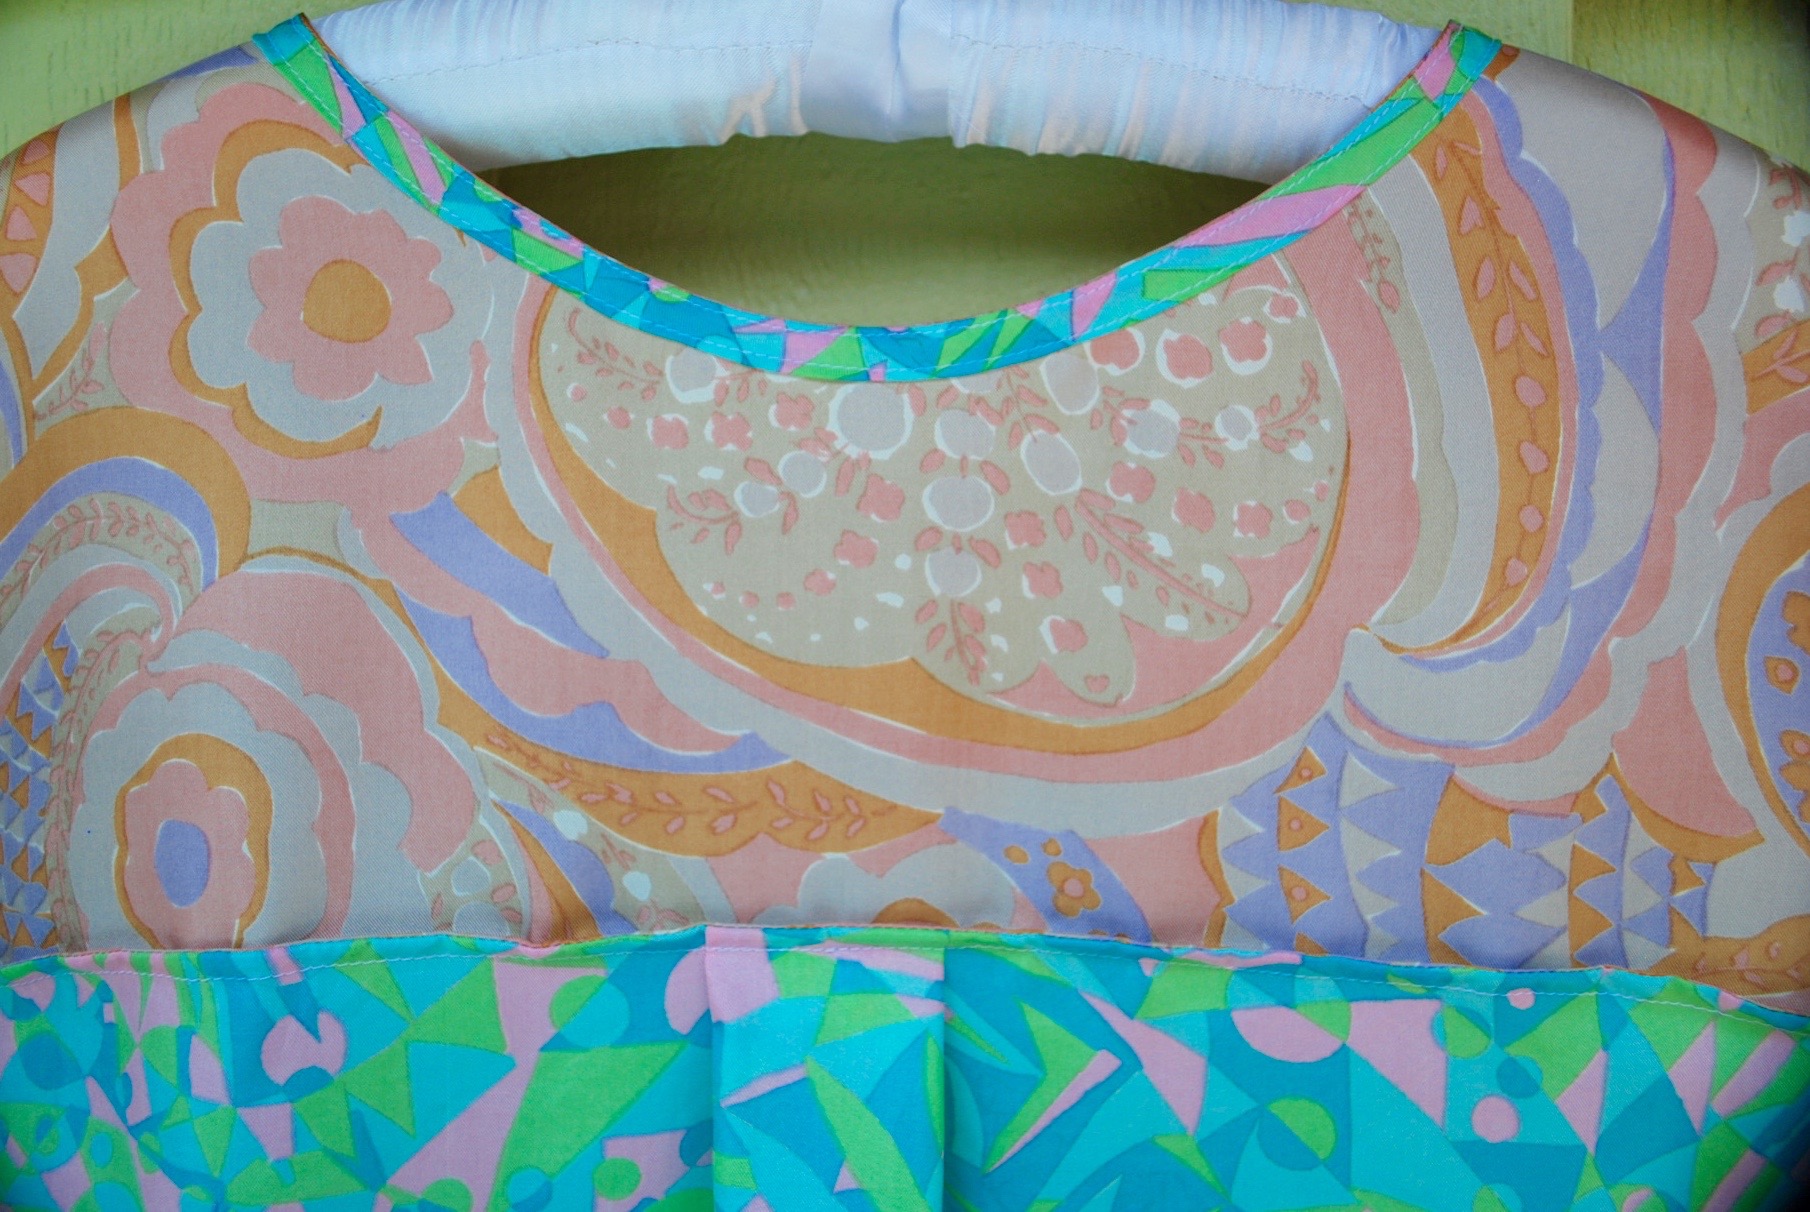
Front inside peek.
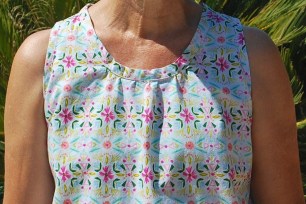
The neck has a bias tape finish that is done before sewing the front seam together. The front center seam and yoke seams are constructed as french seams.

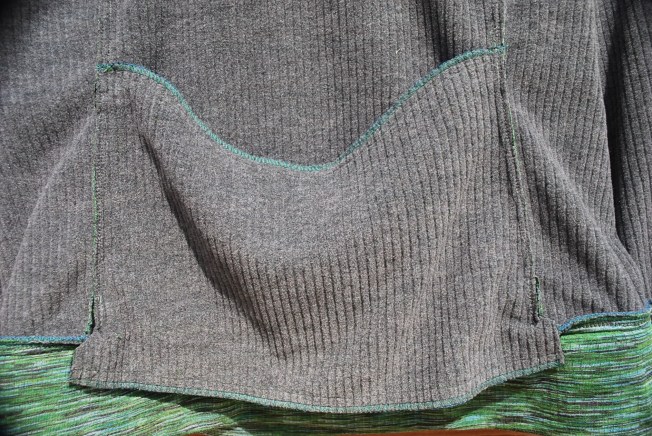
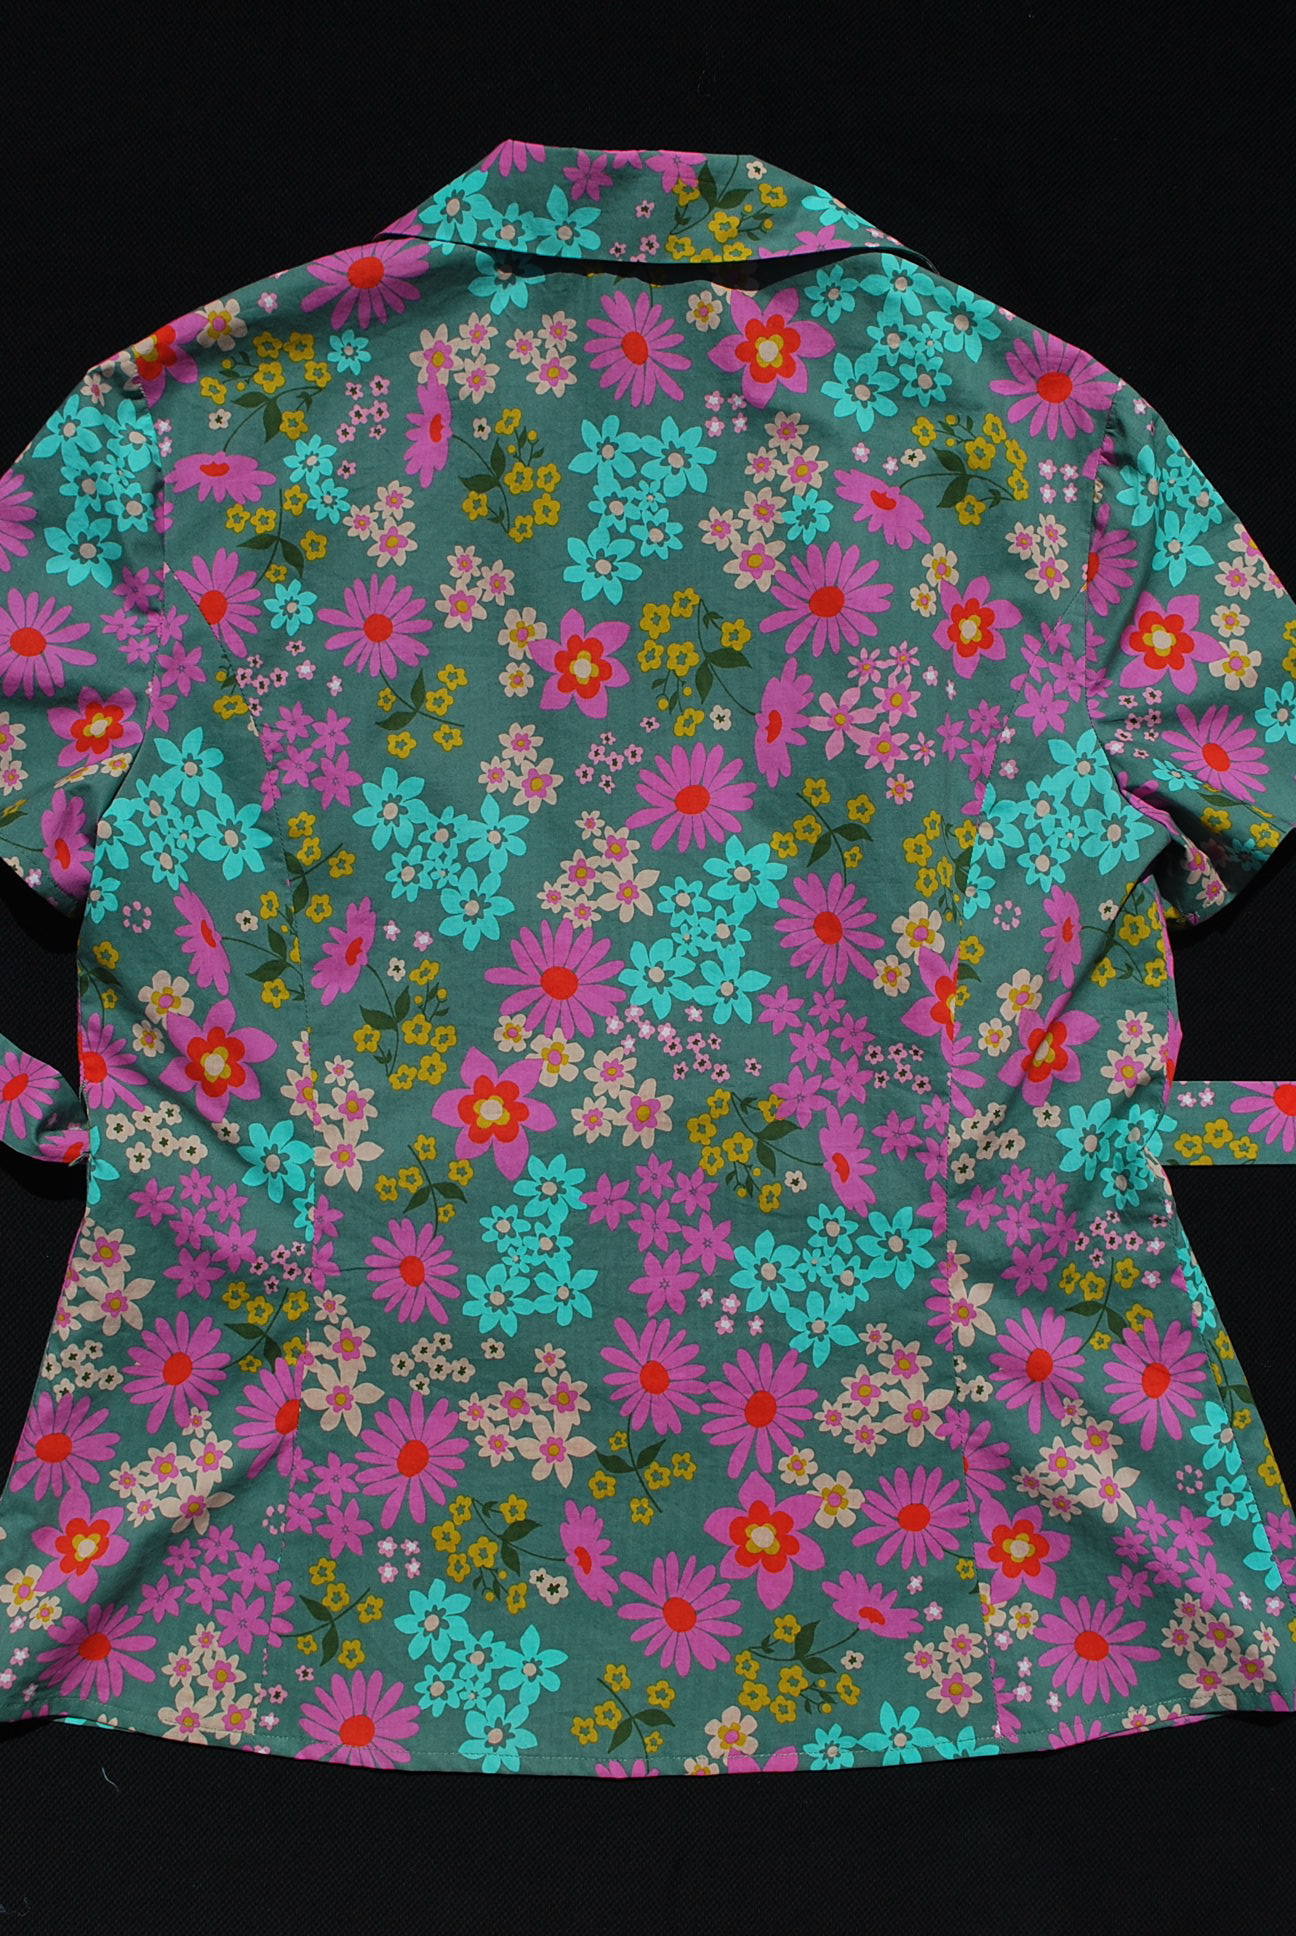
Back inside peek.

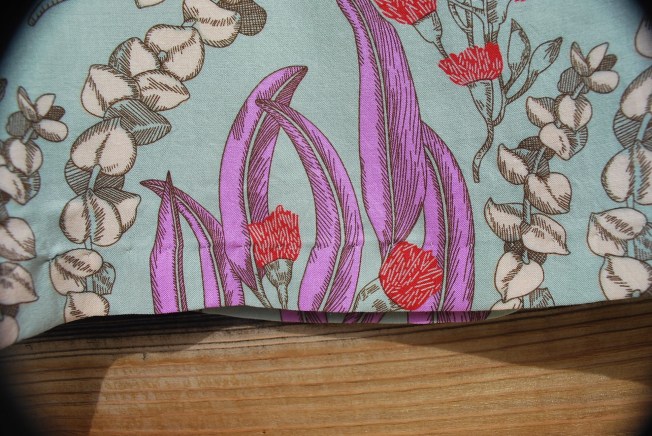
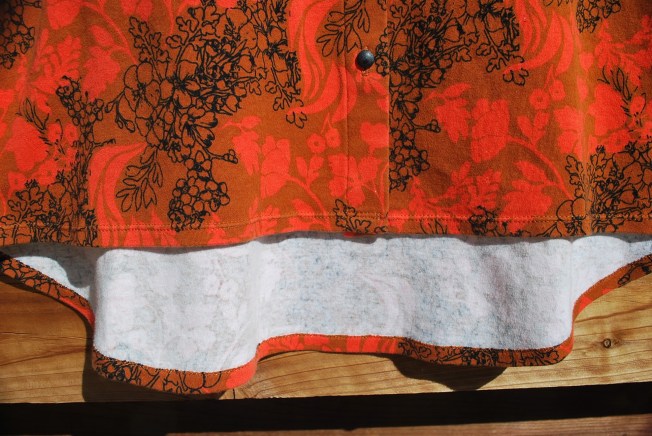
Side seams
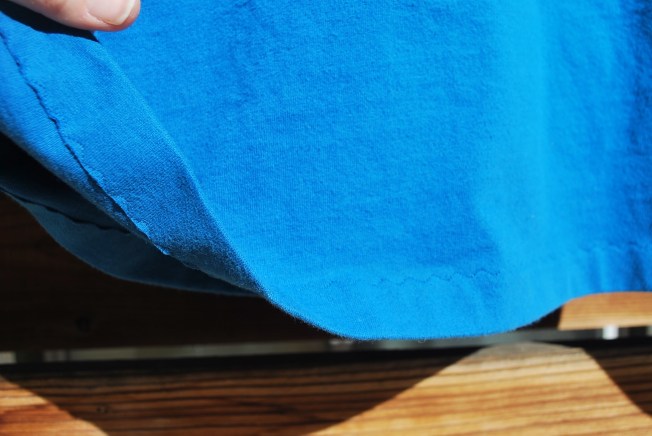
The side seams are finished by serging the edge, ironing under, and stitching. Then the seam is stitched at 3/8″. A french seam cannot be done here as the seam allowances must be kept separate for the slit at the bottom and for ease of construction at the underarm.

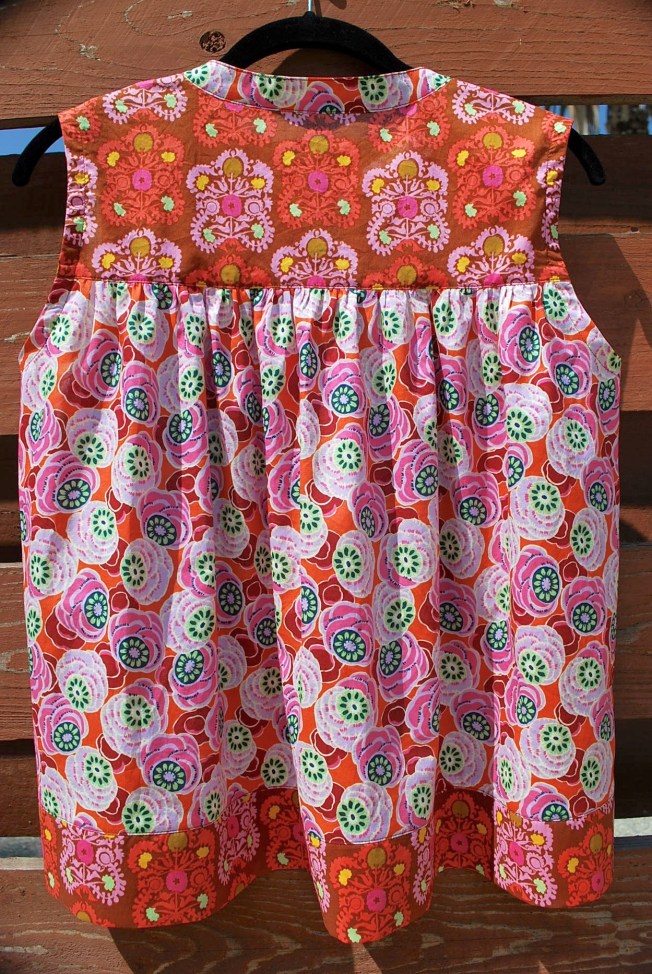
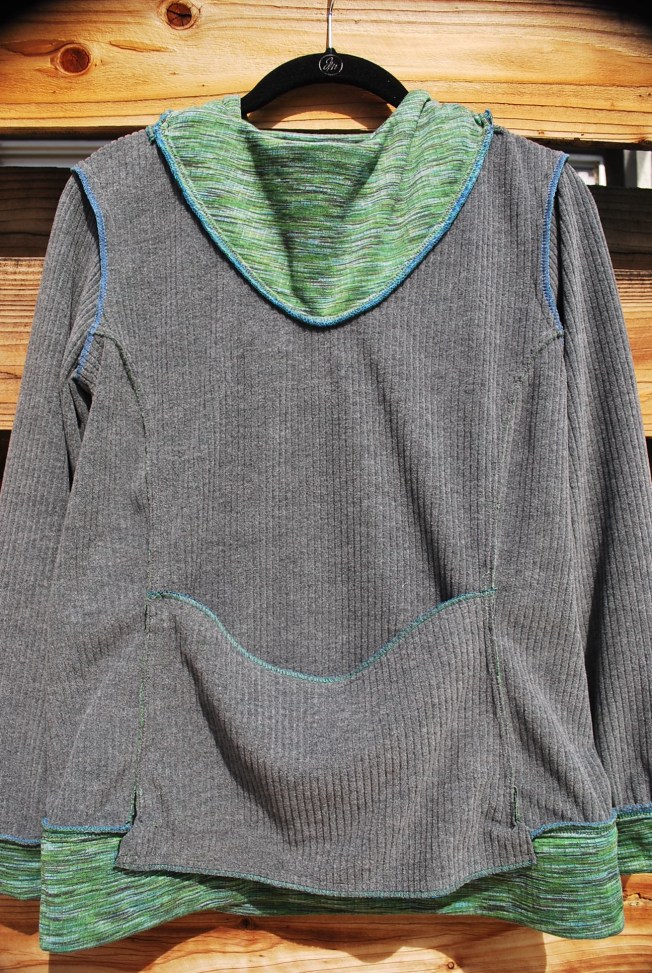
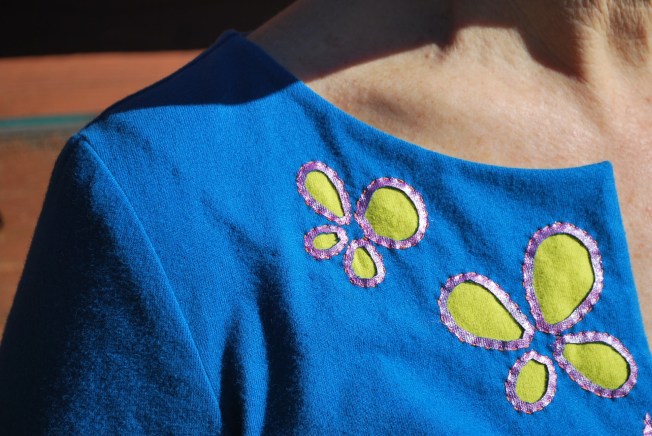
There is a high-low hem with a slit.

I cut a straight size 6. The only alteration I made was shortening the length on the pattern pieces by 3/4″. I am very pleased with the fit.

During Round One of the Super Online Sewing Match, I have: tried a pattern that I never would have otherwise, sewed up some silk that probably would have yellowed in it’s bag, made a perfect top for my new white jeans, and connected with some super gals in the online sewing community.
Harts Fabrics, you are awesome. And the fabrics you sent me were awesome too, just not right for my Sutton. I definitely will visit your store the next time I’m in Santa Cruz, which I hope will be soon!