The Truly Perfect Blouse

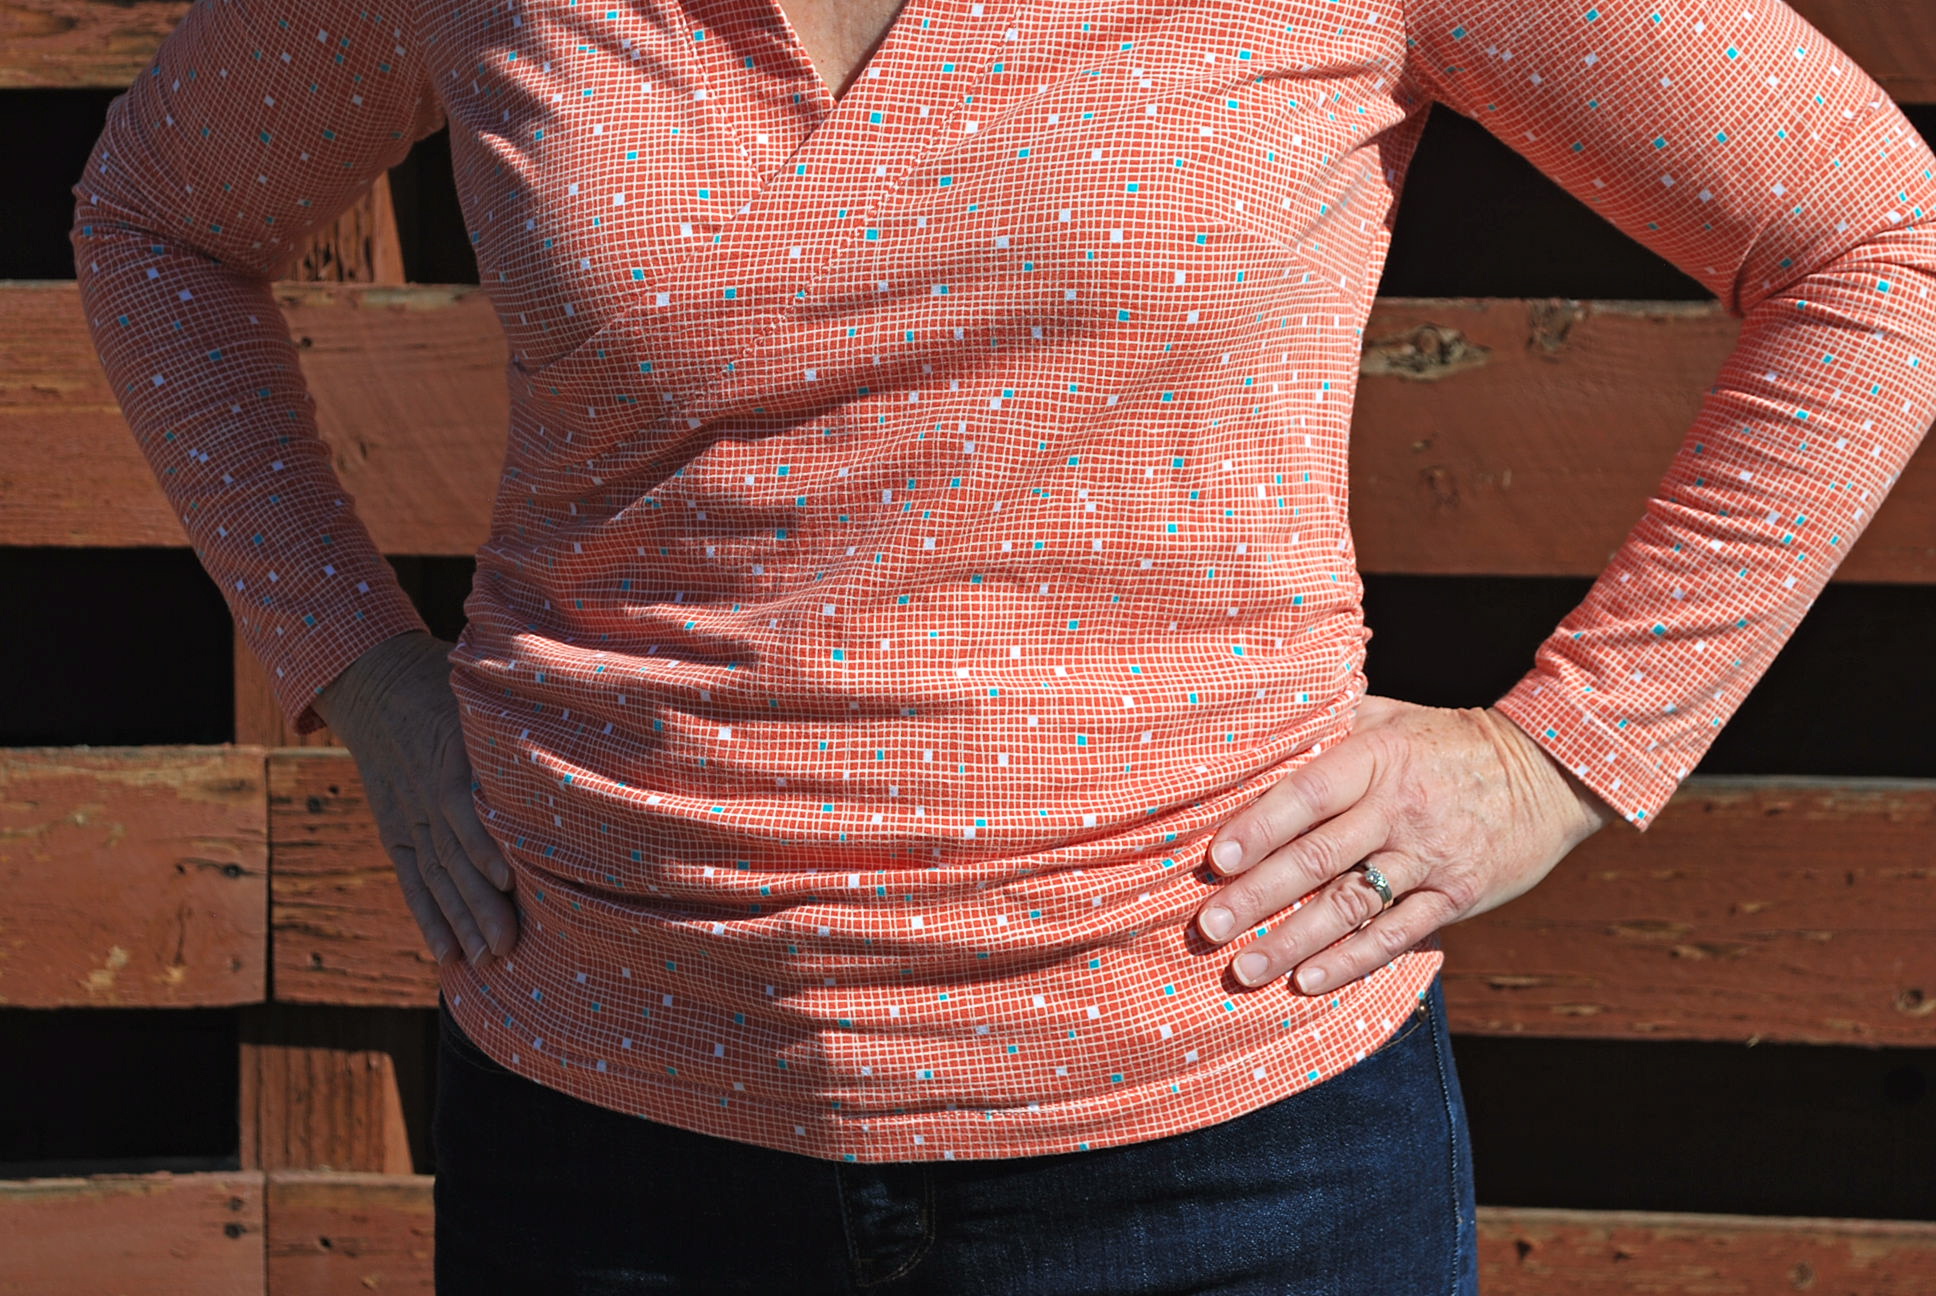
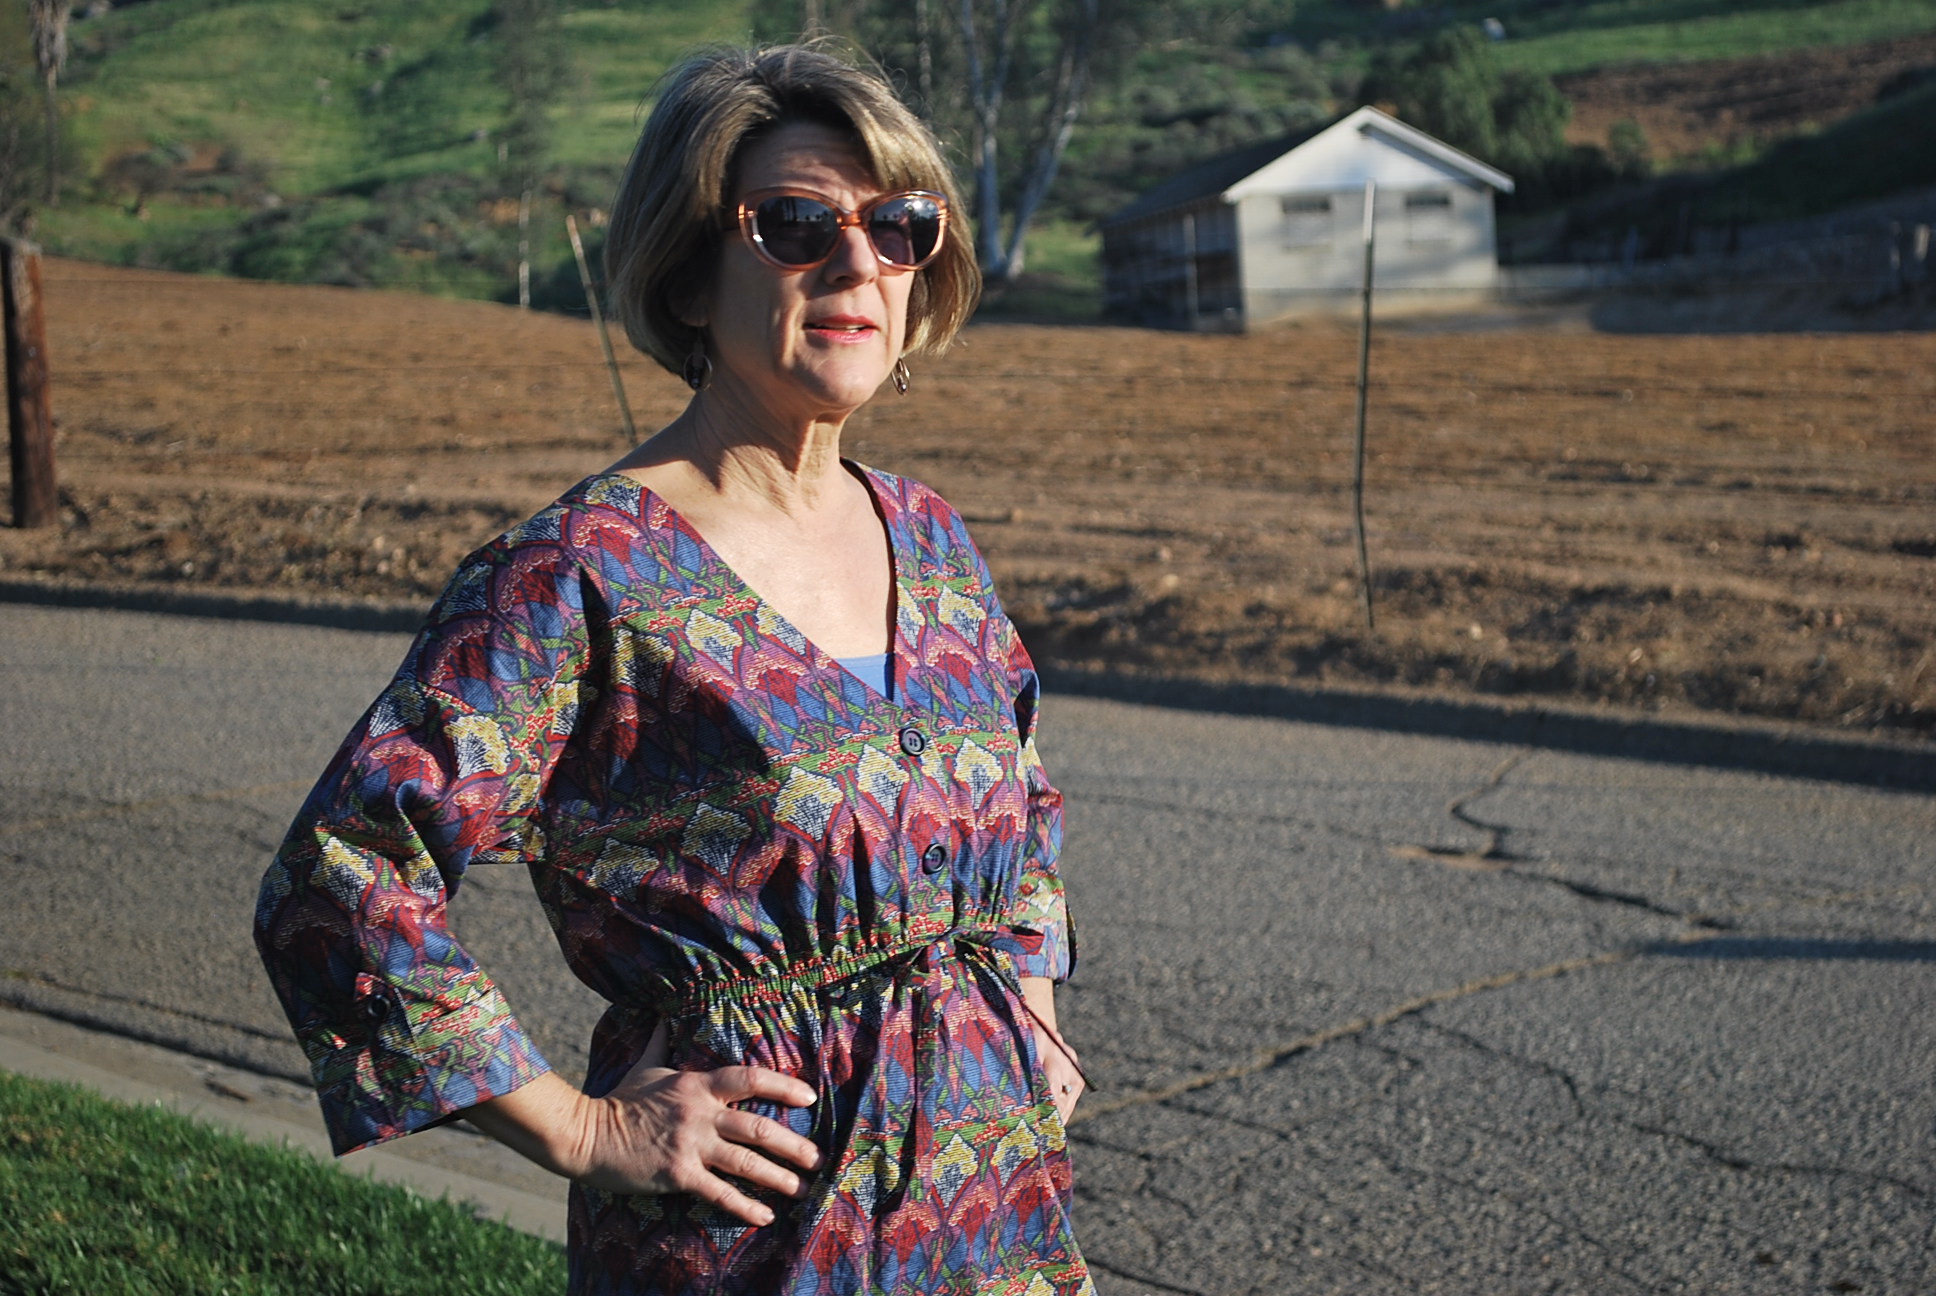
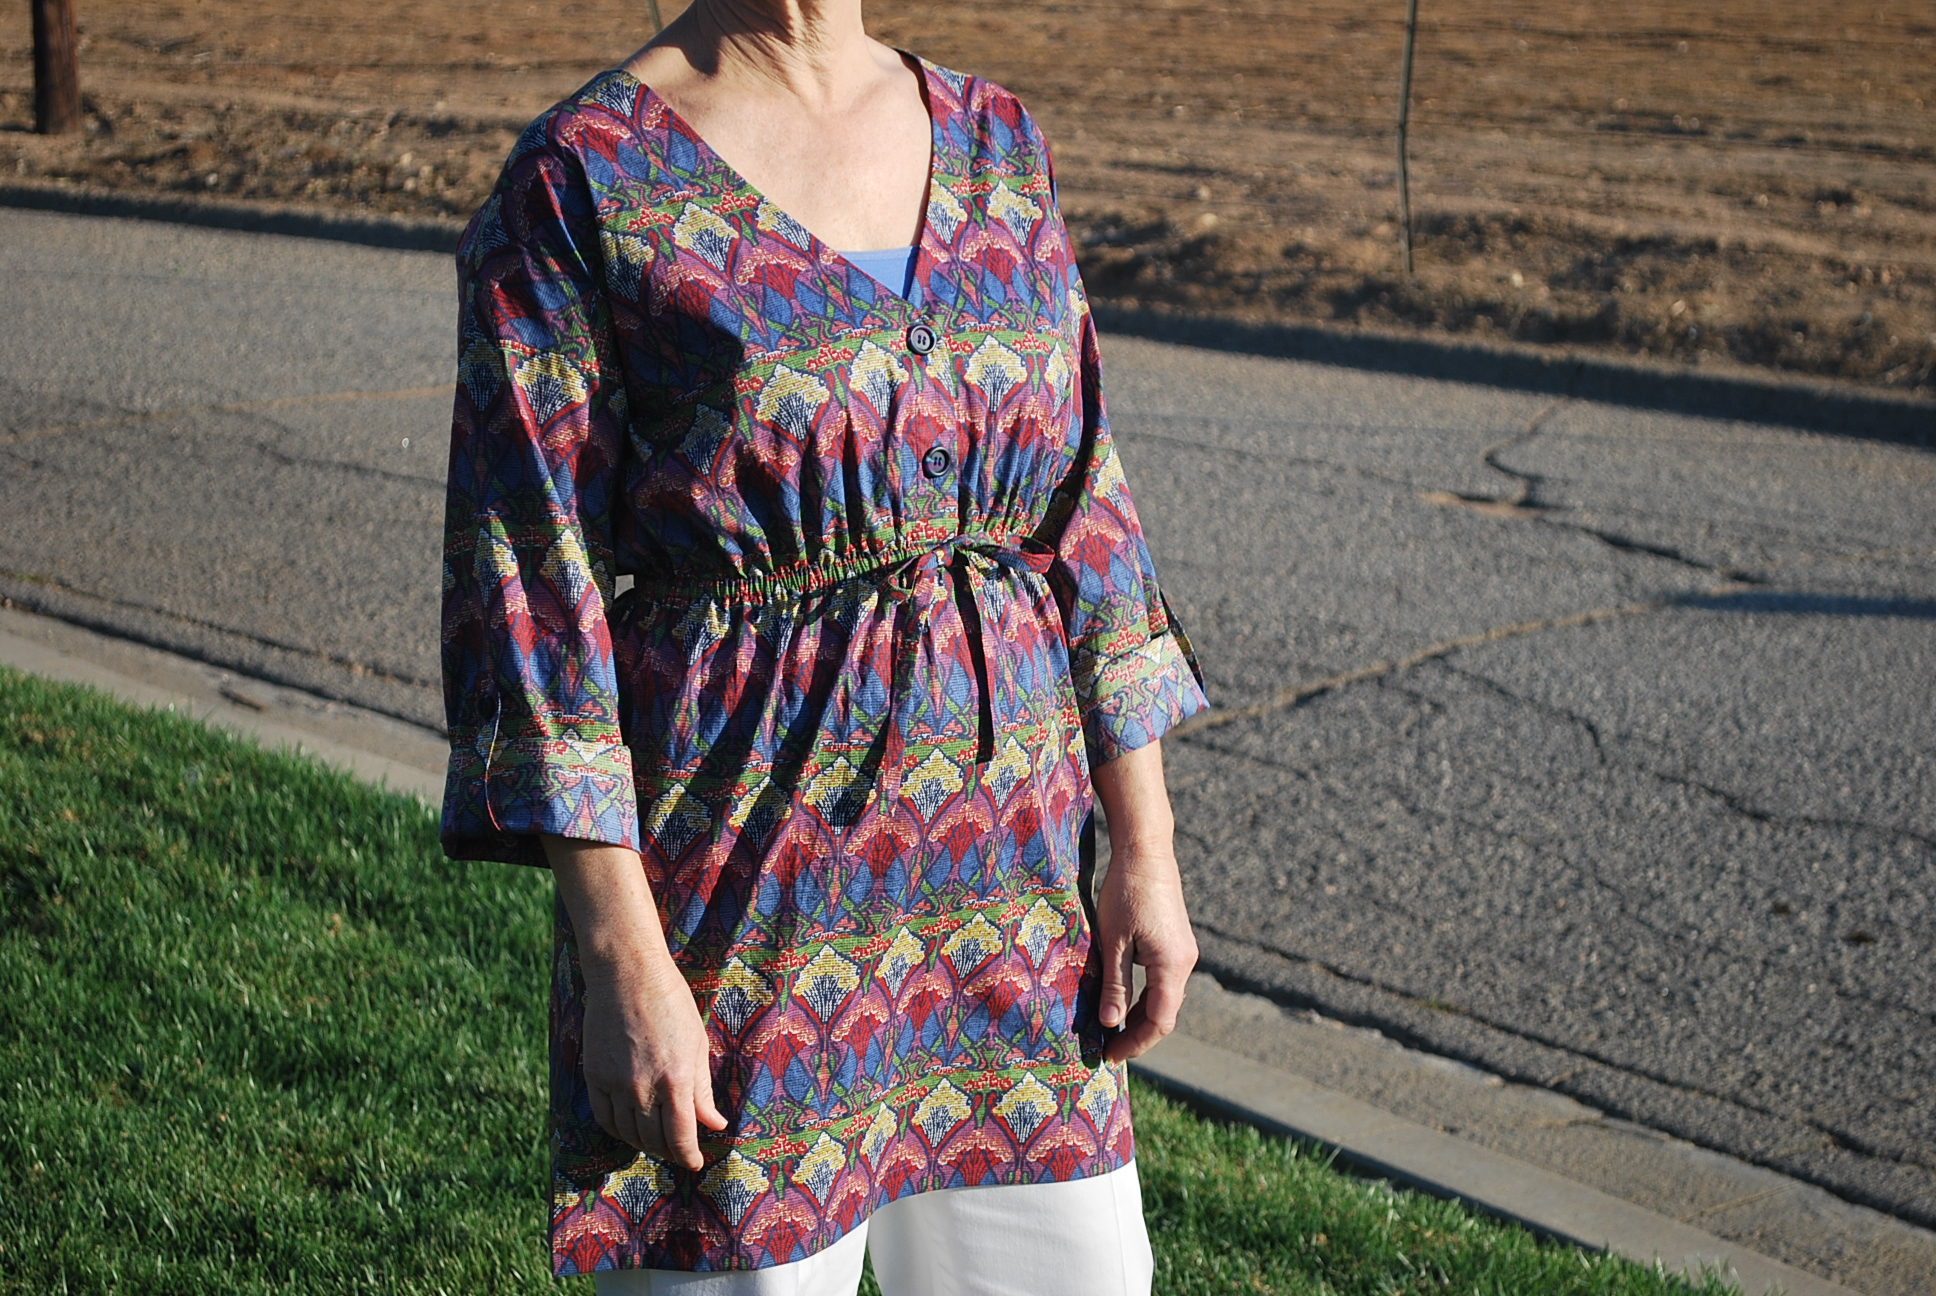
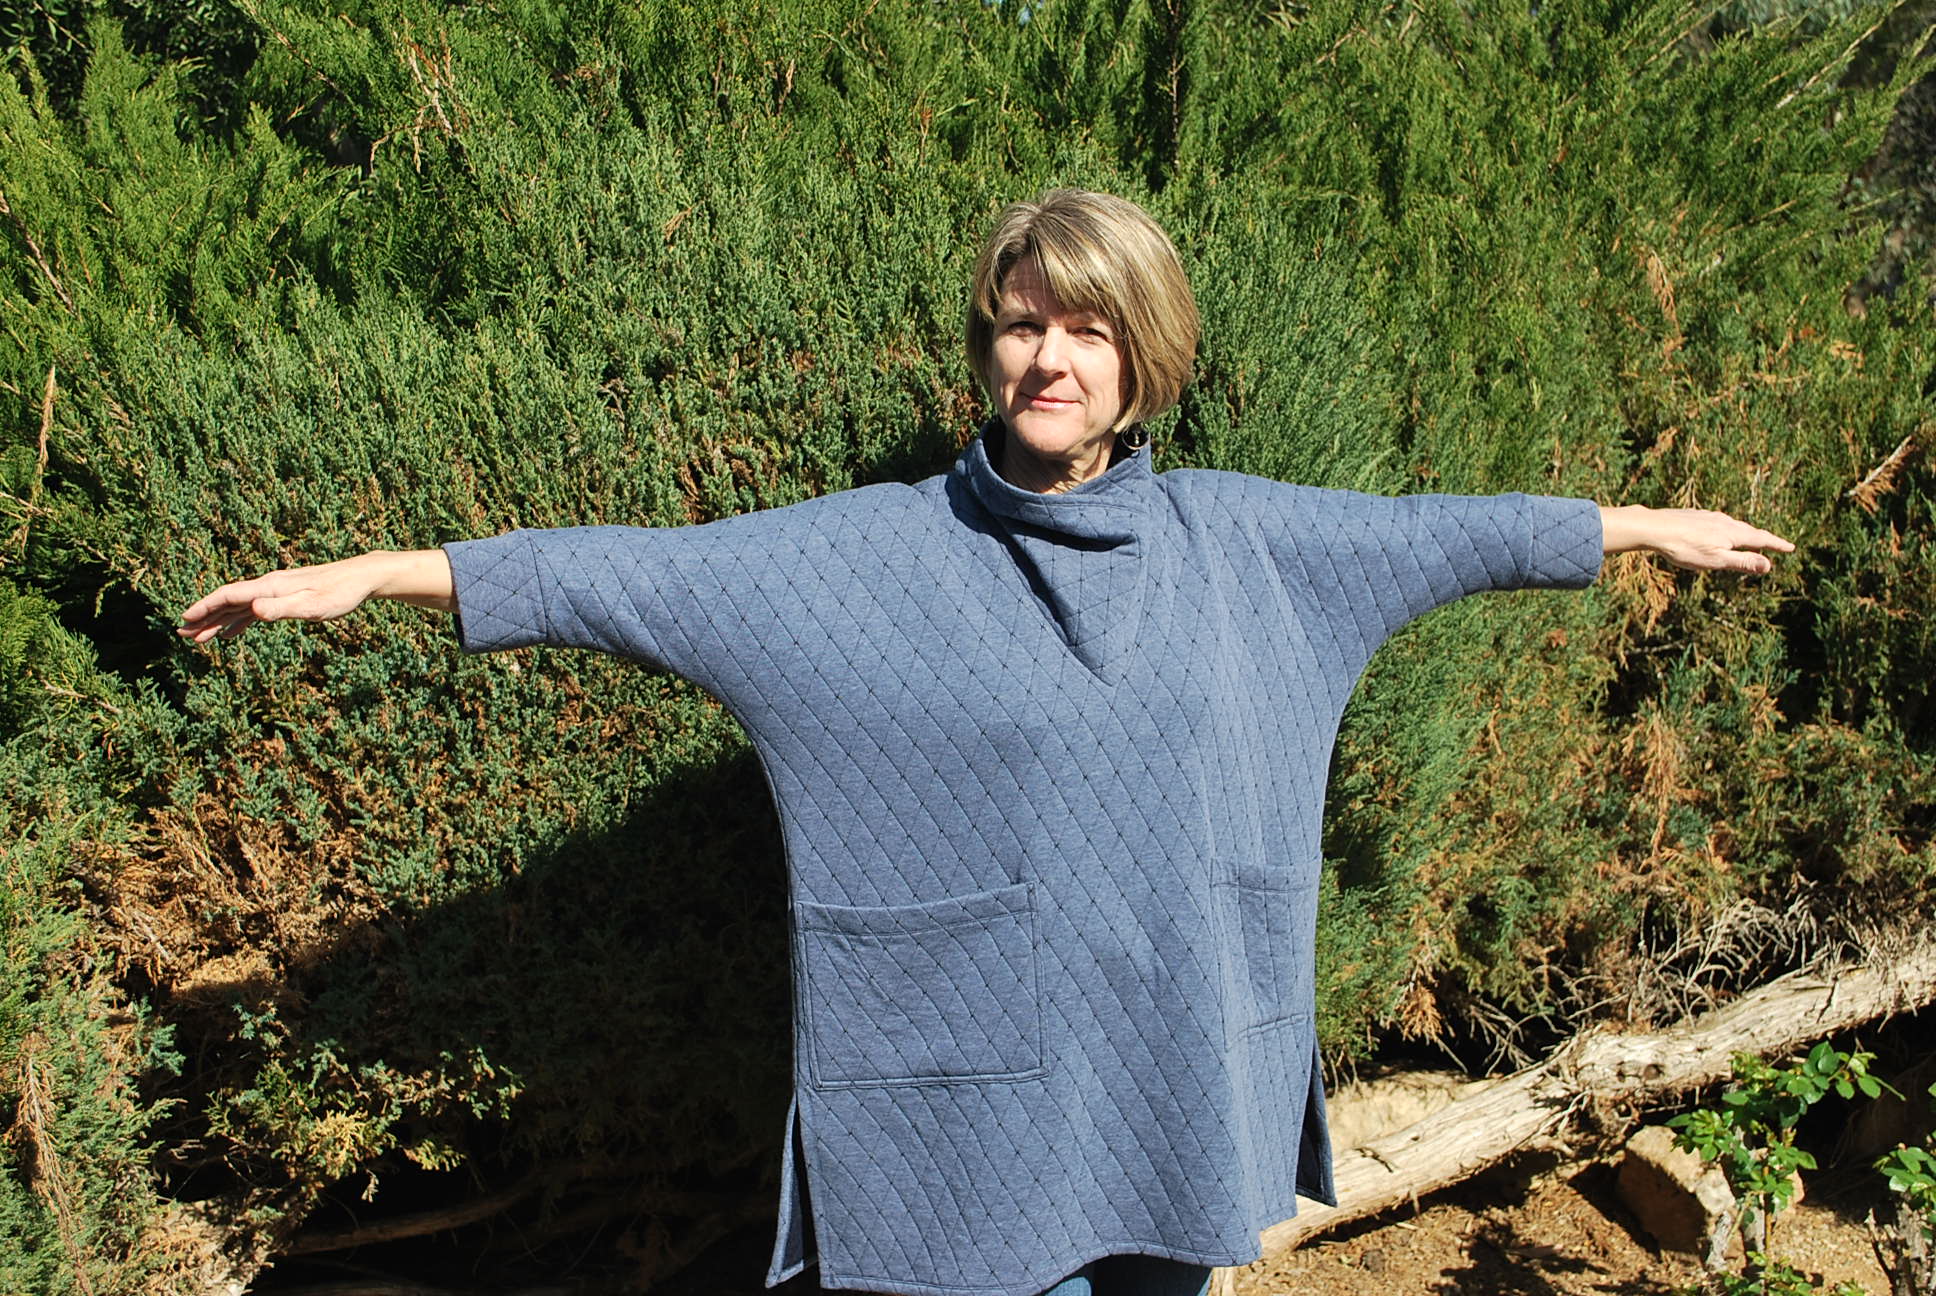
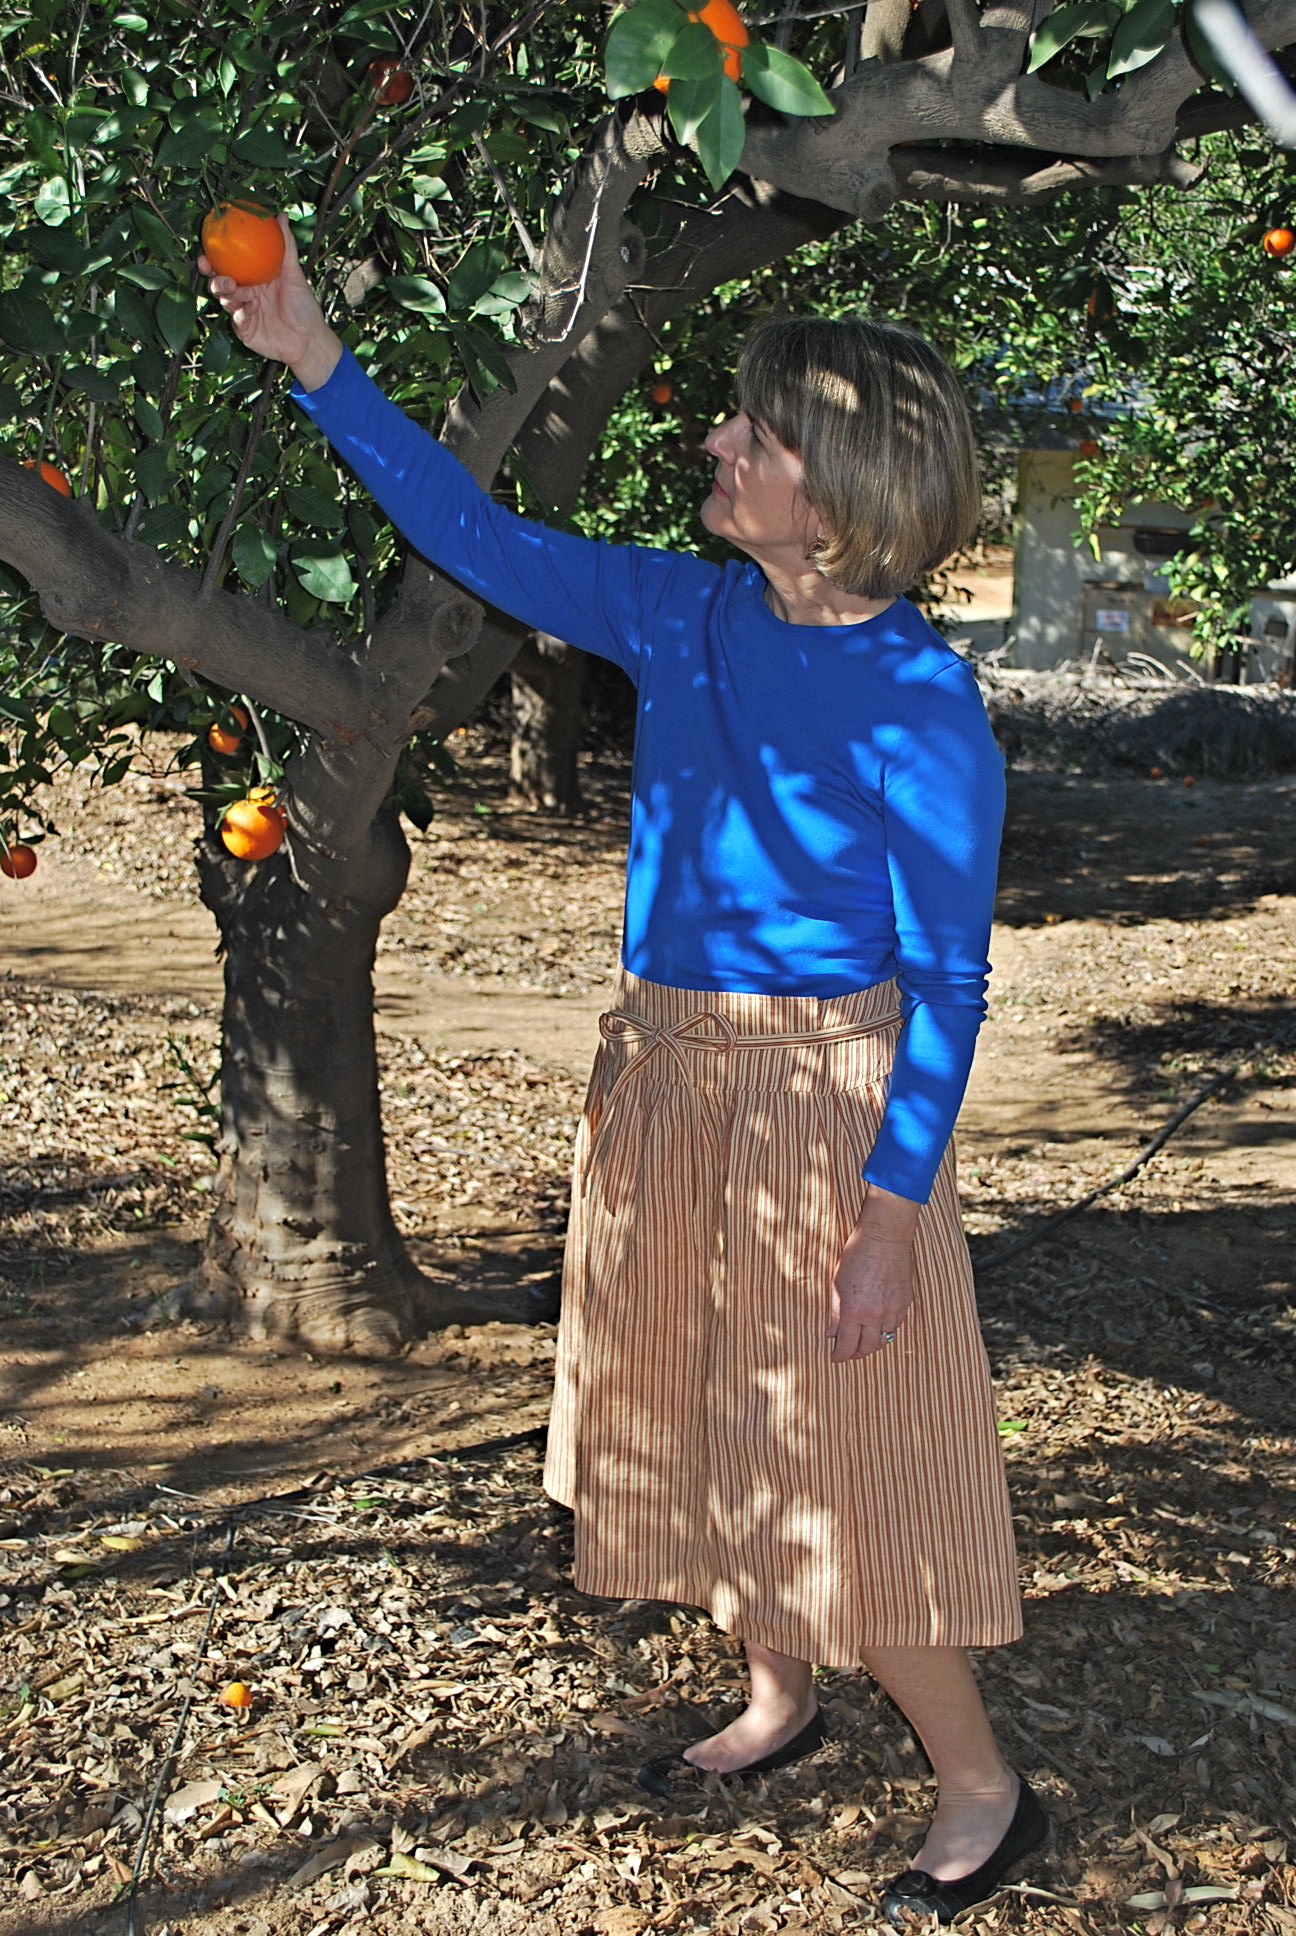
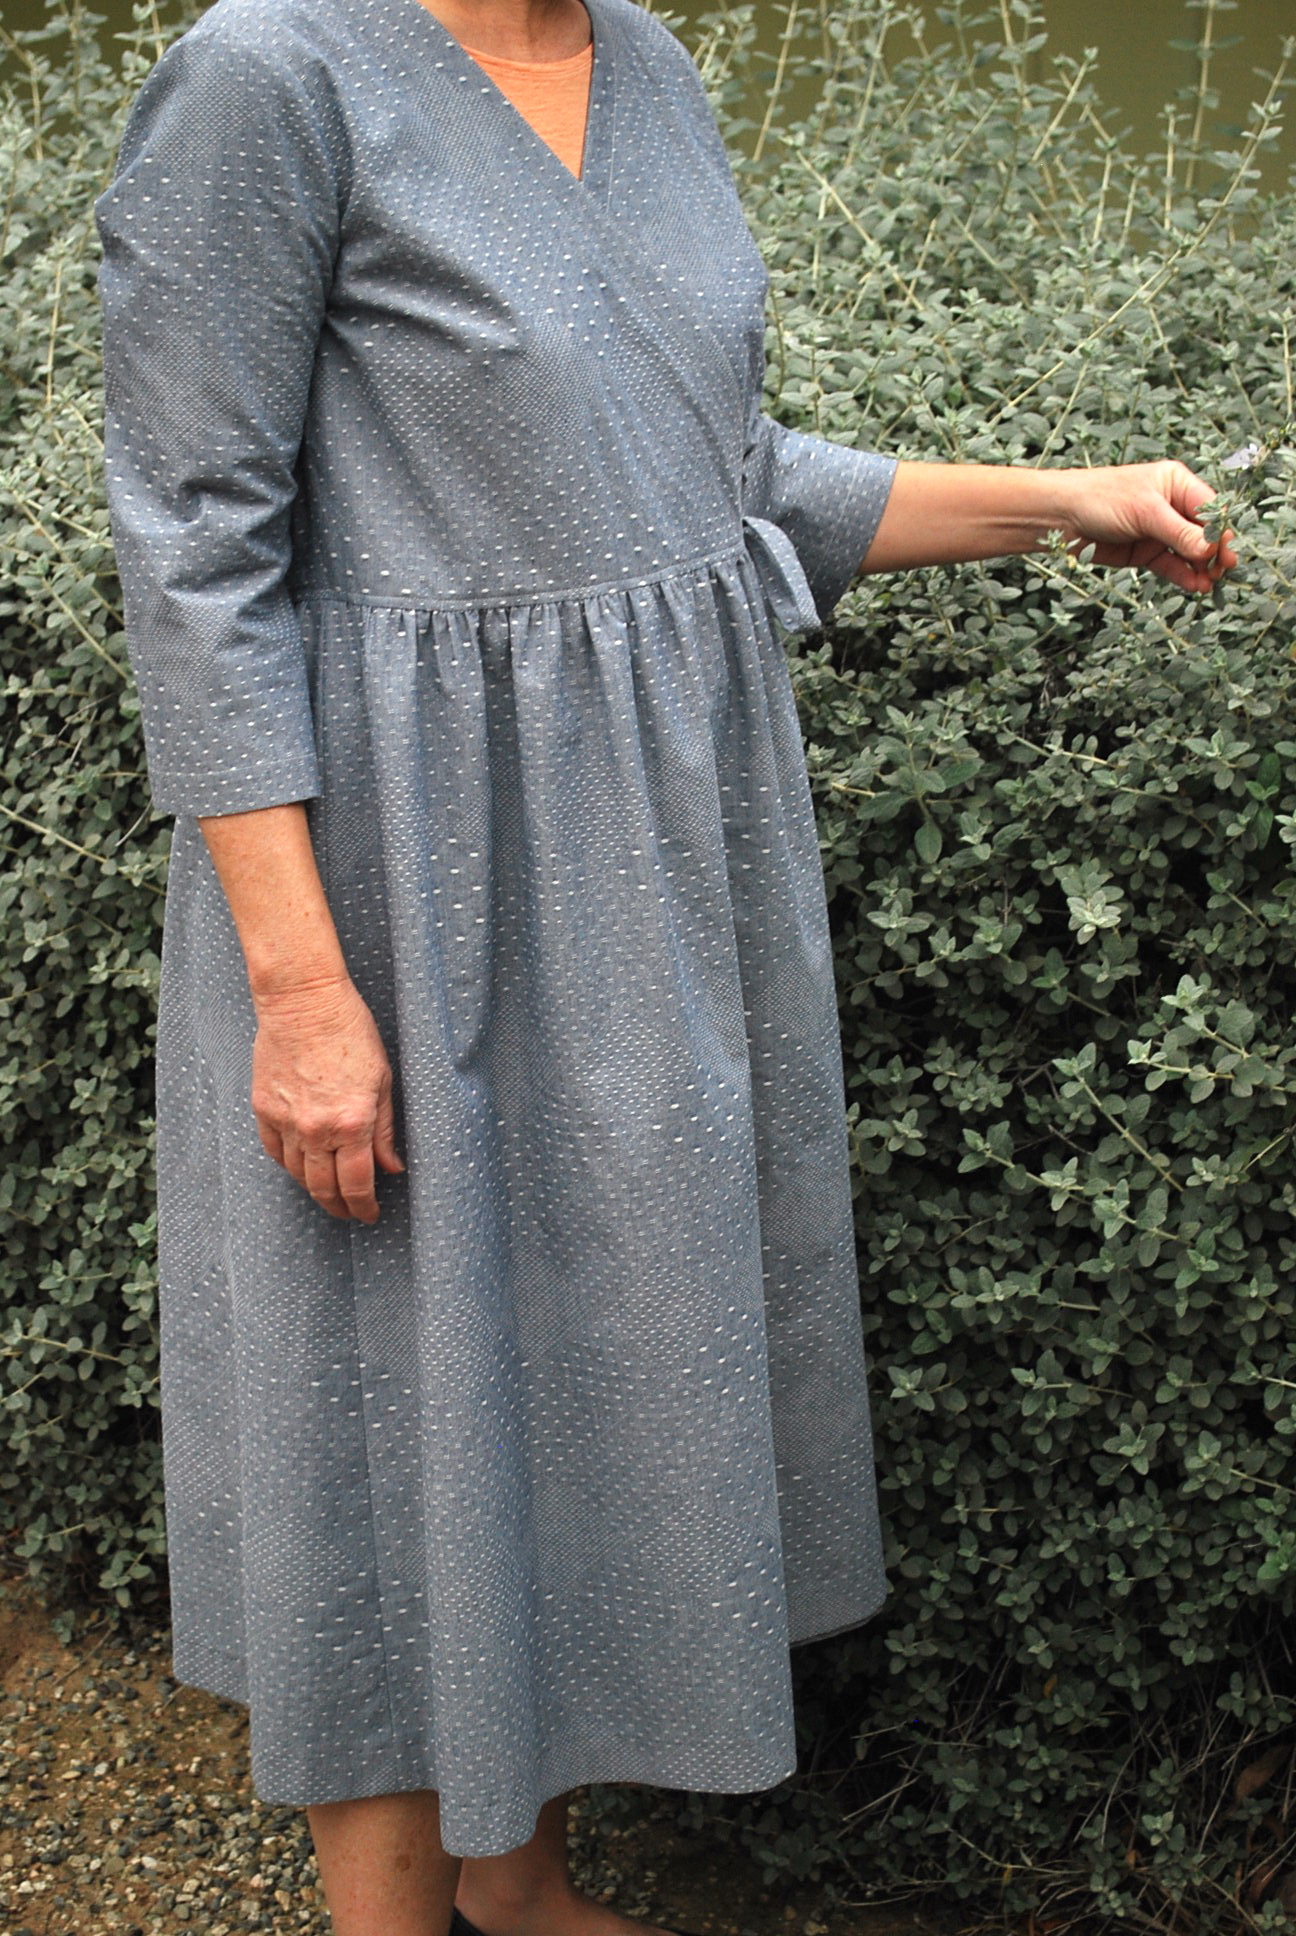
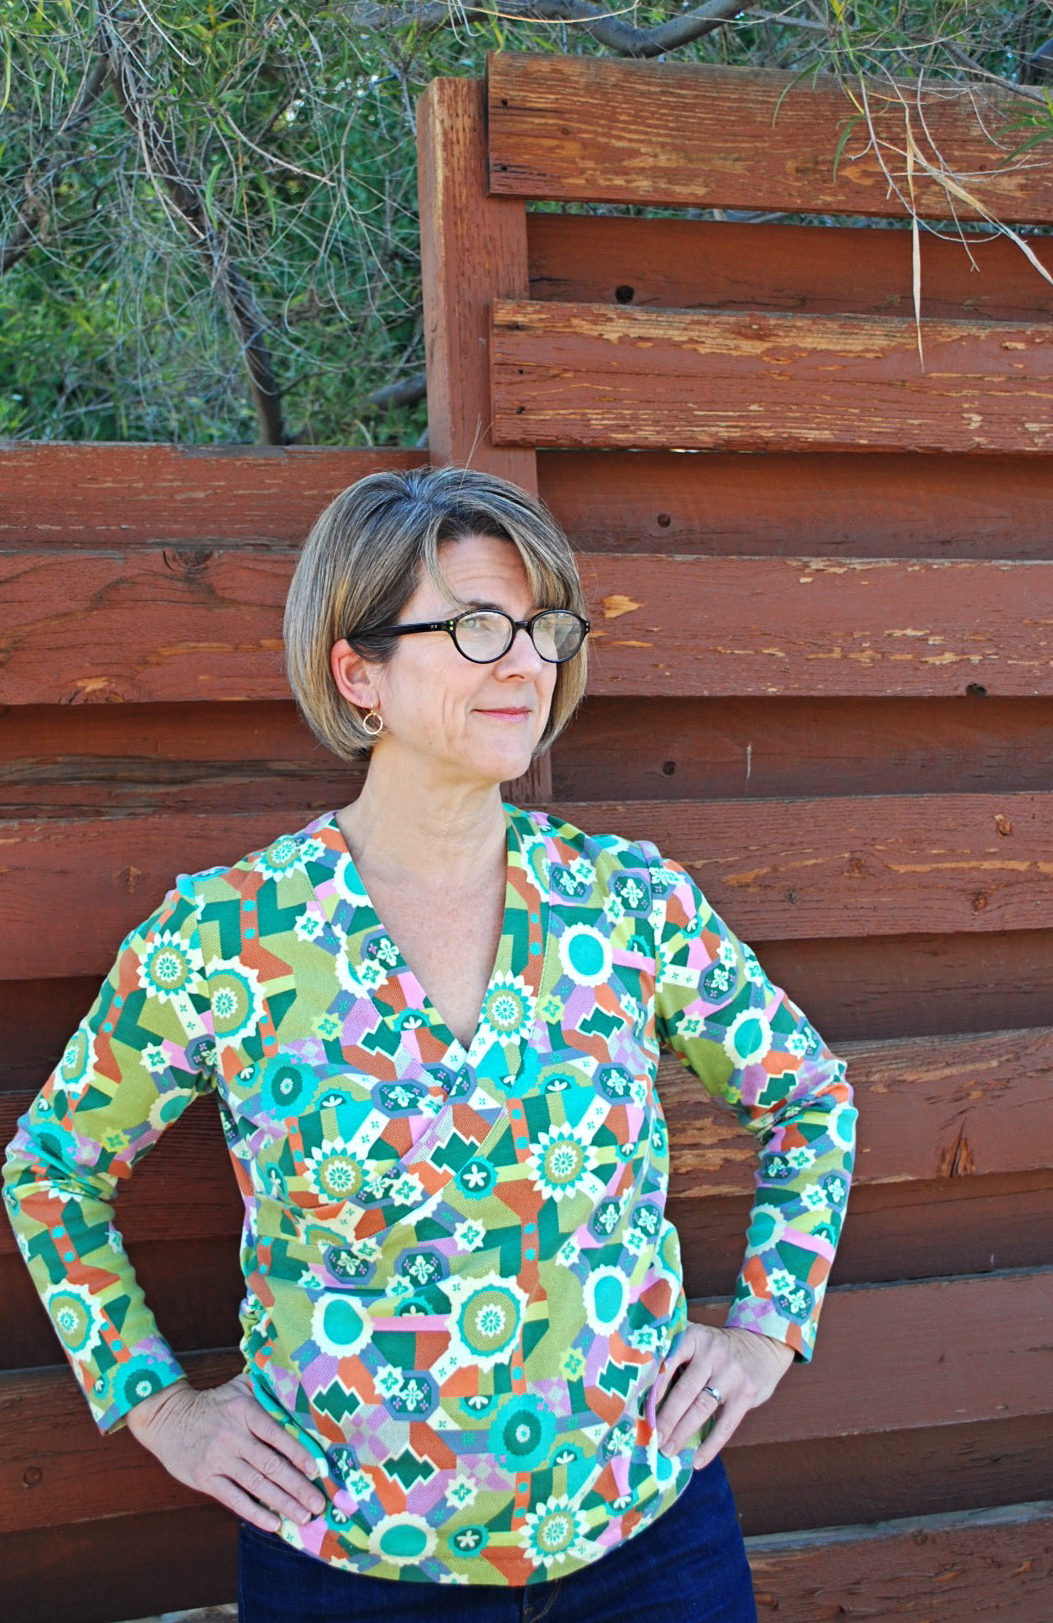
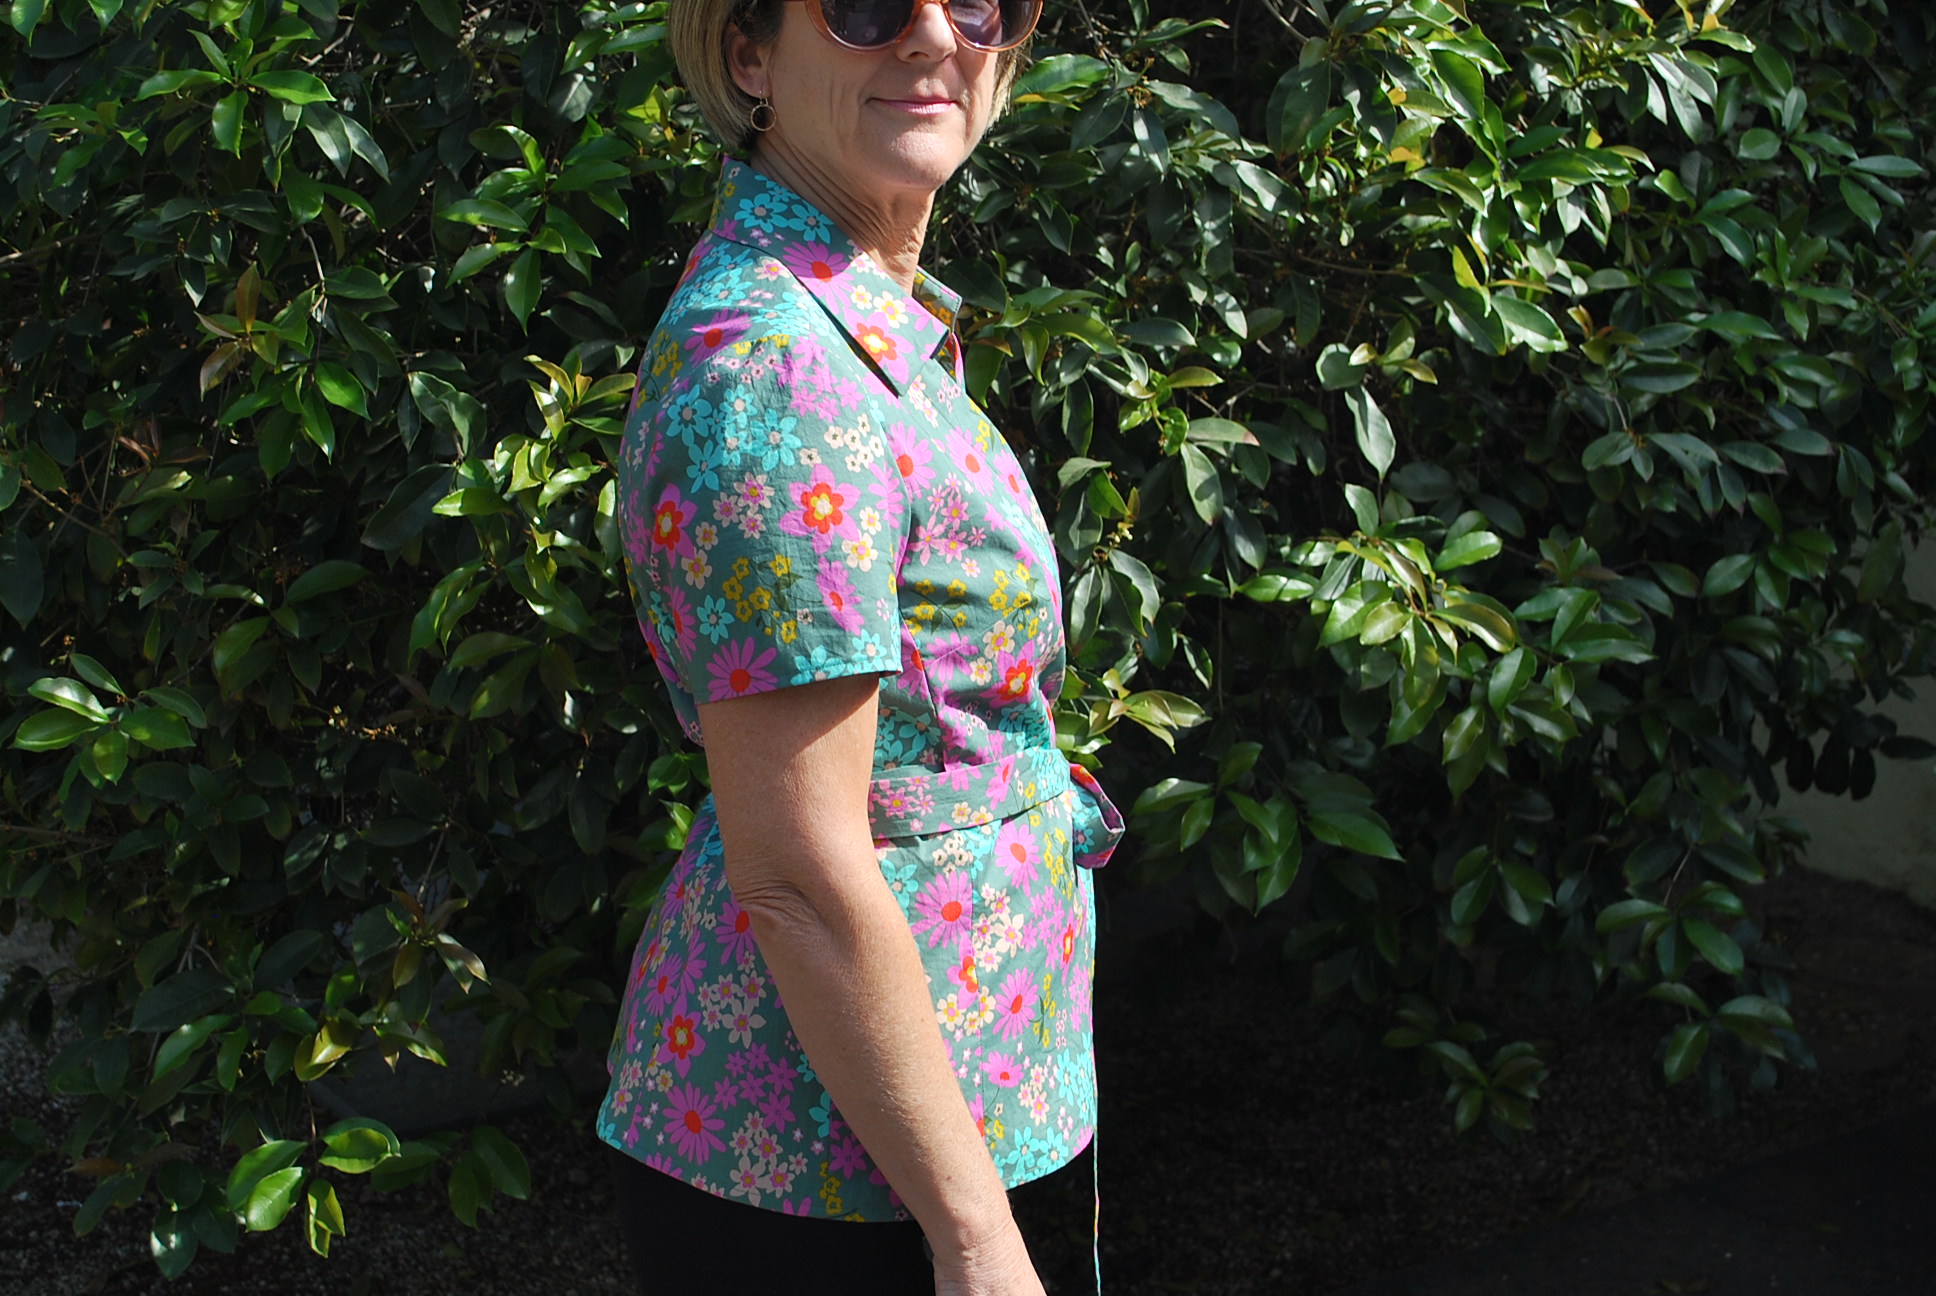
Ok, I broke my New Year’s resolution and got behind on my blogging. Taxes and a wonderful spring break vacation got in the way. I am always envious of other seamstresses who, no matter what, are so prolific all the time. What is their secret? Boundless energy? Hyper disciplined? No day job? Anyway, I have been anxious to share Fresh Make #26 with you because I am so pleased with it turned out. I have made a wrap blouse perfect for work or a fun spring event.

DSC_0037

I was inspired to make another wrap top after my success with the second try of The Every Woman Top. Unlike RTW, I discovered a custom made wrap top can actually look decent on me because I can adjust for my bust to hip ratio.

DSC_0044DSC_0073DSC_0054 
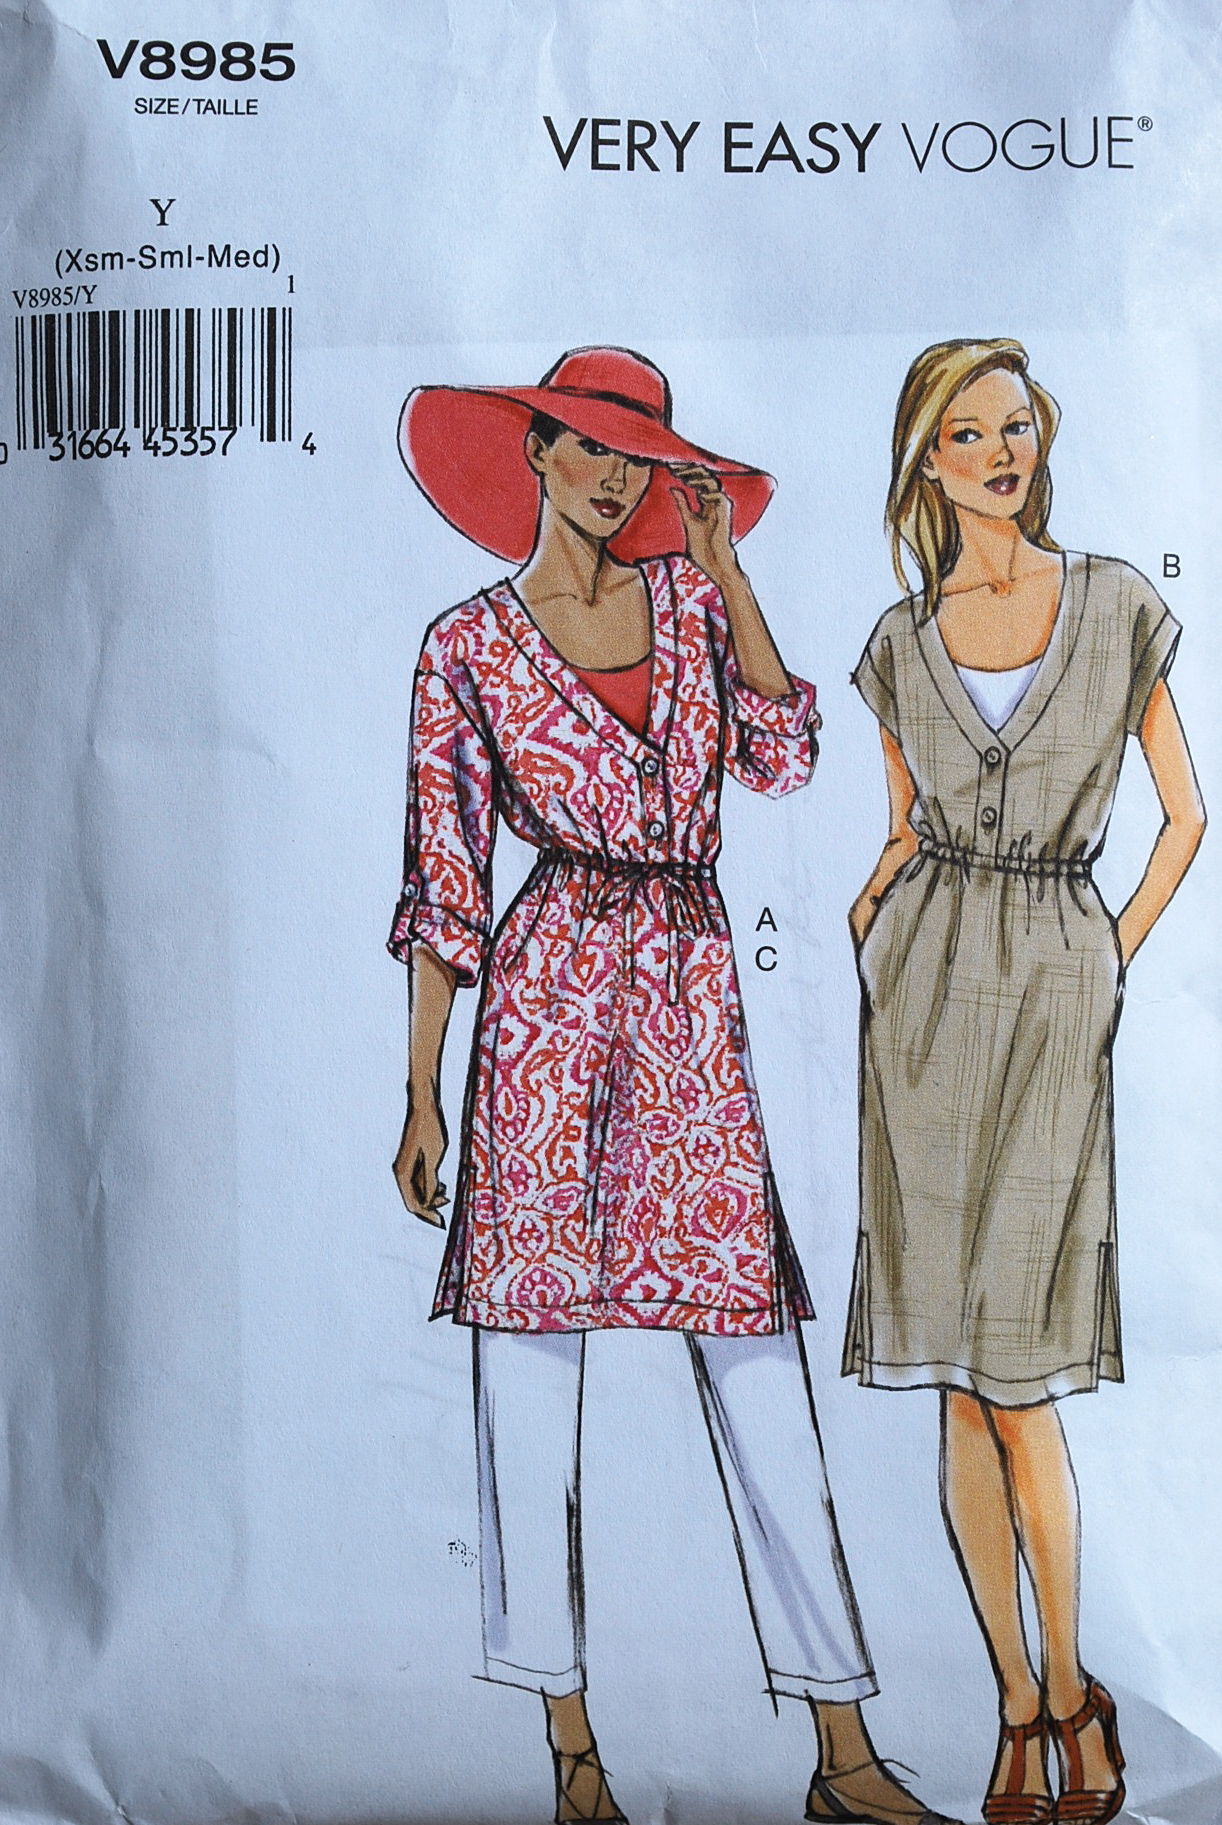
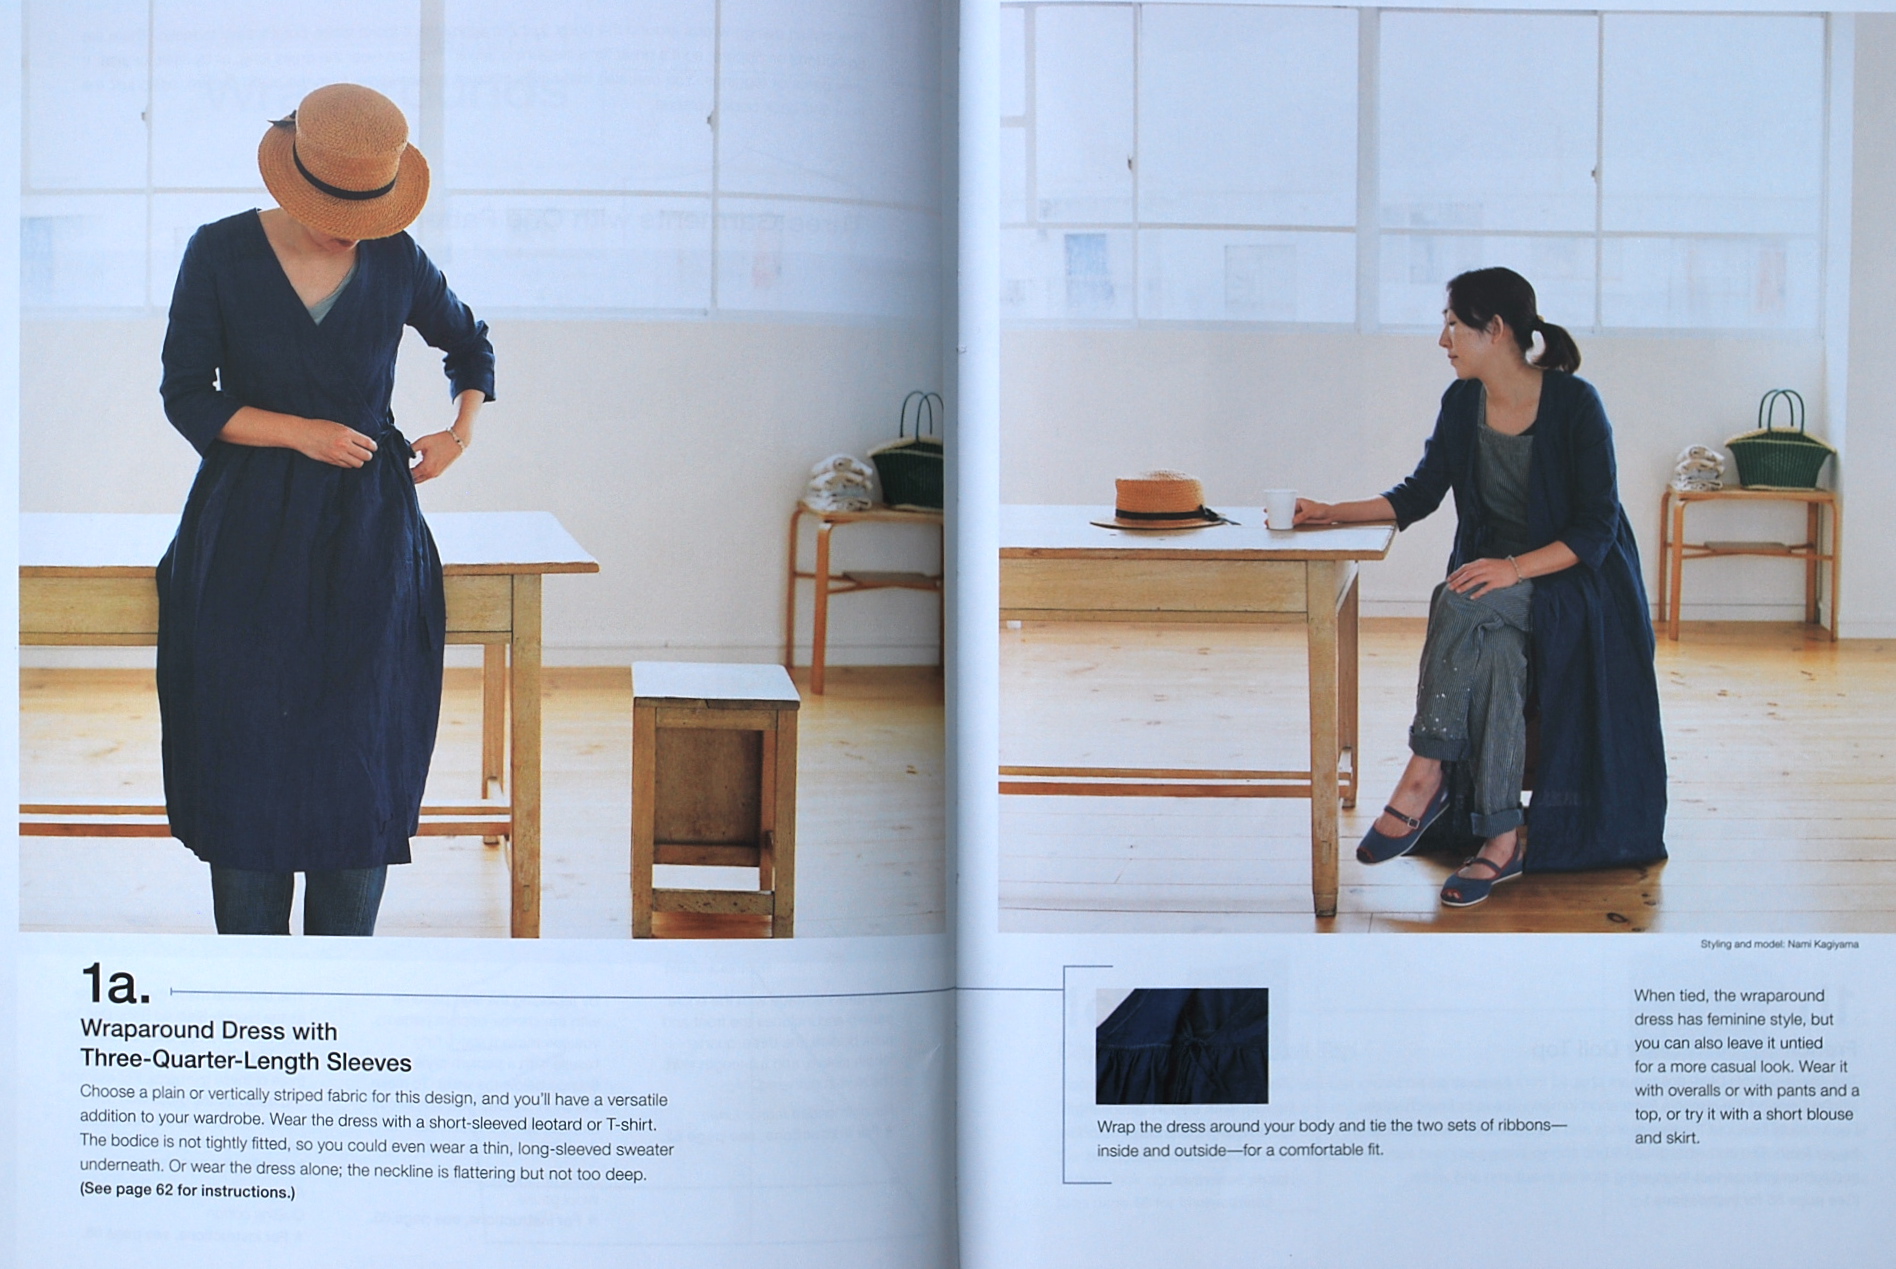
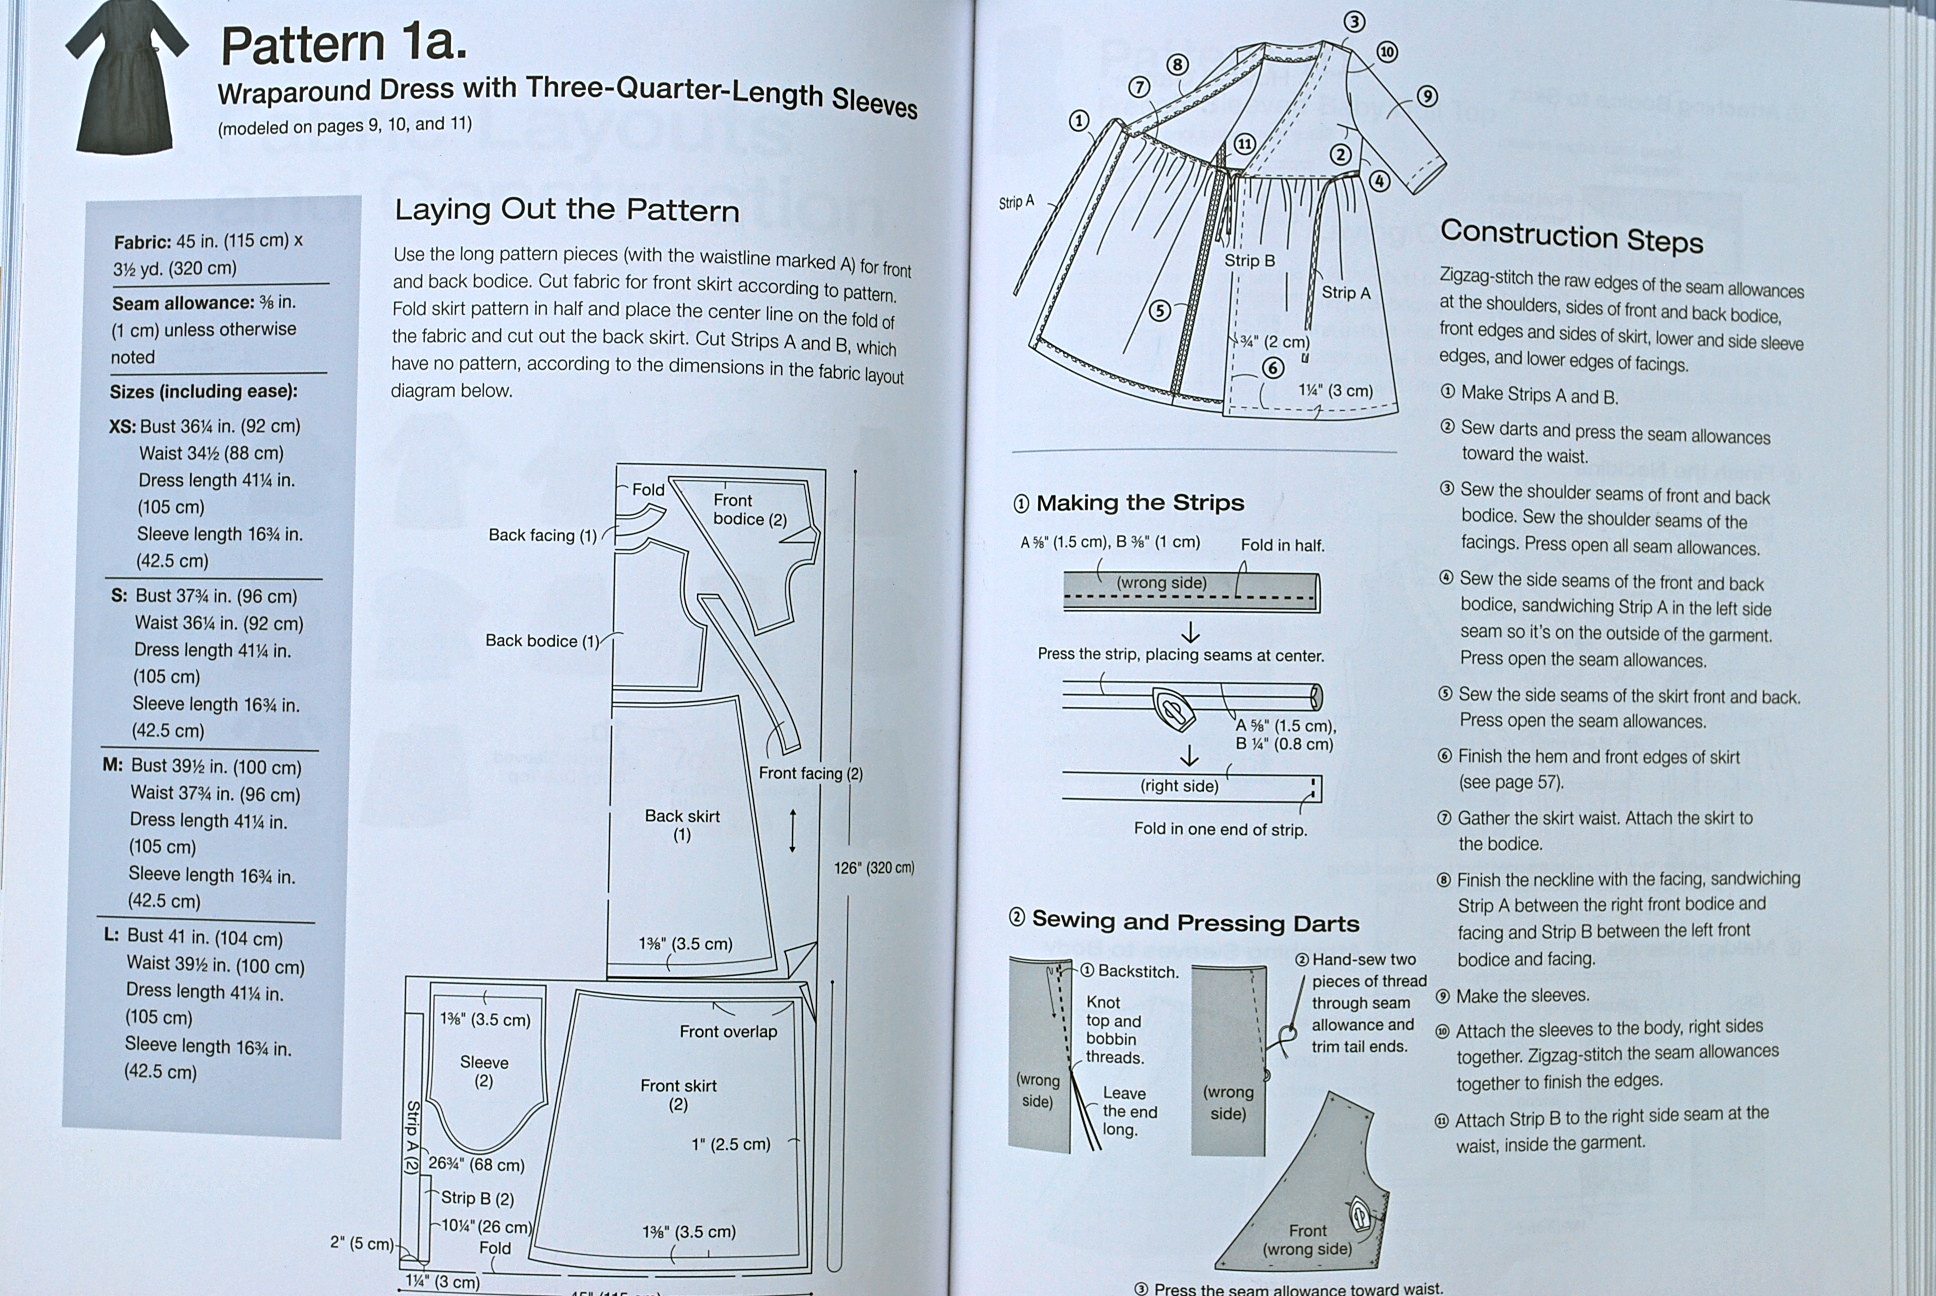
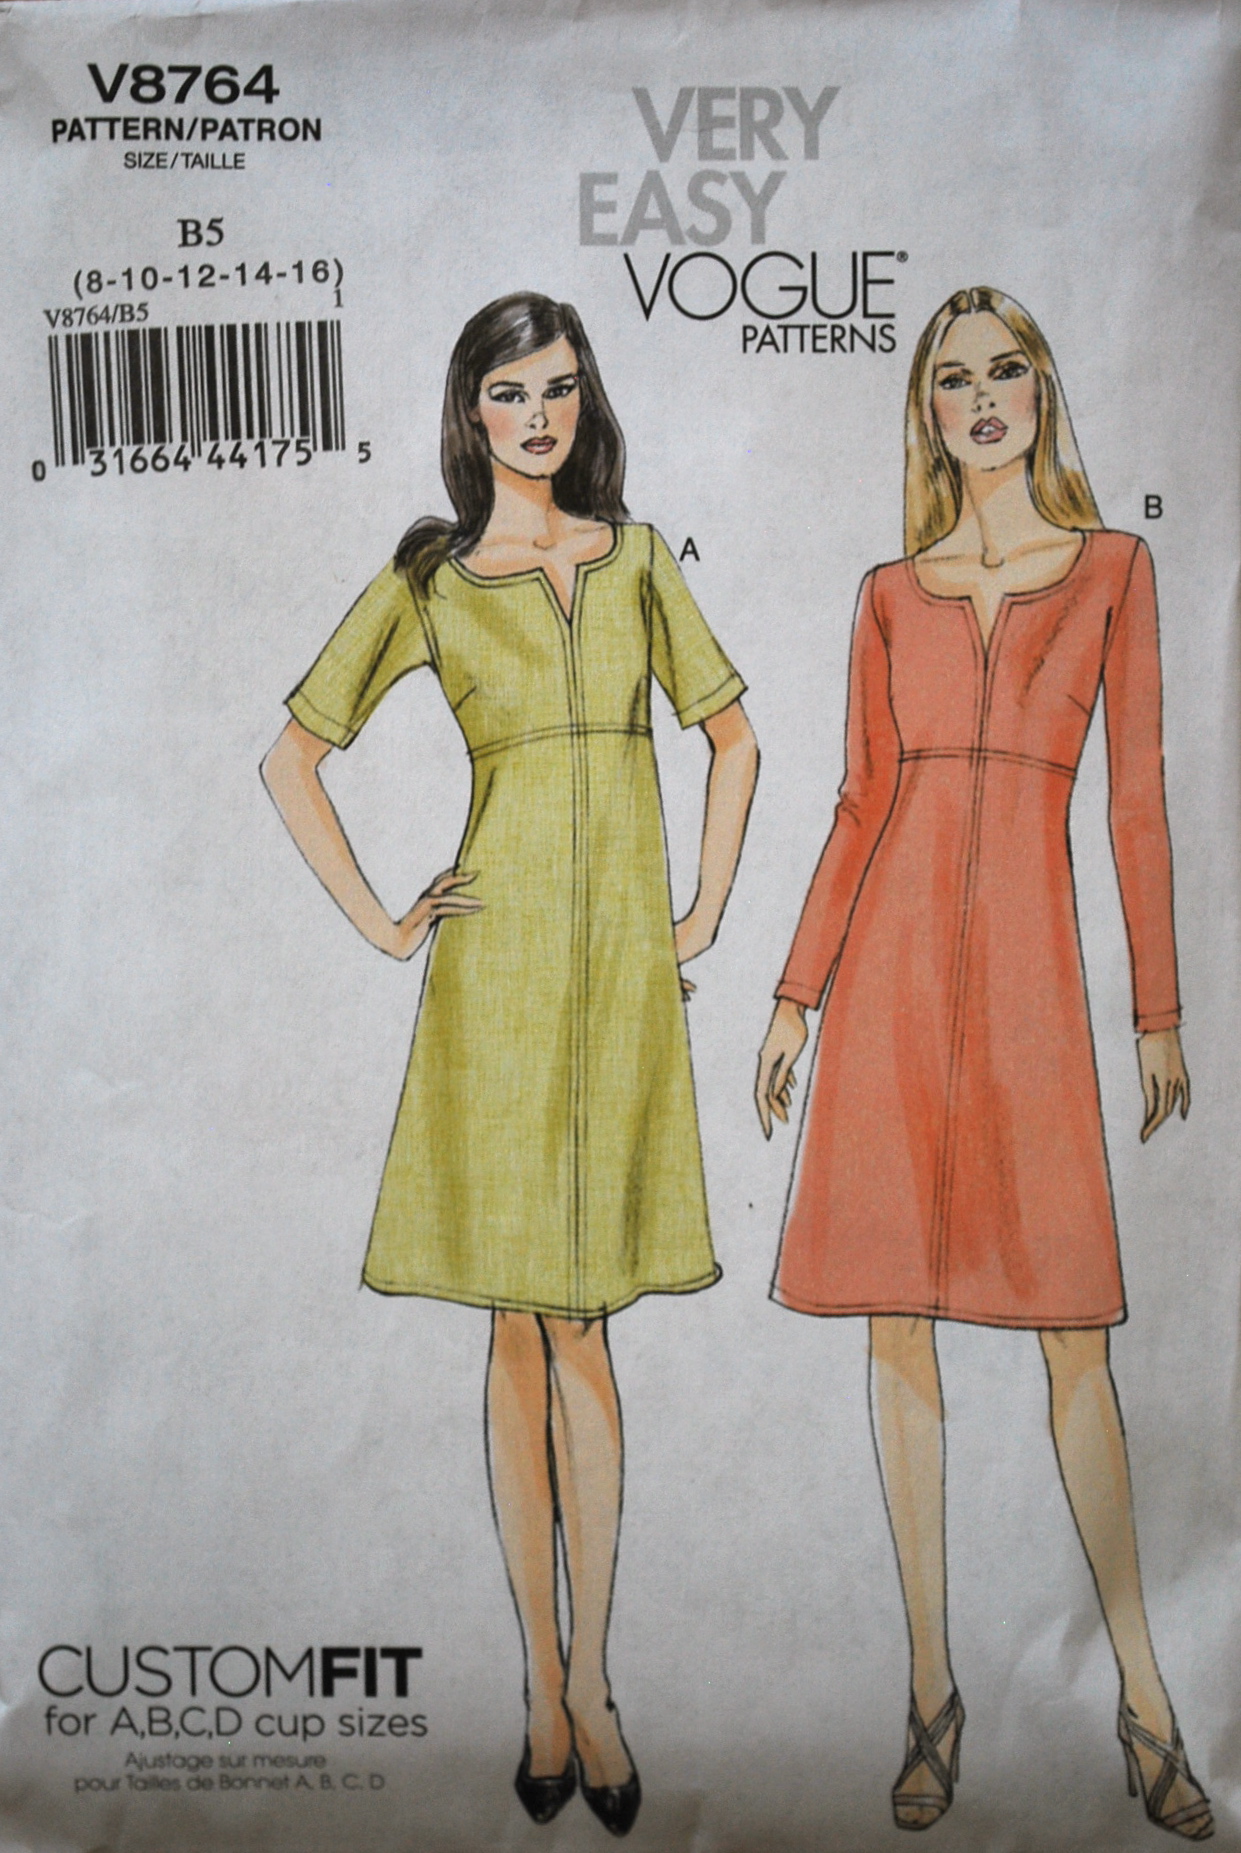
The pattern I used was Vogue 8833, which I purchased on sale at JoAnn’s for $4.99. (I always mark the sale dates for Vogue patterns on my calendar.) I choose this pattern because of my new enthusiasm for the wrap design and my constant need for verstile, causal professional wear. Additionally, I am a big fan of the patterns that have the A,B,C,D cup size options.

vogue blouse

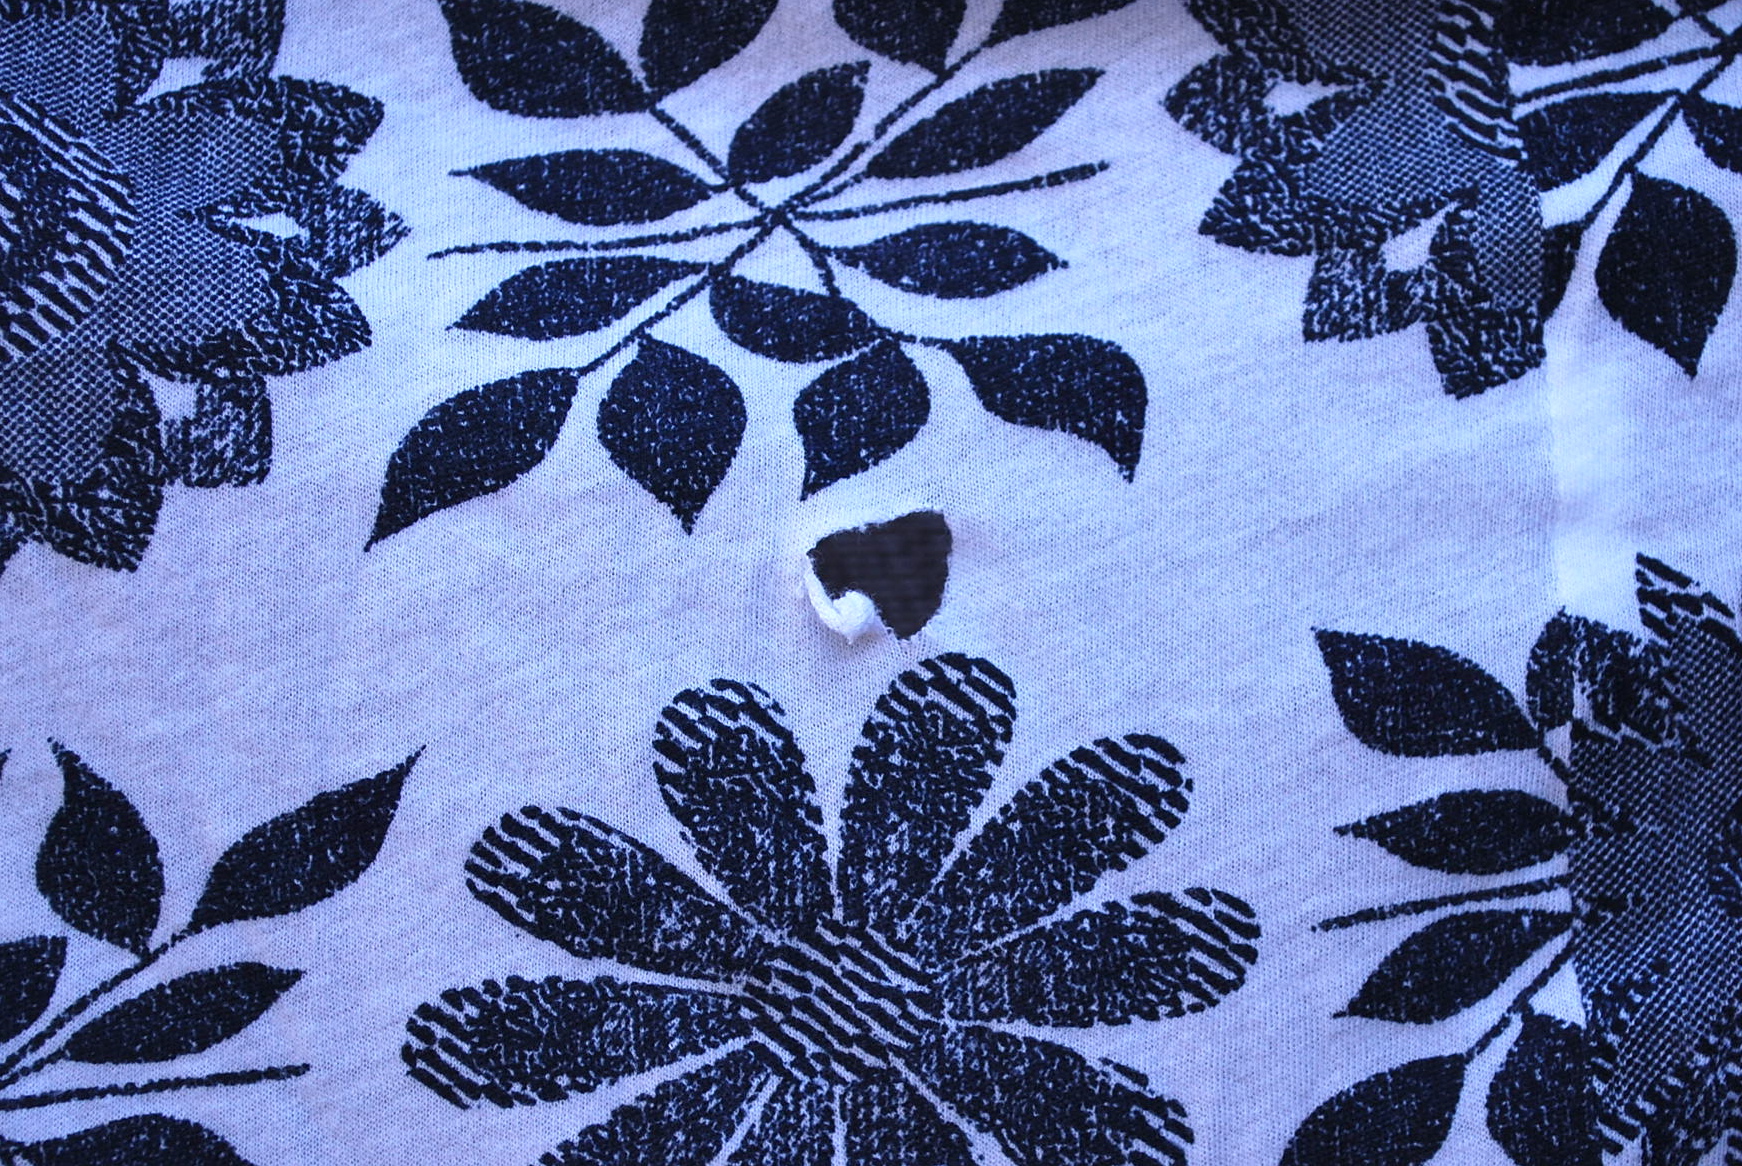
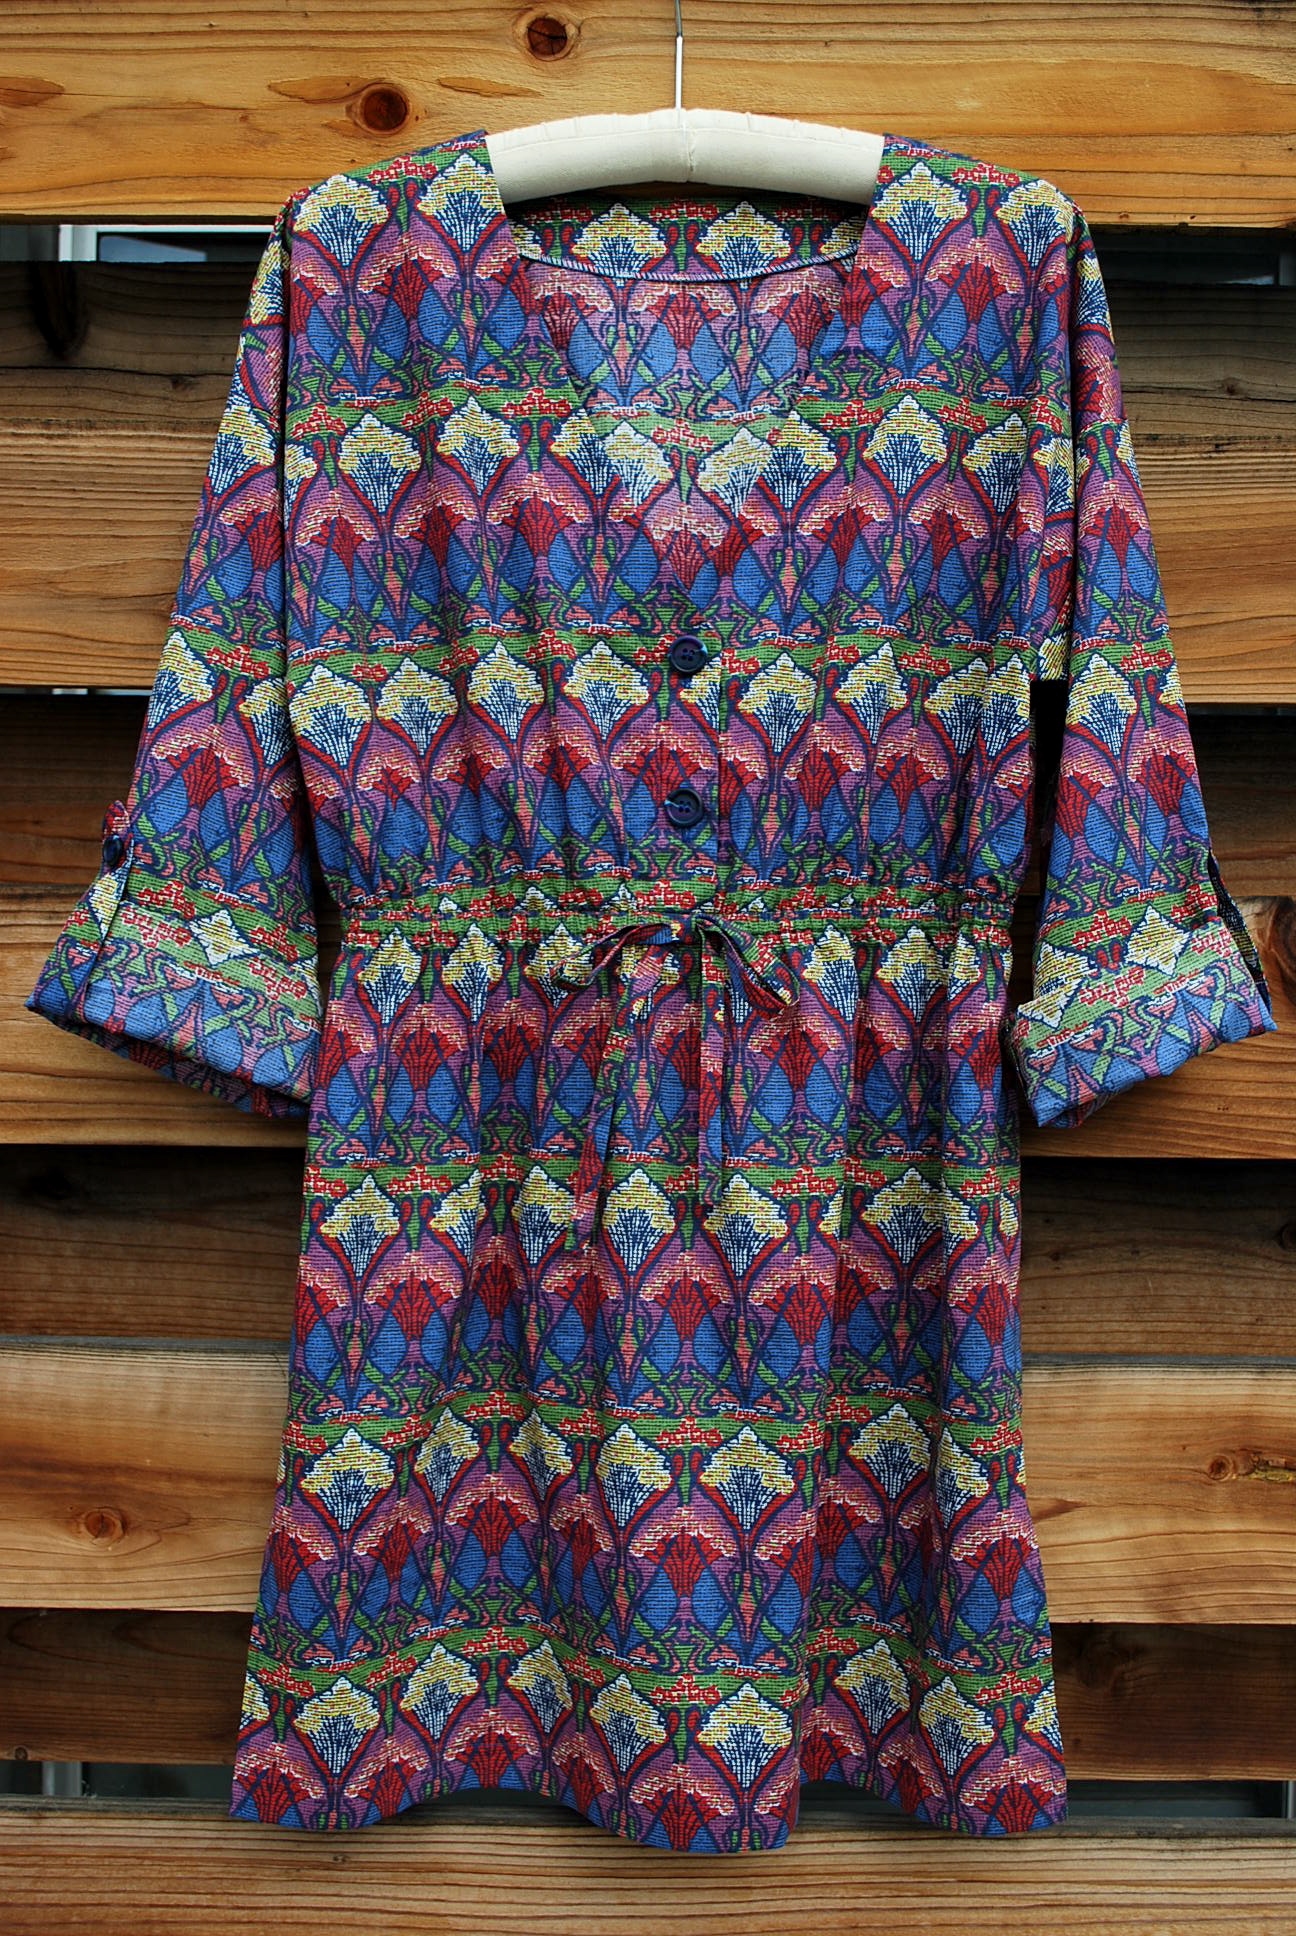
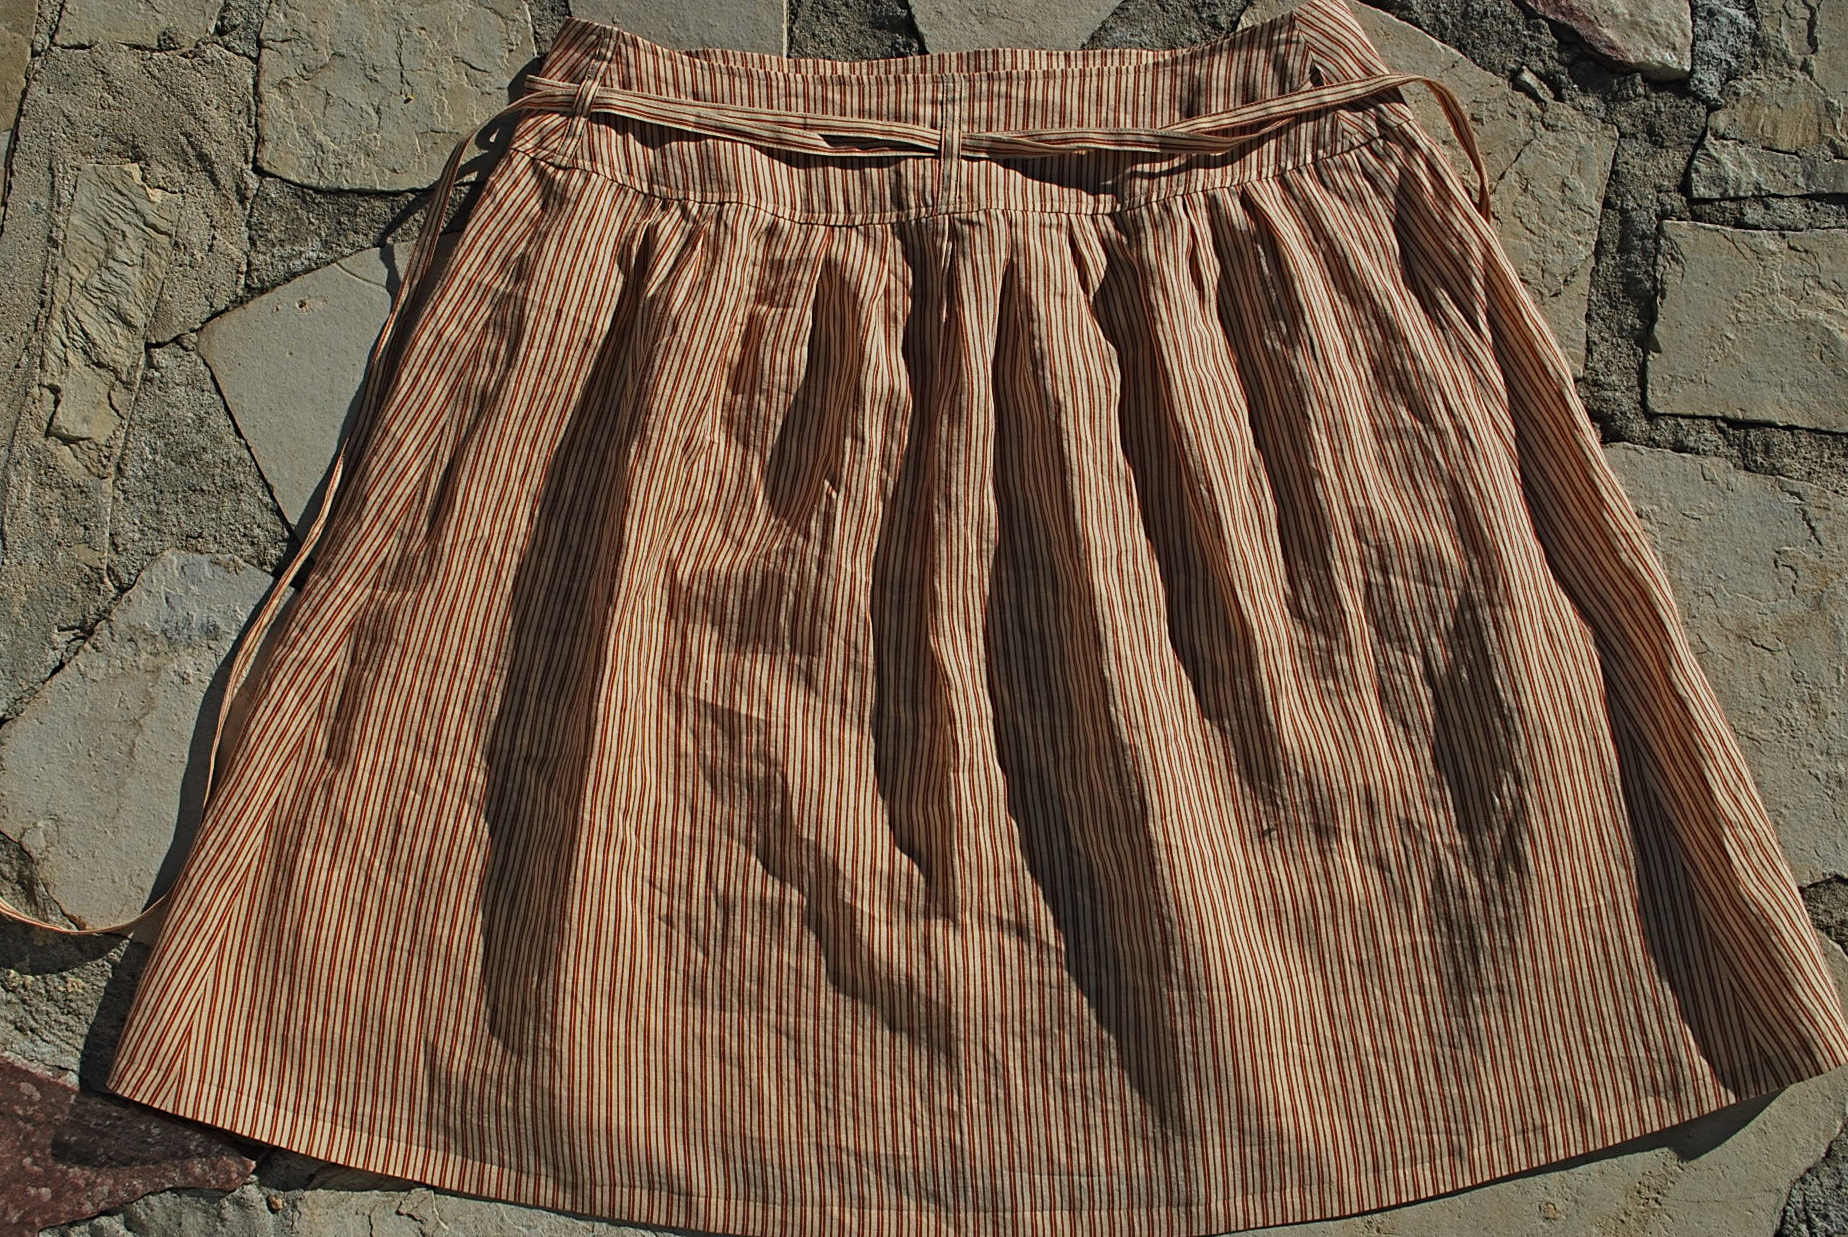
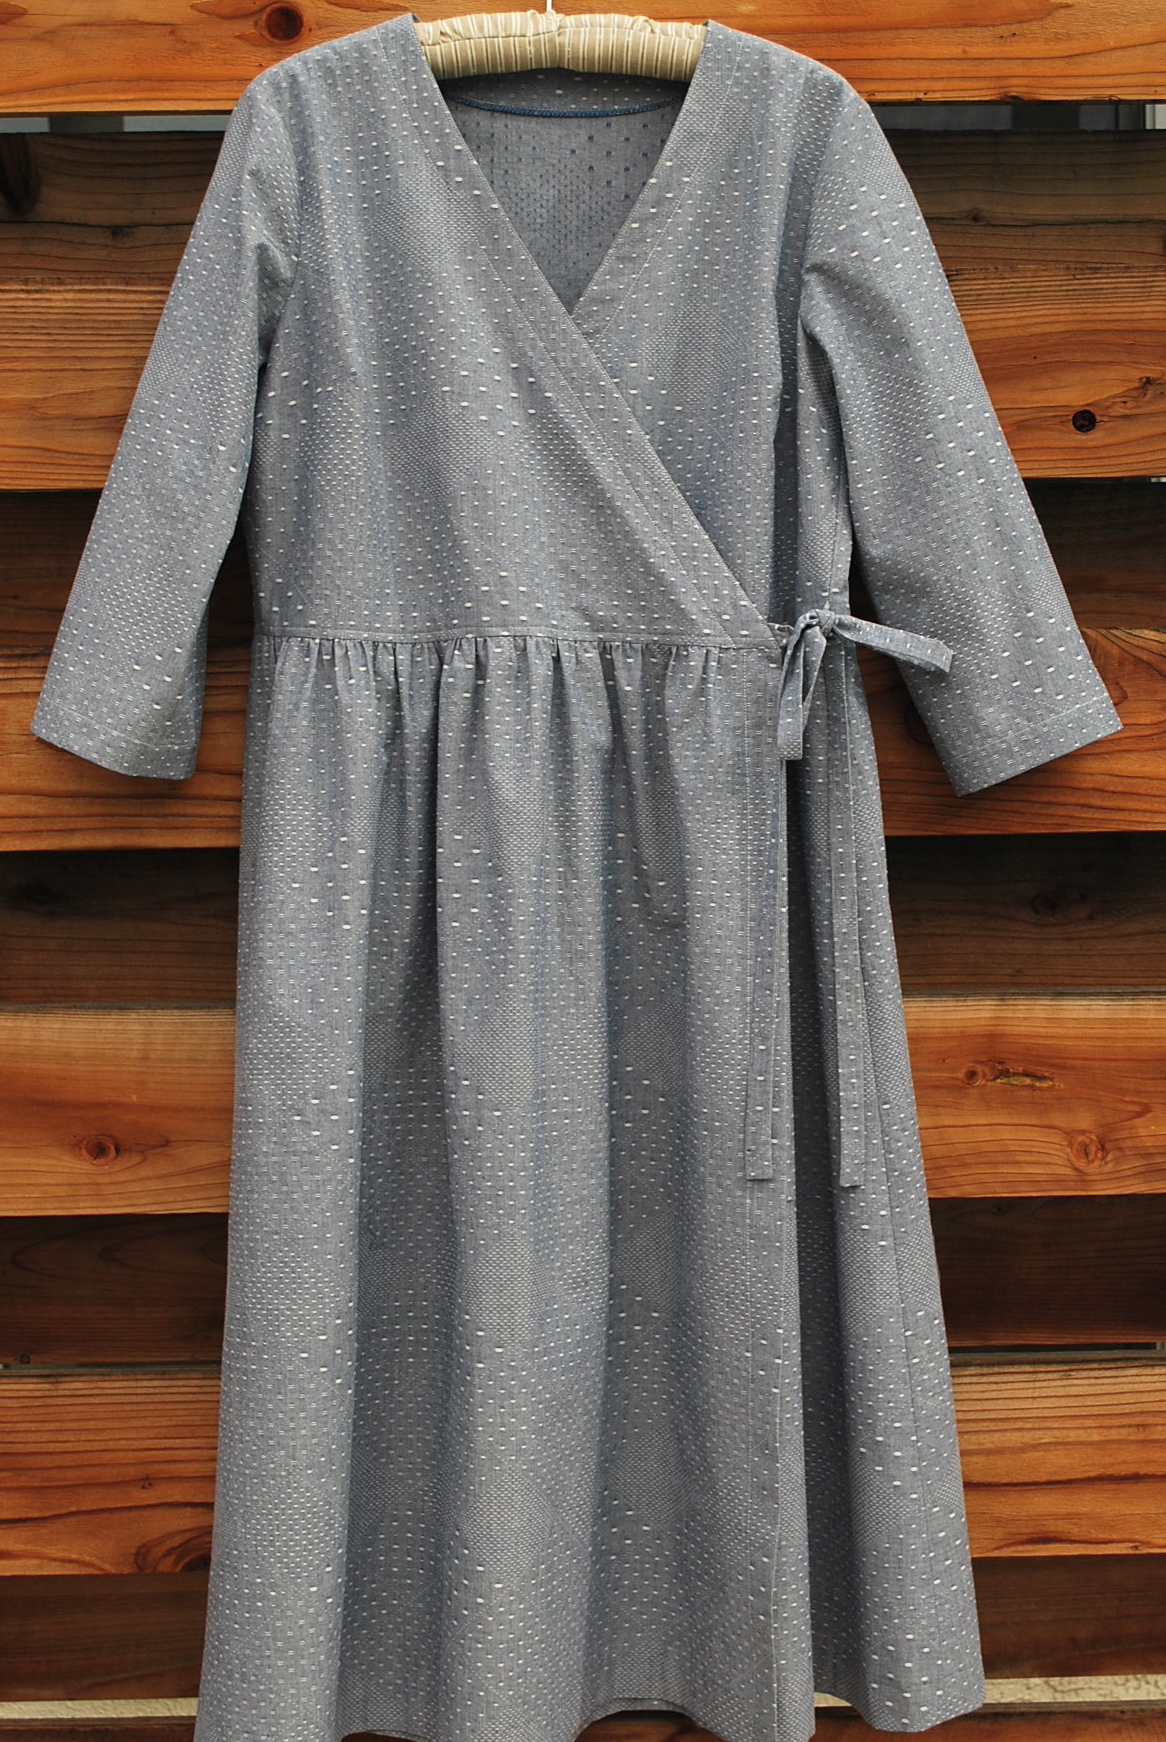
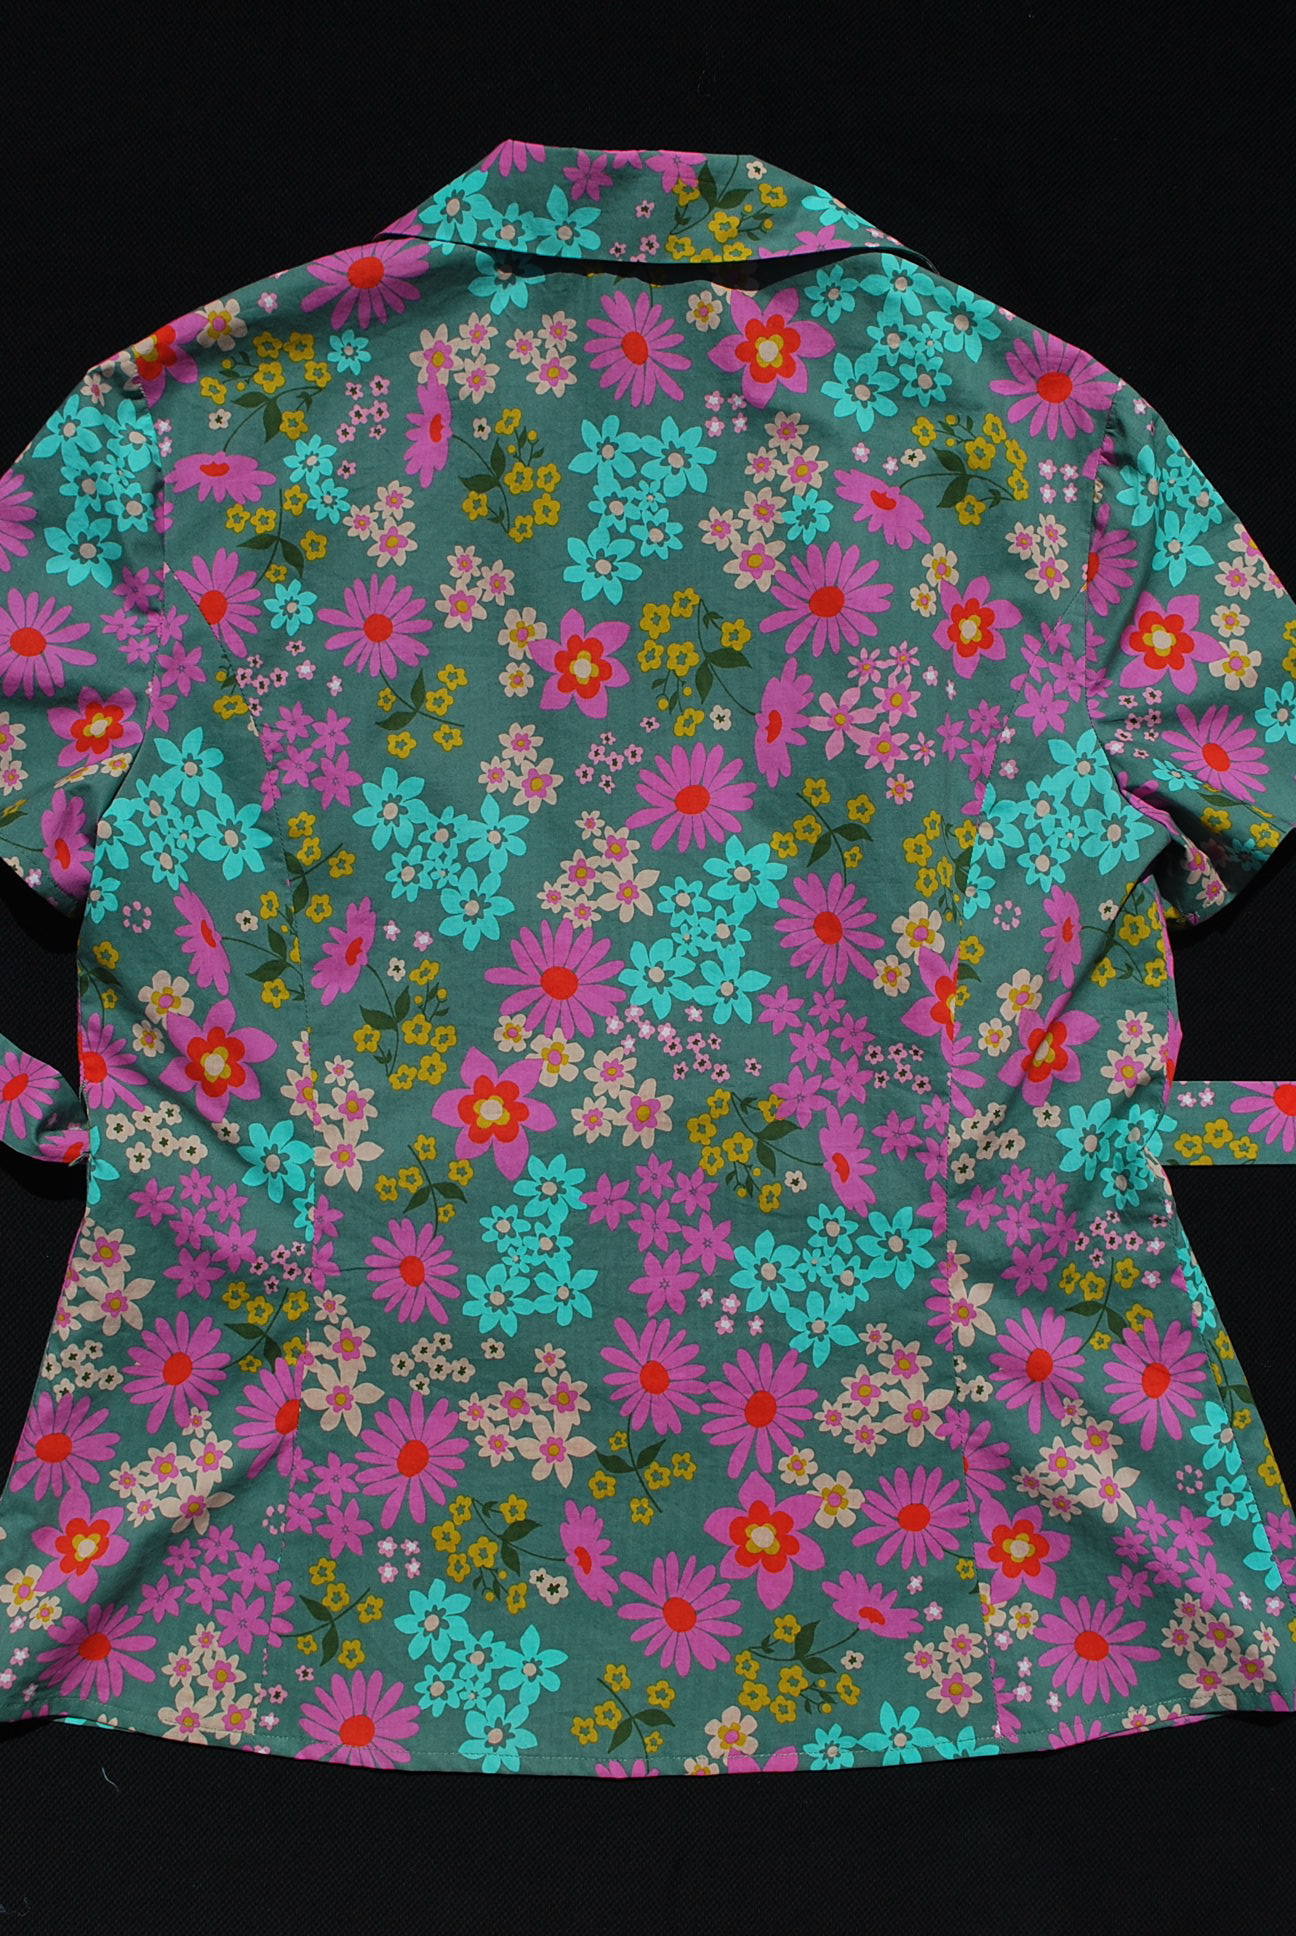
The fabric, which I ordered online, more than met my expectations. It is a smooth, lovely lawn cotton from Hawthorne Threads. Here are the specifics: Melody Miller, Playful Lawn, Vintage Flora lawn in Aqua. I love the fresh, modern color palate. It also comes in a couple of other colorways. I purchased 2 1/2 yards at $13.95 per yard.

DSC_0074

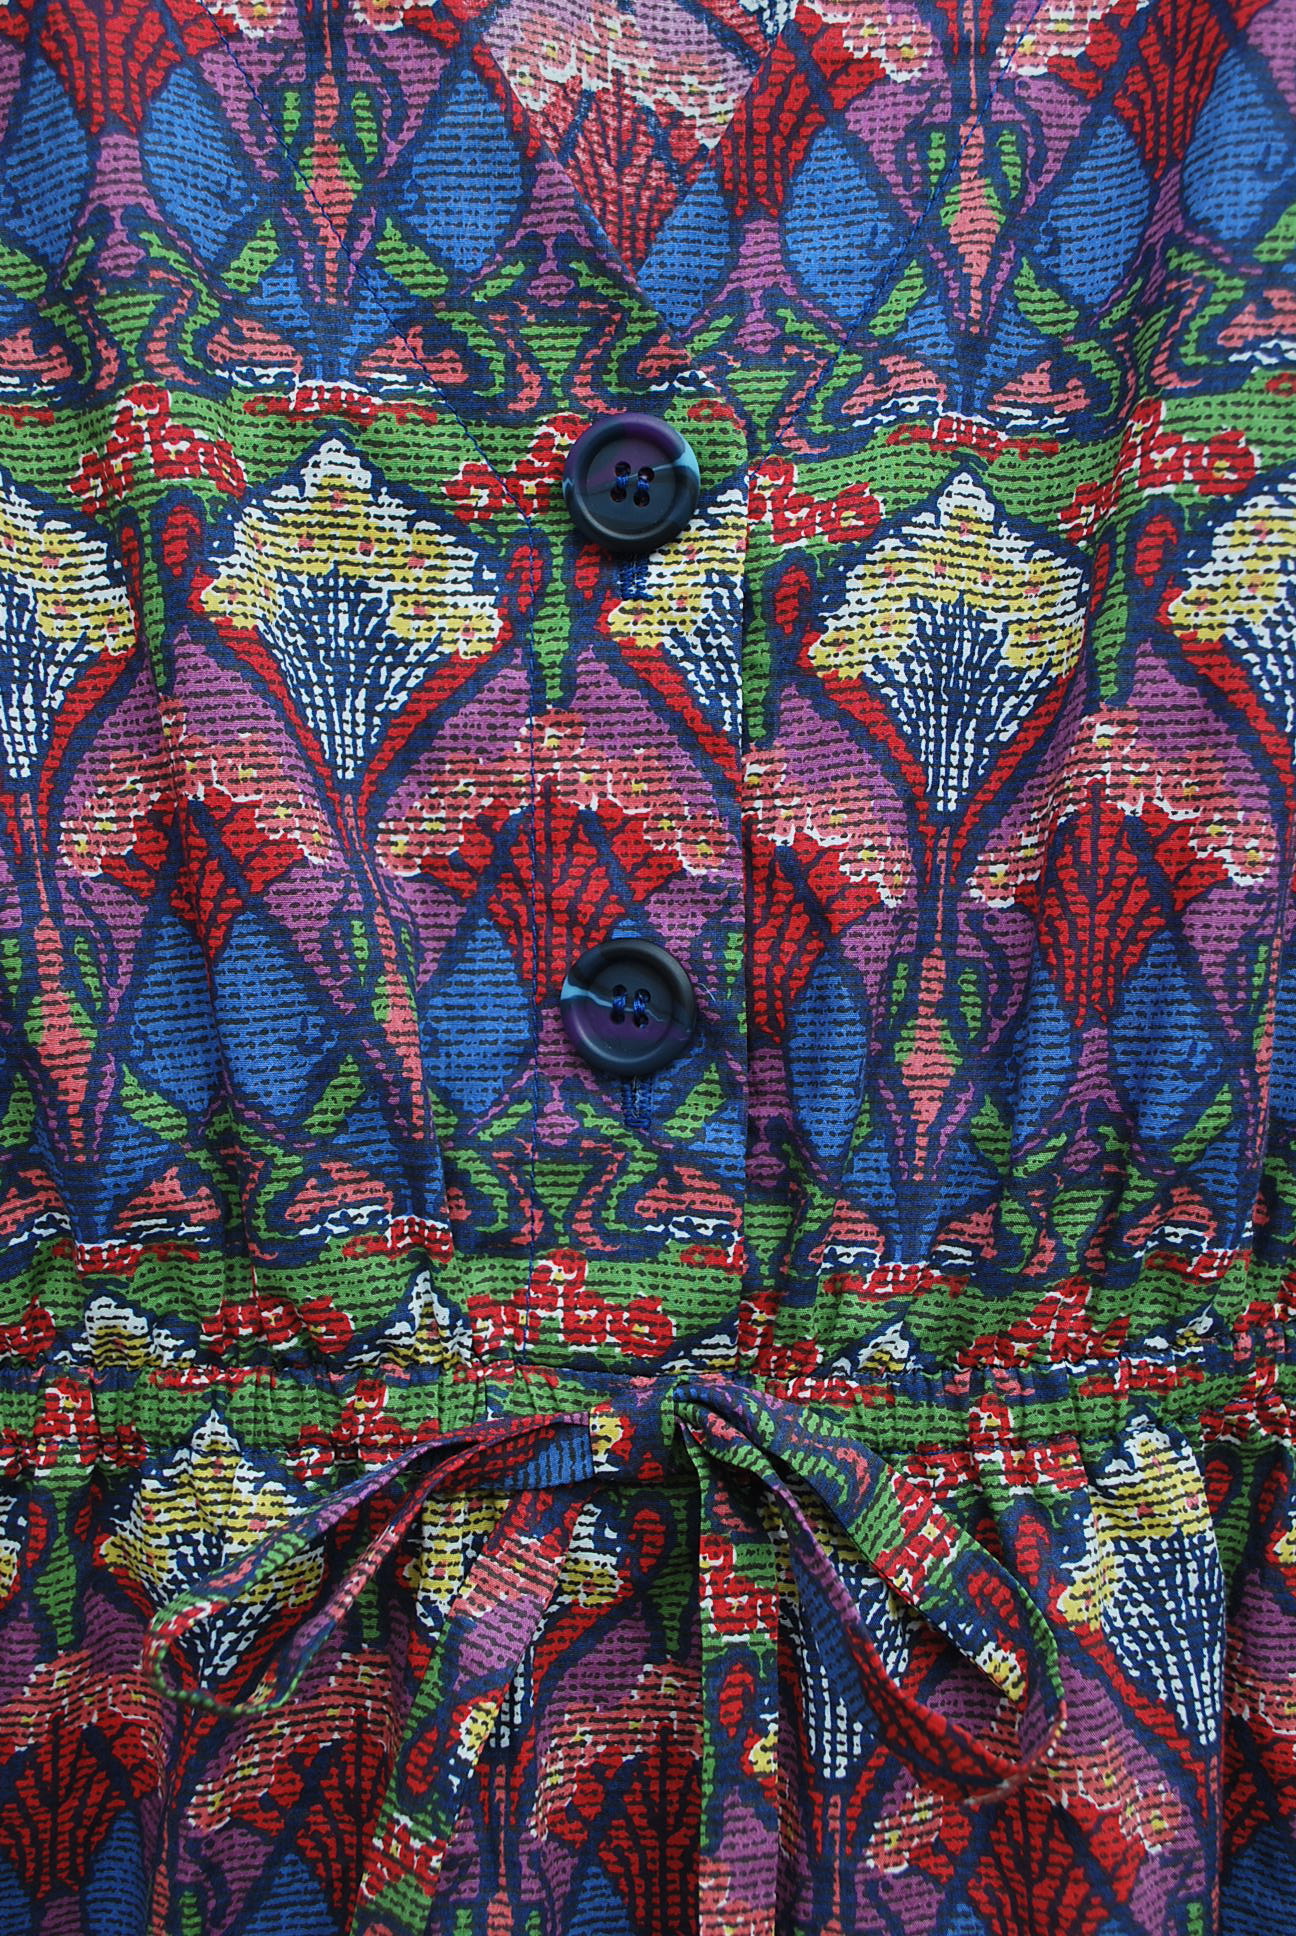
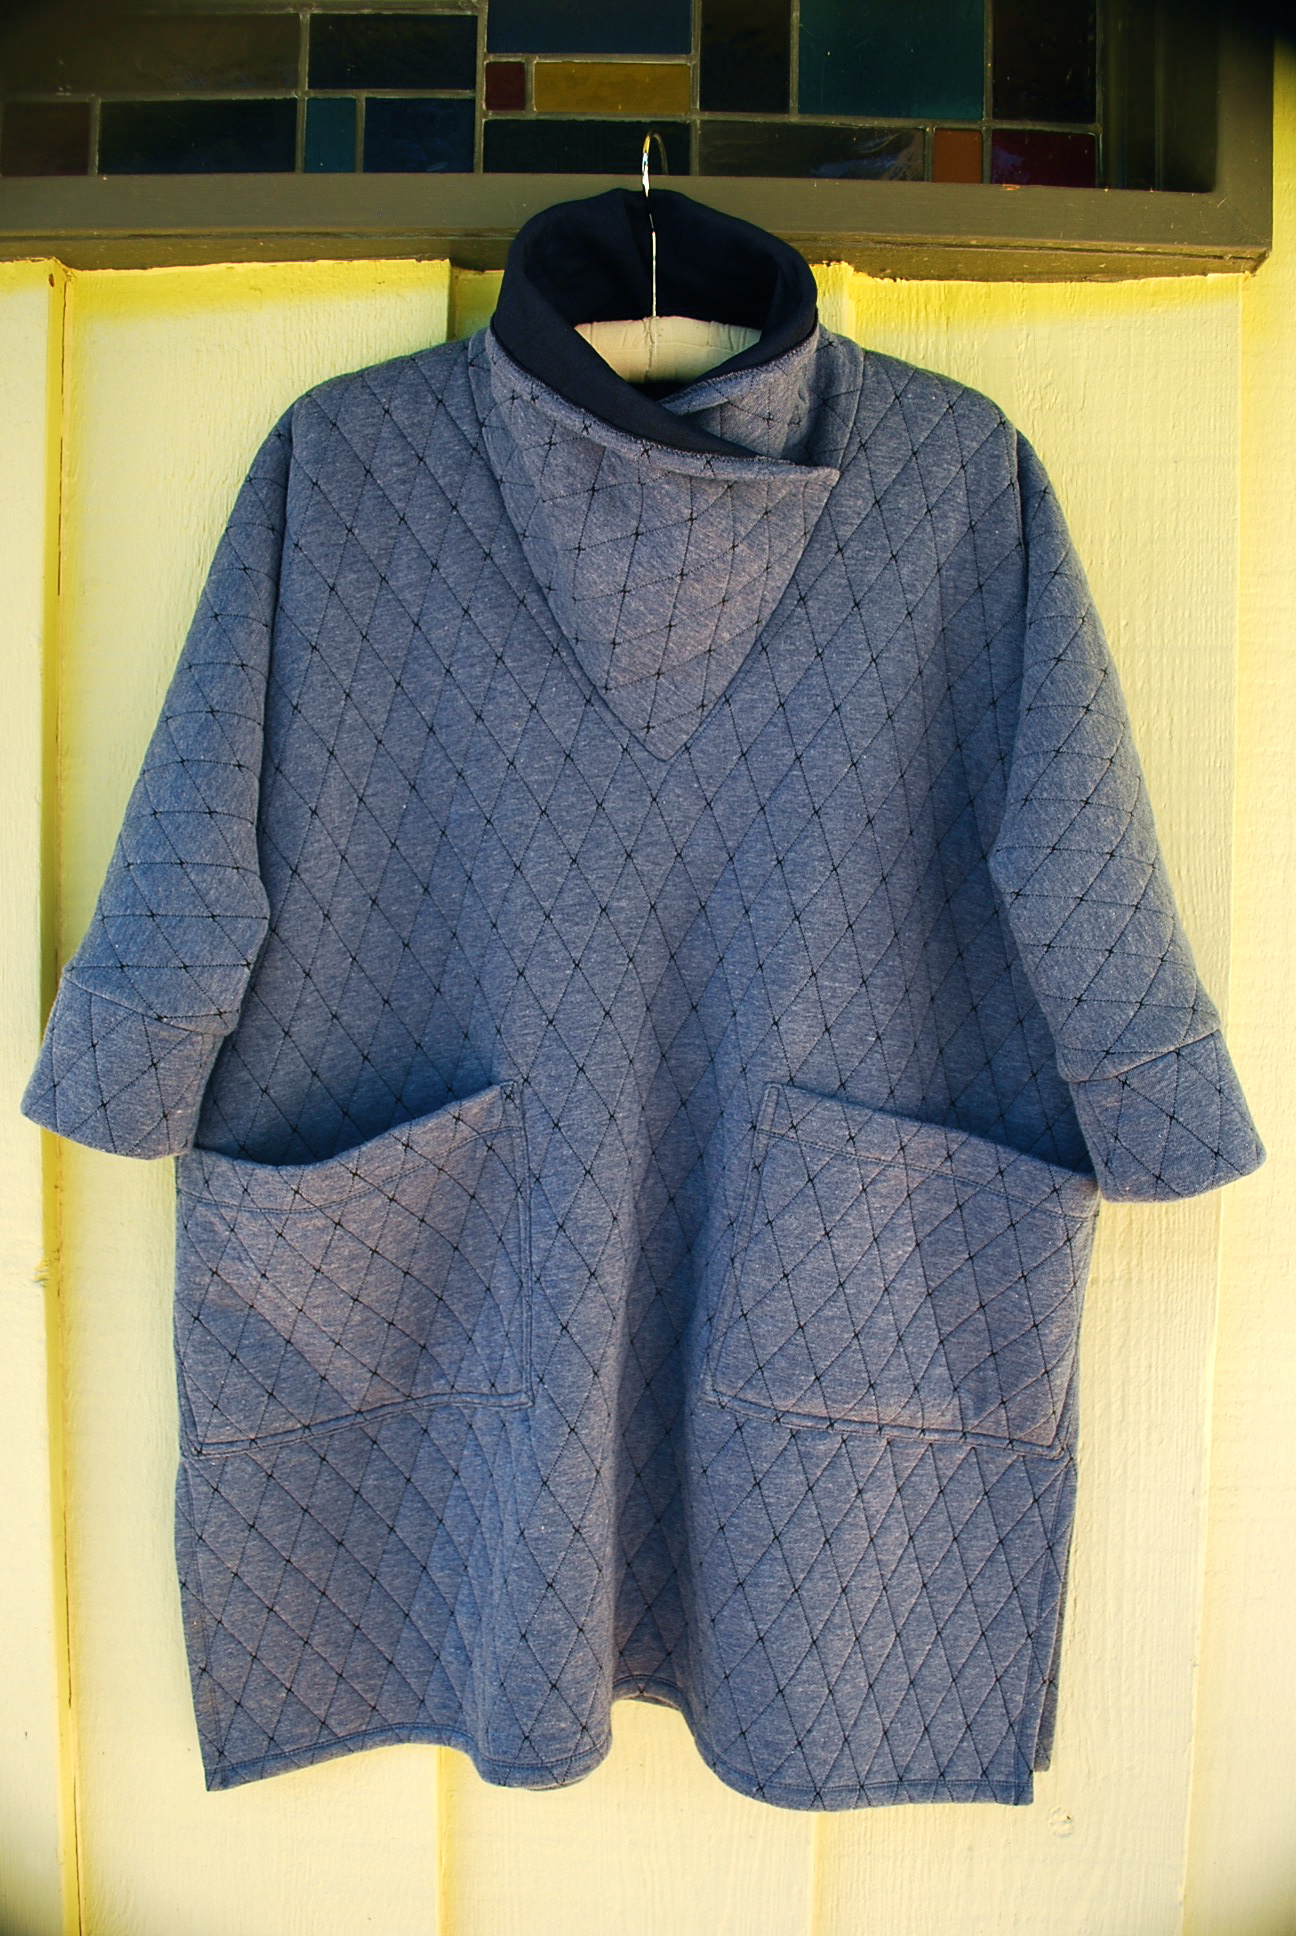
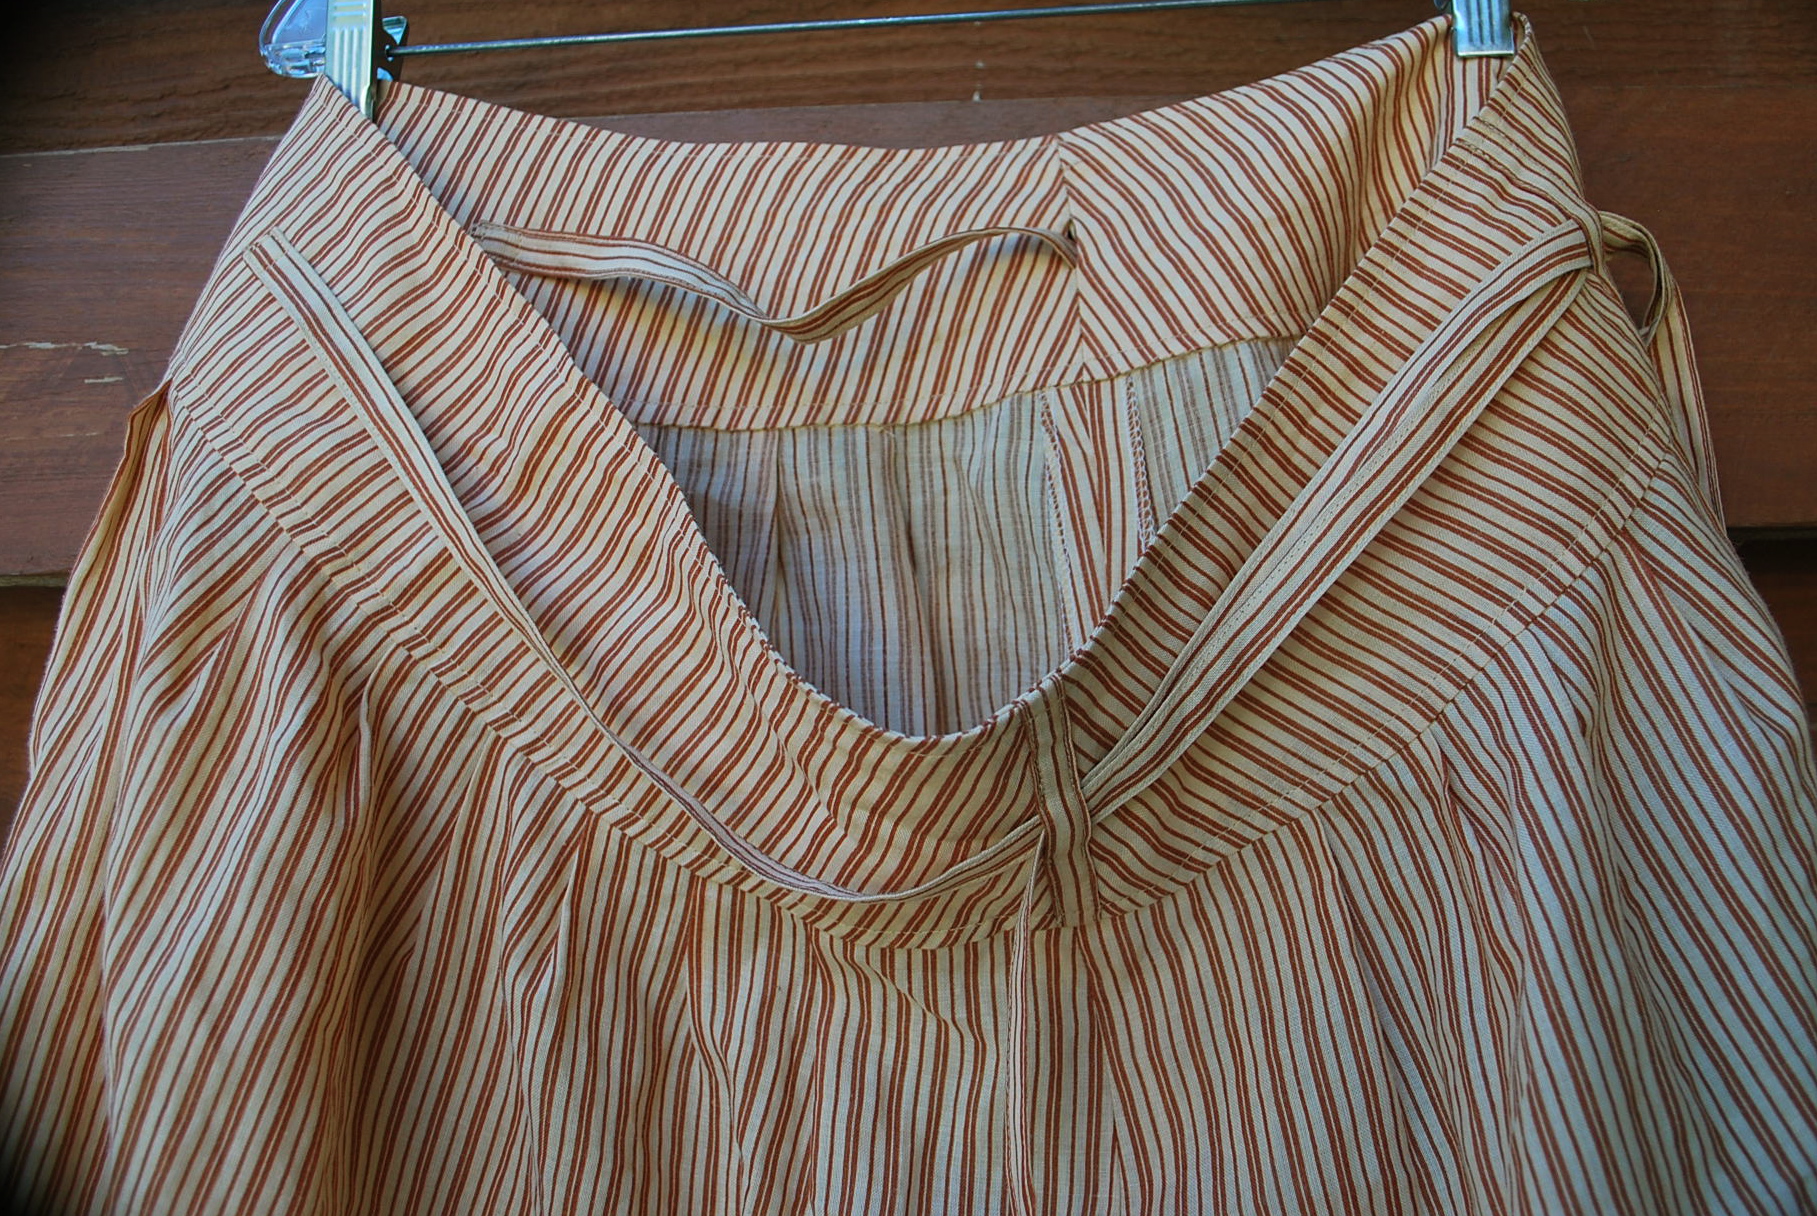
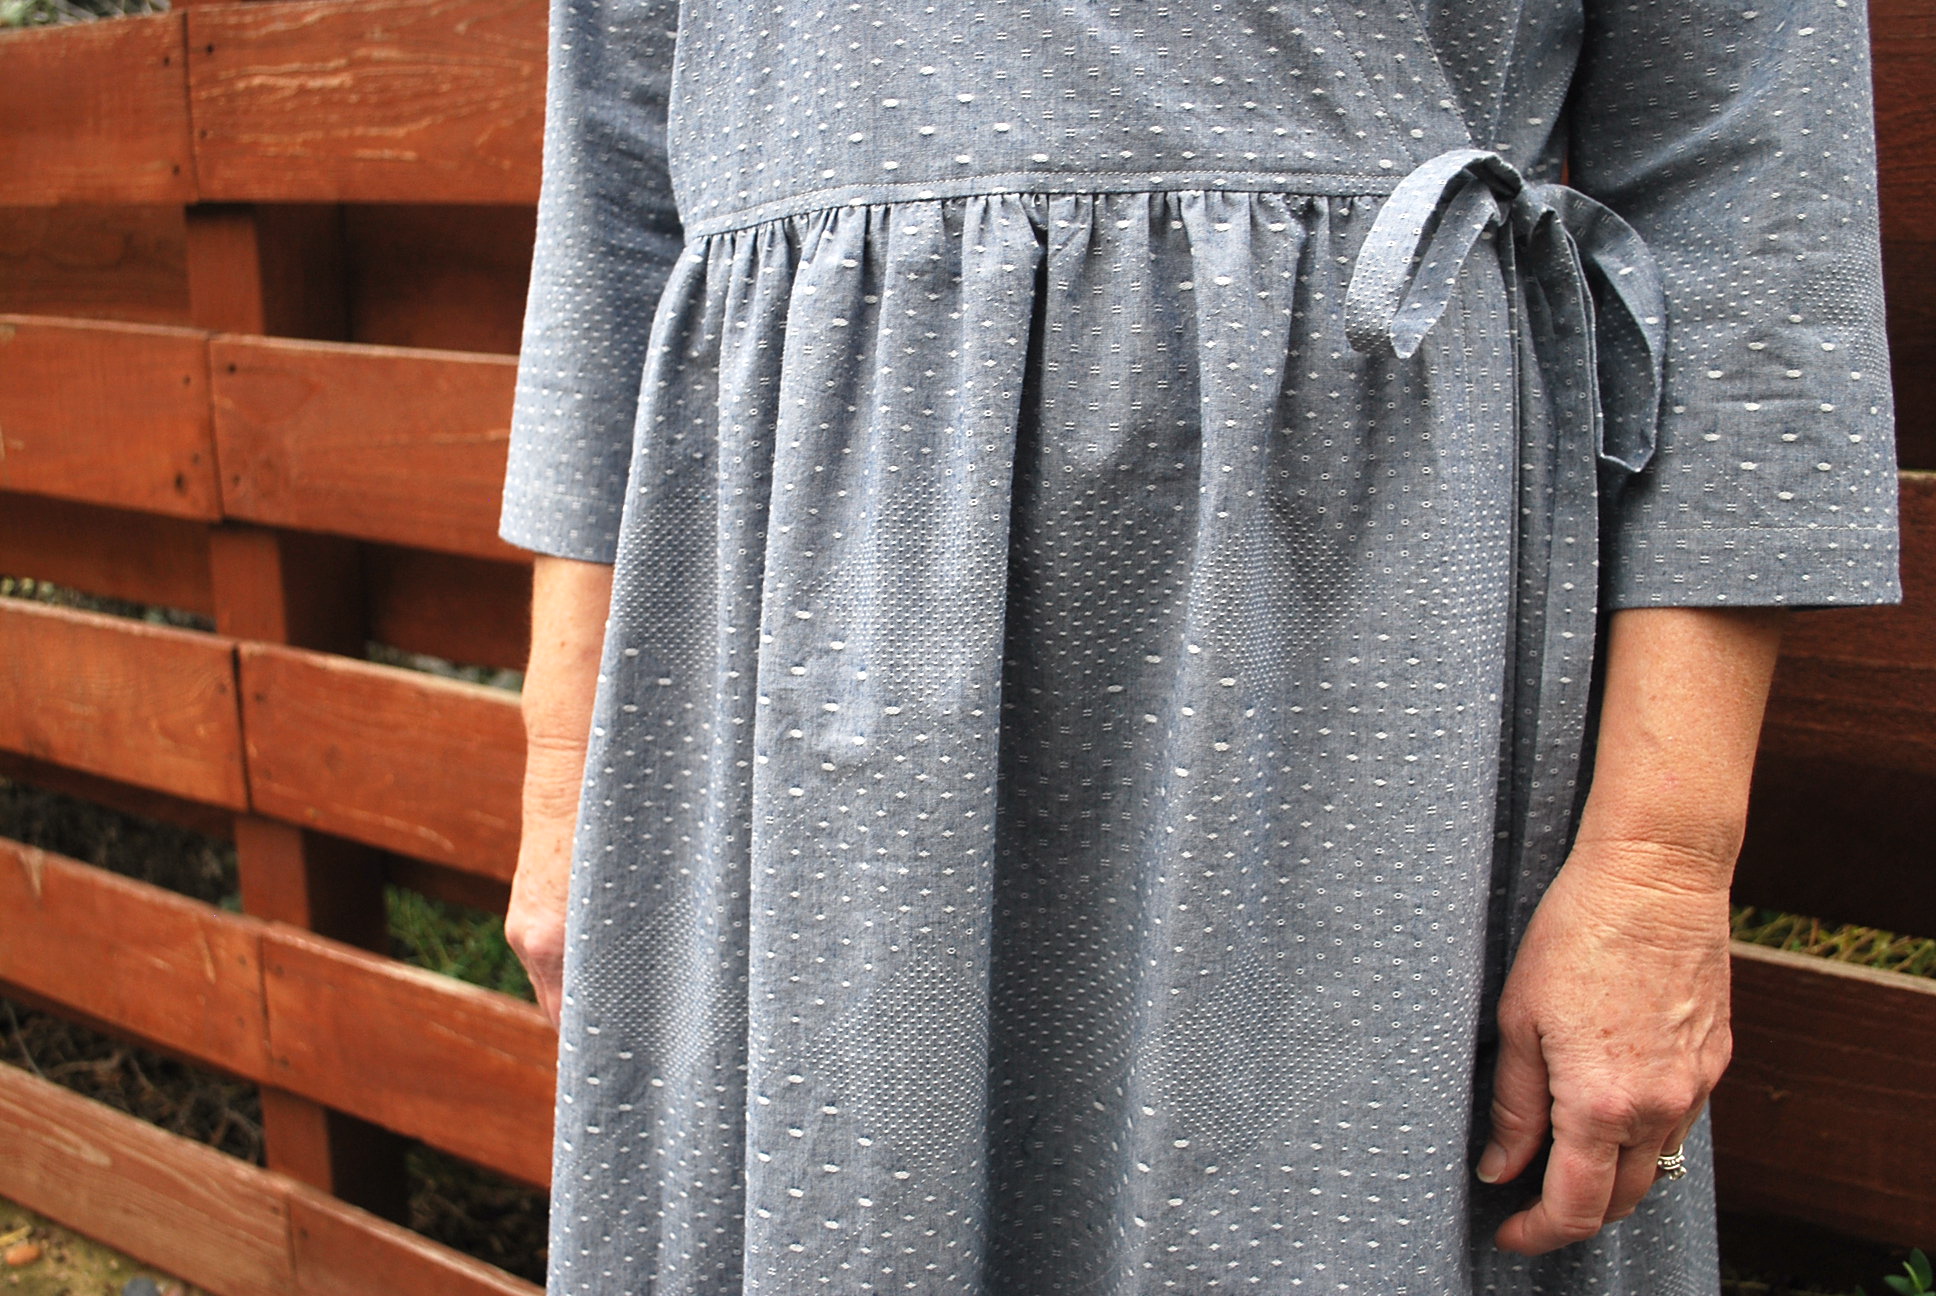
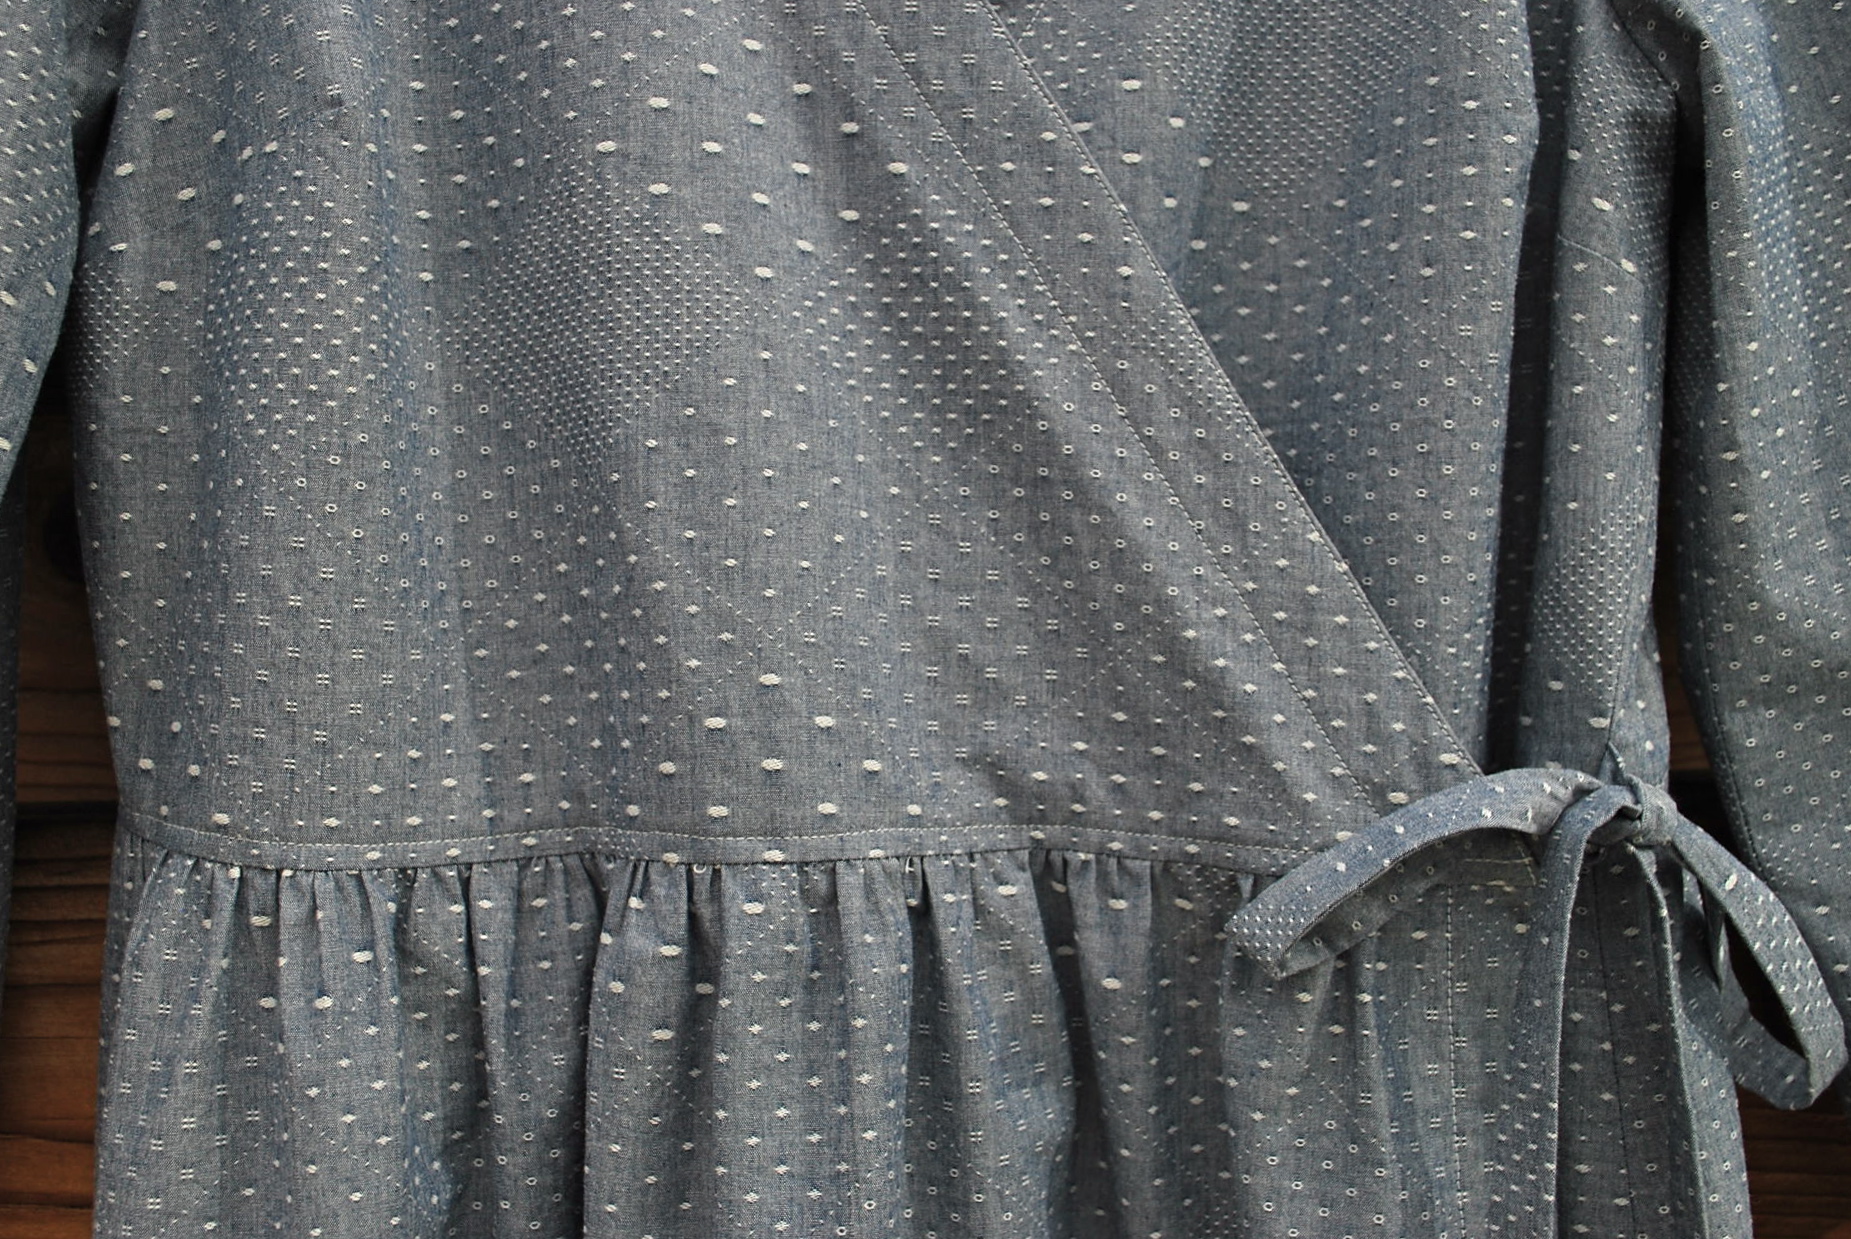
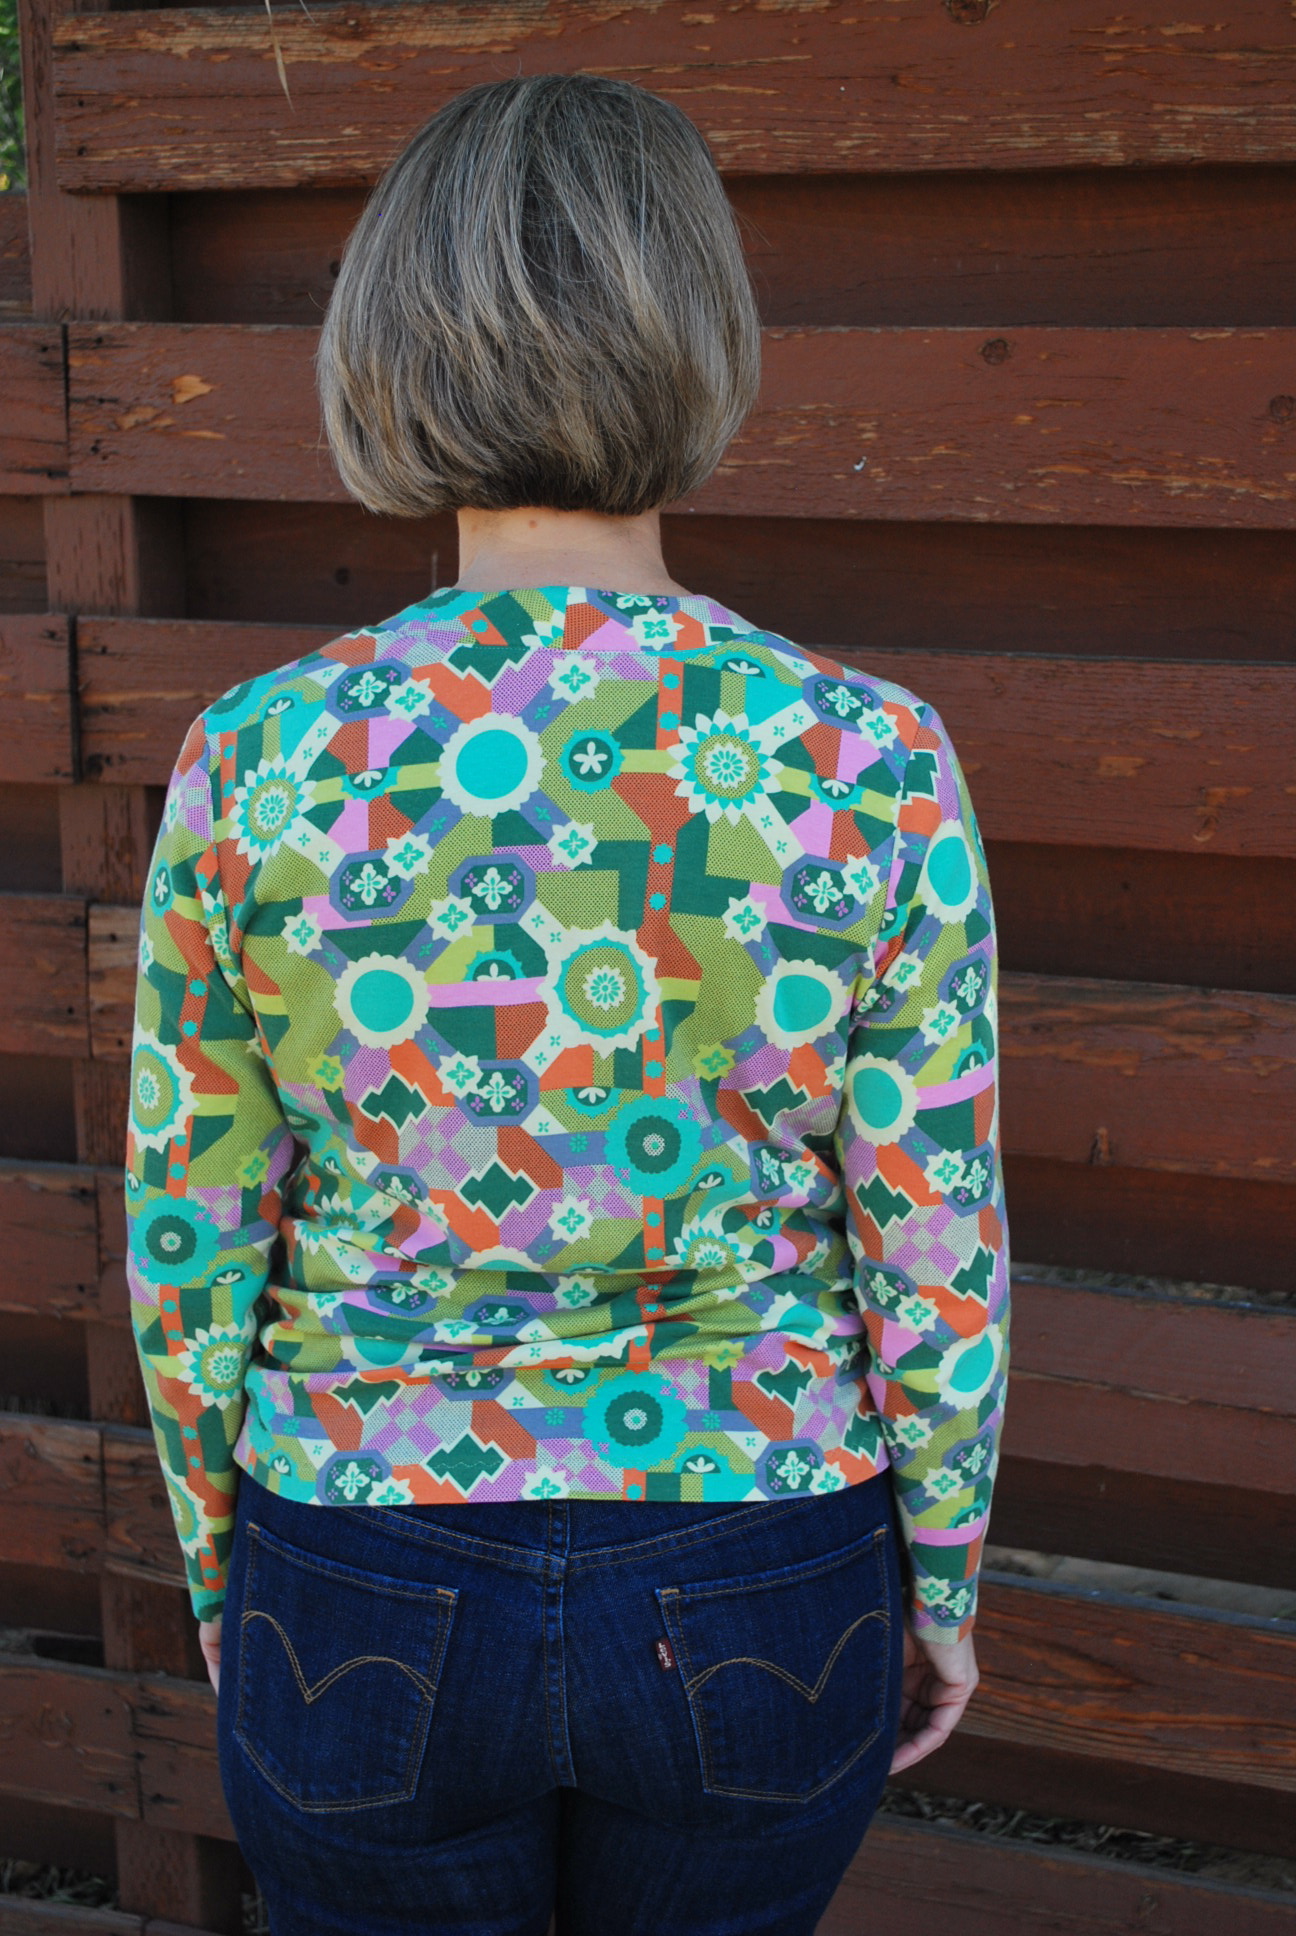
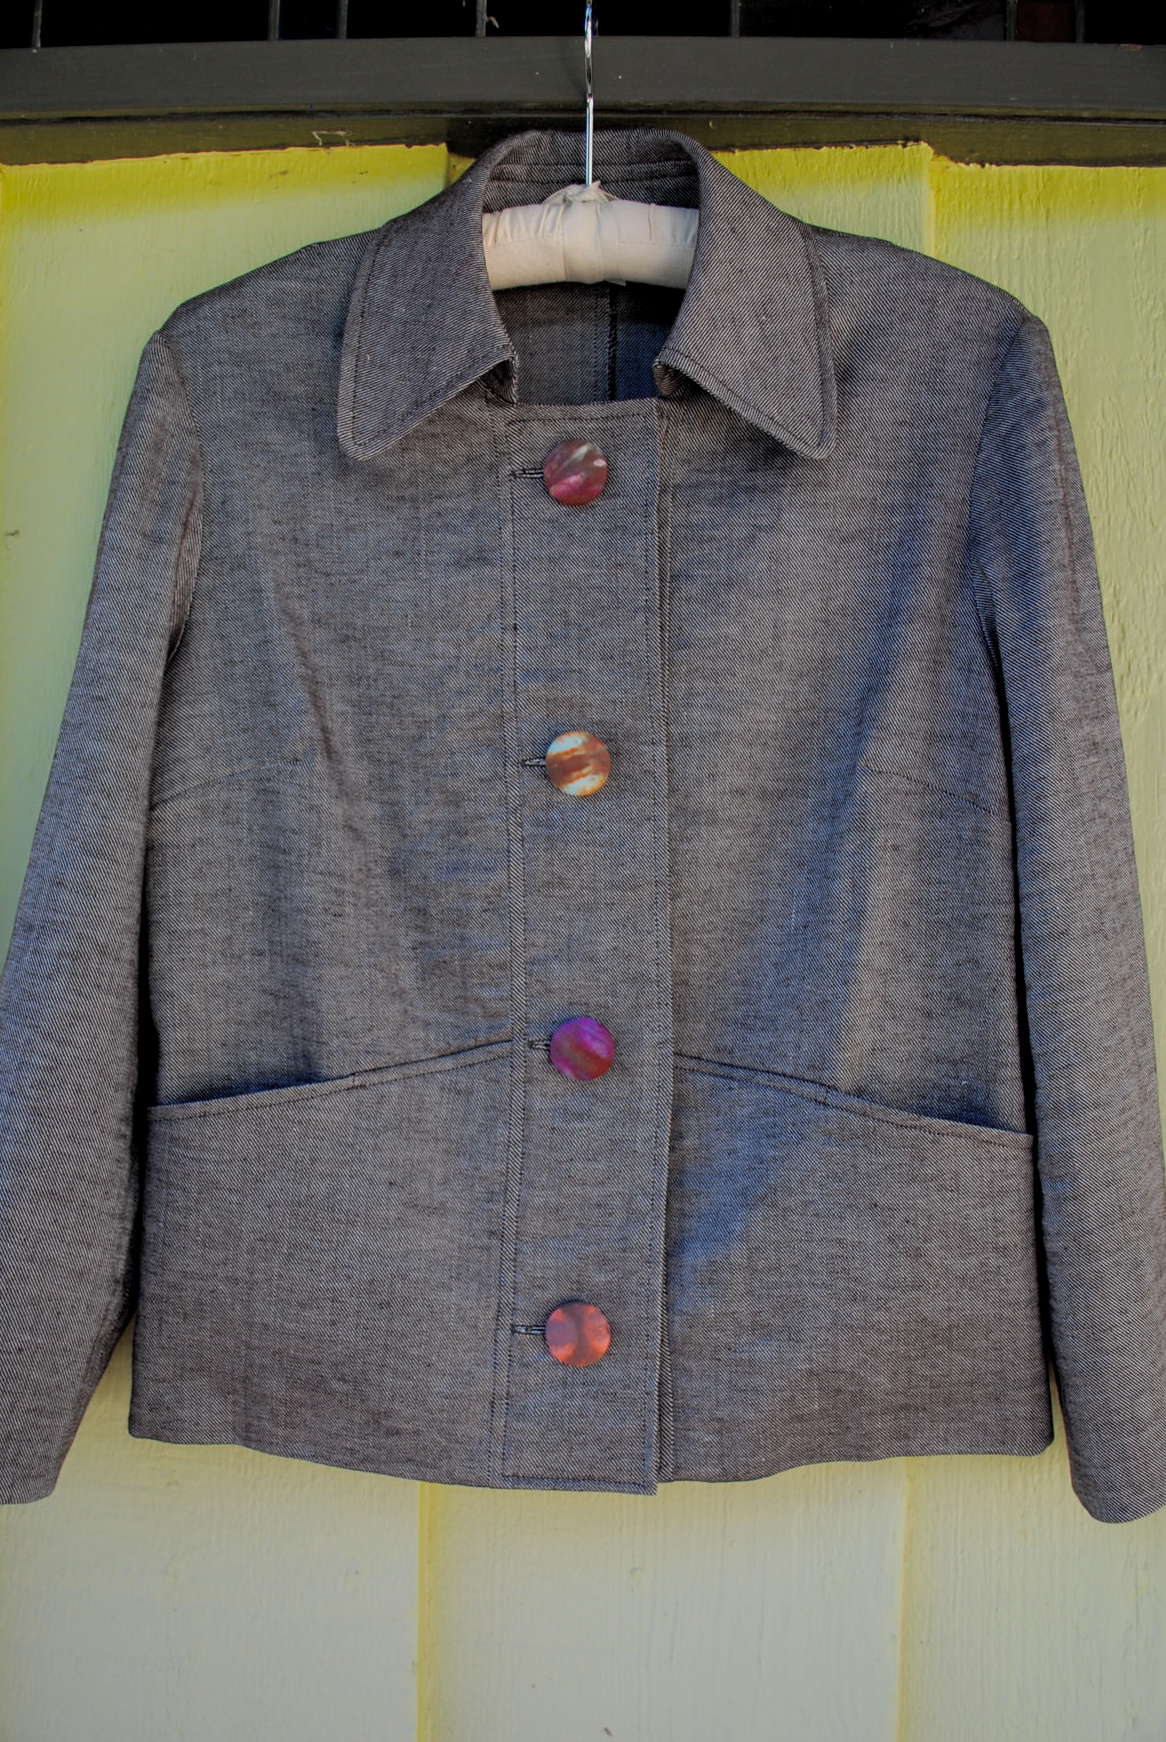
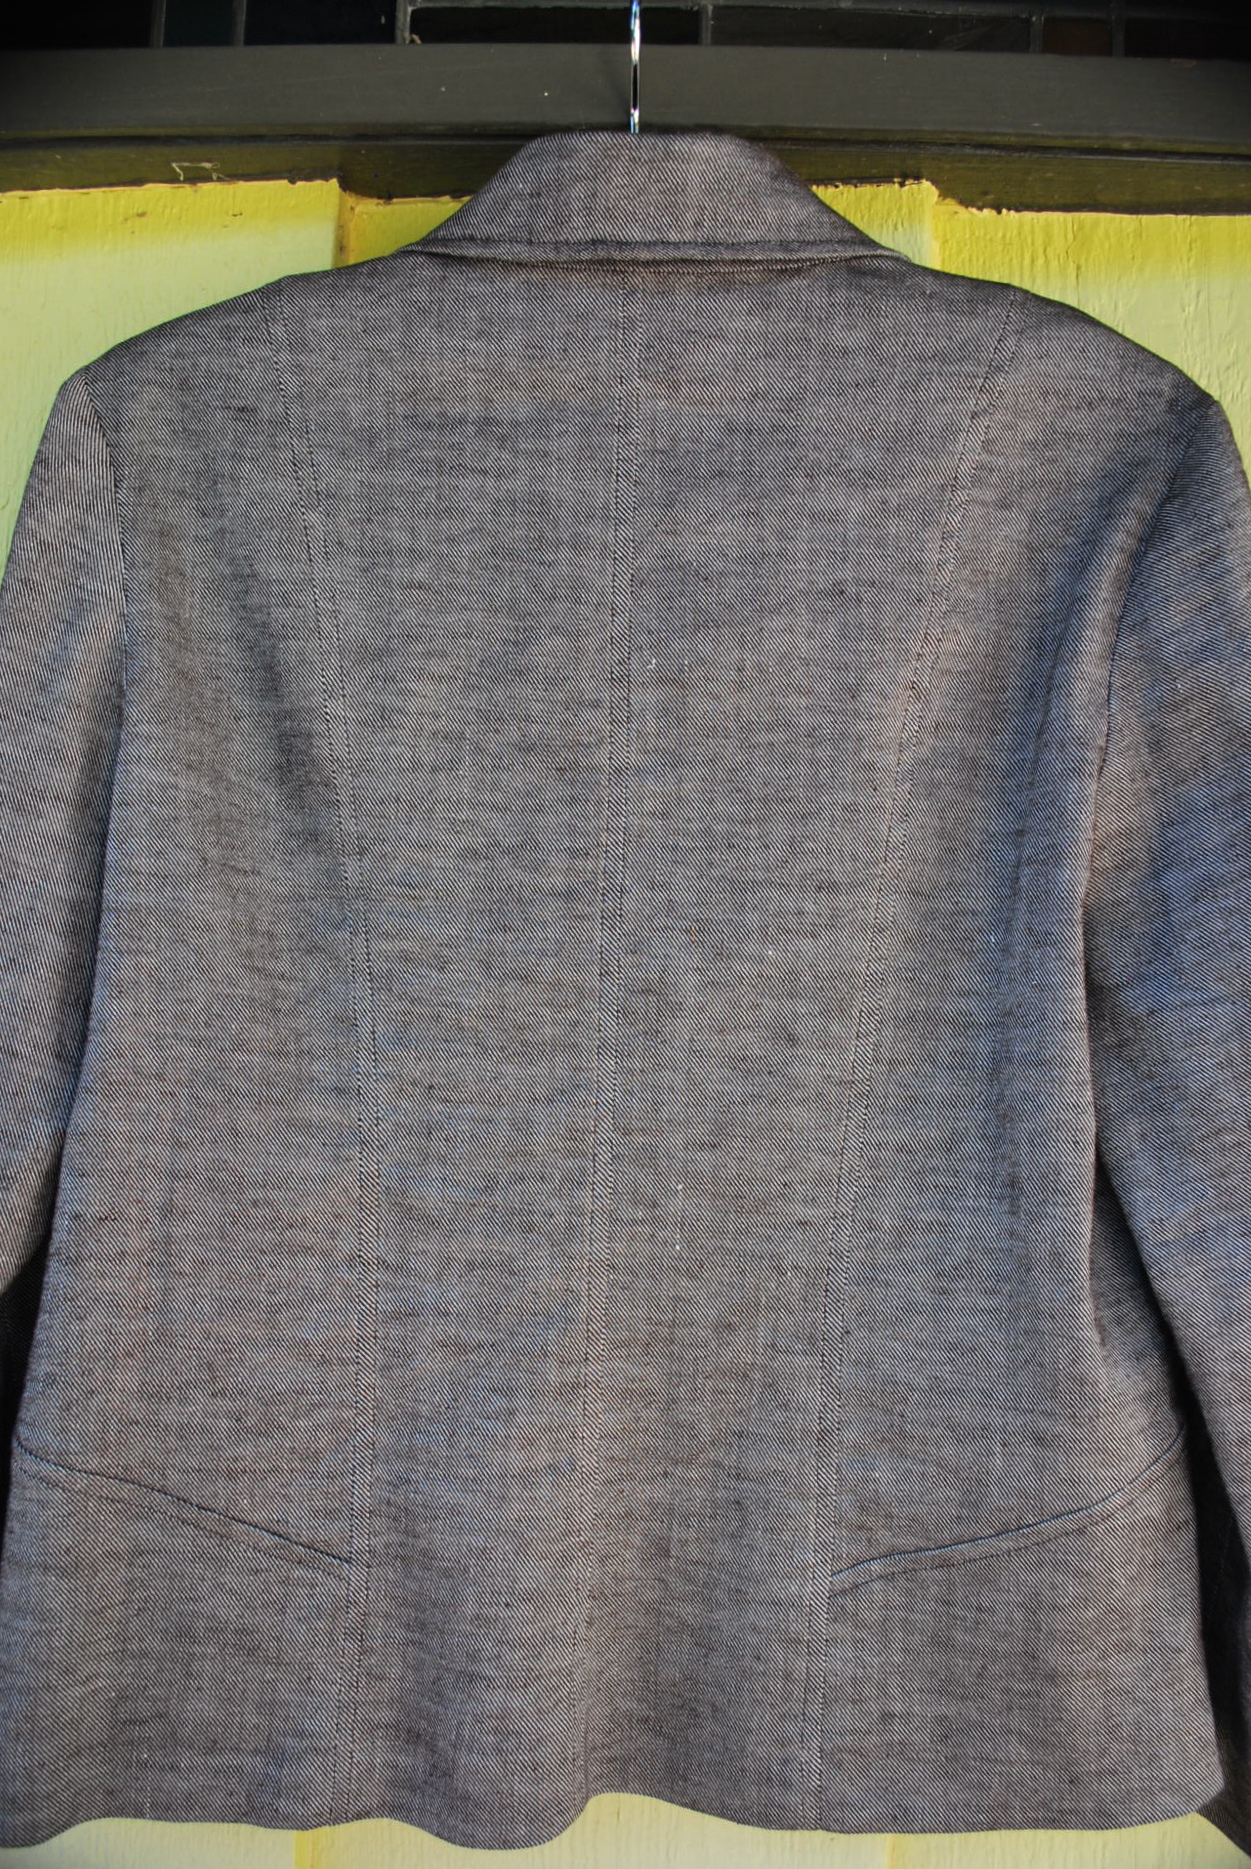
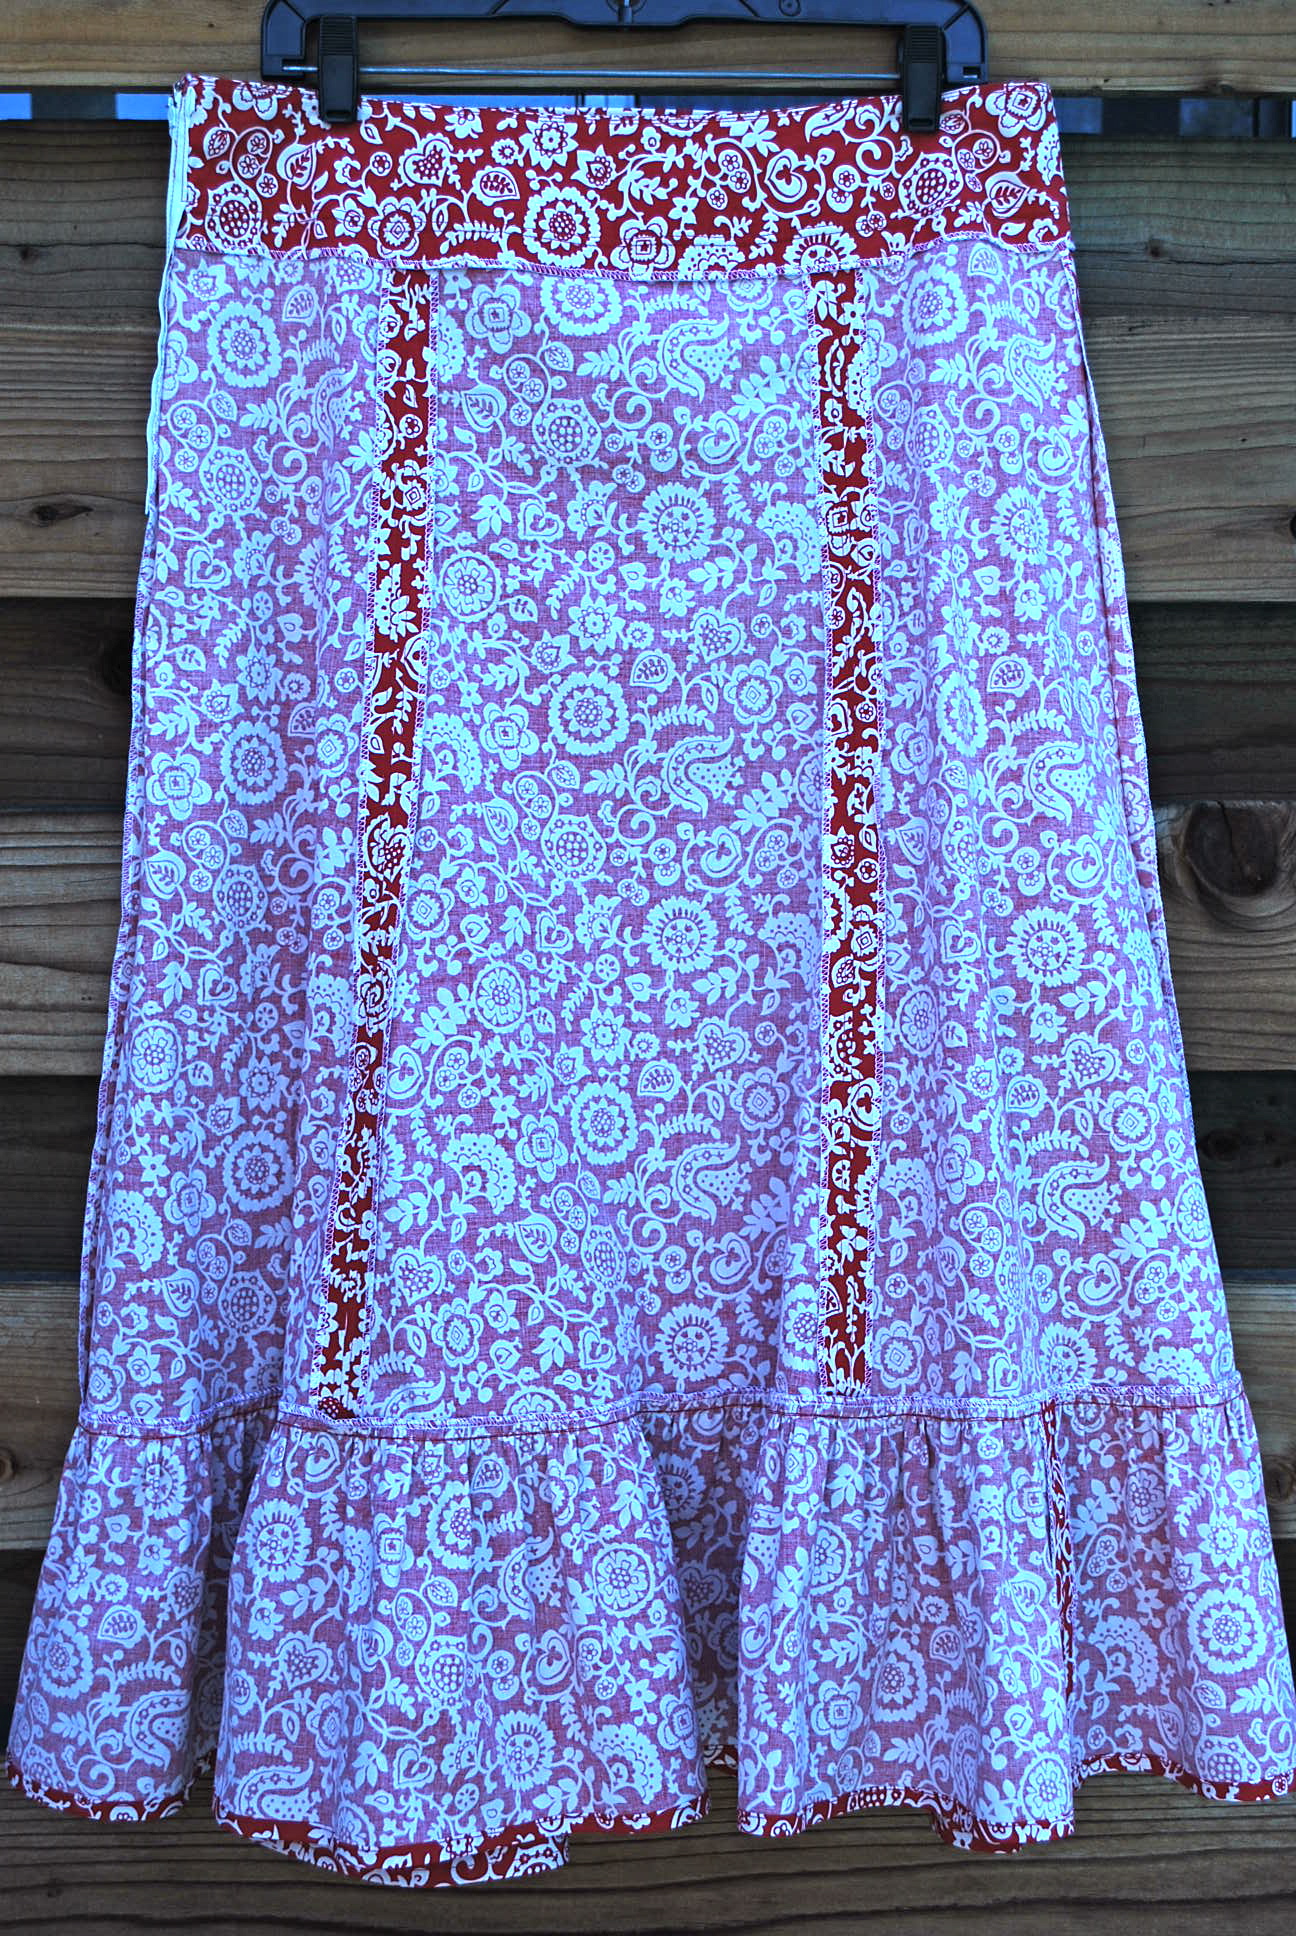
It has princess seams both in both front and back which add to a flattering fit. There’s an opening in one of the princess seams for the tie to go through. I added a thread loop on the opposite side seam at the waistline to hold the tie in place.

DSC_0084 DSC_0078

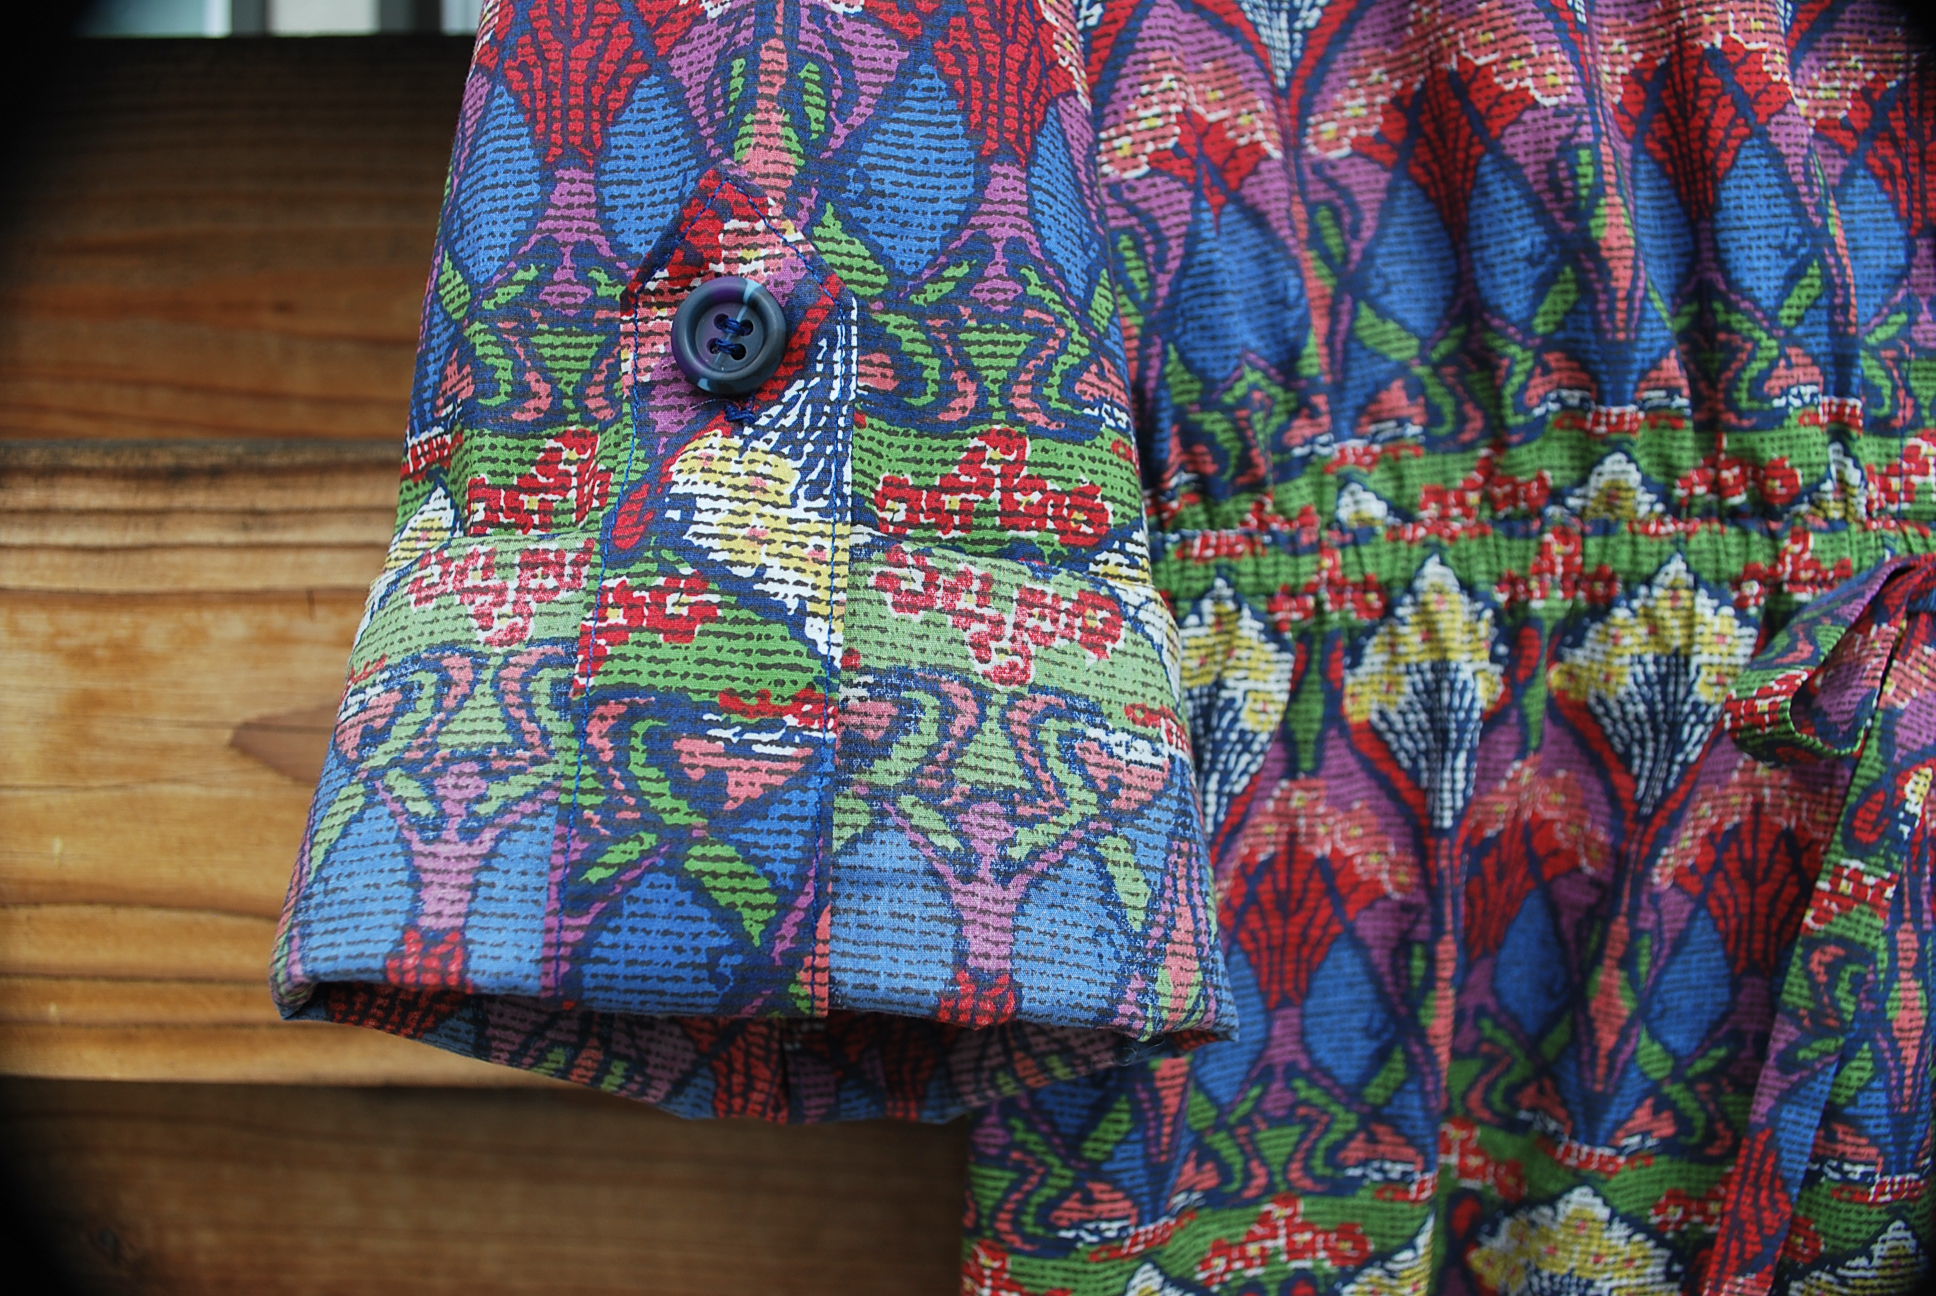
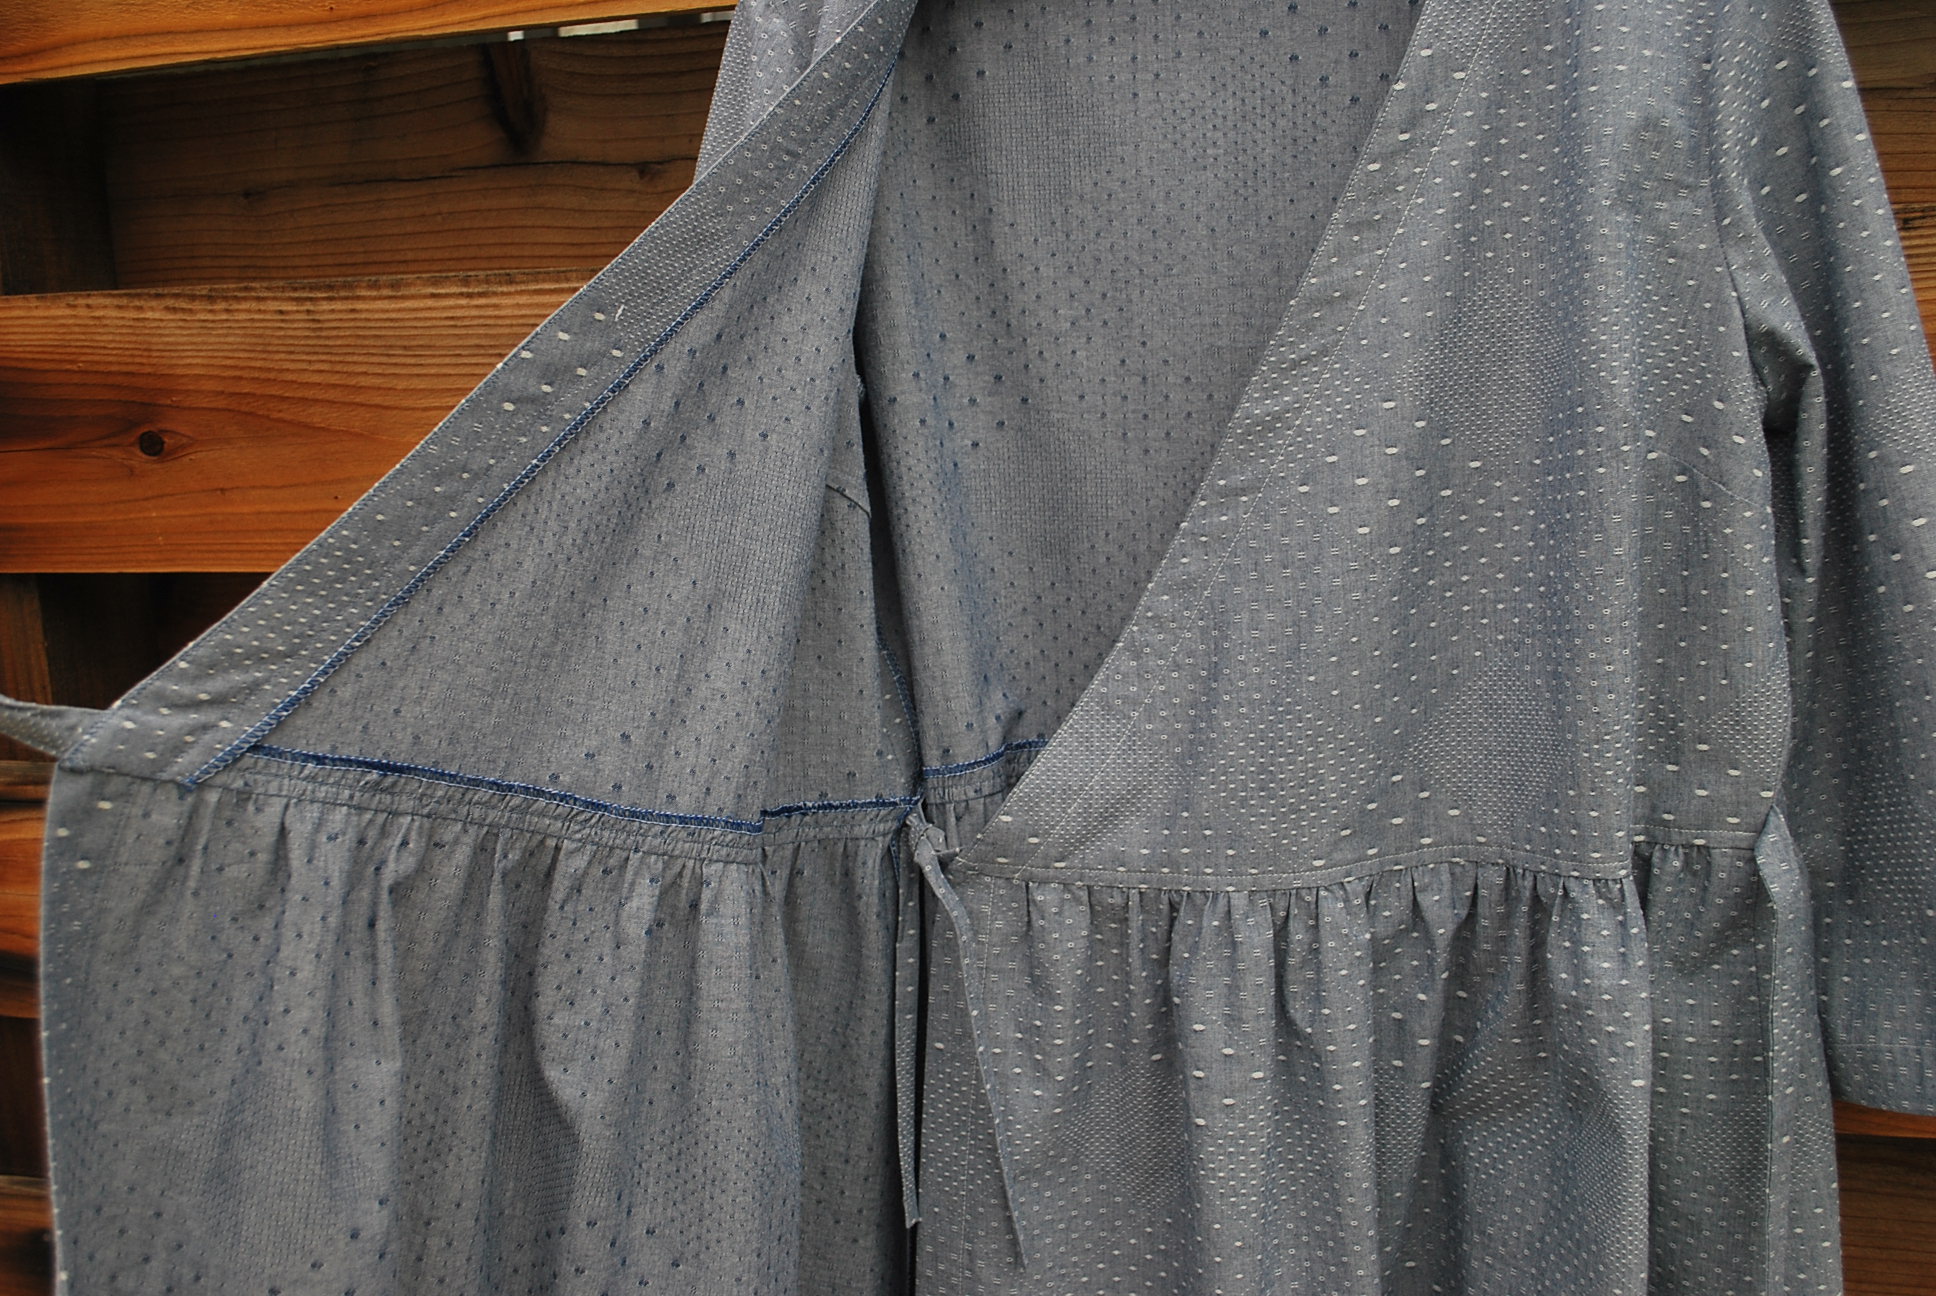
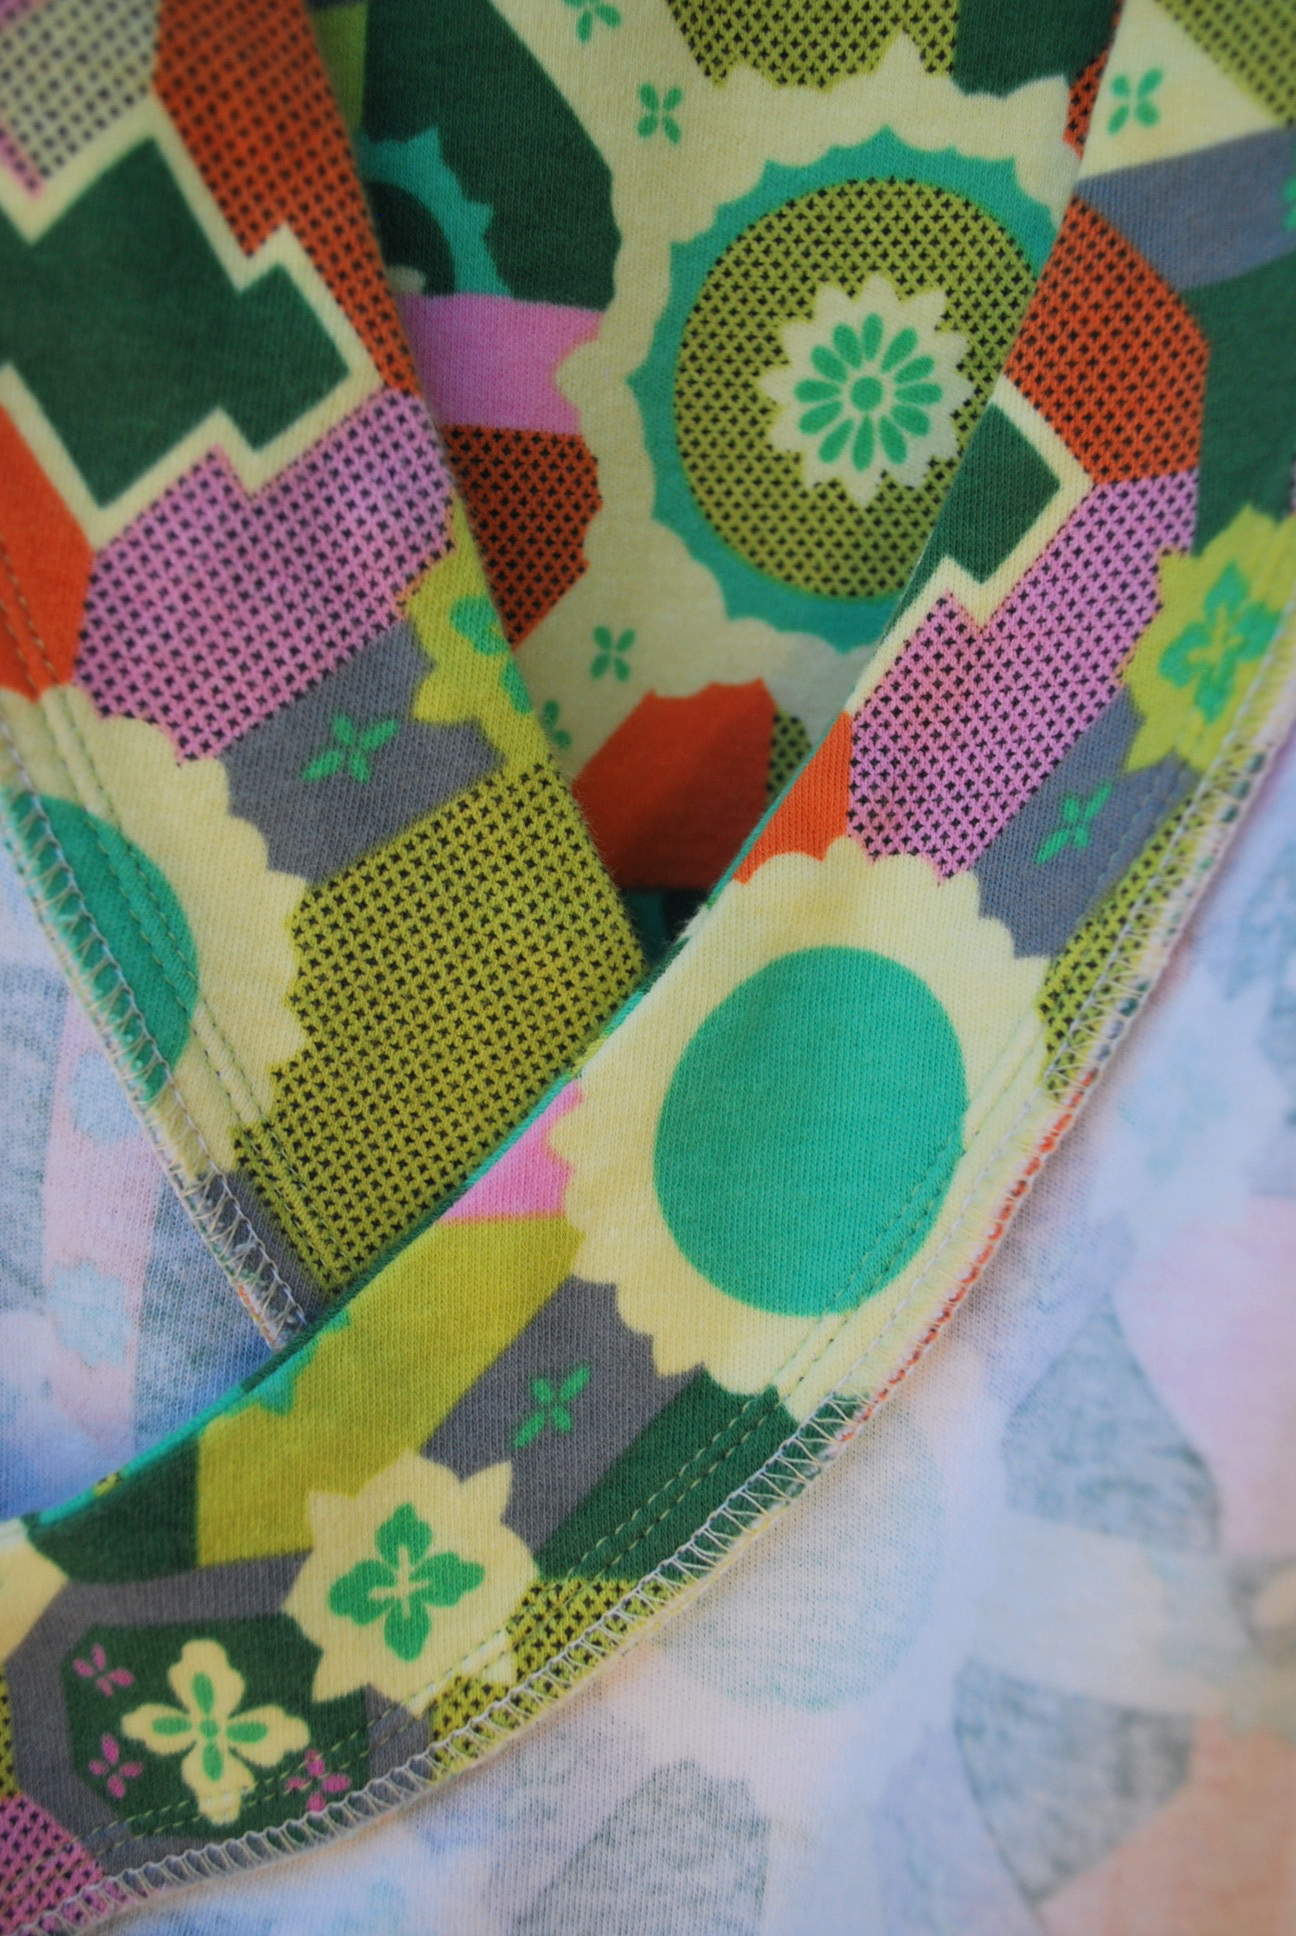
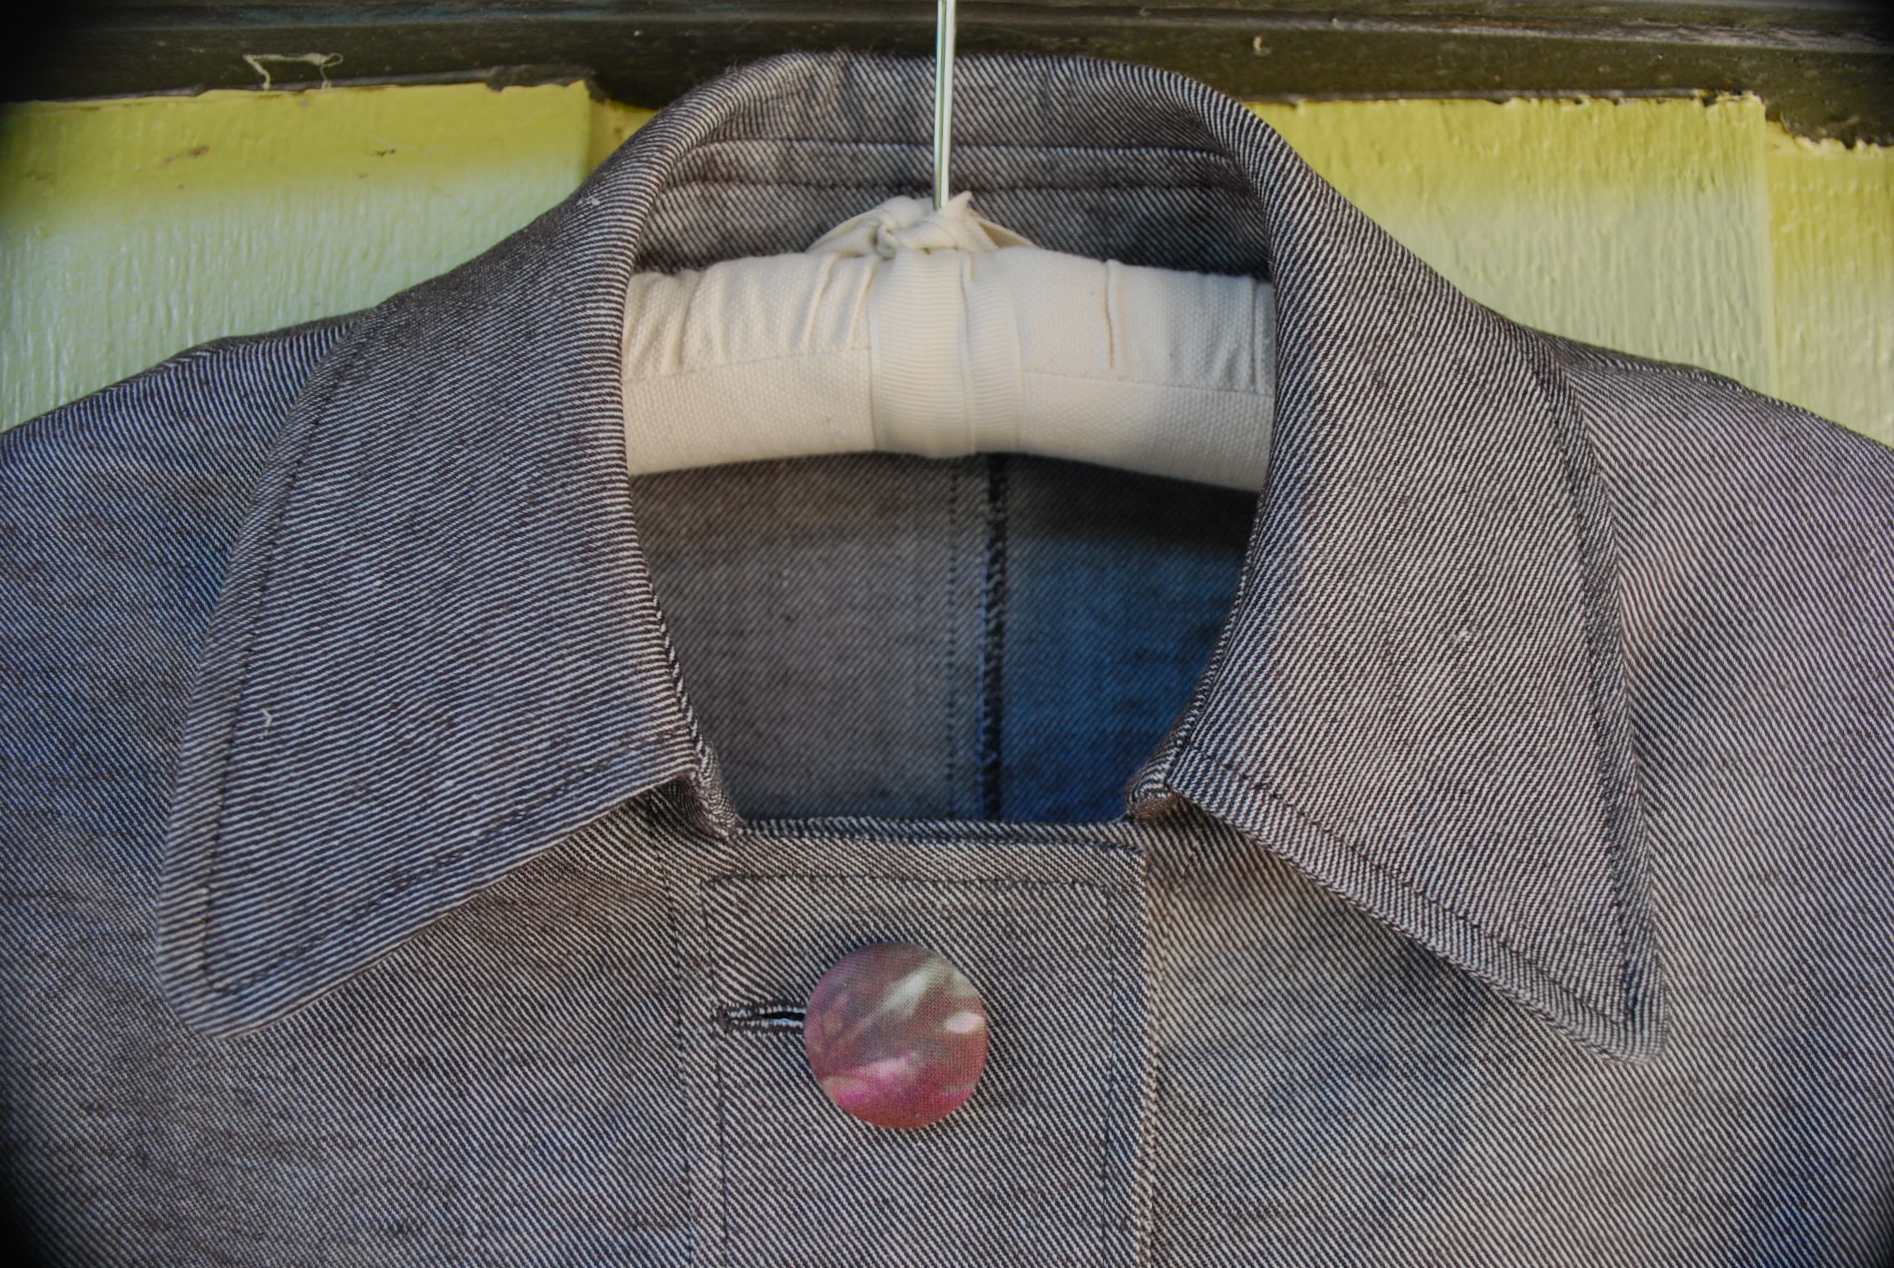
Because the lawn cotton sews up and irons so beautifully, I decided not to top-stitch the edge of the collar or facings.

DSC_0085 
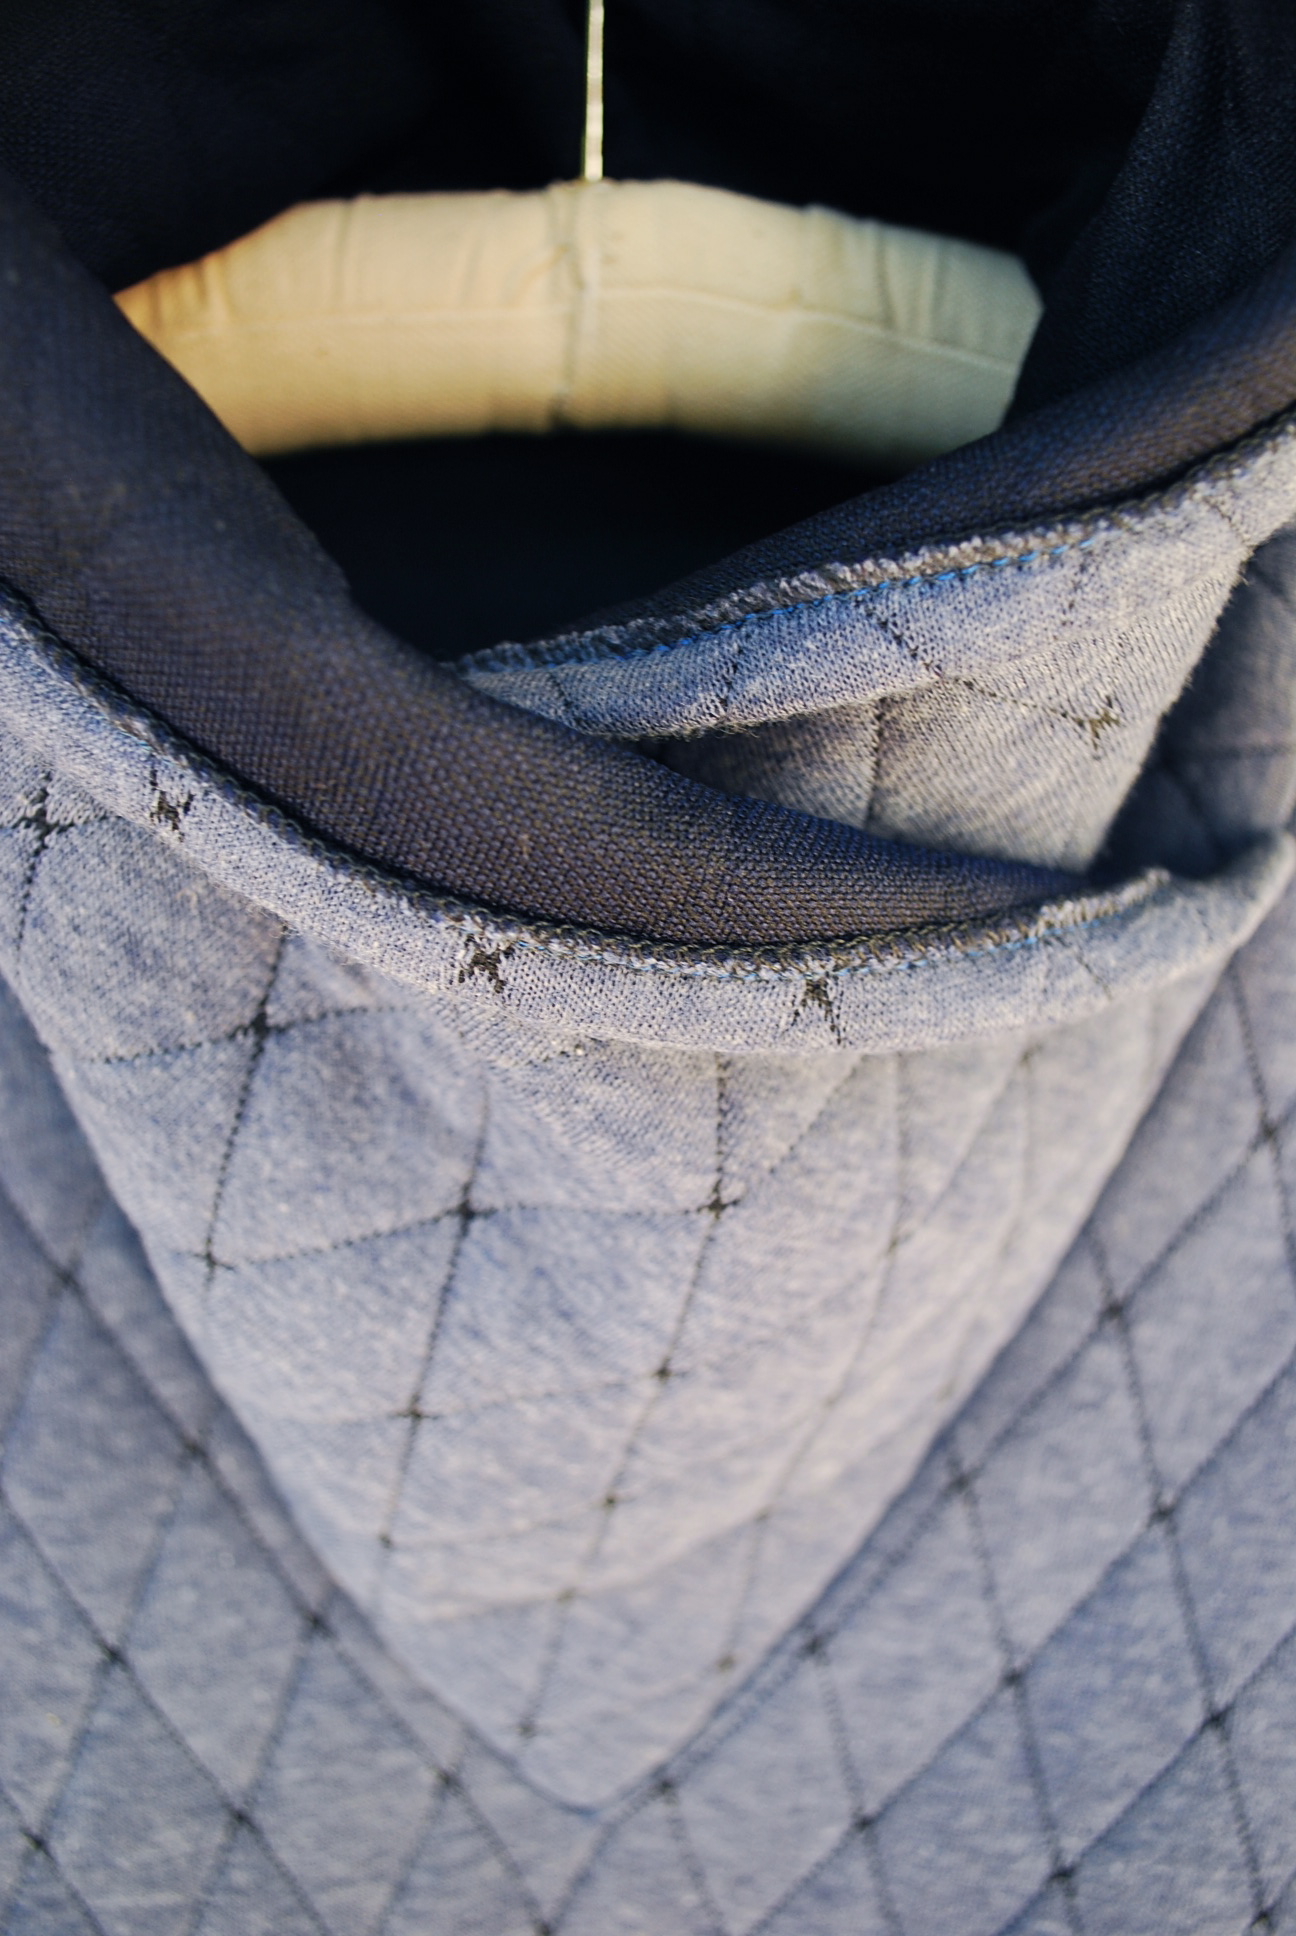
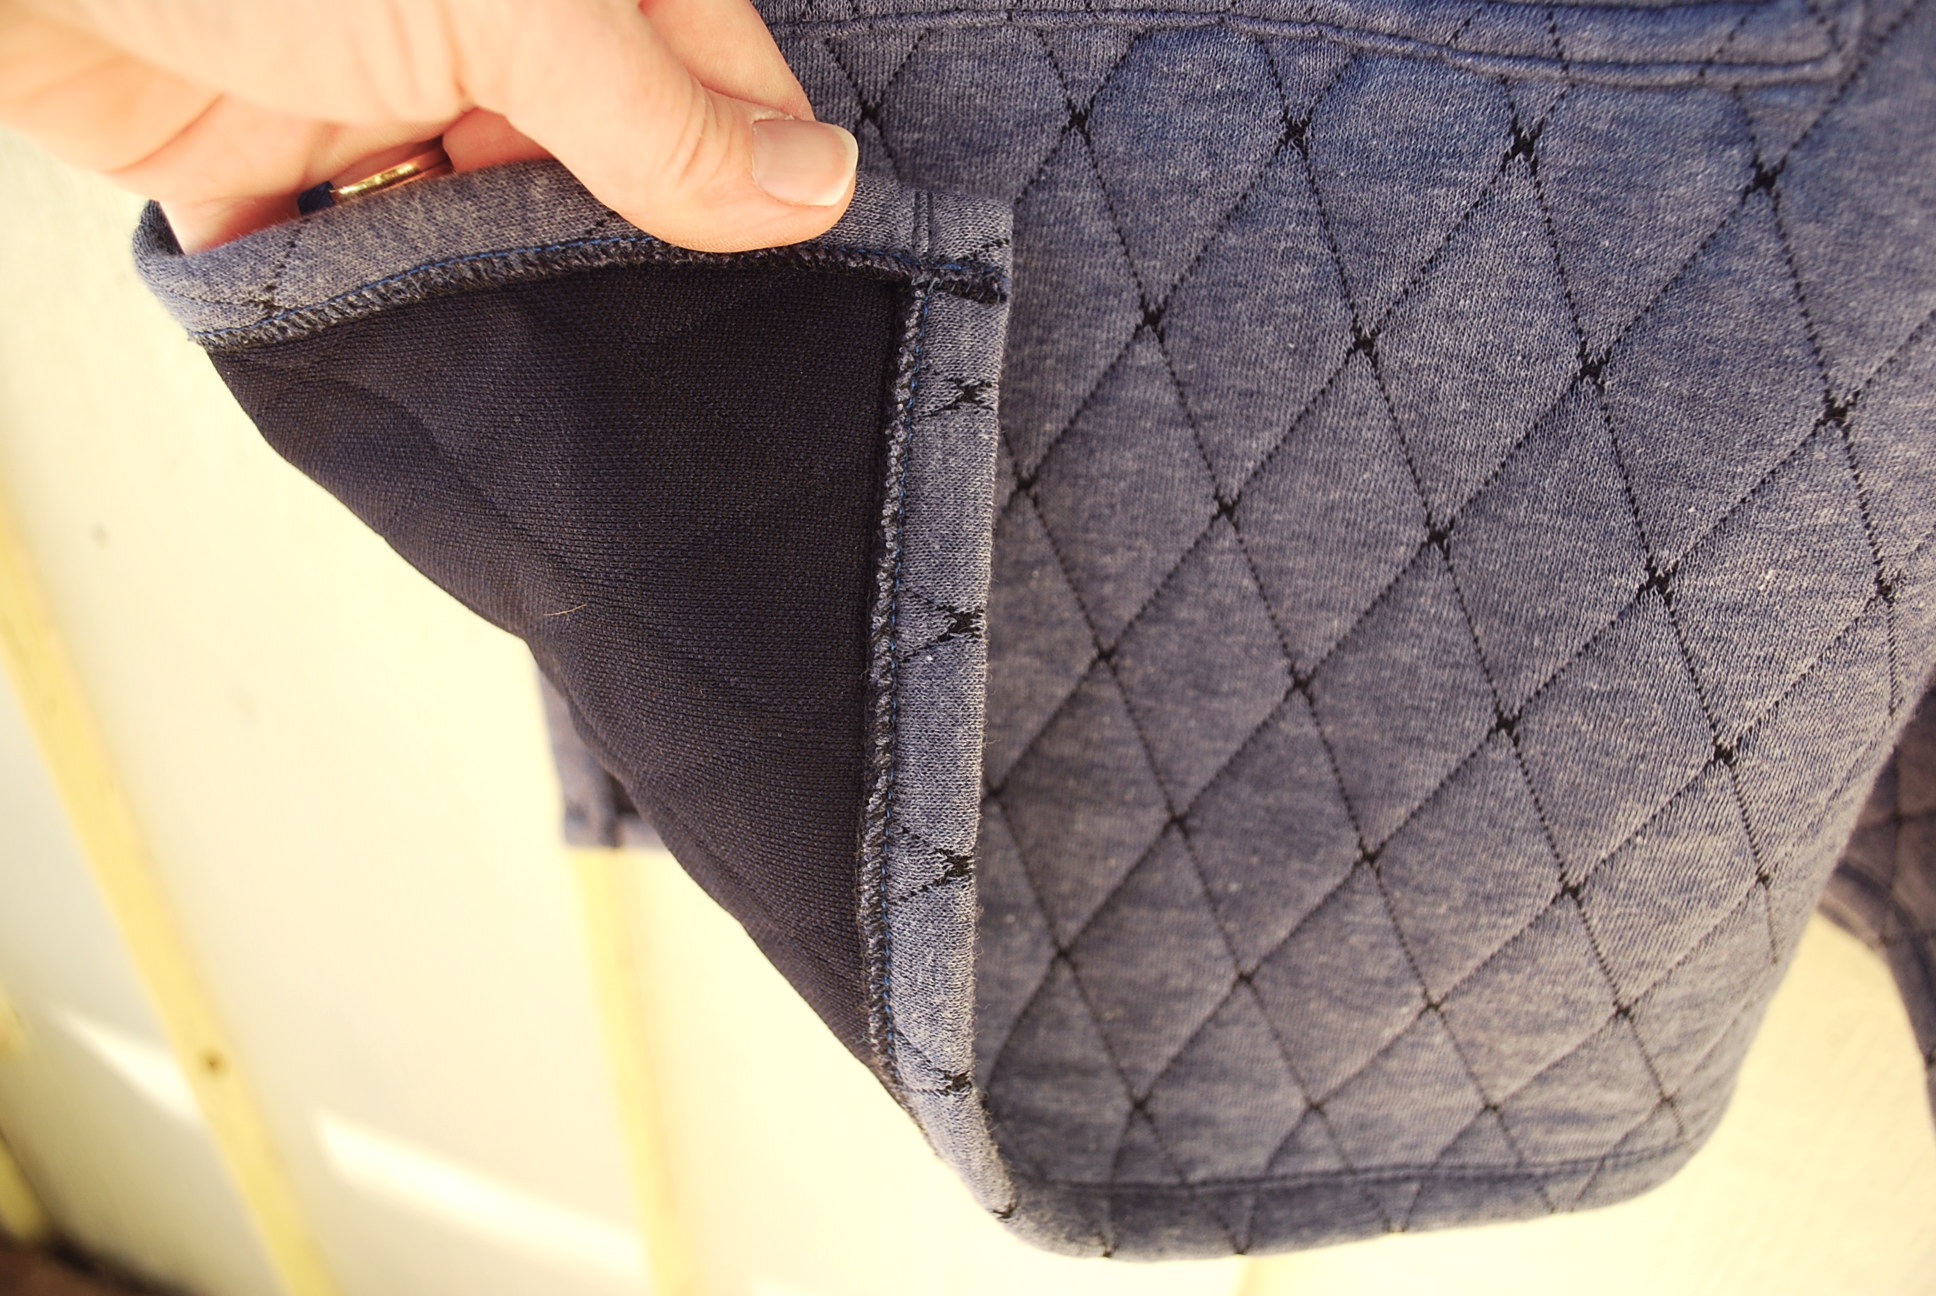
Here’s an inside peek so you can get a better idea of how it all goes together.

LET’S BE HONEST:
1. I think I say this everytime I make a Vogue pattern, but I feel I need to keep making this comment – this pattern is labeled “Easy.” I believe this rating is relative to other Vogue patterns, not sewing in general. This pattern has a collar with a band, set-in sleeves, and some other features that wouldn’t be appropriate for a beginning seamstress to attempt independently.

2. I cut a Size 12 on top and graded to a Size 16 on the bottom. I choose the B cup option. Overall I was very pleased with the fit and did not make any adjustments after trying it on while sewing.

3. The only thing I added that wasn’t suggested in the instructions, was a thread loop at one side seam to hold the tie in place.

4. Honestly, I have nothing more to say about this pattern, except it sews up exactly like it looks. I am very happy with it. I truly think it would be great on all figure types.

REFLECTIONS, REVELATIONS, AND CONFESSIONS:
I’m just anxious to publish this post. Even when I’m on a fabulous vacation, I miss sewing and blogging. I still look on Instagram and scan through other blogs to keep up on what others are doing. How about you? How do you feel when you don’t have time to sew….even when you’re having a fabulous time doing something else?

DSC_0025

Fresh Makes, Take Twos

I have made 25 garments since starting this blog, and I have probably mentioned in most of my posts, “When I make this again, I’m going to…….” So how many have I actually made again? I will admit that 90%+ of my makes are one-time adventures. Mainly because with the limited time I have to sew, I find the most enjoyment out of trying a new pattern from my large pattern stash each time I make a garment. But there are two that I have been compelled to revisit, and I’m excited to share these Take Two makes with you.

The first Take Two is The Jean Skirt, Fresh Make #1.DSC_0001Sometimes the garments that “wow” the least are the ones we grab the most because they are a great basic. And that is the case with The Jean Skirt, Simplicity 1616. I really like how it fits, lays flat across the stomach, yet has plenty of width through the hips and thighs. AND it is quick and easy to make. I wanted to make another as soon as I finished the first and what finally spurred me into action was, sadly, I tore my first Jean Skirt.DSC_0005DSC_0016 The fabric, which I ordered online, was disappointingly thin. While wearing it, it got caught on something, I don’t even remember what, and now it’s wadded up on the top shelf of my closet.

I learned my lesson that you usually “get what you pay for.” So for Jean Skirt, Take Two I shelled out the big bucks for 2 3/4 yards at $14.50 per yard for Anna Marie Horner’s beautiful, thick, soft, interlock knit, Mary Thistle, in navy, from my favorite online fabric store, Hawthorne Threads.DSC_0004This fabric goes through the washer and dryer beautifully. The dark blue with a black print acts like a neutral. You can really pair it with almost any color. A true grab and go skirt.

My second Take Two is The Every Woman Top, Fresh Make #21.DSC_0011
I was initially drawn to this pattern for it’s potentially figure flattering variation of a basic knit top.

My first version of The Everywoman Top, Vogue 8151, was a fit fail from the waist down. The biggest fit fail of my 25 Fresh Makes. I describe this all in my original post, but basically the fabric was too thick and the fit was too loose, resulting in one big belly sag instead of flattering, fabric folds created by the side ruching. BUT I loved the fit from the waist up. The small bust adjustment I did worked well and neck band laid perfectly in front and back.

Through the waist and belly, it's a bit of a blob silhouette. Go ahead and click to enlarge to see what I mean.

Through the waist and belly, it’s a bit of a blob silhouette. Go ahead and click to enlarge to see what I mean.

Version two, much better!

Version two, much better!

I vowed to redeem myself by making another with a thinner, single jersey knit. I did just that with a 95% cotton, 5% Lycra, Threaded Shreds Knit in Mamey, again, from Hawthorne Threads. I splurged in purchasing 1 7/8 yards at $15.95 per yard. I love this fabric. It washes beautifully, and is super soft and stretchy. It is also thin enough that bulk is not created by the double thickness of the wrap front. This time when contructing the garment, I followed the instructions of making a one inch seam allowance down the sleeves and sides. And after trying on, I even took in the side seams another 1/2 inch to get enough negative ease to form the fabric folds across the belly instead of a sag. I am truly 100% happy with the results of this Take Two. It you would like more construction details of these patterns, just go to the original posts, Jean Skirt and Every Woman Top

There seems to be a lot of prolific sewists in the online sewing community who post new versions of the same pattern frequently. I know it makes sense to perfect a pattern that really fits your lifestyle and can potentially become an integral part of your wardrobe. I just don’t like repetitive sewing. It becomes labor to me rather than a creative experience. What about you? What are your thoughts and practices when it comes to sewing up the same pattern several times?

The Good Life Shirt

I’m a fan of the TV show “What Not To Wear.” I truly have internalized some of Stacy and Clinton’s bits of advice in my quest to put together my daily outfits. One of their favorite pieces of advice is to pull stuff of the rack that you wouldn’t normally grab, and just try it on. You might be surprised. This is how I have approached my pattern selection while sewing myself stylish. Sometimes I choose styles that I like, but think that they might not be “right” for me. Fresh Make #25 is one of those patterns. I tried it, and I like it!DSC_0575The pattern I used is Vogue 8985. I purchased it the only way I buy Vogue patterns – on sale at JoAnn’s for $4.99. I named it The Good Life Shirt because it seems like the type of clothing you would wear while indulging in the leisure arts as such picnicking, wine tasting, strolling through beautiful gardens, dining al fresco at the beach, etc… If you have a reason to wear this tunic, your life is good.DSC_0015The fabric is once again from one of my favorite stores, Mood Fabrics on Brea Avenue in Los Angeles. It is smooth, finely woven lawn cotton. I purchased 3 yards at $14.00 per yard.DSC_0578DSC_0573I also made the pants that were included in the pattern. May I add that this is my first pair of white pants EVER. I have always felt that white would not look good on my bottom half. But I since the tunic is LONG, I went for it. I actually like my first pair of white pants.

The top and the bottom are separate pieces, and the elastic casing is formed with their seam.

The top and the bottom are separate pieces, and the elastic casing is formed with their seam.

The bow is decorative. It does not go through the casing.

The bow is decorative. It does not go through the casing.

The sleeves are long. They are rolled up so the wrong side of the fabric shows and are held with a botton tab.

The sleeves are long. They are rolled up so the wrong side of the fabric shows and are held up with a button tab.

I machine finished both the side slits and the hem.

I machine finished both the side slits and the hem.

Inside peek. I serged all my seams and the facing edges.

Inside peek. I serged all my seams and the facing edges.

LET’S BE HONEST:
1. I do not know how Vogue comes up with their ratings. I think they are rated relative to the other patterns in the book. In terms of the seamstress, I think there is an assumed level of competency. This pattern is labeled “very easy,” but by no means is beginner project in the broader world of sewing projects.

2. I cut a size Small (8-10). My bust definitely is larger than 31 1/2 – 32 1/2, but most of us know that when a big four pattern is “loose-fitting” we know that really means LOOOOSE fitting. And it fit perfectly. I did do one slight adjustment. I added 1/4″ to the side seams because I wanted to have enough ease through my hips and thighs.

3. The pattern had seam pockets. I did not include these as I did not want any bulk added in my hip/thigh region.

4. I am not blogging about the pants. But just an FYI if you want to make them, I narrowed them a couple of inches – tapering from the hips to the ankles. They are just simple elastic waist pants, and I also took out width at the top because I didn’t want more fabric than necessary bunching under the tunic. The fabric is a lycra, cotton twill, so they can stretch over the hips when I pull them on.

REFLECTIONS, REVELATIONS, AND CONFESSIONS:
I have no desire to do sewing “tutorials” on my blog. I do not want to stop and stage photos of my WIP, and then compose instructional text to go along with it. (I actually don’t enjoy writing.) I know all the popular sewing blogs out there include tutorials. So I guess I’ll never be a blogging superstar. But in my my defense, I do include a lot close-up, detail photos of my makes, so it’s not just all “show and tell.” And those photos do get “clicked” on frequently, so perhaps I am helping some sewist in some small way. Don’t get my wrong, I LOVE to teach people sew. I would just rather do it in person. Additionally, if a reader asked me a question about something I’ve posted, I would be thrilled to help them.
DSC_0604
Thanks again for taking the time to read this post. Now I’m going to think of fabulous places I can go to wearing my Good Life shirt. I welcome your comments and questions. Cheers! Lori

My Snuggie Tunic

Do you ever make a random project from your patterns-bought-on-sale stash and you instantly love it so much, you wonder how you survived without it? That’s now I feel about Fresh Make #24. When I put it on I feel engulfed in yummy comfort.DSC_0520DSC_0537DSC_0540The pattern I used is Simplicity 2289. I bought this pattern on sale at JoAnn’s for $1.40, probably about a year ago. It was one of those “let’s stock up” and “who cares if I never make it, it’s so cheap” purchases.2289I bought the fabric at Mood Fabrics at La Brea Avenue in Los Angeles. Prior to cutting the fabric, the saleswoman says to me sort of apologetically, “It’s $20 per yard.” “Oh, I thought is was $18.” “The label says it’s Theory.” She shrugs her shoulders. “Whatever, that’s fine,” I say. So, I purchased 2 3/8 yards which totaled $47.60. More than I usually spend for a random project, but I had a $75 giftcard from my wonderful FIL! I have to admit I was not completely in-love with the fabric on it’s own. But the marriage of the fabric and this pattern is unexpectedly perfect and elevates them both. (I googled “Theory” and it’s a clothing company much hipper than me.)

You can wear the collar turned down if you prefer.

You can wear the collar turned down if you prefer.

DSC_0564The fabric is actually not sweatshirt fleece. It is a quilted knit with a polyester backing; it might even be moisture wicking or some such thing. There a thin, middle layer of a soft, synthetic batting that sheds all over the place on the raw edges. For those of you that might not know, Mood Fabrics sells leftover rolls of fabric from RTW clothing lines, so it’s not possible to get detailed information like exact fiber content on the fabric. DSC_0566 I hemmed the neckline and bottom with a double needle, and finished my seams with a serger after sewing them with a regular stitch on a regular machine. There is not enough stretch in this fabric to warrant any special knit stitches.

LET’S BE HONEST:
1. The pattern comes in size XS – XXL. I cut a size Small (10-12). As you can plainly see, this is BIG tunic and I’m definitely glad I made a Small.

2. Being so loose fitting, there was no need for any adjustments. However, as I often routinely do, I took off an inch off both the sleeve and body length before cutting.

3. I am small busted, and I like the way this garment hangs on me. I did google some other reviews on this pattern and there were some negative comments from larger busted woman about how it made them feel even larger, like a linebacker.

4. Overall this is an easy pattern to sew up provided you are comfortable sewing with knits. I had to do my most “careful” sewing when I was making the patch pockets. I hand basted them in place first before machine stitching them to the body because I thought the knit fabric might pucker and stretch if I just secured the pockets with pins.

REFLECTIONS, REVELATIONS, AND CONFESSIONS:
This blog has forced me to look at myself in a lot of photos and I rarely like what I see. I alway tell my photographer to take lots and lots of pictures so I will find at least three good ones. Even though I am very conscientious about dressing to flatter my body, I always look fatter than I envision myself as being. But, oh well, I’m sort of getting used to that. What I hate even more is seeing the winkles on my face! My 78 year old mother has less wrinkles than I do. Every time I look at my face in a photo, I get why so many women have “work” done.DSC_0560

Thanks again for visiting my blog. I’d love to hear your comments. Or if you have a question about this project, please ask! Cheers, Lori

Japanese Drop-Waist Wrap Skirt

I’m still on a quest to populate my closet with easy wear, weekday skirts. I’ve made progress, but I’m always interested in finding that perfect pattern that contains just the right amount of smooth, flair and gather for a flattering fit on my lower half. Fresh Make #23 is a unique skirt that features a bit of all those things.DSC_0529DSC_0528DSC_0525I’m on a roll with “Simple Modern Sewing” by Shufu To Seikatsu Sha.DSC_0546This skirt is my second project from the book. My previous post, Japanese Wraparound Dress was the first. For this project, I choose Skirt 5C, Drop-Waist Wrap Skirt, because it has a fairly wide waistband yoke which should help flatten the belly and mini pleats all around which should hide larger hips and thighs without adding too much extra width.DSC_0546 Once again, I need to comment that the instructions in this book are very minimal. I would not recommend that a beginning seamstress tackle this project without help from someone who can interpret and fill in the gaps of missing information and illustrations.

These are the instructions in their entirety.

These are the instructions in their entirety.

The fabric I choose is a light to medium weight Italian linen. It is once again from Michael Levine’s in downtown LA. This fabric is 58″ wide, and I bought 2 yards at $18 per yard. I selected this fabric because I was drawn to the colors, and the stripes make it a bit more interesting than a solid. DSC_0521Even though the skirt has the word “wrap” in the title, it is really a tube. I believe the designer uses the term wrap because because you fit the skirt to your body by taking a fold in the yoke and then securing it with the ties.

DSC_0543There is a hole in the right side yoke seam for the ties to go through, and two outside loops as well.

I did a blind machine hem.

I did a blind machine hem.

Here's a front view all spread out.

Here’s a front view all spread out.

Here's a back view all spread out.

Here’s a back view all spread out.

DSC_0535

LET’S BE HONEST:
1. I made a size Large, which is a big as it comes. My fold at the yoke takes in about 4″ of slack. I am wearing it so the yoke sits slightly below the waist. Since it’s not fitted, individuals could play around with where they wear the yoke in relation to their waist and hips. If you are tall with narrow hips, I think you could probably wear it farther below the waist and it would be flattering. For a pear shape like me, it probably looks best worn higher.

2. If you read my post, Japanese Wraparound dress, you know my skepticism about trying patterns in this book was put to rest with the discovery of a well drafted dress design. The same holds true for this second project. With the exception of doing a slight bit of trimming/tweaking on yoke pieces, it all fit together as expected.

3. It took me about 20 minutes to figure out where to attach the second tie on the inside and exactly how to configure and wrap the ties around the yoke when putting on the skirt. I think I will secure my fold with a hidden safety pin because it seems as though the ties will slide up the yoke despite the two outside loops.

4. While I love this linen fabric, if I make this skirt again, I will probably choose a linen/cotton blend that might be more soft and drapey. The book recommended a linen/cotton blend. I don’t want to risk putting my $18 linen in the dryer to get that laundered look that’s in the photo.

5. I interfaced the yoke, even though the instructions did not say to do so.

RELFECTIONS, REVELATIONS, AND CONFESSIONS:
This is my sewing room. I consider myself fortunate that we have a spare room in our house that I can dedicate to sewing. (Well, the computer also is in there.) However, it is a mess. I have never made a priority to make it cute and uncluttered. I would rather spend my time sewing. DSC_0526But just so you know that my whole house doesn’t look like this, here’s a picture of my living room.DSC_0524

Once again, thanks for taking the time to read this post. I welcome your comments or questions on the skirt; or even a comment on the environment you sew in. Cheers, Lori

Japanese Wraparound Dress

This is my one year anniversary of Sewing Myself Stylish. Have I sewn myself stylish yet? I would say not, but I’ve learned many things and had a lot of fun. Bit by bit, I will share my insights of sewing for myself again as well as my observations of the online sewing community and social media from the perspective of an “older” gal. But for now, I would just like to share with you Fresh Make #22, a comfy, versatile dress that I could wear a number places.DSC_0519DSC_0523DSC_0541 I did my occasional veer of the Big Four path for this one and used a pattern from the book “Simple Modern Sewing” by Shufu To Seikatsu Sha ($24.95). I am normally not compelled to buy these kinds of books because I am leery of the actual pattern drafting and fit of an unproven designer or company. BUT, my husband gave me a gift card for Interweave, so I took the opportunity to purchase this book which had not made it’s way to the 75% off section yet.

DSC_0546 I was immediately attracted to the Wraparound Dress with Three-Quarter-Length Sleeves. It looks like a dress I might have worn in college in the 80’s, or wear now, as a teacher dress.

DSC_0552The directions in the book are minimal. I wouldn’t recommend sewing patterns from this book unless you had basic knowledge of dress construction and/or weren’t planning to rely solely on what was provided in the book.

DSC_0547

The fabric I chose is kind of a textured chambray cotton from Michael Levine’s in DTLA. It’s about 58″ wide, and I purchased 3 yards at $15.00 per yard. It appeared to be a high quality cotton and was lovely to sew with. I like this fabric because it’s a basic with a bit of a twist.

DSC_0534DSC_0536DSC_0542DSC_0543

LET’S BE HONEST:
1. Obviously for this pattern, the most crucial measurement for determining your size is the bust. I am spot on for the Medium with a bust measurement of 35 1/2″. I cut the Medium and the dress fit me very well. So, here’s a word of warning to larger busted gals- Large is the biggest size with a bust measurement of 37″.

2. On me, the point of the dart is about an 1″ too high. If I make this again, I will reposition it. Fortunately the style is such that it’s not that noticeable. Also the texture and pattern in the fabric help mask this as well.

3. I am pleased with the accuracy of this pattern. It sewed up just like it was portrayed in the photo. I realize this is a classic Japanese pattern, and obviously the author of this book had access to a well drafted one. I am planning to try other patterns in the book. I already have a fabulous linen fabric for a skirt.

4. When tracing off this pattern from the master sheet, you need to be up for figuring out which lines go to which pieces as several pieces are overlaid on each other.DSC_0554

I love this dress, my first project of the new year. It couldn’t be more comfortable. I intend to wear it with different tank tops or t-shirts underneath for a pop of color. Thanks for reading this post. I welcome your comments. Cheers! Lori

DSC_0531

The Every Woman Top

I waited for months for the weather to change, and then when it finally did I realized I had quite a shortage of professional, casual clothes for cooler temperatures. You know the category – not jeans and hoodies, and also not dress slacks and blazers. These are the clothes I need to wear to my teaching job every weekday morning. So I choose to make this long sleeve, knit, wrap top for Fresh Make #21, not to wow you with my sewing skills (which I confess is sometimes how choose my makes), but because it is a garment that I truly need.DSC_0496DSC_0497

The neckband lays beautifully in the back. The gathers formed by the side shirring are more successful in the back because of the single layer of fabric.

The neckband lays beautifully in the back. The gathers formed by the side shirring are more successful in the back because of the single layer of fabric.

The pattern I choose is Vogue 8151. I bought it on sale at JoAnn’s for $4.99. I’ve been trying to make a commitment to making my own basics. I was attracted to this pattern because the wrap front offers a nice variation on a basic knit top. I was also curious about “Today’s Fit” by Sandra Betzina. The sizing on “Today’s Fit” patterns have a bust/waist/hip ratio more in line with the measurements of real women. I noticed that it was copywrited in 2005, so this pattern has some staying power in the Vogue book. I named it The Every Woman Top because it was designed for all of us. DSC_0510I originally purchased this fabric with the intention of making an easy wearing, short sleeved dress. But the weather turned cooler, and another warm weather dress was not what I needed at the moment. I bought this fabric because I was anxious to try an Amy Butler knit as I know hers is a name I could trust for quality fabrics. There are a lot of bad knits out there. This cotton interlock is Cross Roads in Citrus from Amy Butler’s Glow collection. The weight is substantial and it feels as soft as a favorite pair of PJs. I purchased it from my favorite online fabric store, Hawthorne Threads. I purchase 2 yards at $14.50 per yard, plus tax and shipping. Not cheap but well worth it, I think.
I love the neckline on this top. I usually do not look good in a wrap neckline because of my small bust, but this it cut just right for me.

I love the neckline on this top. I usually do not look good in a wrap neckline because of my small bust, but this it cut just right for me.

Inside peek!

Inside peek!

DSC_0518I used clear elastic for the shirring on the sides. I first used this elastic on my Moneta Dress.

LET’S BE HONEST:
1. I cut a size C. The sizes range from A to J. The measurements on size C are: bust – 36″, waist – 28 1/2″, hips – 38 1/2.” I still have a pear shape even with these adjusted ratios. The pattern offered simple adjustment instructions for different body types. I followed the small bust adjustment and folded out 1/2″ through the middle of the dart to reduce dart width.

2. I followed the instructions by looking at the illustrations (which is what I usually do, unless the picture is confusing, then I read.) When I did my first try on, it felt a little too roomy, and I honestly felt I cut the right size for me. So I did a gradual take in on the sides from the armhole through the bust and waist and gradually came back out near the hip. Just today, when I glanced over the pattern, before writing this post, I noticed the instructions says to sew a 1″ seam down the sleeve and sides, then adjust if necessary depending on the stretch of your knit. Ah, that’s why it was big, I had stitched a standard 5/8″ seam! Oh well, next time.

3. You can’t really tell exactly how it’s going to look and fit until the elastic is sewed into the side seams to create the shirring. After I had done that, I wasn’t compelled to remove it to adjust the side seams. (Maybe I shouldn’t have been so lazy.)

3. While I love this fabric, I don’t think it’s a perfect choice for this pattern. Aside from the fact that the top should just fit me more snugly, I think the shirring at the bottom would form nicer folds with a thinner fabric such as a single jersey knit.

4. I shortened the sleeve by 1″ before cutting.

Despite not achieving the fit I envisioned based on the photo on the front of the envelope, I still like this top and I have something new to grab in my closet. I am actually very anxious to make this pattern again with a single knit and a more snug fit. I think it has the potential to be very flattering. Thanks for reading this post. I welcome your comments! Cheers, Lori

The Global Warming Jacket

Can a gal have too many cardigans? Maybe, maybe not. But I do get tired of grabbing one day after day, especially when that’s all we to need to keep ourselves warm for most of our fall and winter days in here in inland SoCal. As an alternative to a cardie, I made a lightweight, unlined jacket for Fresh Make #20.DSC_0598DSC_0576DSC_0590 The pattern I used is Butterick 5617. I bought it several months ago at JoAnn’s on sale for $1.40. I was drawn to this pattern because of it’s loose fit and hip length, a style that is usually flattering on me. I named it the Global Warming Jacket because, like I already mentioned, cold days here in Southern California seem to be getting fewer and farther between. The El Ninos they kept predicting never come. If I spend my time making a jacket, I want to actually get lots of wear out of it.

I made view C/D.

I made view C/D so I can wear the sleeves long or rolled up.

I purchased the fabric at The Fabric Store on La Brea Avenue in Los Angeles. It is a medium weight twill linen, and unbeknownst to me when I bought it, it’s stretchy – quite stretchy, in fact. I have never encountered linen with Lycra. The pattern required 1 3/4 yards. I thought I was paying $12 per yard, but when the sales clerk rang me up, the total including tax came to $13.73. It turns out the fabric was 40% off that day! This was one inexpensive linen jacket. At my own risk, I pre-washed the fabric in the washing machine in cold water and hung dry.

I love to dye fabrics as much as I love to sew. I couldn't resist putting some hand-dyed covered buttons on this jacket.

I love to dye fabrics as much as I love to sew. I couldn’t resist putting some hand-dyed covered buttons on this jacket.

DSC_0583

The back has four separate pieces which create a nice fit and style.

DSC_0580

The collar consists of an under-collar piece and a separate band.

The collar consists of an under-collar piece and a separate band.

DSC_0594
LET’S BE HONEST:
1. I cut out size 12 with no alterations. I was more concerned that it fit well on top than it being a little snug through the hips. I imagine it being worn unbuttoned most of the time anyway. (If you’ve read my previous posts, you know that I’m a 16/18 on my bottom half.)

2. This stretchy Lycra is interesting to work with. It can stretch out while sewing, but just as easily steams back into shape. I had to hand baste close to where I was going to machine top stitch to prevent the top layer of fabric from pulling and creating puckers. Also, the fabric snagged fairly easily.

3. The illustrations of the collar on views B,C and D are inaccurate. The corners are rounded, and it is attached to a neckband. If you look closely, the line illustration at the beginning of the instructions shows this more accurately. I actually love the rounded collar, so I’m not complaining.

4. Twice I sewed the top of the pockets on the wrong place on the front panels. I didn’t match the correct snips together. I was worried there would be permanent marks on the fabric where I took the stitches out. Luckily where weren’t.

I love this jacket. The stretch in the linen makes it as comfortable as any cardie. There will be lots of days this fall, winter and spring that I will be wearing it!

Thanks for reading this post. As always, I welcome your comments. Any plans for making some outerwear this fall or winter? Cheers, Lori

The Teacher Dress

I found myself unexpectedly with a new “day” job at the end of the summer. I’m now teaching middle school math at a small private school. Even though it’s only for three hours each morning, I still want to look the part. So I made myself a simple, day dress appropriate for teaching for Fresh Make #19.DSC_0584DSC_0587DSC_0605 The pattern I choose is Vogue 8764. I already had the fabric and when I spotted this pattern, I knew it was the one. I waited a few weeks for the $4.99 Vogue pattern sale at JoAnn’s to purchase it. I have named it The Teacher Dress because it is an updated version of those full gathered dresses and jumpers of the early 90’s that my peers and I referred to as “teacher dresses.”

I made view A.

I made view A.

The fabric which I purchased online at Hawthorne Threads is a woven quilting weight cotton from the “Serafina” collection by Alice Kennedy. I got one yard of the red and two yards of the grey, both a $9.95 per yard. I had purchased the fabric a few months ago, in the middle of summer, with the intention of making another Sunshine Jumper. But summer escaped me without sewing it up, and I decided a short sleeved dress would serve me better in the fall.

I did a 1 1/4" hand hem.

I did a 1 1/4″ hand hem.

DSC_0581

I just put a regular ol’ zipper in.

The pattern actually gives instructions for a fully lined dress. I did not want the added weight of a lining with my cotton dress. So I just put a facing on the neckline, and for this, I had to make my own front and back facing pattern pieces.DSC_0587DSC_0579
DSC_0618

LET’S BE HONEST:
1. This pattern is labeled as “very easy” and for a Vogue pattern, it probably is. There really nothing beyond basic techniques such as darts, a zipper, set-in sleeves, and, in my case, a facing. I would not, however, recommend this pattern for a beginning seamstress who is working independently.

2. I cut a size 14 on the top and graded to a 16 on the bottom. In all honesty, the bodice is still a bit big, and I could still use a tad room through belly and hips. I guess I just have to face the fact that with a semi-fitted dress, I am at least two sizes different on top and bottom. I actually do know this, but I think I’m trying to keep the original proportions of the design as illustrated. But, hey, if it’s not right for your body, don’t buy the pattern, or be happy with a change in silhouette. Right?

3. Unlike the instructions, I did a hand hem on both the bottom and sleeve. I added about 1″ to the bottom before cutting the pattern pieces to make sure I would have enough length to hit me mid-knee with a 1 1/4″ hem.

Overall, I am very happy with my new teacher dress. I wore it to school yesterday, got a compliment from one of my fashion forward 5th graders! I just love it when young people compliment someone who is even older than their mom!

Thanks for reading this post. I your welcome your comment and questions. Cheers! Lori

Happy Folk Skirt

I’ve only made two skirts since starting this blog, and my go-to Jean Skirt now has a rip in it from being caught on a metal edge and is out of commission. I thought it was time to sift through my ever growing pattern stash and find a fun skirt to make for Fresh Make #17.DSC_0485DSC_0498DSC_0501 The pattern I chose is Simplicity 1888. I bought it several months ago during a pattern sale at JoAnn’s, most likely for $1.00 but possibly $1.40. (JoAnn’s 5 for $5.00 recently have become 5 for $7.00. Hey, you can still count me in!) I was drawn to this pattern because it looked like a good balance between fitted and flared, and the gathers were where I like them – at the bottom, not the waist! I named it the Happy Folk Skirt because, depending on the fabric, this skirt can either have a hippy folk feeling or ethnic folk feeling.

I made view C.

I made view C.

I purchased the fabric at Mood on La Brea in Los Angeles. I was excited to stop by there on my way home from seeing my sometimes model and always daughter off at LAX for her second year of college. I hadn’t been to Mood in six months, and as it usual it was overwhelming. I forced myself to focus in the task at hand. This is a cotton woven fabric with lycra. It’s actually stretchy! I bought the indicated amount of 3 1/4 yards at $12.00. I managed, however, to have quite a bit leftover and probably could have gotten away with 2 3/4 yards.

DSC_0528

The skirt has a wide, curved waistband that sits best a few inches below the natural waistline.

I top-stitched the seams and waistband with quilting weight thread.

I top-stitched the seams and waistband with quilting weight thread.

There is a 7" ruffle at the bottom.

There is a 7″ ruffle at the bottom.

Inside peek. I serged all the seam edges and the waistband edge.

Inside peek. I serged all the seam edges and the waistband edge.

DSC_0516

LET’S BE HONEST:

1. I had a hard time on sizing with this one. My waist and hip measurements put me between a 16 and 18. I usually measure the actual pattern pieces and adjust accordingly. With this pattern, there was no information about where the waistband/yoke should sit – at the waist, slightly below the waist? According to the photos on the pattern envelope, it looked like the skirt sat a few inches below the natural waist. I just decided to cut a straight 18 and let the skirt fall where it may. The skirt panels turned out too big through the waist and hips, so I trimmed off 3/4″ from the side side seams (3″ total) and 1/4″ (1″ total) from the sides of the waistband. (Totally embarrassing update: literally 5 minutes ago, I discovered on the back of the pattern envelope, in the yardage chart “Skirt C – worn 1″ below the waist.” Now wouldn’t that have saved a lot of aggravation if I had read that!)

2. I love the styling on this pattern. The panels create the perfect amount of flair for a flattering fit and the ruffle is a fun touch. I love the fabric, too. I do feel however, that the fabric is not optimal for this pattern. This fabric had the folksy feel I wanted for this pattern so I ended up overlooking the fact that it was a bit heavy and stiff for this skirt. I think it would be perfect for a pair of shorts or capris.

3. I should have cut 2″ off the bottom before attaching the ruffle. I already shorten the skirt panel pattern pieces 2″ before cutting the fabric, but it still turned out a bit long. I think am getting lazy or impatient, because I tried it on several times before adding the ruffle but just didn’t carefully evaluate how much length a 7″ ruffle would add. Oh well. It looks fine with my 3″+ platform sandals that I love. 

4. I made the t-shirt that I’m wearing also. It is Butterick 5215. More on this pattern another day. This wide ribbed knit fabric is also from Mood. I love the lilac color with the red and white print. I think it actually acts as a neutral against the bold red.

Overall, I do like my Happy Folk Skirt and I know I’ll be wearing it plenty this fall. Have you got any fun skirts in your sewing queue? Cheers, Lori