The Mid-Summer Dress

I always sew for the season that we are actually in. I like the instant gratification of wearing my new make the next day. Here in inland So Cal, the weather will be warm until October, so I am still in the market for easy wearing summer dresses. I am sharing with you my new Fresh Make that will help get me through the dog days of summer.DSC_0187
DSC_0179

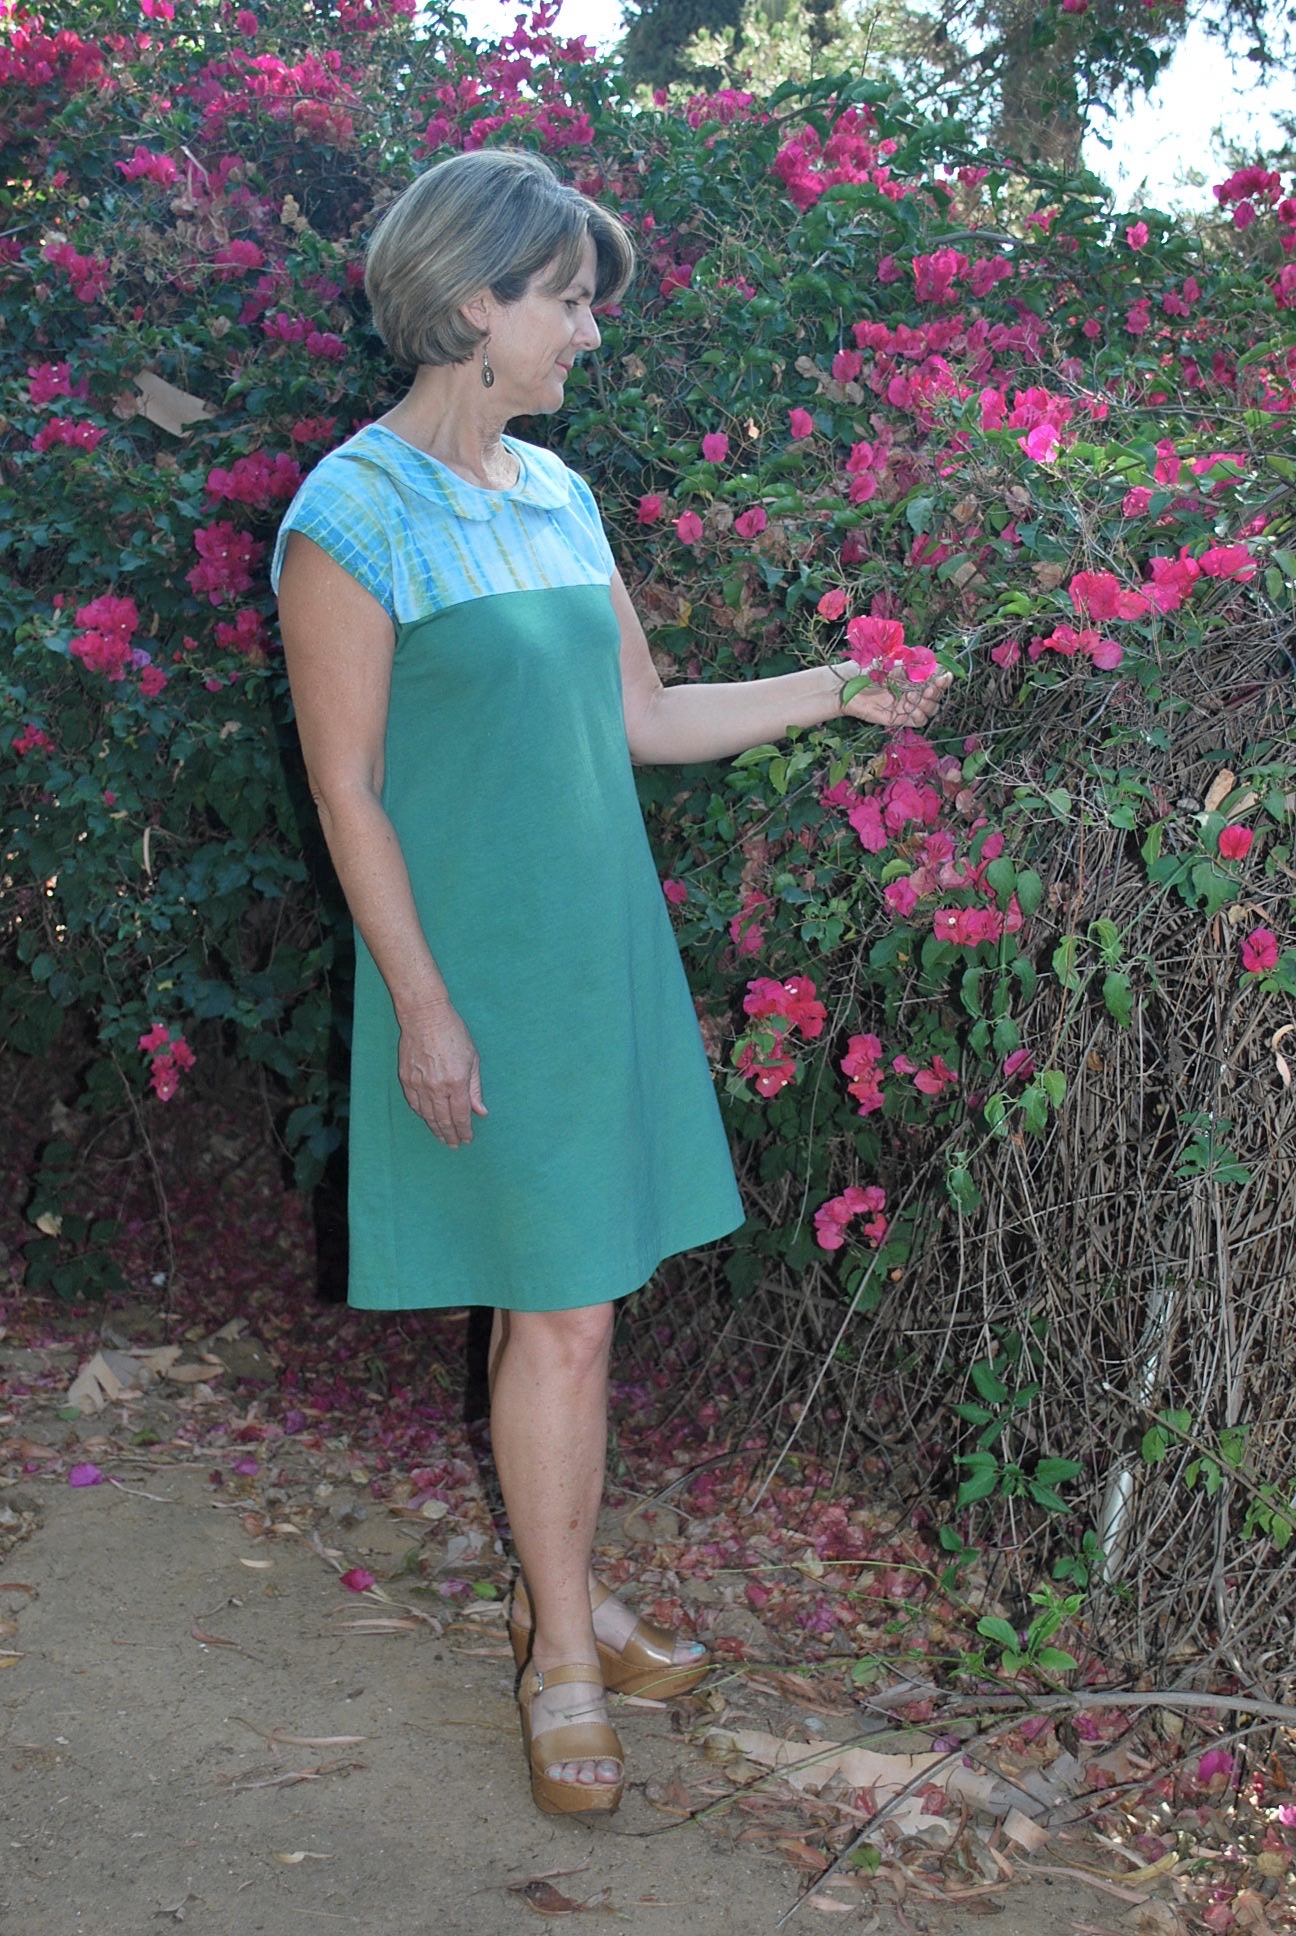
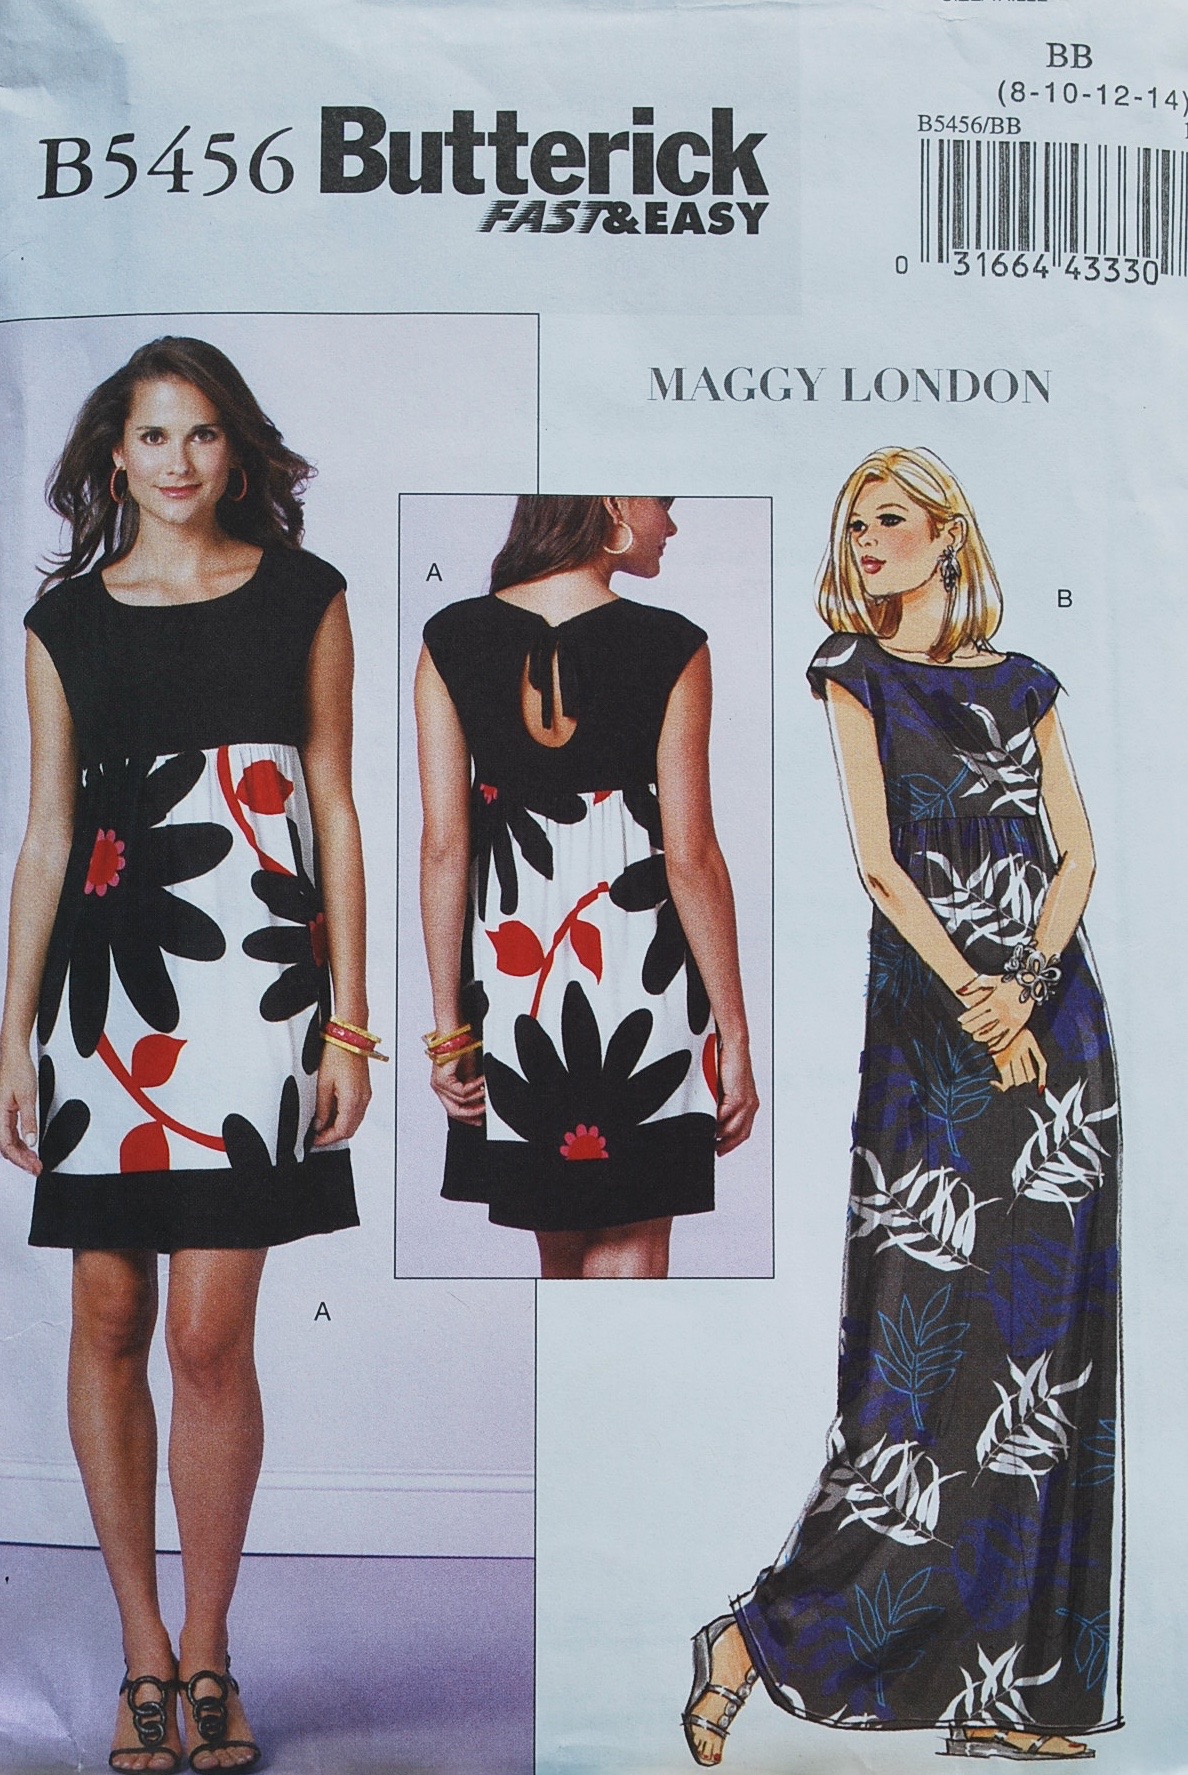
The pattern I used is Butterick 5456. I purchased this pattern at least a year ago at JoAnn’s during a pattern sale which means I paid less than $2 for it. The year on the envelope is 2010. I hope it’s still in print because I think it is a timeless, wearable pattern.

DSC_0503

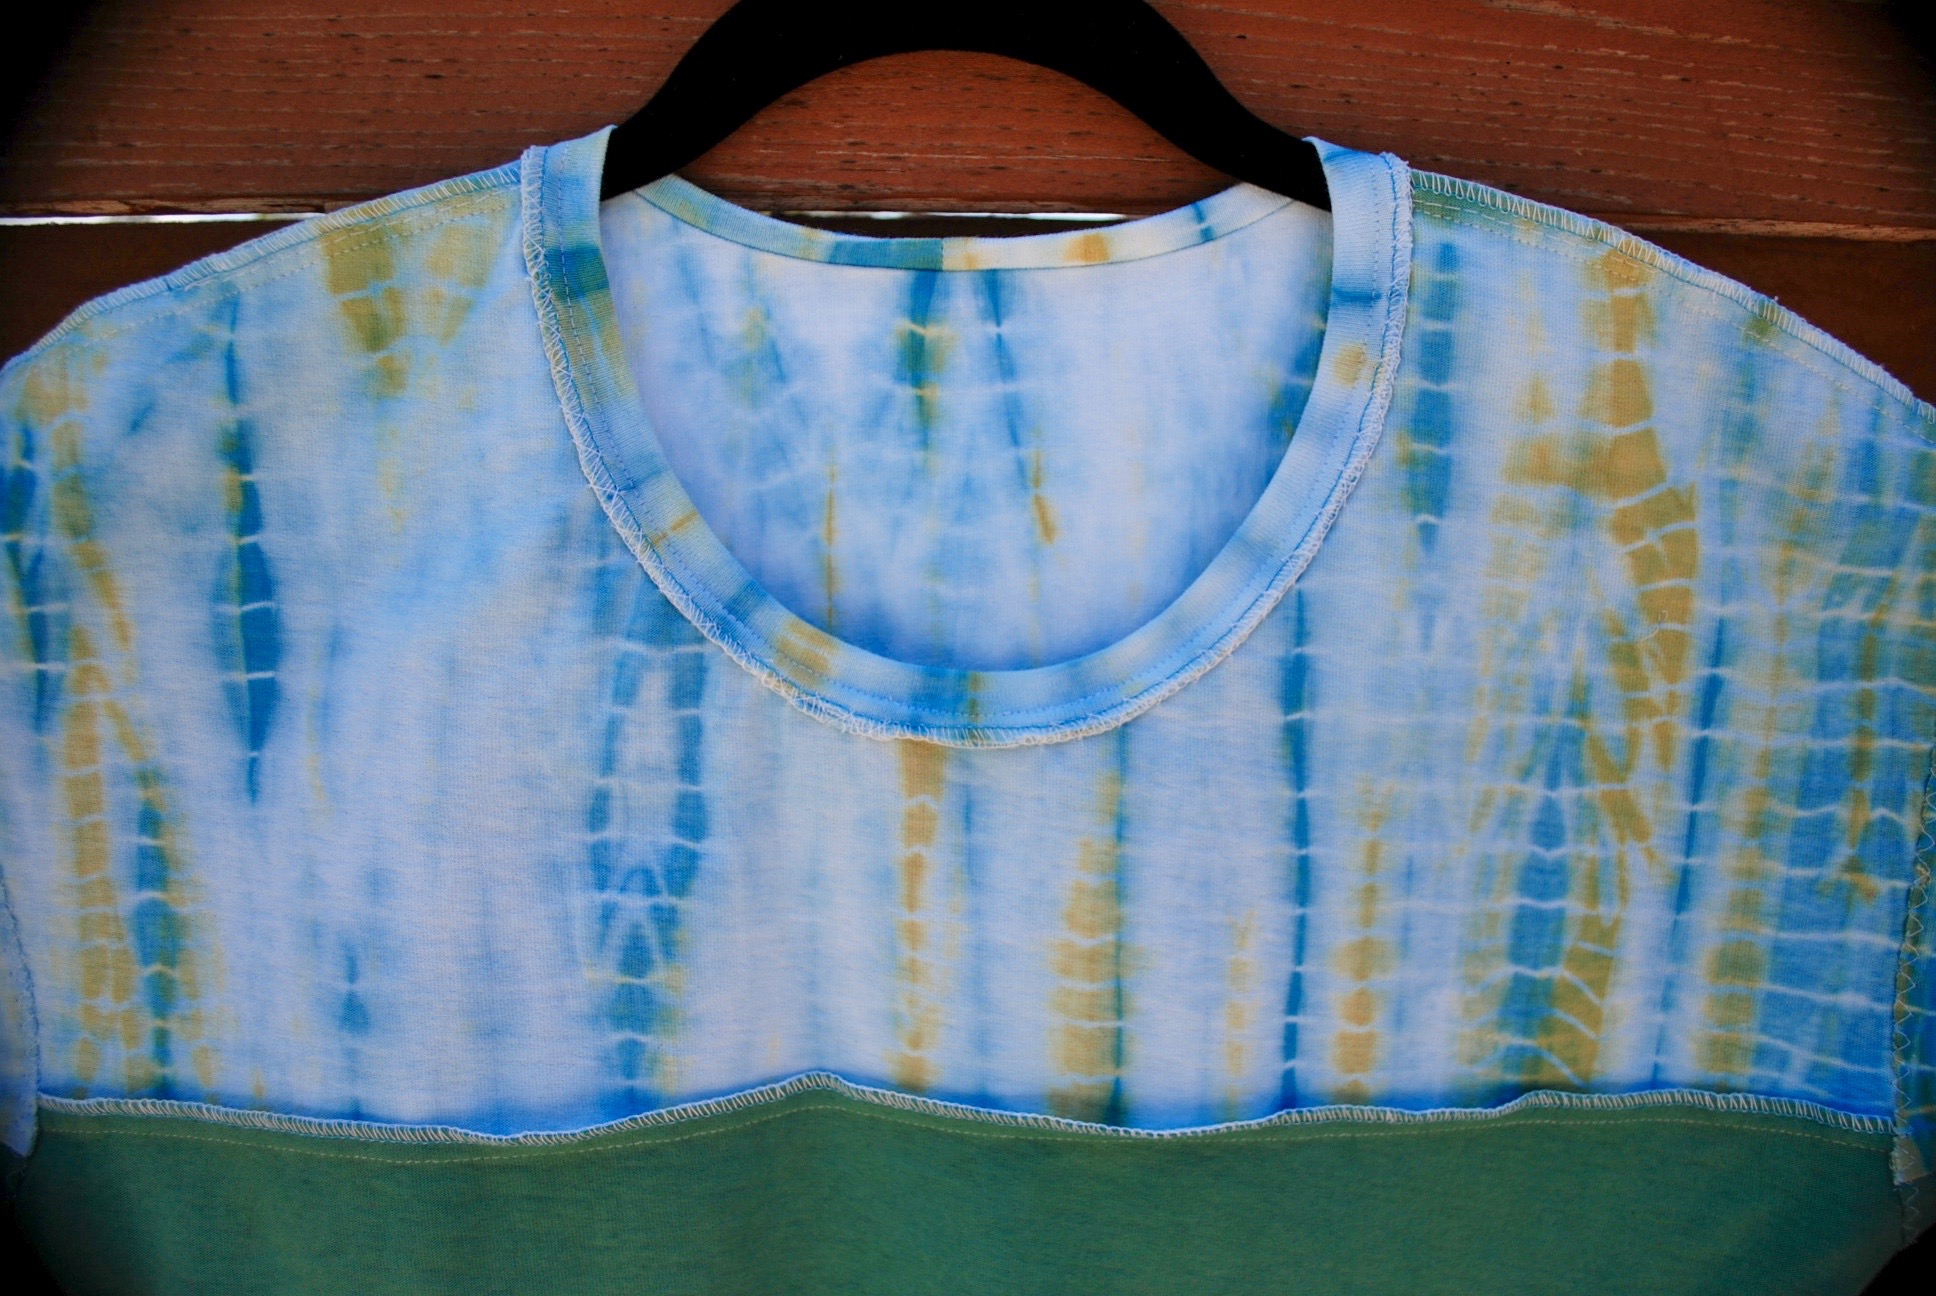
The fabric I used was purchased online at Fabricworm originally for a Marianne Dress for Round Two of the Super Online Sewing Match. (I was eliminated after that round, but it but it was great fun while it lasted!) I ended up using some other fabric for the contest, so I still had this fabric on hand screaming at me to sew it up. The blue and white print is an organic cotton interlock knit by Charley Harper for Birch Fabrics. It was $13 per yard and 45″ wide. Honesty time: I don’t think I will purchase from this collection again. While the weight of the interlock was substantial and as expected, the blue ink stiffens the fabric and does not soften with a machine wash and dry. Also the ink application is a slightly uneven and blotchy in places. Fortunately, the green Birch Organic, Mod Basic Solid, is a completely different story. It is super soft and dreamy, and the touch of Lycra is genius for an interlock, a weave that can stretch out easily. It was $12.80 per yard and 60″ wide. This collection will definitely become a “go to” solid for me.

DSC_0487DSC_0489

The bodice is fully lined. It would have been optimal to use a thinner knit for the lining instead of the green interlock, but there was enough and I wanted to use what I had on hand. I used the method for a clean, machine armhole finish from the Moneta Dress by Colette.

DSC_0488

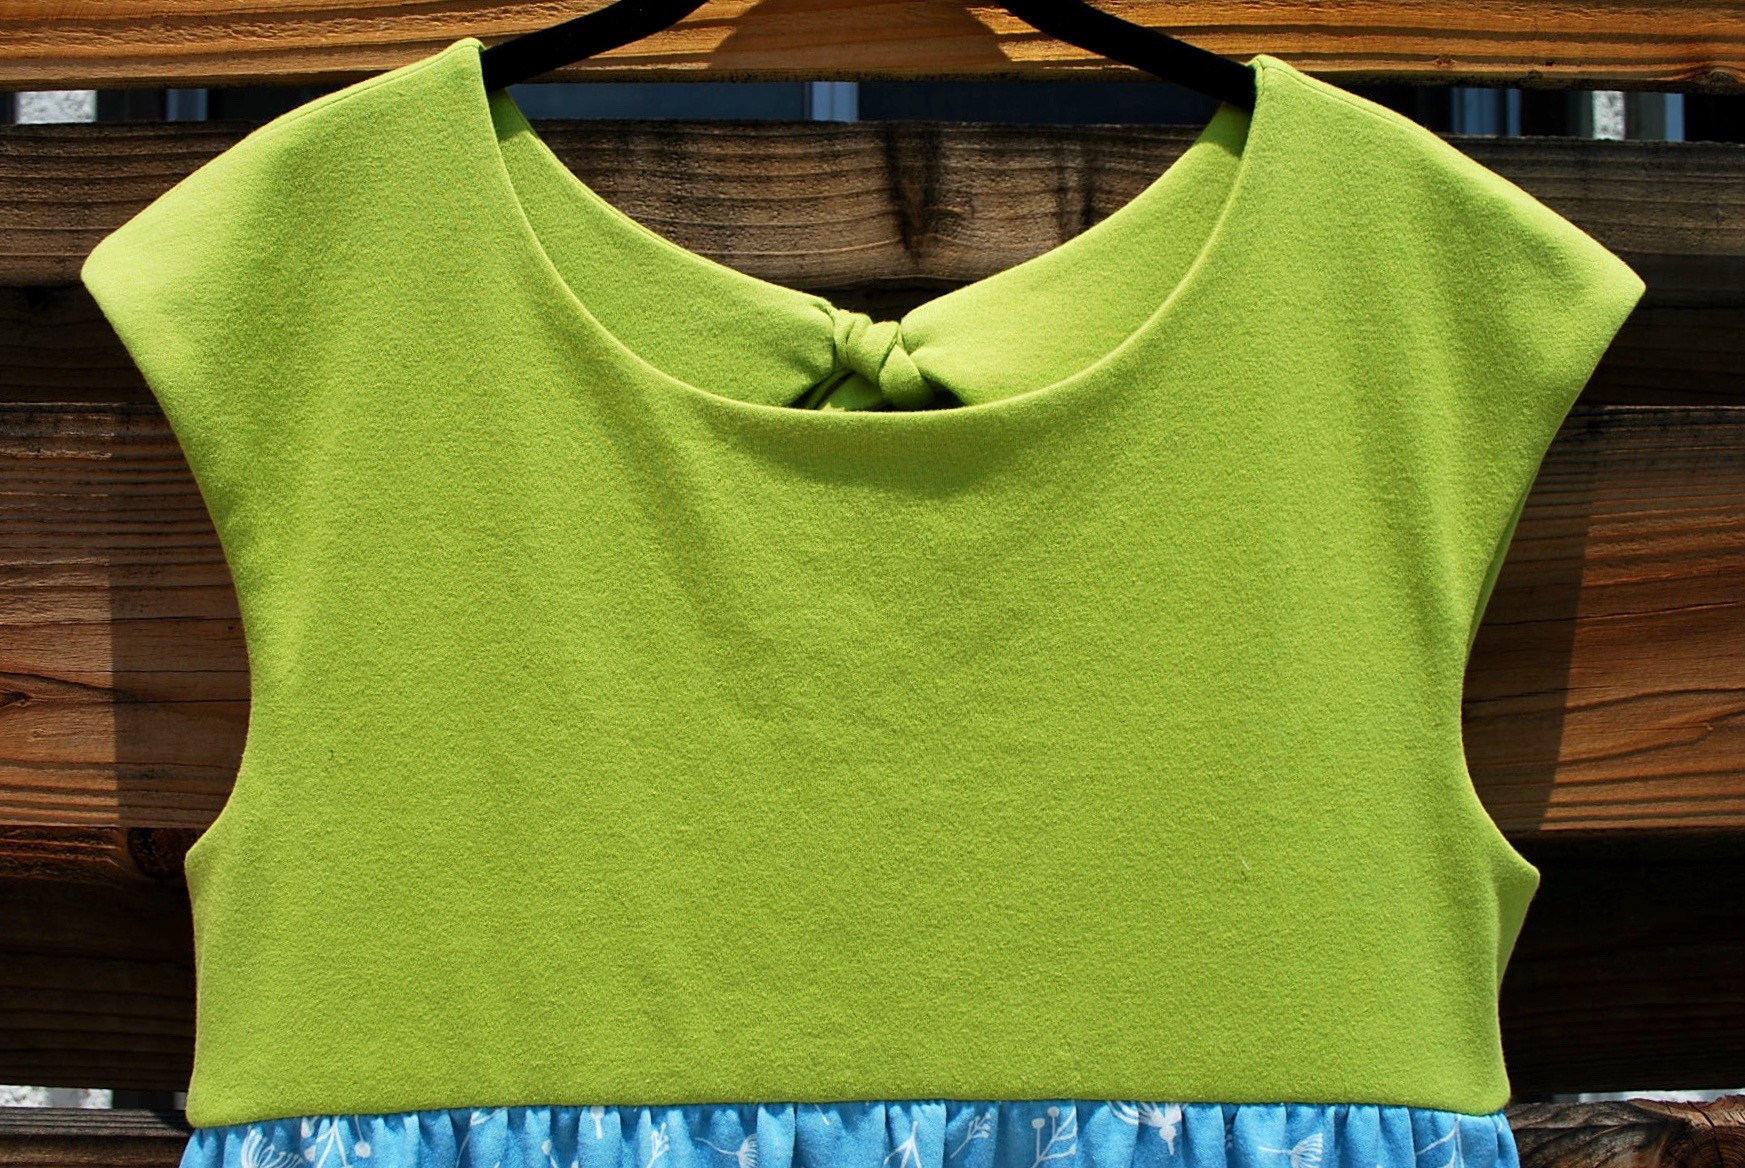
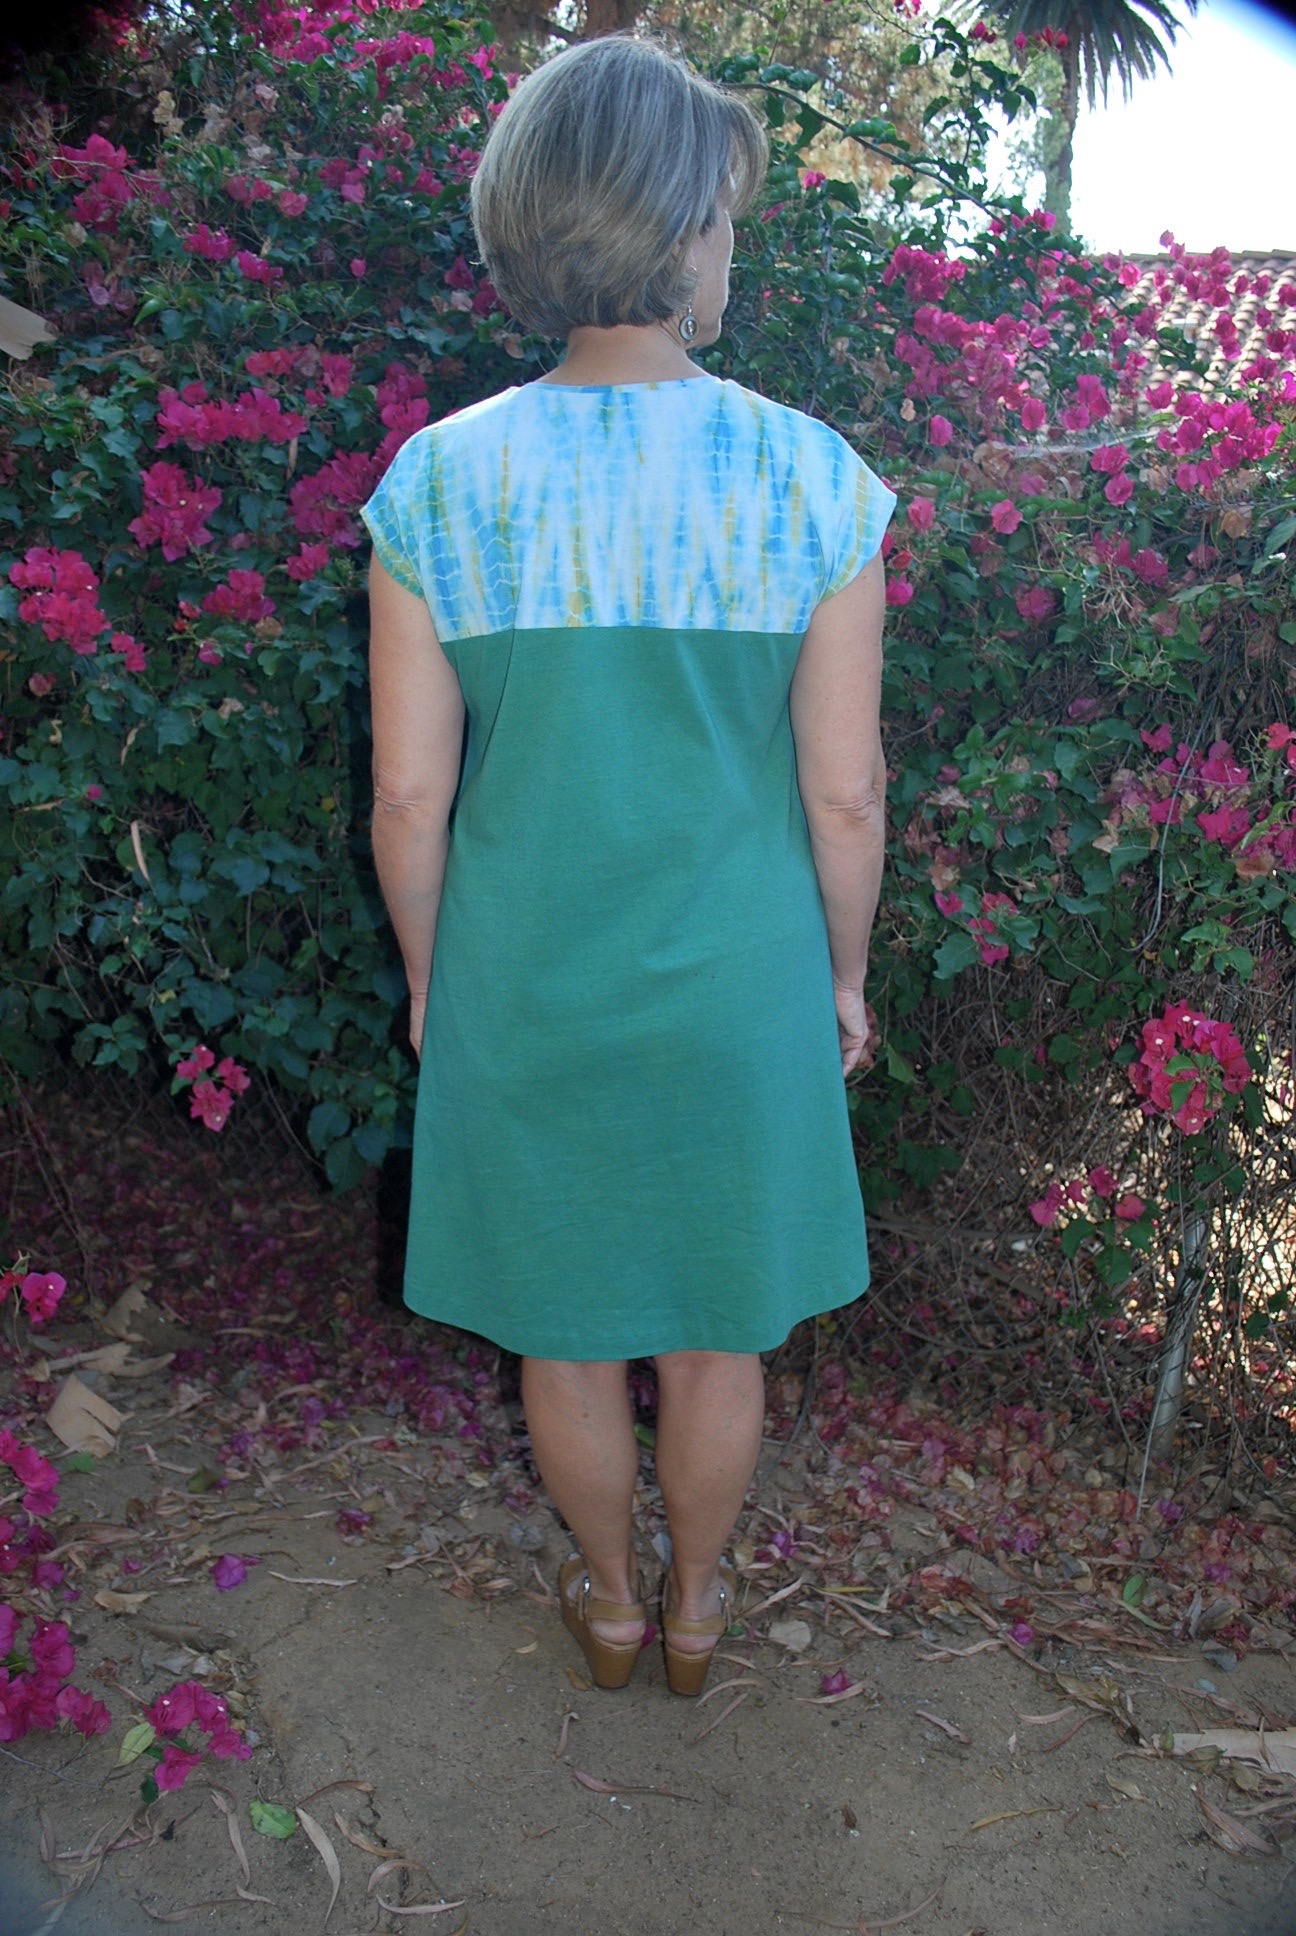
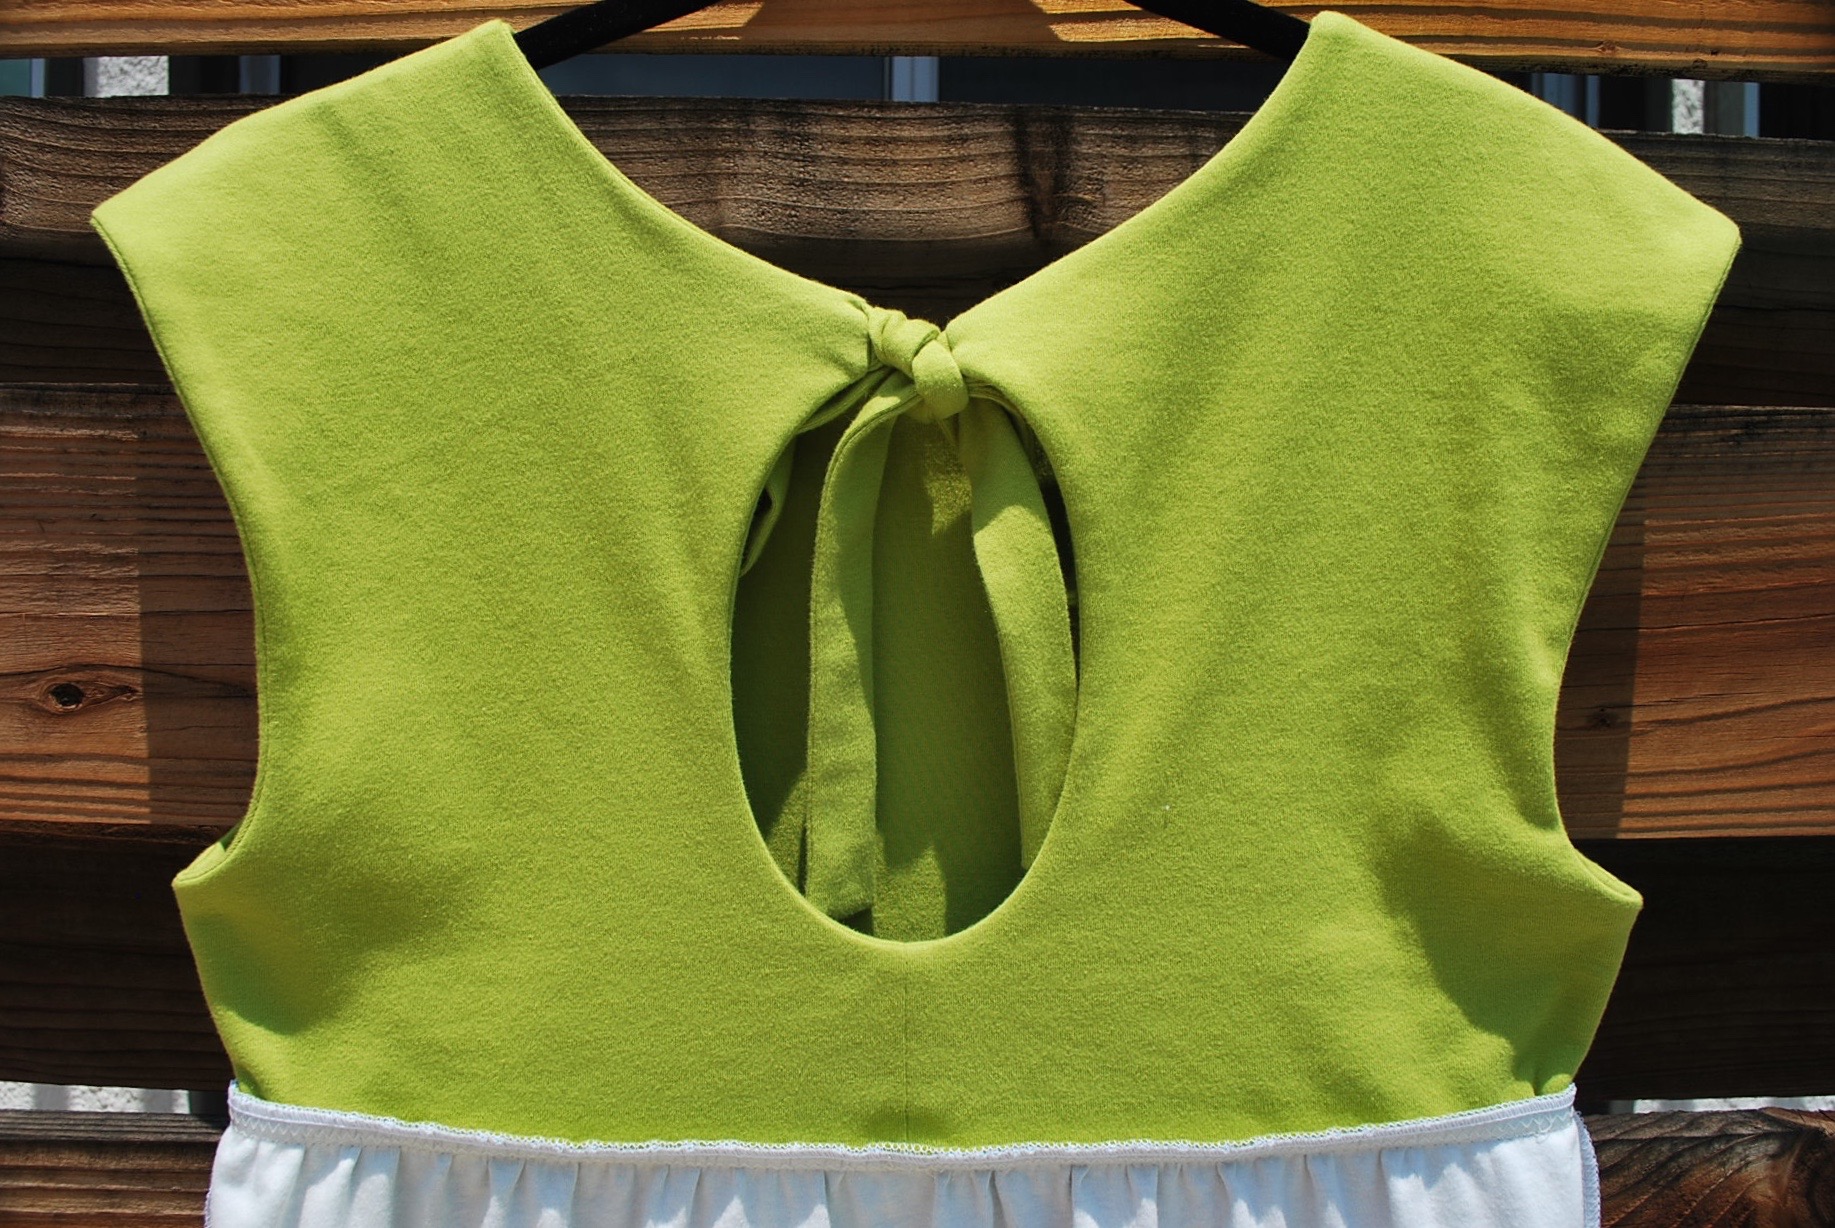
I think the keyhole back and tie add an interesting detail to a simple dress. And I really like that the opening is high enough that you can still wear a regular bra.

DSC_0491

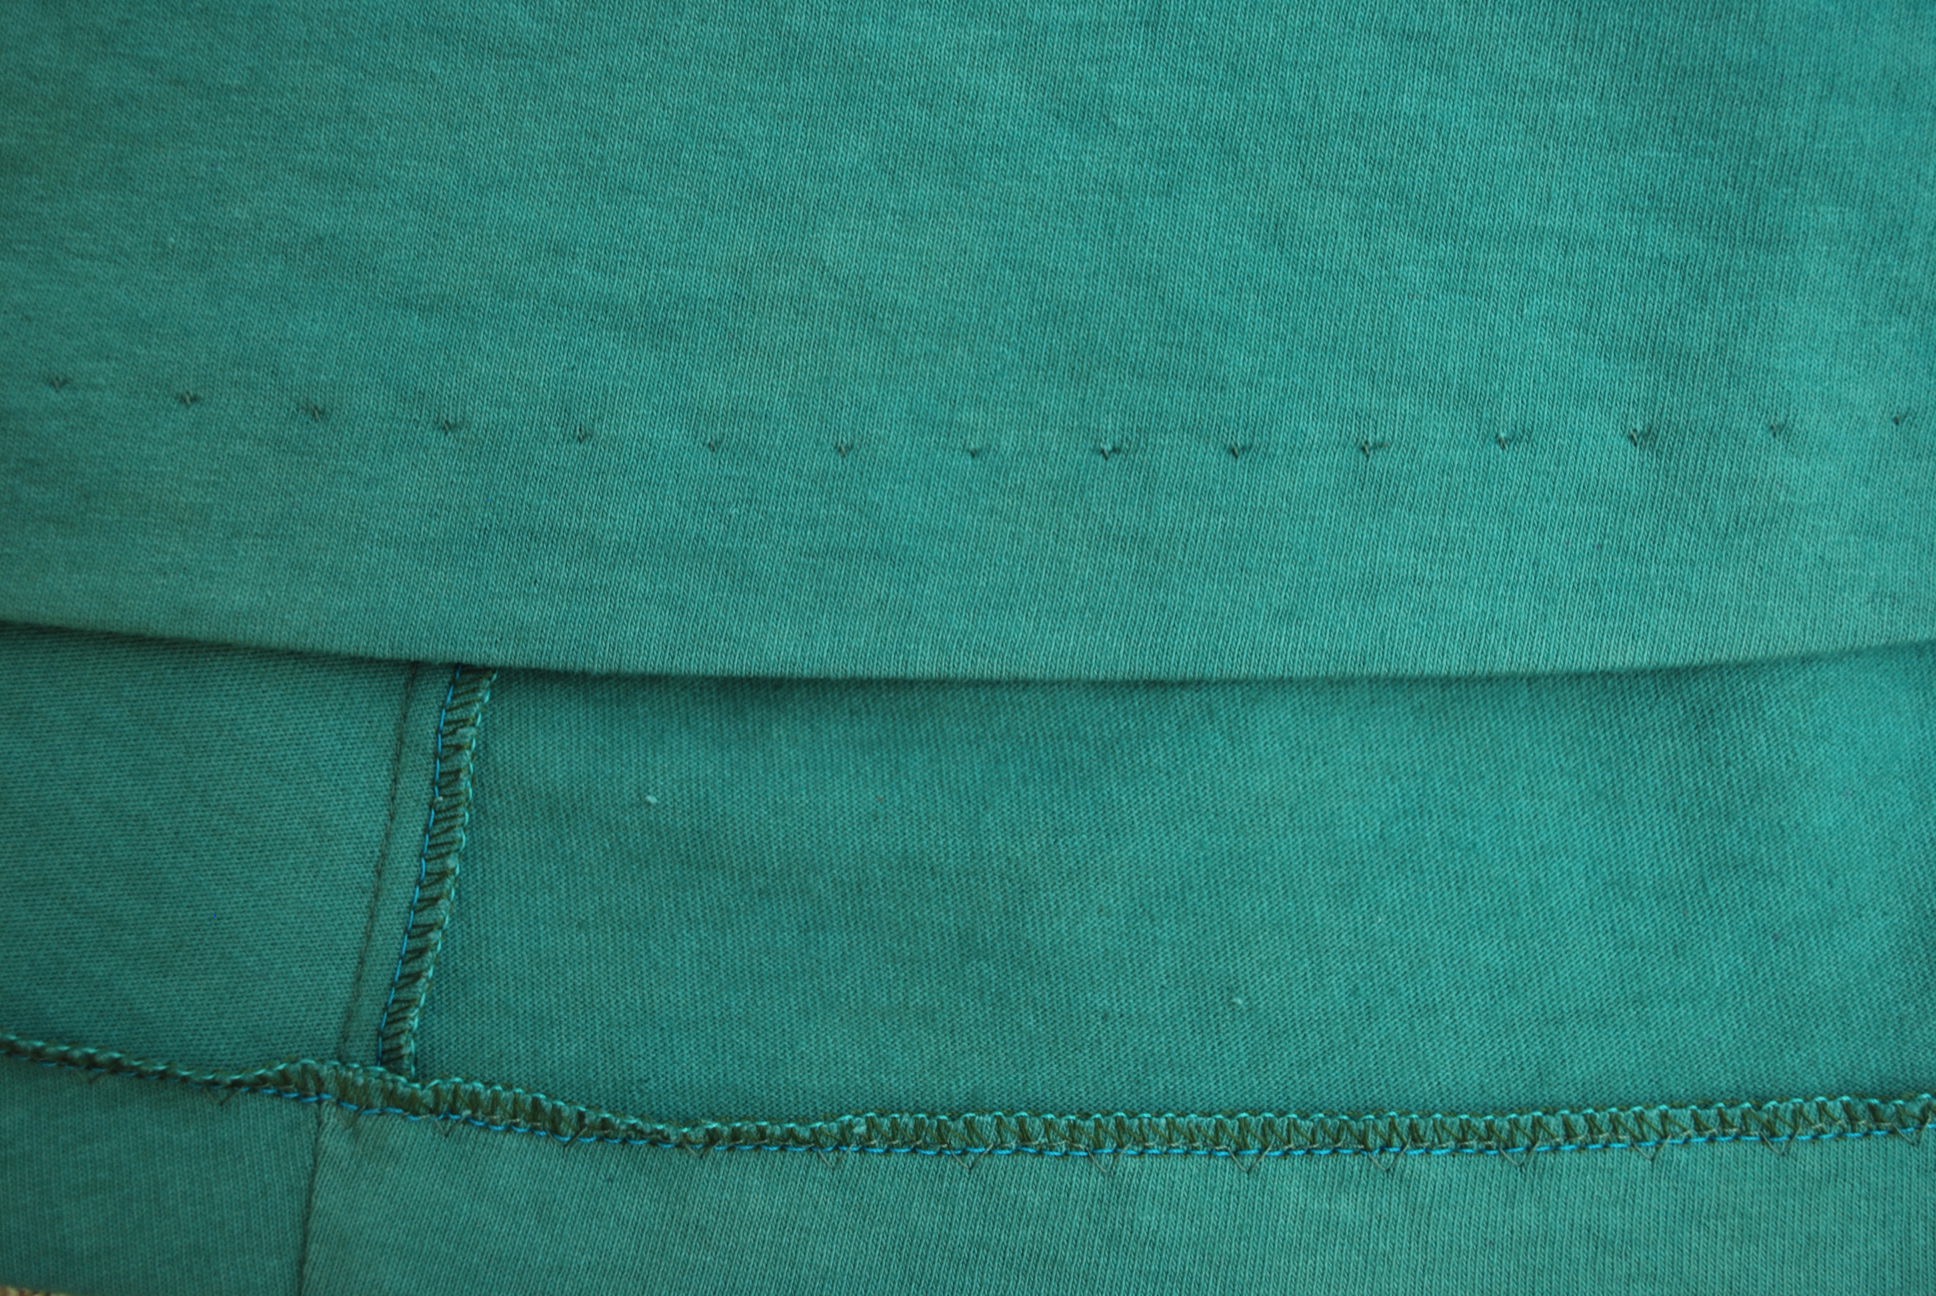
I shirred the skirt with clear elastic, also a method from the Moneta Dress by Colette.

DSC_0493

After attaching the bottom band, I decided I didn’t like the way it hung as a single layer and futhermore did not want machine stitching at the bottom since there was no machine top stitching anywhere else. I went ahead and folded the band and “stitched-in-the-ditch.”

DSC_0496

LETS BE HONEST:

1. The pattern is labeled “Fast & Easy.” That it is. However, there is no differentiated instruction for knits which could cause frustration for someone who has not sewn on knits before. I basically glanced at the illustrations and used my own knit techniques as well as the two from the Moneta Dress mentioned above.

2. I cut out exactly between size 12 and 14, taking into consideration that knit ease should be less. I still misjudged and the bodice turned out a little big. The armholes are particularly large. Don’t get me wrong, I am still going to wear it! If I were to make it again, however, I would probably cut a size 10.

3. I like the double thickness of the bottom band, but proportionally I think the original width of the band looks better. So if I were to make the dress again I would cut a band of double width, fold and stitch-in-the-ditch again.

I really do like this dress. It was simple, no hassle sewing. And it is as comfortable as can be.

What about you? Do you sew a season ahead or squeeze in a few end-of-the-season makes?
DSC_0184

The Marianne, tie-dye and a Peter Pan collar

SOSMII2

Hey, it’s Round Two of the Super Online Sewing Match II! Again, I want to thank Sew Mama Sew for this opportunity. My enthusiasism went up a few more notches when I learned this challenge would be the Marianne Dress by Christine Haynes. I actually had purchased the printed version of this pattern a few months ago. So, yay, no PDF tiling for me! But that’s where any possible advantage stoppped, as I had not sewn it up or even purchased any fabric for it. It was just sitting in my pattern queue.

marianne.2

When I first laid eyes on the Marianne Dress, I was drawn to View B, the one with the cuffed, 3/4 length sleeves. The youthful, retro inspired style of View A was not for me, a woman of 50+ years.

I know….this photo doesn’t match what I just said! Read on and I’ll share with you how my Marianne Dress came to be.DSC_0167

HERE’S MY STORY OF ROUND TWO

Unlike the first challenge, I had the gift of time (a true summer vacation week), but no apparent inspiration. The reason this pattern was still sitting in the stack was the fact that I was having a hard time imagining fabric combinations that would create a fun yet age appropriate garment for me. But NOW I was forced to make some decisions. The same day that we received the challenge, I went ahead and took advantage of the fabric offer from Fabricworm, and placed an order after much deliberating. But I couldn’t stop there. I also placed an order for some white cotton knit jersey at Dharma Trading Co. I thought perhaps I would like to dye some fabric for this project.

Additionally, with the time I had on this first day, I ran to JoAnn’s to get some fabric to make a muslin. Now I know I bragged in Round One that I never make muslins. But I did have concerns about a flattering fit on this pattern, so I figured why not sew up a trial; I had the time. I cut a size 10, and added a little flair to make sure that circumference throughout the body of the dress comfortably cleared my pear shaped bulges. I also added about 6 inches of length beyond the size 10. Just above my knee cap is as far as I go these days.

By Sunday, I was done with my muslin. I was very pleased with it. I got a “bonus” dress out of the deal. Now I just had to wait for both my fabric orders to arrive. I was expecting the Fabricworm shipment on Wednesday, and possibly the Dharma Trading Co. on that day also. With this “extra” time, I started to feel antsy, and began to develop a case of FOMO (fear of missing out). Maybe I should go into Los Angeles tomorrow (Tuesday), maybe the perfect fabric for my Marianne dress is waiting for me there.

Just as I was conjuring up this plan, my husband came to me and told me he thought something was wrong with our beloved dog, Pixel. She seem to have suddenly lost her sense of balance. She was leaning to one side and kind of staggering around. Tuesday morning it was clear we needed to bring her to the vet. This situation cured me of my fabric shopping desires. I needed to be there help my husband with the dog. We had to do a drop-off, since the vet had no same day appointments. They would examine her when they could. By mid-morning, we were back home sans dog, and my fabric from Dharma Trading Co. had arrived! Whether I used the fabric or not for this project, I decided to dye the it right then, as a way to stay busy and keep my mind off the dog. I did two dye baths, gold and then blue. I tied and re-tied two smaller pieces, resulting in a multicolored pattern. The piece that I intended for the body of the dress, I kept solid.

The vet was unable to diagnose the dog, and sent her home with some meds. It would be a waiting game. So Wednesday morning I decide to go ahead and cut out my hand-dyed fabric. I just wanted to keep busy, rather than wait for my Fabricworm shipment. As I laid out my pattern pieces to cut View B, I realized I hadn’t dyed enough solid fabric for the sleeves. And I really wanted my sleeves to be solid. I decided I would leave them off.  EXCEPT, my dress would then be too SIMPLE. In the spirit of the competition, I took a big gulp, and cut out the Peter Pan collar that I was 100% certain I would never use. And this is how my dress came to be. My Fabricworm fabric came later that day. I liked it, by this time I was all in with my tie-dyed fabric and my Peter Pan collar.DSC_0160

To my surprise, I LIKED my Peter Pan collar. The collar was an interesting element in an otherwise simple dress, and the tie-dyed fabric took away the “sweetness” I was concerned about.

DSC_0150

DSC_0165

This was my first time sewing up a pattern by Christine Haynes.  I found her instructions clear and easy to follow. She offers techniques for both conventional machines and sergers. For those new to sewing on knits, you would need to find some additional resources detailing the hemming of knits as the instructions say to “Hem using the stitch of your choice.”

I have to admit I was leary of the ribbing/collar combination at the neckline. I had never seen that before. But because this was competition, I felt it was important to stay true the this unique feature and not “do my own thing.” When I first attached the ribbing, I wasn’t happy. I thought it looked awkward, and I had an “Oh no!” moment. Still, I felt I shouldn’t do away with the ribbing. I decided to narrow it by 1/8″. I found this little adjustment made enough difference for me to live with it and even LIKE it.

DSC_0127

I have a three thread serger from the 80’s. (It still works great, by the way.) I don’t sew seams with it. I just use it for finishing.

DSC_0143

I did not include the clear elastic on the shoulder seam because this was a low stretch knit. I didn’t think that extra reinforcement was necessary, and the elastic would only add more bulk. I did use the elastic in my muslin which was a very stretchy knit, and found it to be a great feature.

I used a zig zag stitch for the hem on the sleeve cap. I thought the look integrated better than a straight double needle stitch with the tie dye pattern.

DSC_0136

For the bottom hem, I used a machine blind hem stitch. I prefer a bit of width on my dress and skirt hems. After serging the edge, I turned it up 1 1/8″. With some carefully steam ironing, I was able to reduce the additional bottom circumference so it all laid nice and flat. (After making the muslin, I determined I only needed to add 3″ to the length instead of 6″.)

DSC_0148

DSC_0137

During Round Two of the Super Online Sewing Match, I have: sewn up a pattern that was sitting in my stack for a while, made a nice wearable muslin, included a style of collar that I never would have chosen, and used creative practice as therapy.

You can see what the other talented competitors have made and keep up to date with the contest at Sew Mama Sew.

Her name is Pixel because she has dots on her snout. We are giving her the gift of time and hoping for the very best.

Her name is Pixel because she has dots on her snout. We are giving her the gift of time and hoping for the very best.