Japanese Recovery Clothes

I am having some surgery in a short time and need some comfy clothes to wear during my recooperation. I figured why not try to be a bit stylish! My range of motion in my arms will be limited for a while, so I wanted to make some button-front garments to avoid to need to raise my arms overhead. I looked through my stash of patterns and two designs in my Japanese pattern books fit the bill the best. Cute, loose, and button-front.

DSC_0484


DSC_0476

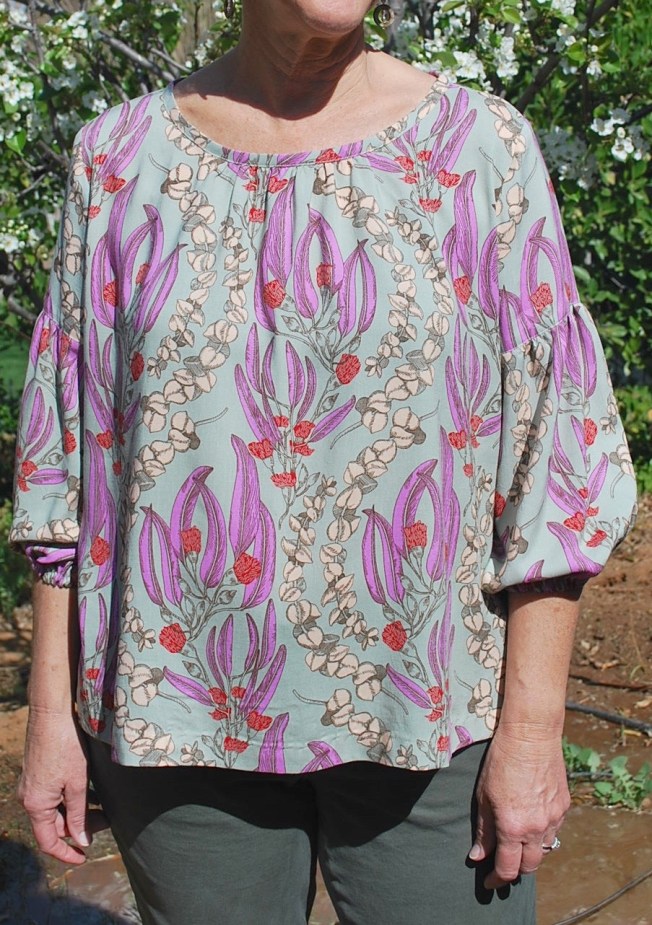
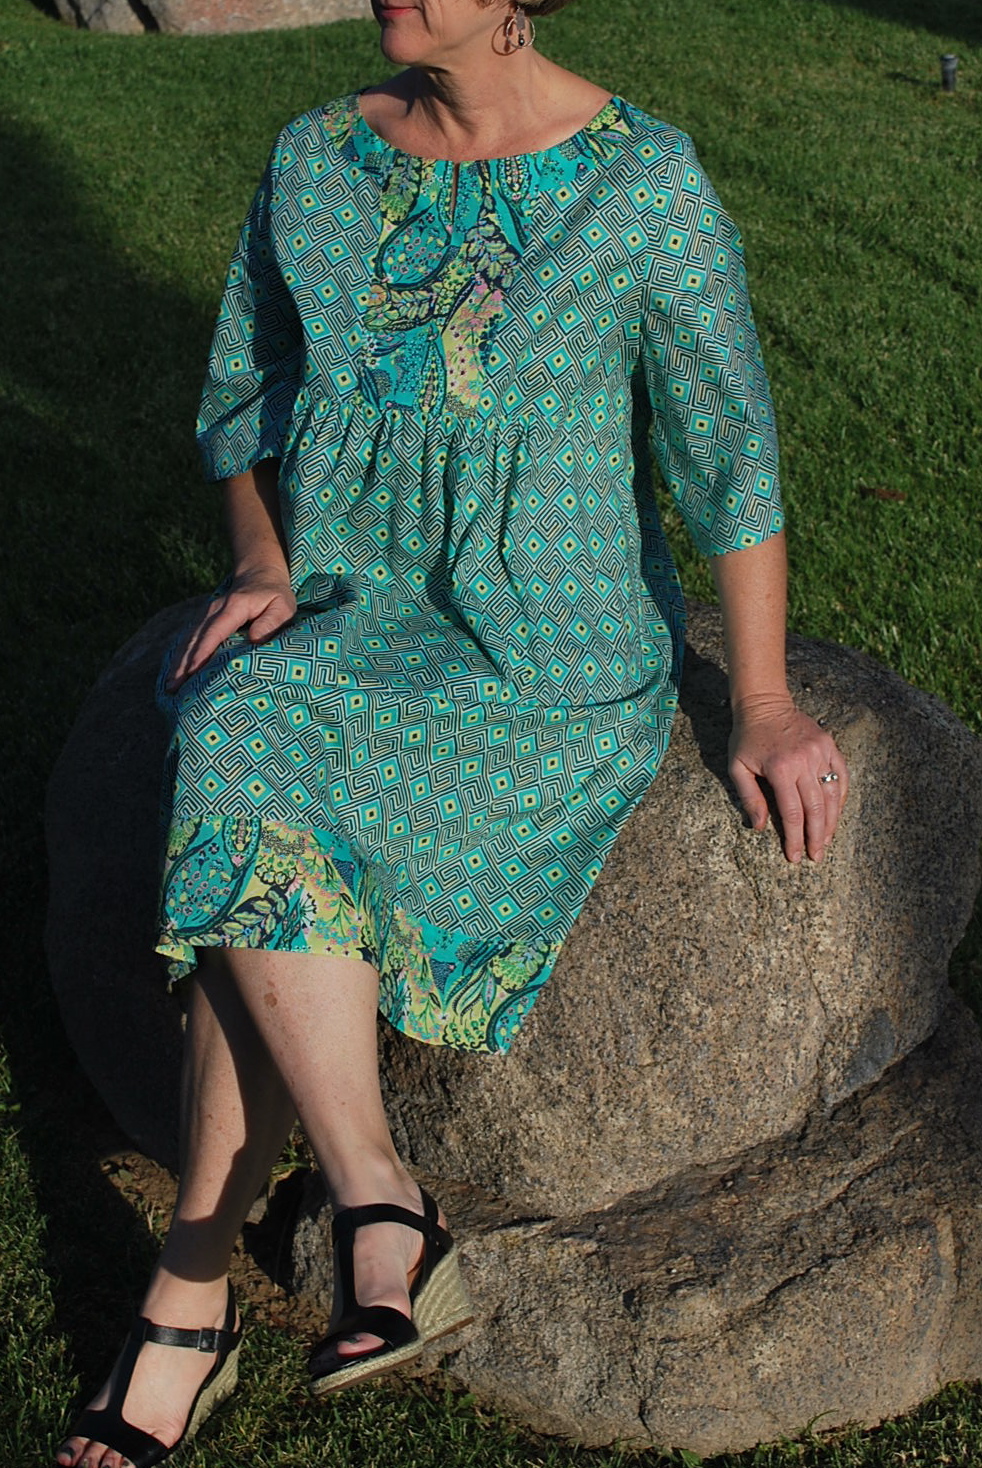
I wasn’t going to use this photo because I didn’t think this view looked flattering. I didn’t want to torture my husband to do a retake. But more importantly, I realized that this garment for me is about comfort and cover-up, and it is both of those things. So forget the perfectly staged photo!


DSC_0470

DSC_0473

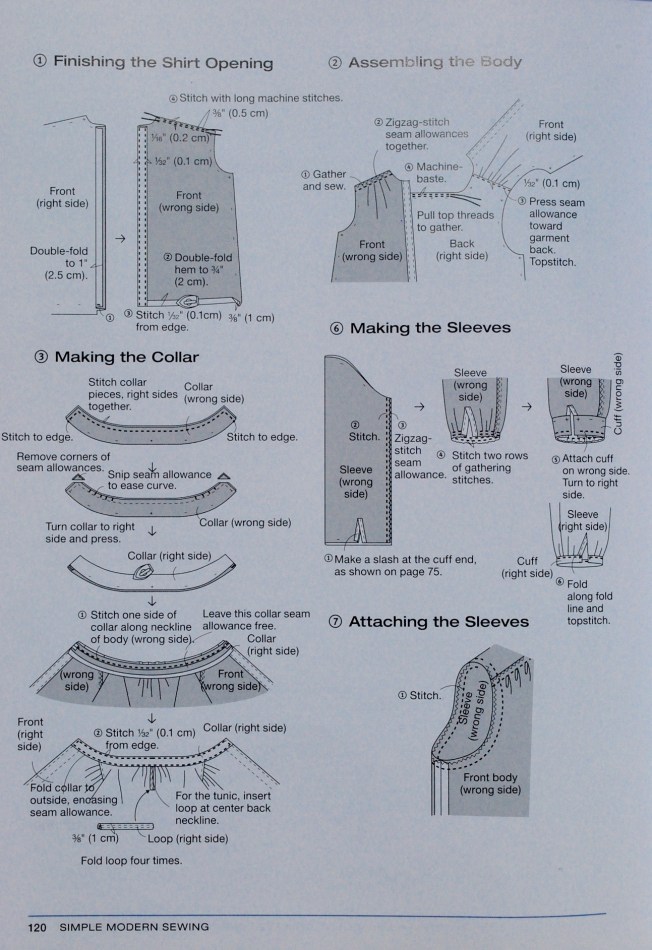
If you’ve been reading my blog, you know I’ve become quite a fan of the Japanese patterns in the past year or so. Now I’m even more entrenched! The first one is Tunic with Tie Belt – 8b from Simple Modern Sewing by Shufu to Seikatsu Sha.

DSC_0460

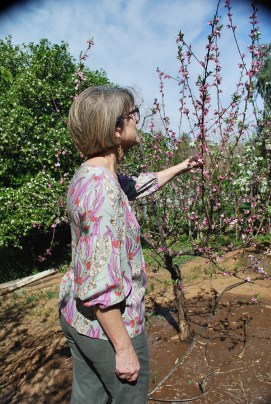
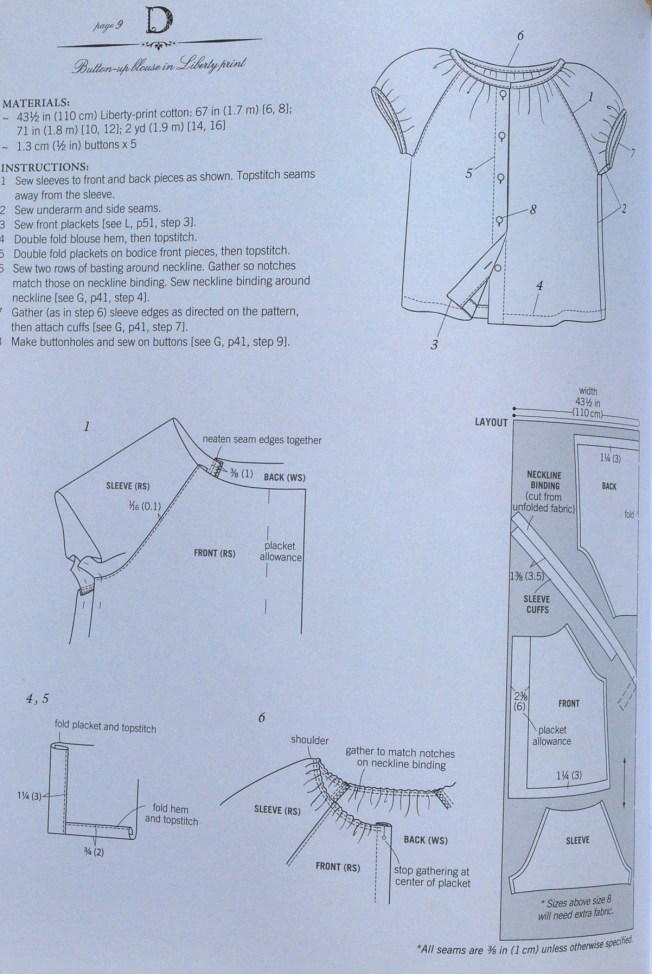
The second one is Button-up Blouse D from Stylish Dress Book, Wear With Freedom by Yoshiko Tsukiori.

DSC_0452

The fabric I used for the Tunic is from Mood in Los Angeles. I purchased it for another project a few months ago, but felt it lent itself well to this pattern. It is a light weight cotton and was $10 per yard. I paid for three yards, but really ended up with nearly four! They’re always generous. Thank you Mood!

DSC_0436

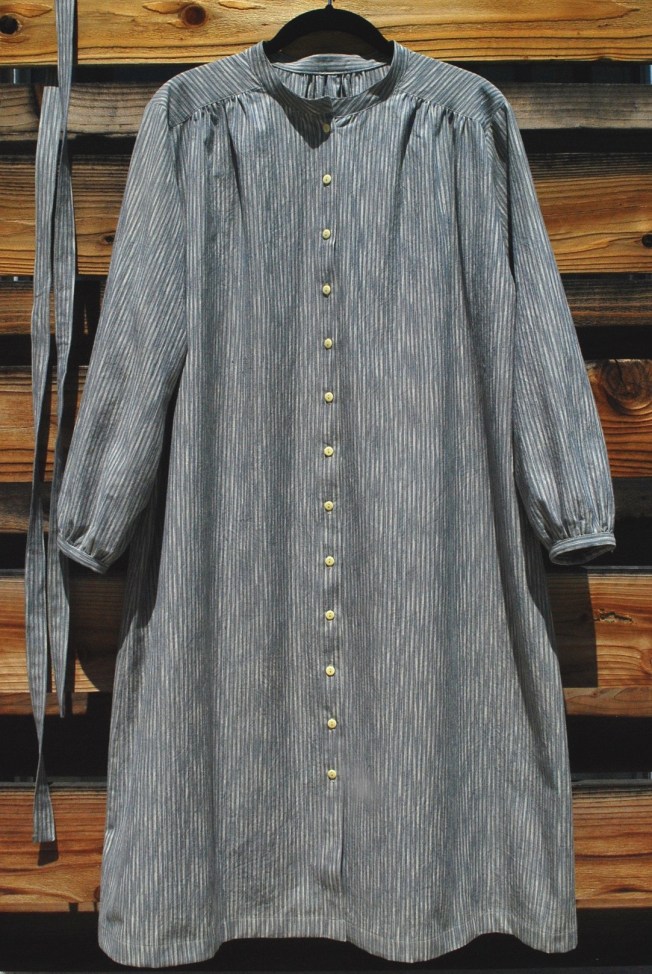
This tunic has 15 buttons! 13 down the front and one on each cuff.

DSC_0438

DSC_0443

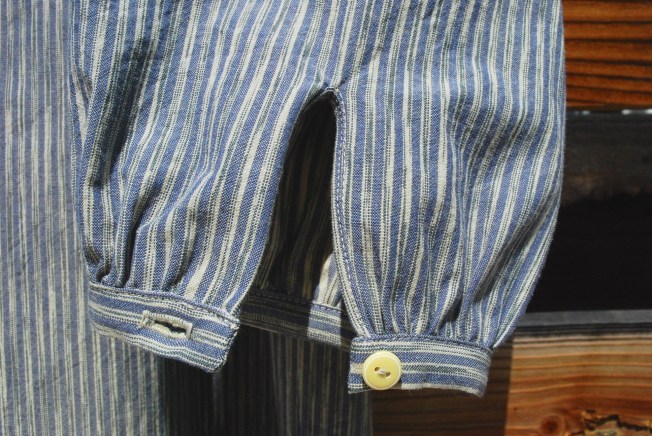
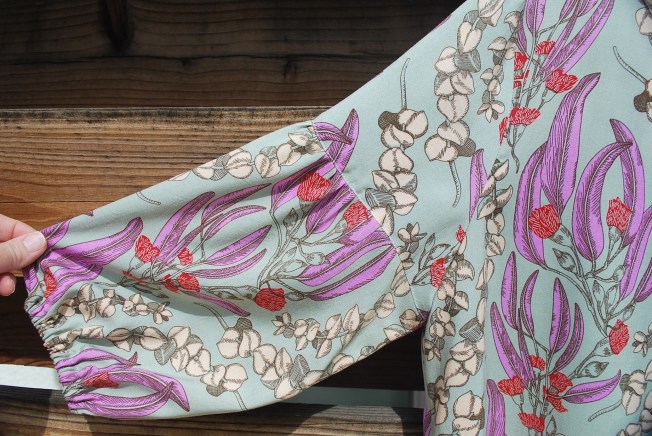
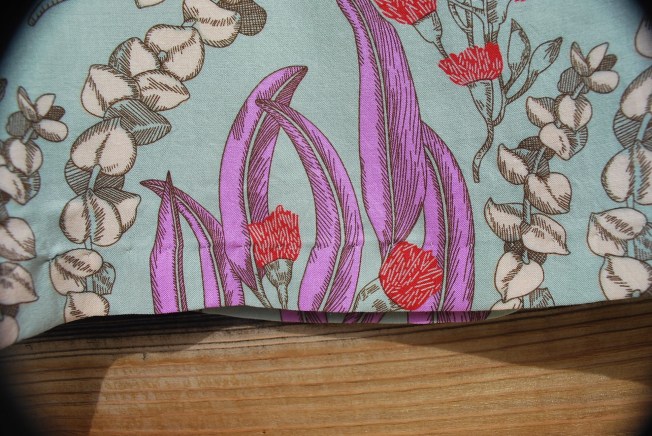
The cuff opening is made with a slash, covered with a narrow binding.

DSC_0447

DSC_0445

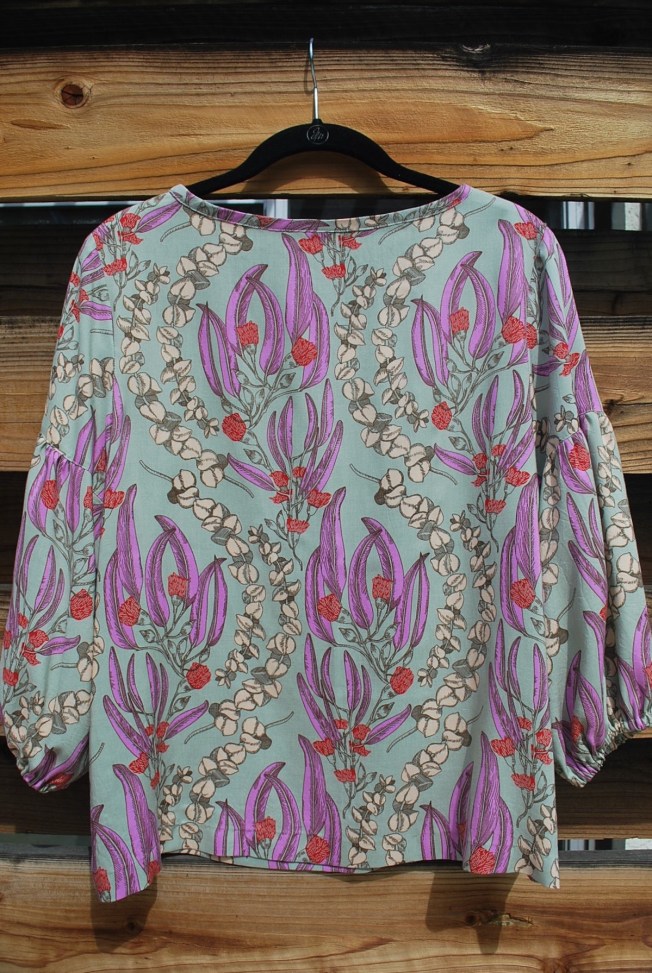
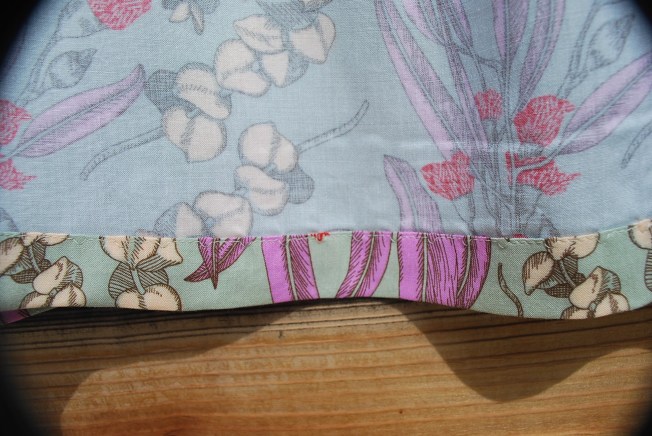
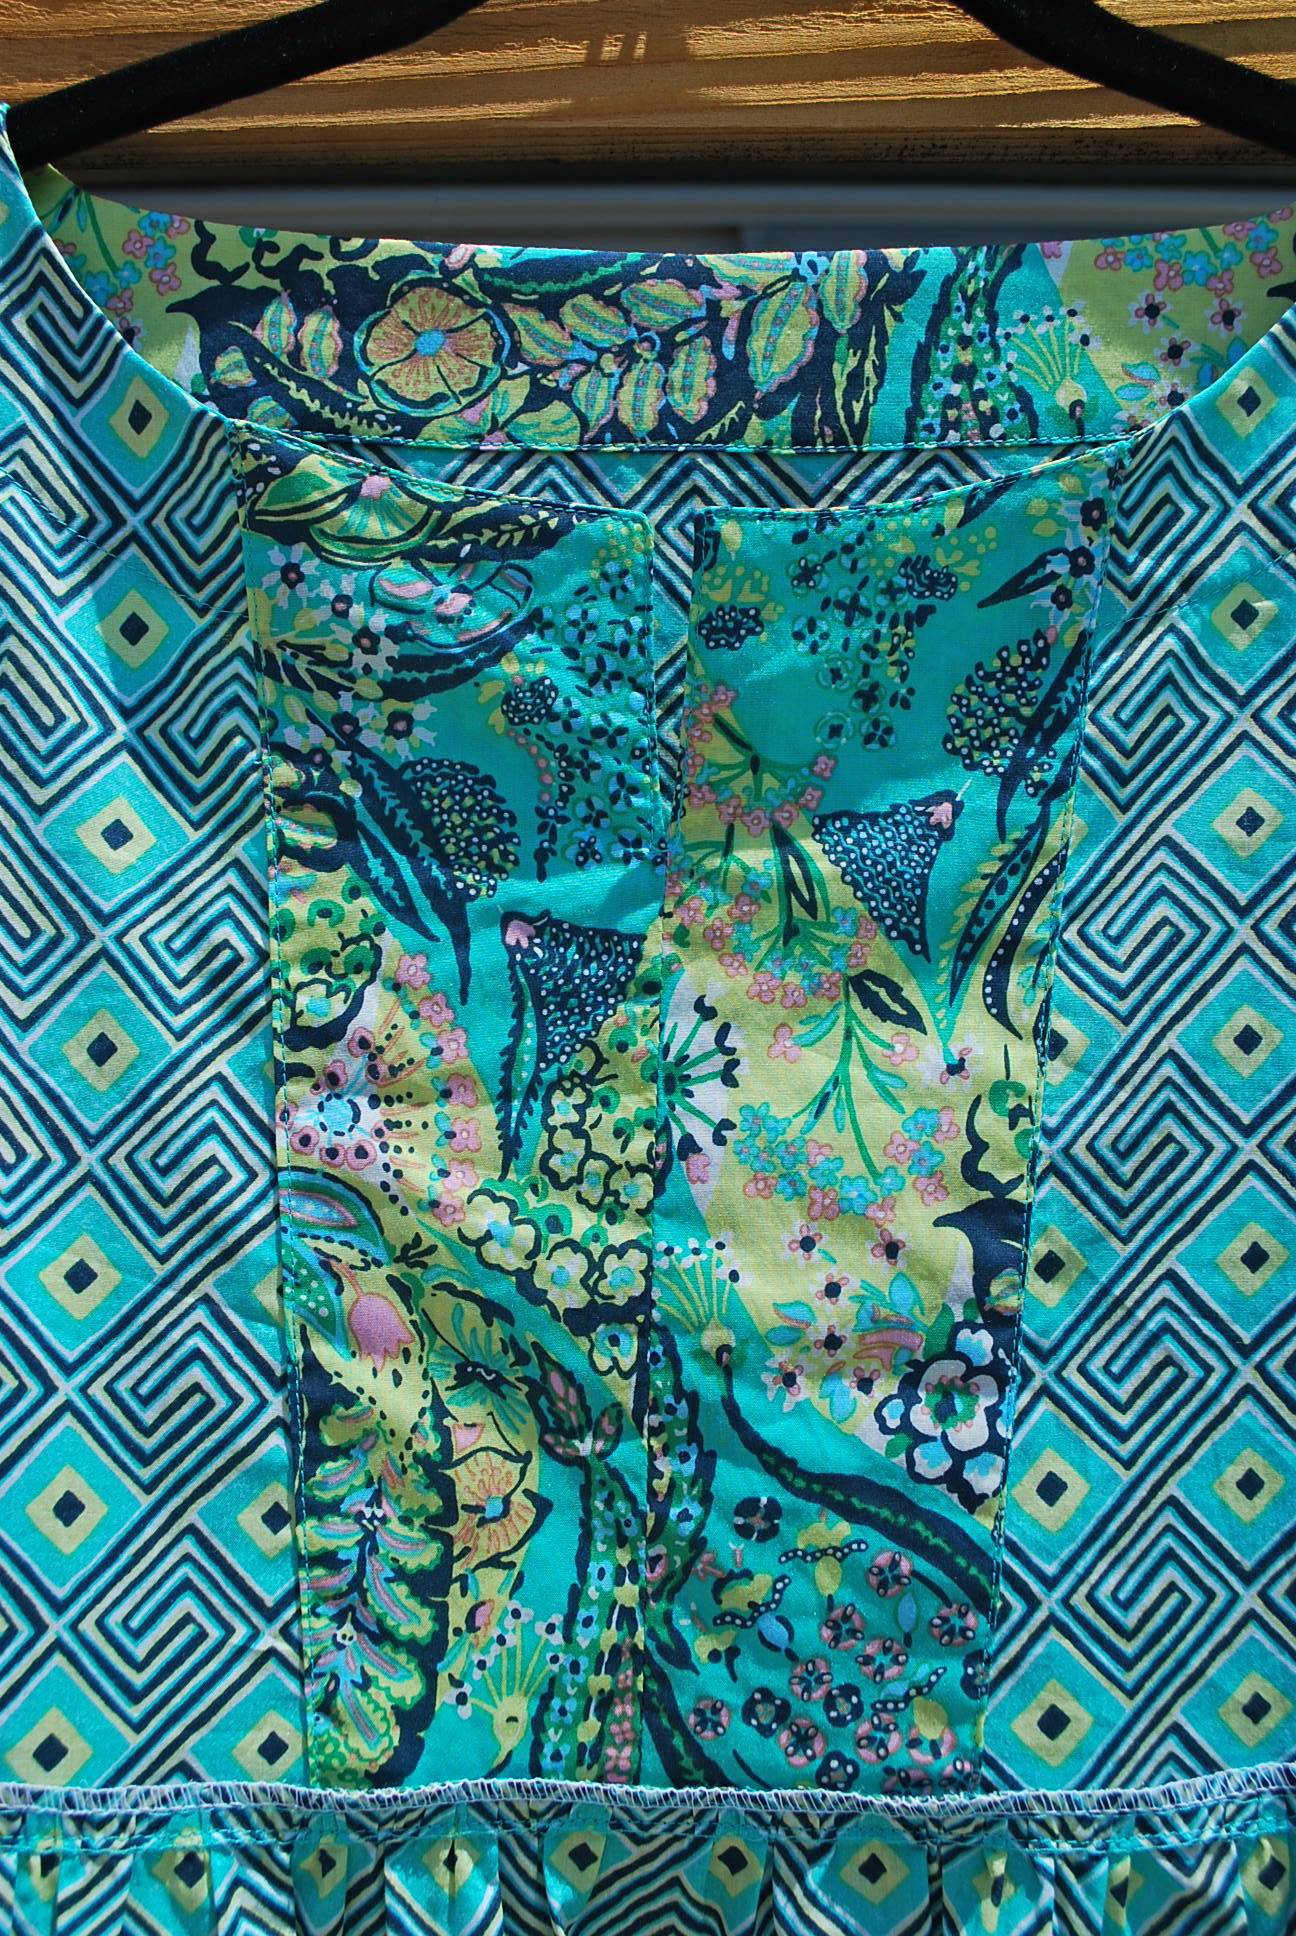
The back has this cool loop detail. I think this garment was originally designed as a work shirt/cover up and the loop allowed the wearer to hang it on a hook in the studio.

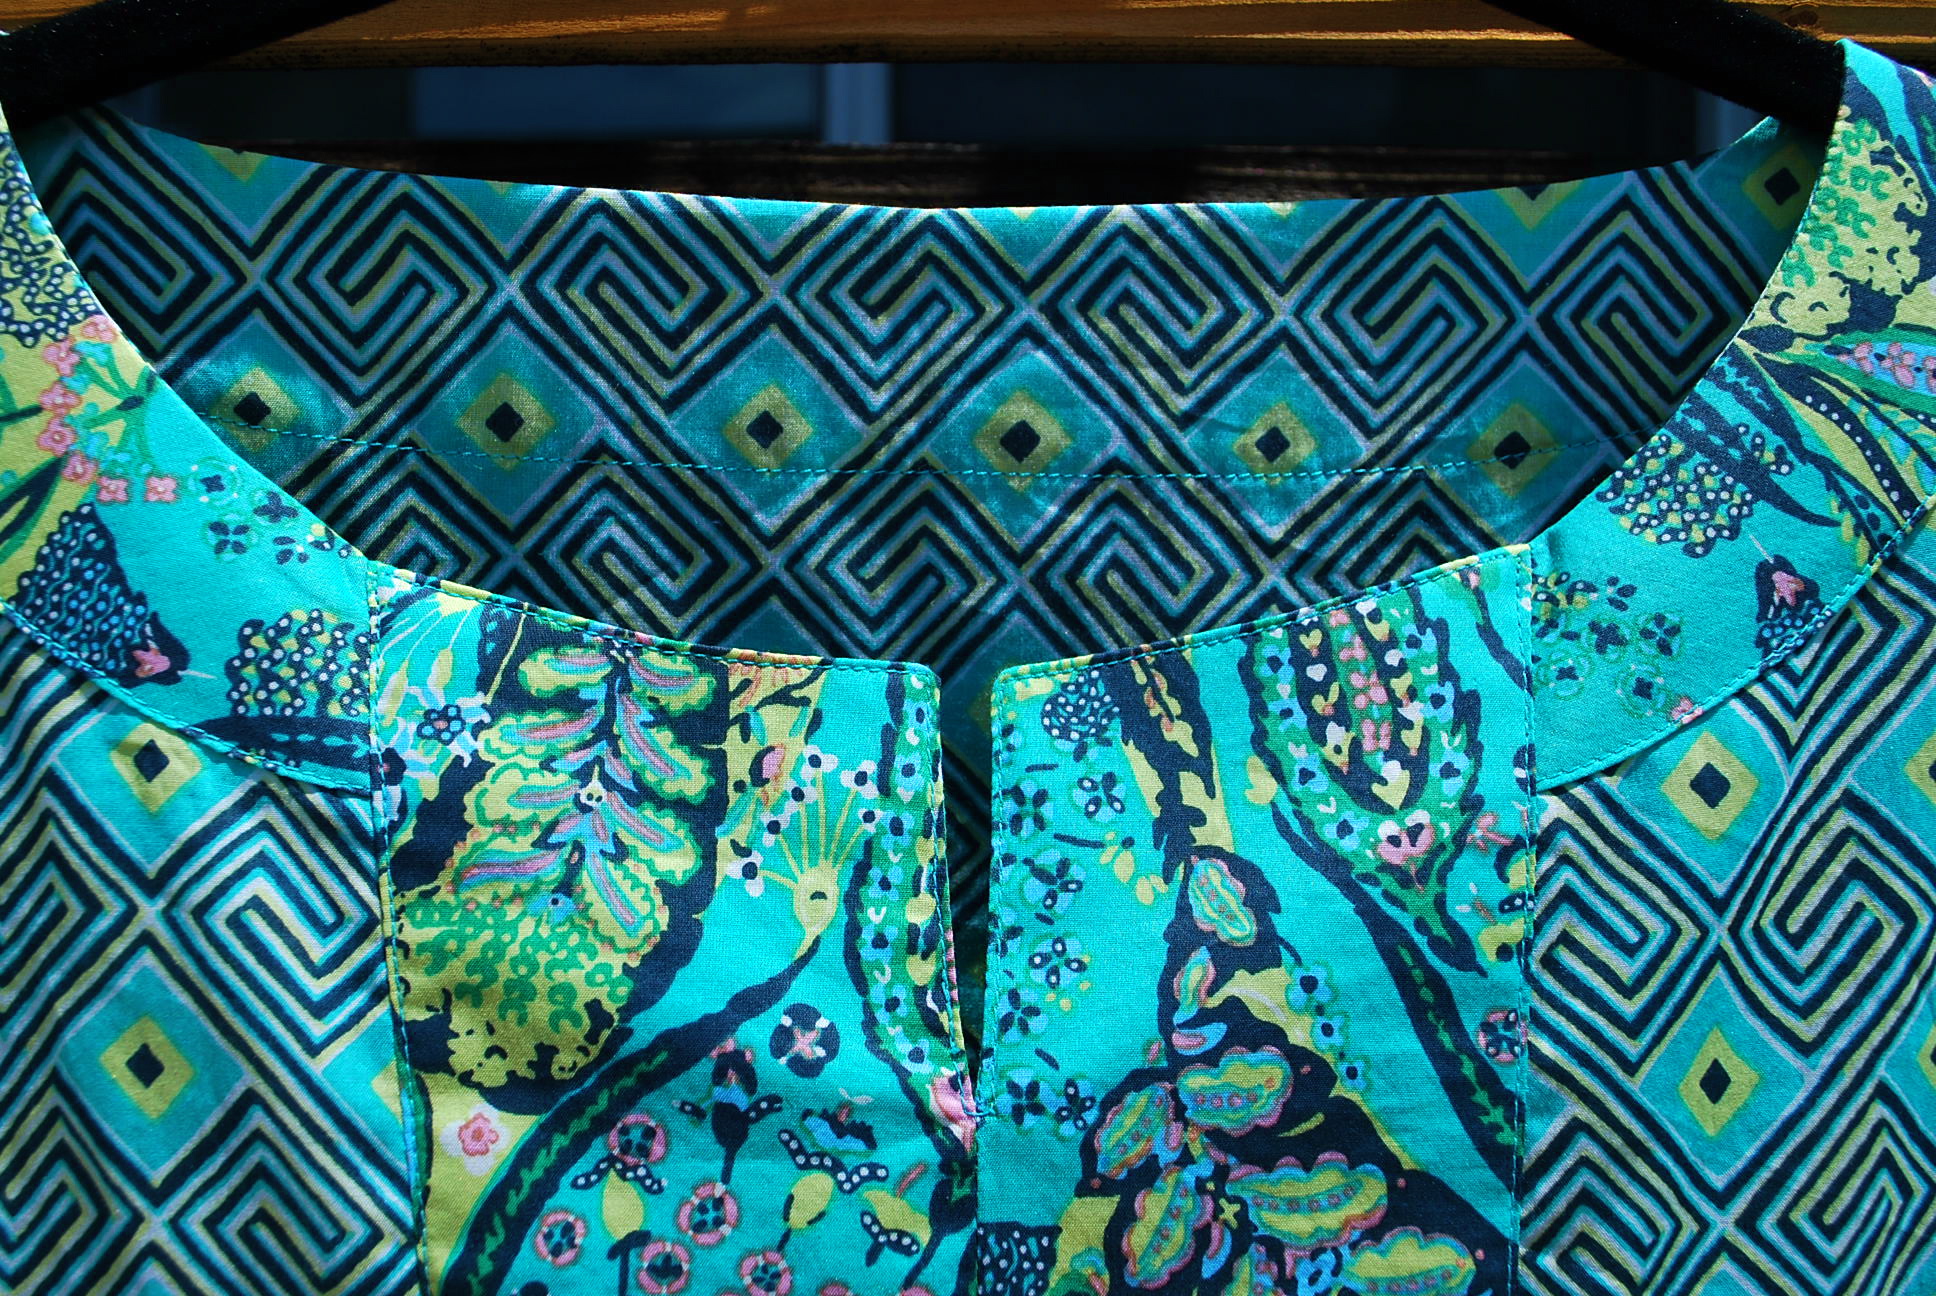
Fabric I used for the Blouse is from The Fabric Store, also in Los Angeles, only five blocks from Mood. How lucky am I? This fabric, also intended for another project, was $10 per yard, but I hit a 30% sale. And like Mood, The Fabric Store is always generous. I paid for 1.5 yards, but ended up with close to two yards, and this fabric was nearly 60″ wide. Plenty for this blouse. I recently noticed from the print on the selvage, that this fabric is from Japan.

DSC_0429

DSC_0431

DSC_0420

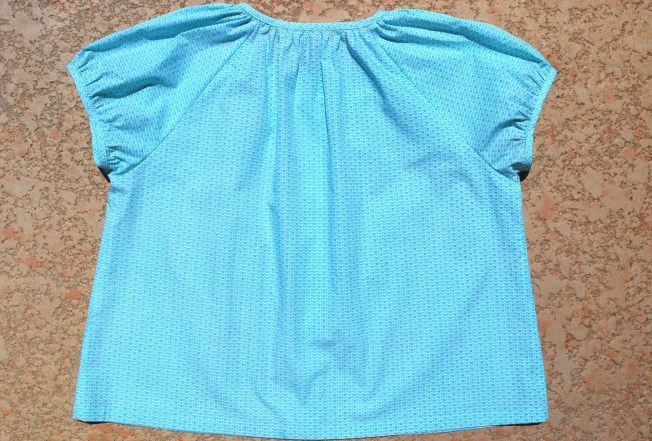
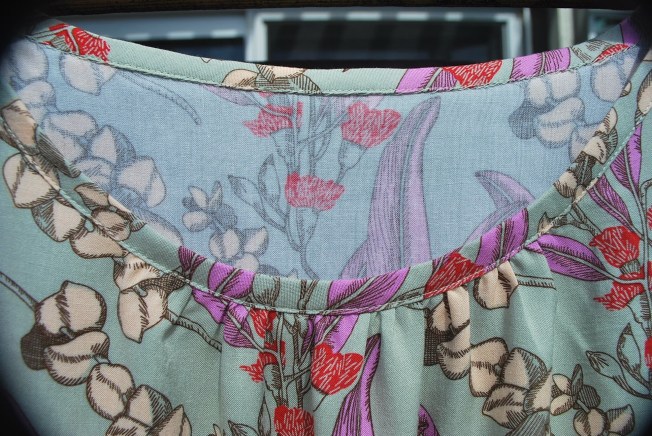
For the cuff and the neck binding, I first sewed the right side of the binding to the wrong side of the fabric. Then I folded it in and top stitched it to the right side. You can avoid hand sewing with this technique.

DSC_0421

LET’S BE HONEST:

Tunic from Simple Modern Sewing:

1. This is my third project from this book, and continue to be impressed with the well drafted patterns.

2. The sizes in this book range from XS to L, bust 32 1/4″ t0 37.” I made a Medium and because of the loose fit of this pattern, I probably could have made a Small or even Extra Small and it wouldn’t have made much difference. I think it would be safe that if you fall  somewhat outside the Large measurements, you could still wear this pattern.

3. I was actually aiming to make a 7/8 length sleeve (just above the wrist) so I cut off about 2 inches before adding the cuff. It wasn’t quite enough, so I would probably take off another inch to acheive this style.

4. Here are the instructions. Typical for these Japanese patterns books. Sufficient if you have a background in the required techniques. Otherwise they are insufficient for a beginner as stand alone instructions.

DSC_0465DSC_0466

Button-up Blouse from Stylish Dress Book, Wear with Freedom:

1. This is also my third project from this book, and same as above, am continue impressed with the drafting.

2. The sizes in this book range from 6 to 16, bust 30 3/4″ to 40 1/4.” I made a size 10, and same as the tunic, I could have made a smaller size because of the very loose fit. So same conclusion, with this pattern, if you are larger than a size 16, you could probably still wear this pattern.

3. I did not make any changes to this pattern, and sewed it exactly as shown. (Actually, I did add a 1/4″ to the width of the bias binding. I was afraid it could fray or stretch and end up too narrow. I am of the philosophy that you can always trim off, but you can’t add on.)

4. If I were to make another one, I would probably use a lighter cotton weight with a softer hand.

5. Here are the instructions. Same comments as above. You are directed to another page for cuffs and buttonholes.

DSC_0457

I really like both of these garments, and I know I will continue to wear them after my recovery is complete. What about you, have you made garments to help you or someone else through a physical limitation?


DSC_0483

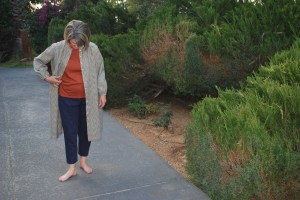
My pants are the Owyn Pants from Lotta Jansdotter Everyday Style.


Advertisement

Japanese Smock Blouse B

Japanese patterns…I’ve become mildy obsessed. With each project I make, I become a bigger fan. My continuing quest for more interesting tops was a great reason to sew up my fourth Japanese pattern.

DSC_0393

DSC_0390

DSC_0397

The pattern I used is B: Smock Blouse with Garibaldi Sleeves from Stylish Dress Book, Wear With Freedom by Yoshiko Tsukiori. This is my second project from this book. My first was Japanese Dress Y. I chose pattern B because of it’s simplcity and design features that would lend well to a drapey fabric.

DSC_0098

This book has 26 adorable patterns to choose from.

DSC_0379

Contrary to my usual habits (I am actually not a fabric horder, and have very little stash), I already had the fabric before I choose this pattern. It was part of my online Black Friday sale purchase from Hawthorne Threads. The fabric is Anna Maria Horner, Pretty Potent Rayon, Eucalyptus in Ruby. I purchased about 2 yards for $9.95 per yard. This is a nice quality rayon which came through a machine prewash and line dry beautifully.

DSC_0352

DSC_0354

The neckline is finished with bias tape which I first machine stitched to the front, then folded over, hand stitched on the inside and then top stitched on the front side. The pattern does not provide explict instructions on how to do this!

DSC_0356

Here’s a Garibaldi sleeve. It has a partially gathered bottom piece with an elastic casing hem.

DSC_0358

The back neckline does not have gathers.

DSC_0360

I did a machine blind hem. One of my favorite finishing techniques for hem that have little or no curve.

DSC_0362

Inside peek at the stitch.

LET’S BE HONEST:

1. The pattern sizes in this book range from 6 to 16. I cut a straight size 12, and was happy with the fit. I probably could have made a 10 and been just as satisfied since it’s very loose fitting.

2. This pattern is well drafted and true to the picture. I have developed a trust in the Japanese patterns.

3. However, as with the other Japanese patterns I’ve made, the instructions are minimal. If you are a beginner, do not attempt one of these patterns unless you have some in-person support. Here’s Blouse B in it’s one page entirety:

DSC_0383

4. The instructions showed the bias tape cut at 1 3/8″ wide. I cut it at 1 5/8″ because I was afraid any stretching or fraying might leave it too narrow in places.

5. I think one reason I like these patterns is they are friendly/flattering to the pear shaped, small busted woman.

I only sewed with Big 4 patterns (plus Burda) for 40 years. I trust them and know how to work with them. Since starting this blog, 2 years ago, I have ventured to other resources for patterns. (Yes, you can teach an old dog new tricks.) I have discovered that well drafted patterns can come from just about anywhere. Still, I choose patterns from alternate sources because I find an appealing and unique design, and not because I want to jump on the social media bandwagon with the latest indie pattern.

What about you? How do you choose patterns?

Thanks for visiting and reading this post! Cheers, Lori

DSC_0403

It’s been such a warm February, our trees think it’s spring!


Japanese Dress Y

I have now become a big fan of Japanese pattern books. I bought my first book, Simple Modern Sewing, on sale, with a gift card, and as a skeptic. After two big wins from that book, I was compelled to buy another one, Stylish Dress Book, Wear with Freedom by Yoshiko Tsukiori. For Fresh Make #27 I chose a loose fitting, easy wear dress. Perfect for the hot summer that’s just around the corner.
DSC_0074DSC_0087
While the decision wasn’t easy from the 26 patterns, I chose Dress Y. Mainly because I wanted a pattern that combined two fabrics, and also the construction didn’t look to fussy.

This book has 26 adorable patterns to choose from.

This book has 26 adorable patterns to choose from.

Here's Dress Y. Those are the complete instructions! More on that later.

Here’s Dress Y. Those are the complete instructions! More on that later.

The fabrics I used are from Amy Butler’s Glow Collection, Maze Voile in Grass and Jolie Voile in Grass. I purchased them online at Hawthorne Threads for $13.50 per yard. I needed a total of three yards. I have been coveting the cotton voiles that have recently become a part of designer collections that traditionally have only included quilting weight fabrics. There’s no turning back once you start making blouses and dress with voiles and lawn cottons – so light weight and luxurious.
DSC_0079

DSC_0087

The neck trim is attached by sewing right and wrong side together at the neck edge so the seam allowances are tucked inside, and there is no need for a facing.

The neck trim is attached by sewing right and wrong side together at the neck edge so the seam allowances are enclosed inside when you fold the trim over to the front, and there is no need for a facing.

The pattern called for a single layer yoke with a bias tape trim at the top. I  made a double layer for a facing instead.

Here’s the inside. The pattern called for a single layer yoke with a bias tape trim at the top. I made a double layer for a facing instead.

The hem band is a single layer. I did a 1 1/4

The hem band is a single layer. I did a 1 1/4″ machine blind hem.

LET’S BE HONEST:
1. The pattern size range is from 6 to 16. Obiviously this is a very loose fitting design and the bust is the main measurement needed to gage your size. I cut a 12 with no alterations.

2. The width throughout the bodice and where it meets the skirt is wider than it appears in the photograph on the very skinny model in the book. It almost A-lines from the armhole. I am considering this a surprise design feature (I didn’t study the pattern pieces), rather than a misfit, because the shoulders and neckline are perfect. I feel it might not be the most flattering thing, especially from a side view, for me to have all that width floating around me.

3. Ok, after making three Japanese patterns, there is no denying they are well drafted. And also fit well, at least for a relatively narrow size range. BUT, the instructions are inadequate. (Enlarge the photo of the book above.) Beginner beware! Stay away. I because of my sewing experience, I can make a basic dress without instructions, but I try to look at what is presented from a beginner standpoint. I definitely would not attempt one of these patterns without a body of sewing knowledge.

4. I would like to question one method in the instructions. They show laying the garment out flat and sewing the sleeve in before the side seams. I usually save this technique for knits and/or sleeve caps with a straighter curve. The sleeve cap in Dress Y has a fairly high curve and I think would ease in better insetting it after the side seams are sewn. At least that’s what I did, and it work well.

Overall, despite the slightly tent-like sillouette, I love this dress. The fabric is soft, smooth and lighter than air. Dress Y like a pair of shoes that are super comfortable the first time you try them on – I know I’ll reach for it over and over again.

Have you tried any Japanese patterns? Which ones? Are you a skeptic or fan?
DSC_0093