Japanese Smock Blouse B

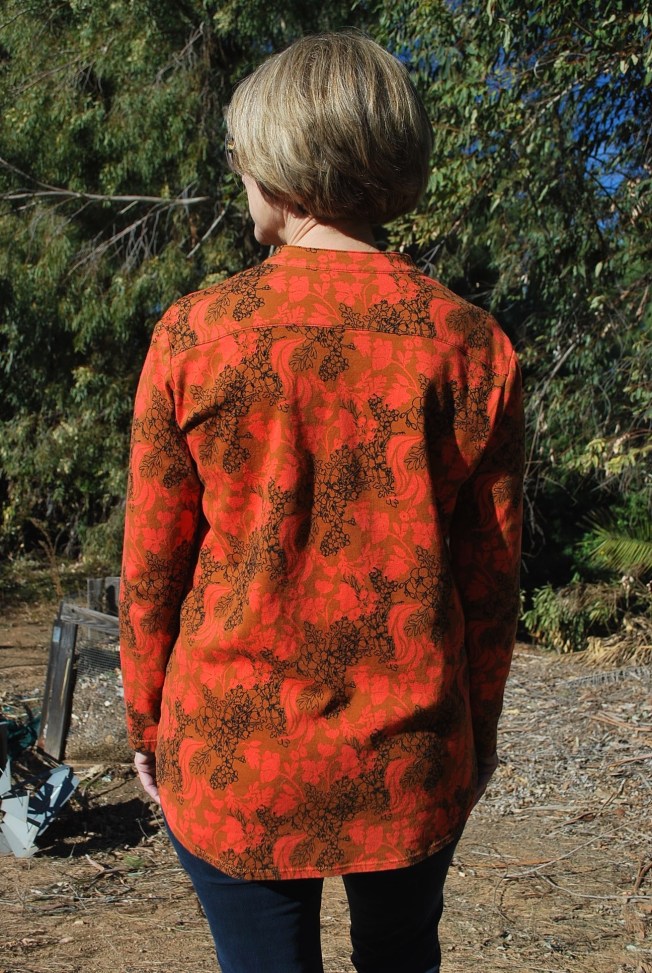
Japanese patterns…I’ve become mildy obsessed. With each project I make, I become a bigger fan. My continuing quest for more interesting tops was a great reason to sew up my fourth Japanese pattern.

DSC_0393

DSC_0390

DSC_0397

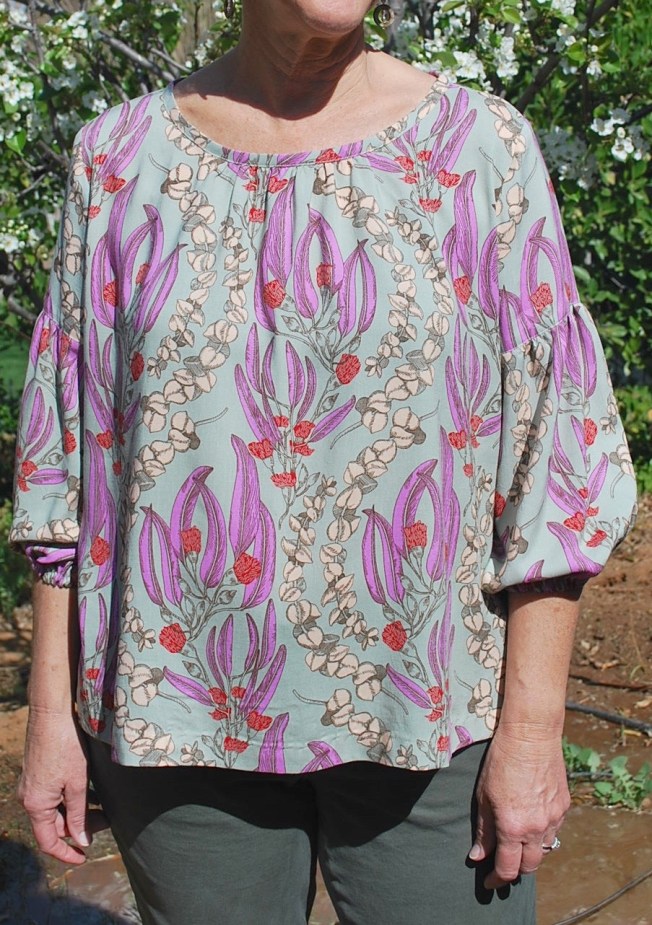
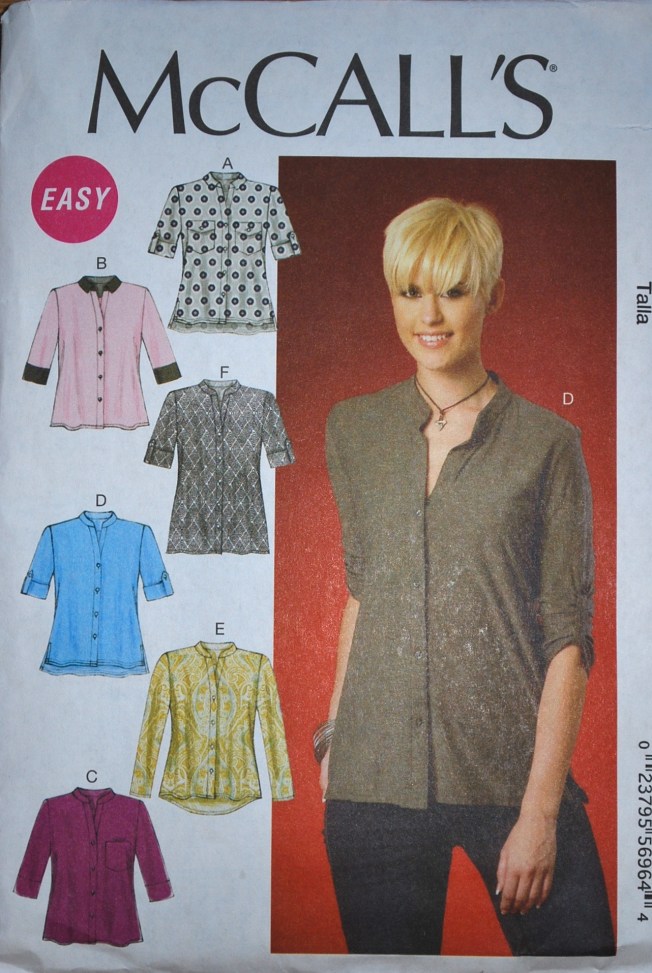
The pattern I used is B: Smock Blouse with Garibaldi Sleeves from Stylish Dress Book, Wear With Freedom by Yoshiko Tsukiori. This is my second project from this book. My first was Japanese Dress Y. I chose pattern B because of it’s simplcity and design features that would lend well to a drapey fabric.

DSC_0098

This book has 26 adorable patterns to choose from.

DSC_0379

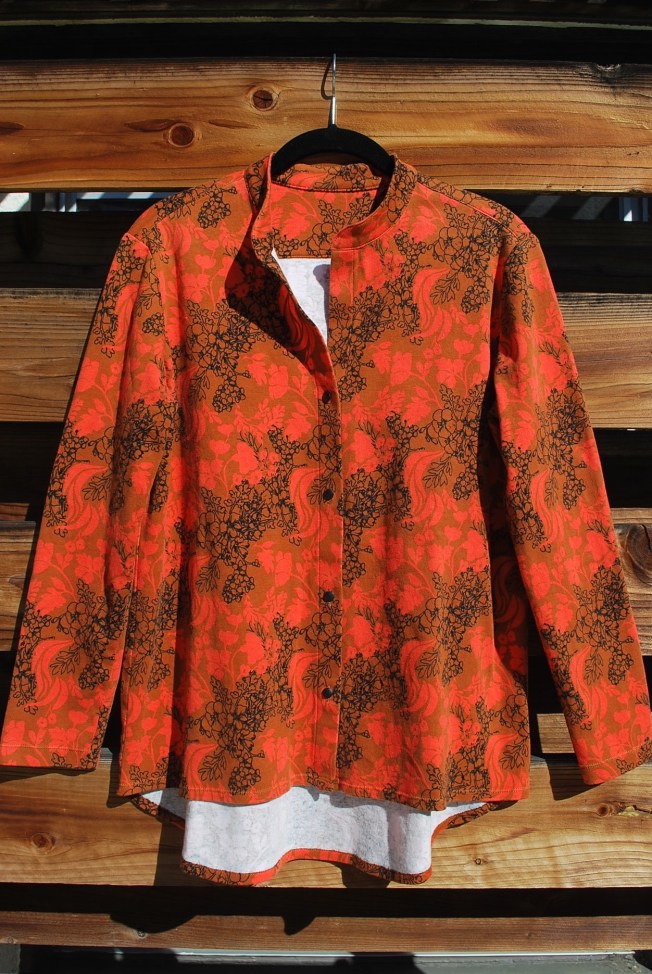
Contrary to my usual habits (I am actually not a fabric horder, and have very little stash), I already had the fabric before I choose this pattern. It was part of my online Black Friday sale purchase from Hawthorne Threads. The fabric is Anna Maria Horner, Pretty Potent Rayon, Eucalyptus in Ruby. I purchased about 2 yards for $9.95 per yard. This is a nice quality rayon which came through a machine prewash and line dry beautifully.

DSC_0352

DSC_0354

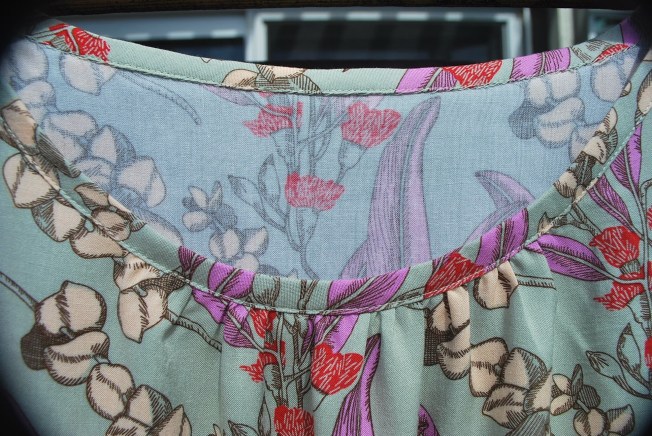
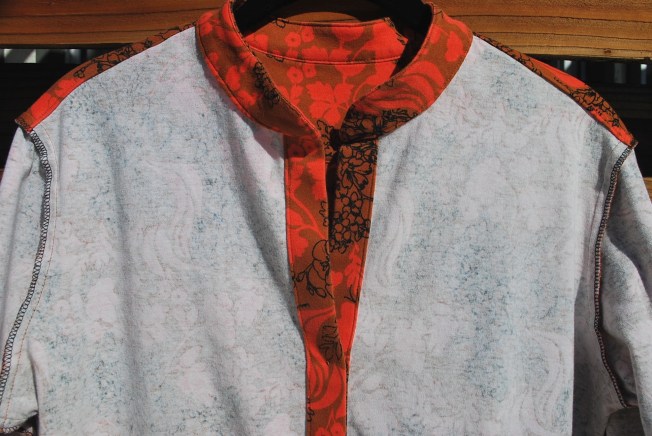
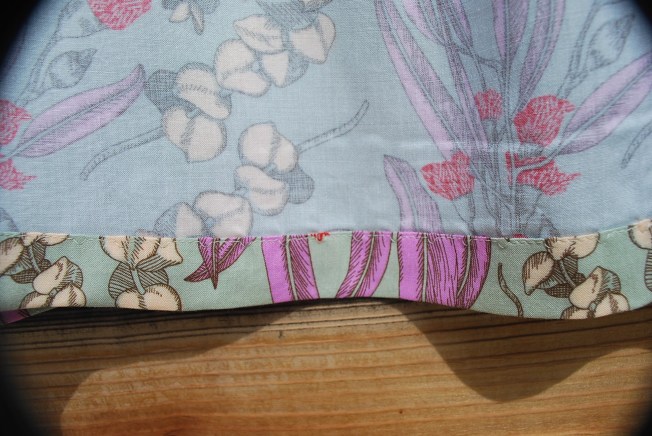
The neckline is finished with bias tape which I first machine stitched to the front, then folded over, hand stitched on the inside and then top stitched on the front side. The pattern does not provide explict instructions on how to do this!

DSC_0356

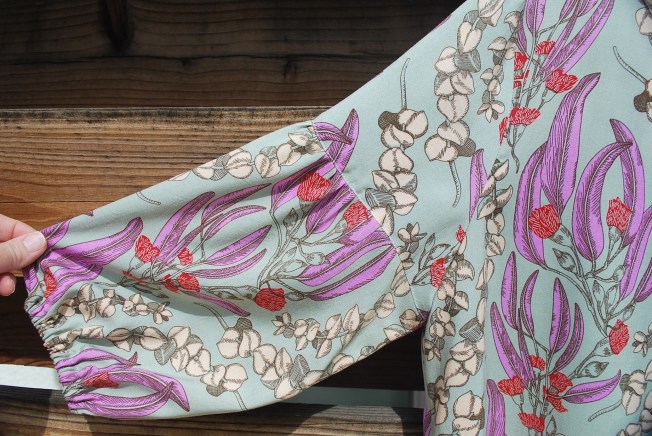
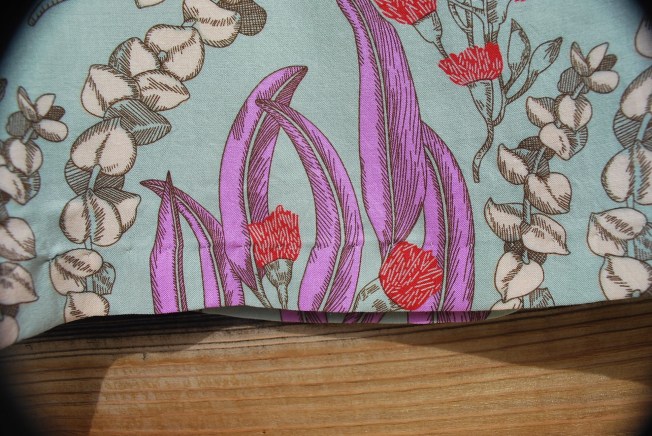
Here’s a Garibaldi sleeve. It has a partially gathered bottom piece with an elastic casing hem.

DSC_0358

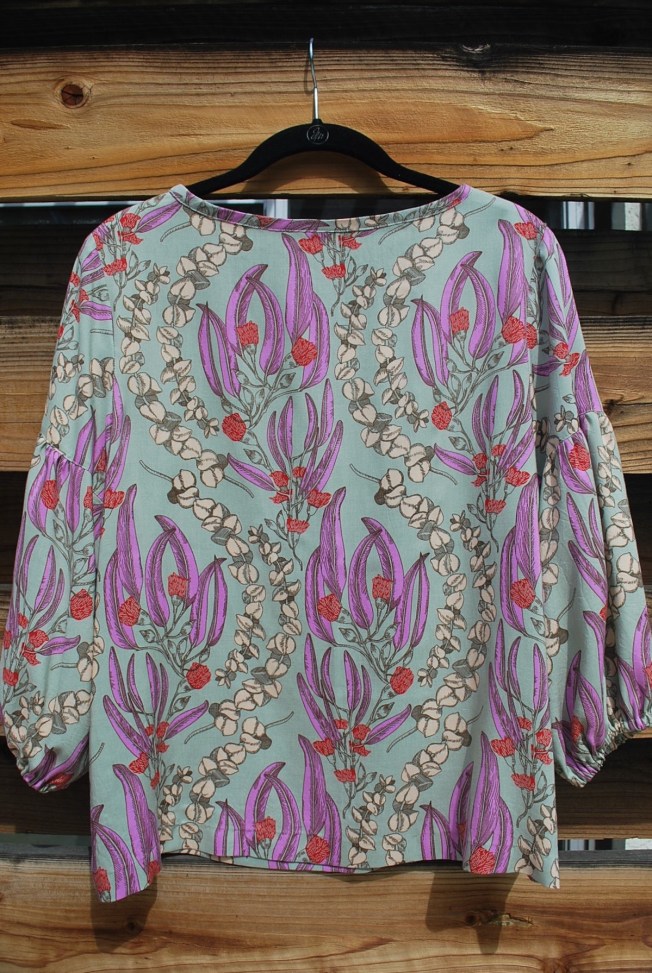
The back neckline does not have gathers.

DSC_0360

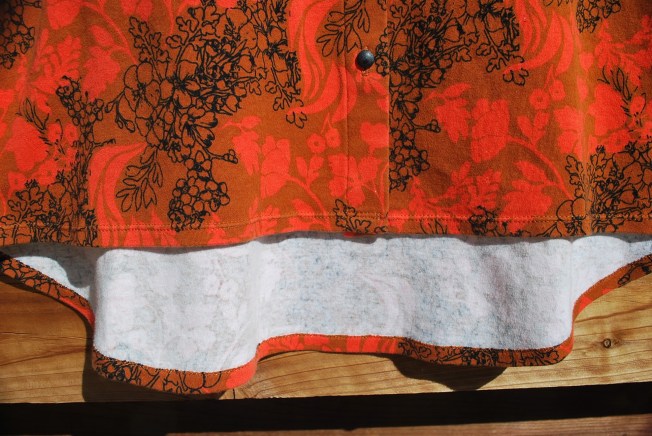
I did a machine blind hem. One of my favorite finishing techniques for hem that have little or no curve.

DSC_0362

Inside peek at the stitch.

LET’S BE HONEST:

1. The pattern sizes in this book range from 6 to 16. I cut a straight size 12, and was happy with the fit. I probably could have made a 10 and been just as satisfied since it’s very loose fitting.

2. This pattern is well drafted and true to the picture. I have developed a trust in the Japanese patterns.

3. However, as with the other Japanese patterns I’ve made, the instructions are minimal. If you are a beginner, do not attempt one of these patterns unless you have some in-person support. Here’s Blouse B in it’s one page entirety:

DSC_0383

4. The instructions showed the bias tape cut at 1 3/8″ wide. I cut it at 1 5/8″ because I was afraid any stretching or fraying might leave it too narrow in places.

5. I think one reason I like these patterns is they are friendly/flattering to the pear shaped, small busted woman.

I only sewed with Big 4 patterns (plus Burda) for 40 years. I trust them and know how to work with them. Since starting this blog, 2 years ago, I have ventured to other resources for patterns. (Yes, you can teach an old dog new tricks.) I have discovered that well drafted patterns can come from just about anywhere. Still, I choose patterns from alternate sources because I find an appealing and unique design, and not because I want to jump on the social media bandwagon with the latest indie pattern.

What about you? How do you choose patterns?

Thanks for visiting and reading this post! Cheers, Lori

DSC_0403

It’s been such a warm February, our trees think it’s spring!


Advertisement

The Allay Shirt

So I need to ask myself again at the two year anniversary of my blog – have I sewn myself stylish yet? I have to say no, not completely. At times, I still feel frumpy or a lack of clothes. When the weather finally cooled down this fall, sometime in the middle of November, I really felt like I had no cool weather clothes. I say cool weather, not cold weather because I live in Southern California. I’m talking about everyday, nice, casual – something more interesting than a long sleeved, plain t-shirt. I thought this loose-fitting shirt was a great way to start filling this void in my wardrobe.

DSC_0318

DSC_0321

DSC_0329

The pattern I used is McCall’s 7018. I had this pattern for quite some time, bought on sale at JoAnn’s, probably 5 for $7. I made view E. I was attracted to it’s loose fit and versatility. We do have chilly mornings and evenings in the winter, so one feature I look for is a simple, narrow sleeve that will easily slide into a jacket or sweater.

DSC_0347

The fabric I used is Anna Maria Horner, Tangle Knit in Rust. I bought this knit online at Hawthorne Threads during their Black Friday Sale. I bought 1.75 yards for $9.70 per yard. I am always leery about buying knits online because the quality of the fabric and the printing can vary greatly. But, I have purchased Anna Maria Horner knits before and knew it was a sure bet. I was not disappointed, this is a perfect top weight cotton interlock with a nice print quality.

DSC_0289

I like the not-too-drastic high-low feature of the hem.

DSC_0295

This shirt washes beautifully. When I took these photographs, it had been worn and put through the washer and dryer.

DSC_0299

I slipped stitched the bottom of the collar down by hand before top stitching on the front side.

DSC_0300

DSC_0293

Simple narrow double needle hem. No serging on the edges, just trimming close to the stitching.


LET’S BE HONEST:

1. I cut a straight size 12. The only adjustment I made was taking off 1″ in the length before cutting. This is standard practice for me as my widest part is my thighs and I never want to top to end at that spot. Since this top is “loose-fitting,” I did not have to grade wider at the hips were I am about a size 16. I am very pleased with the fit and like the look of the shaped hemline.

2. The pattern is labeled as “EASY.” Doing a collar with a button front is never easy for a beginner especially with a knit. I guess we should assume that EASY does not equal Beginner?

3. Before top stitching on the collar, I hand-based all around close to where I was going to top stitch to prevent the fabric from stretching/pulling under the machine foot when stitching.

I love this shirt. I’ve worn it 3 or 4 times already, and very time it makes me feel happy that I’m wearing it.

DSC_0319

What about you? Do you find the start of a new season upon you and suddenly feel like you have nothing to wear?